In this foundational lab, explore the core principles and techniques of modern cryptography. The project focuses on understanding how data is secured through encryption, decryption, hashing, and key management. Implement classic algorithms such as Caesar Cipher and RSA, and examined real-world applications of symmetric and asymmetric encryption.
Cybrary is a well established and free IT training platform with several intuitive labs to explore
A paid subscription with more advanced labs is available as well outside the scope of this platform
Head to https://www.cybrary.it to create a free account for learning available on their platform
Head to Cryptography Basics to complete this lab for yourself or perform on your homelab below
Quick Links:
Requirements:
• Windows PC w/ Internet Connection
• USB Flash Drive w/ at least 32GB Capacity
• Unused PC w/ at least 2GB of Memory
1. Cryptography Overview
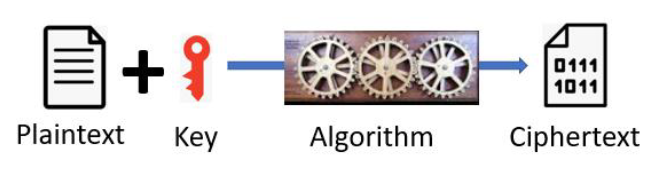
Cryptography is a mathematical science that transforms human-readable plaintext into ciphertext
This process is called encryption. Once encrypted as ciphertext it cannot be read or understood
To retrieve the original plaintext, the ciphertext must run through the reverse known as decryption
The encryption and decryption process is performed using a specialized algorithm known as a cipher
Ciphers can range from simple to massively complex, most ciphers fall into that second category
The Caesar Cipher is one of the simple ones, it is a type of shift cipher that shifts characters
Each alphabet letter is shifted by a number (n) between 0 and 25 and replaced with another letter
For example using a shift of 3 A would become D, B would become E, and F would become I, etcetera
In that example above, 3 is the cryptographic key, a piece of information which modifies the input
When taken as an input to the encryption cipher, it encodes plaintext into ciphertext or vise versa
The goal of cryptography is to ensure privacy for parties that wish to communicate confidentially
Even if their communication is intercepted, the third party will be unable to understand the message
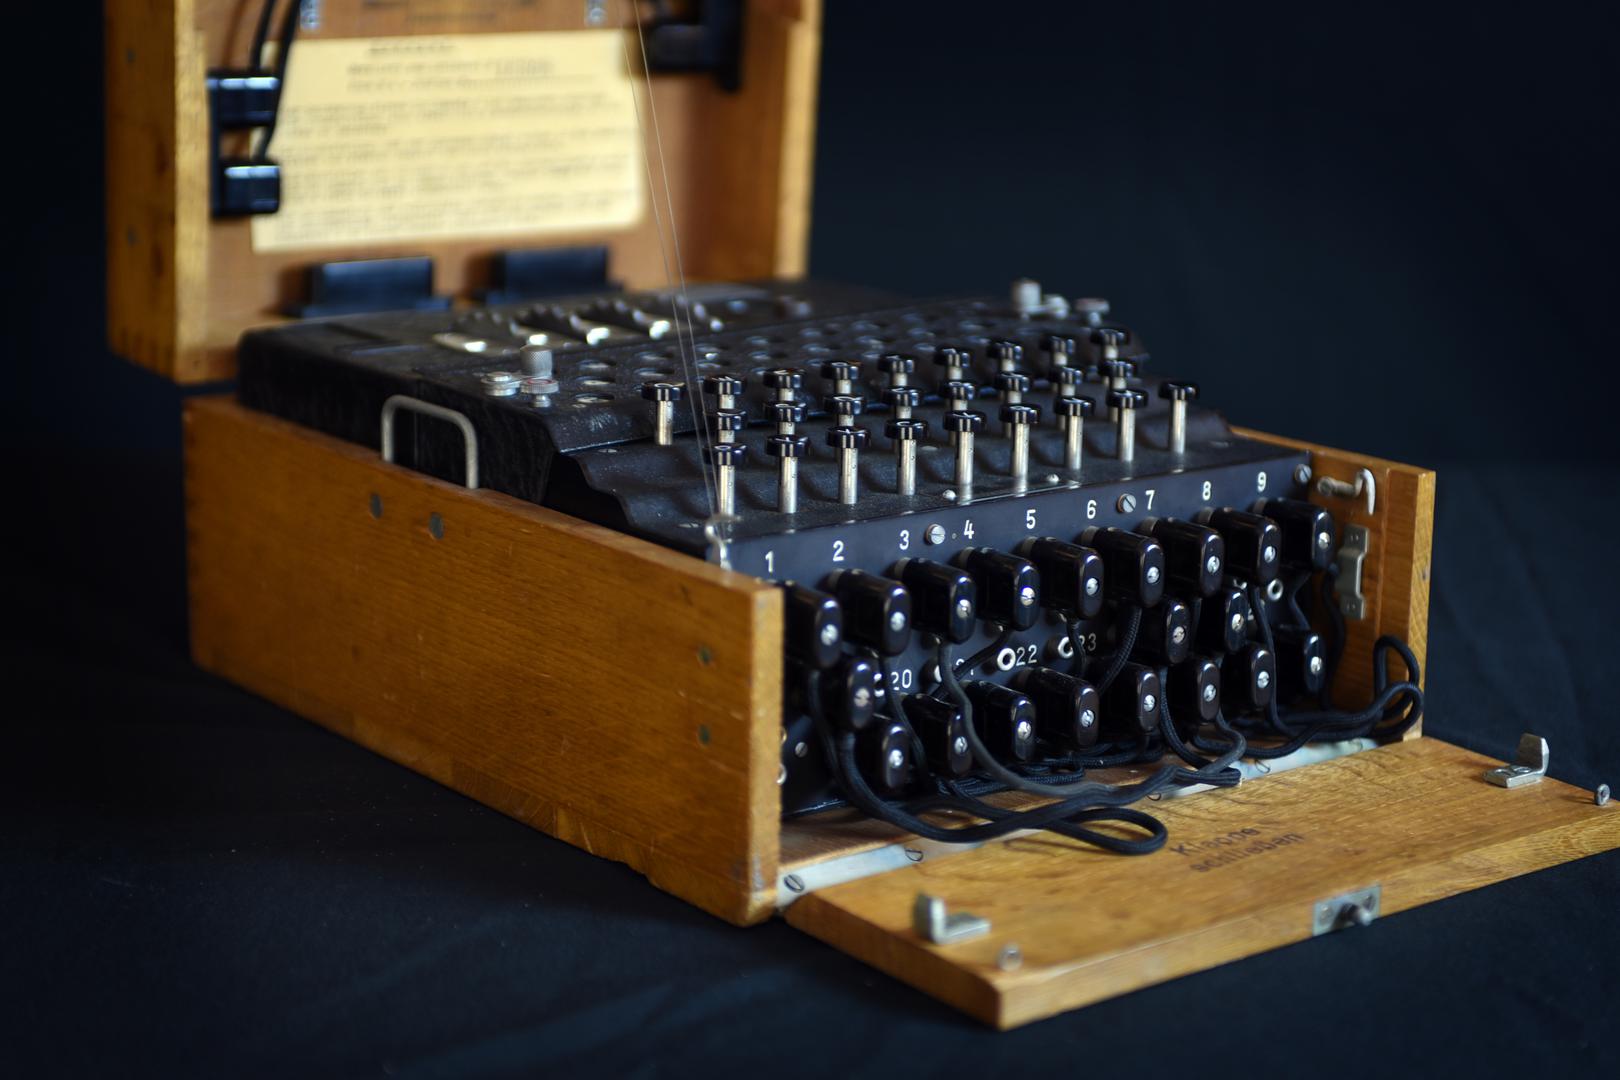
During World War 2, German forces used a complex physical cipher called an Enigma Machine to encode
You could only decode the messages if you knew the exact settings used to create the encoded message
The Enigma Cipher was eventually cracked, providing a significant strategic advantage to the allies
In modern cryptography, cipher keys are pseudo-random strings of various lengths, measured in bits
Typical key lengths are from 128-bits to 4096-bits. The key is used in combination with an algorithm
This process takes the plaintext as an input and applies both the forementioned to produce ciphertext
Some of the most commonly used modern cryptographic algorithms are listed below:
|
Name |
Key Size |
Type |
Common Uses |
|
3DES |
168-bits |
Symmetric |
Older Products |
|
AES |
256-bits |
Symmetric |
Wireless, VPN, File Systems |
|
RSA |
512 to 4096-bits |
Asymmetric |
Public Key Encryption, SSL/TLS, Digital Signatures |
As noted in the table above, there are two types of cryptographic algorithms: Symmetric and Asymmetric
Both Symmetric and Asymmetric encryption have their advantages which we will explore later in this lab
Next we will write a simple Python script which will allow us to apply the Caesar Cipher for encryption
2. Create Linux Mint Live USB
Linux Mint is a popular Linux distribution based on Ubuntu designed for those switching from Windows
It comes with a sleek and defined Graphical Desktop and is suitable for the simple operations this lab
You can use the operating system without having to install it onto your hard drive with a live USB
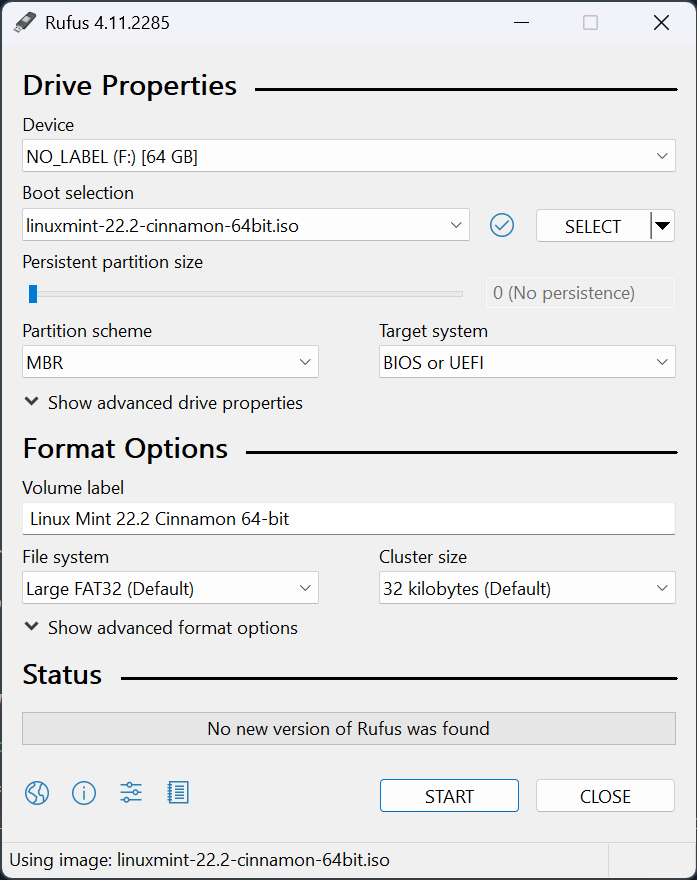
Download Linux Mint ISO: Linux Mint Official Download
Download Rufus Disk Imaging Tool: Rufus Official Download
Insert USB Flash Drive, run rufus.exe, select target drive, select Linux Mint XFCE ISO, start:
Remove USB Flash Drive and Insert into second PC. Start PC and press hot boot key on startup:

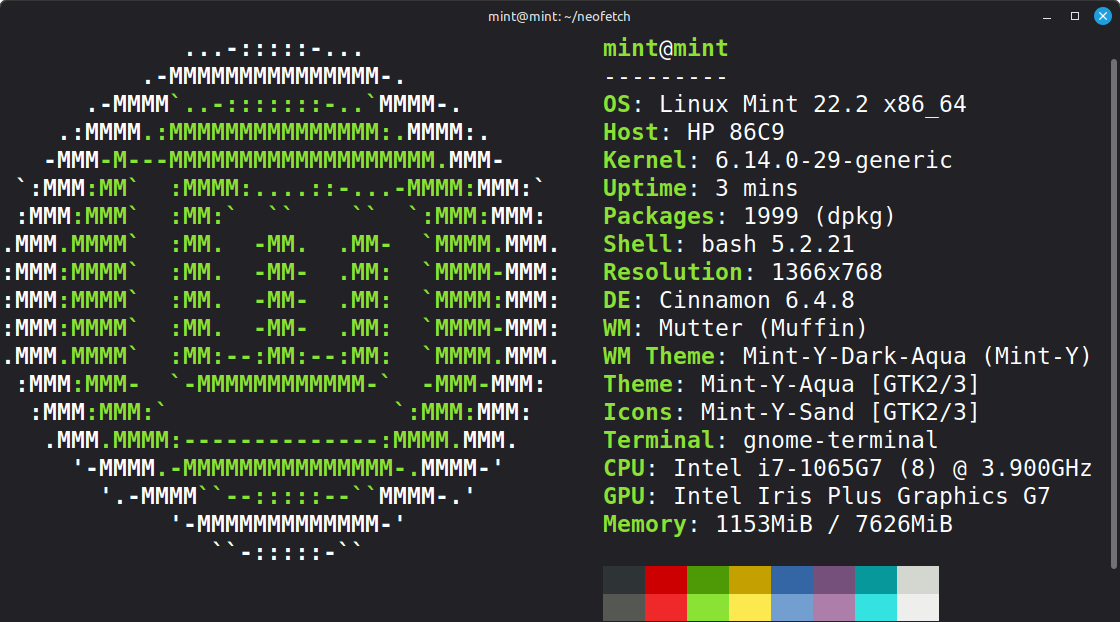
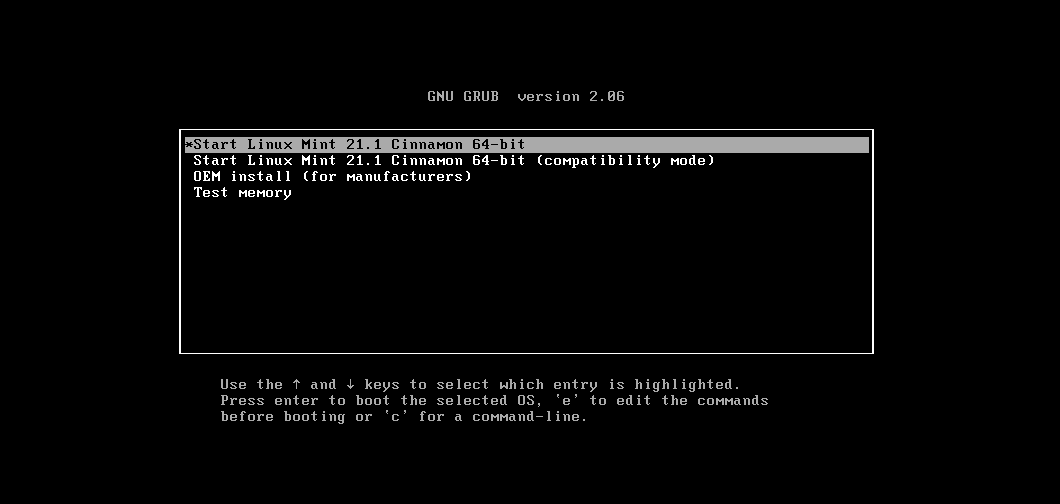
Select UEFI USB Flash Boot. Allow Linux Mint to load and scroll to select the Start Linux Mint option:
Now allow your workstation a moment to load and you'll be taken to the Linux Mint desktop environment:
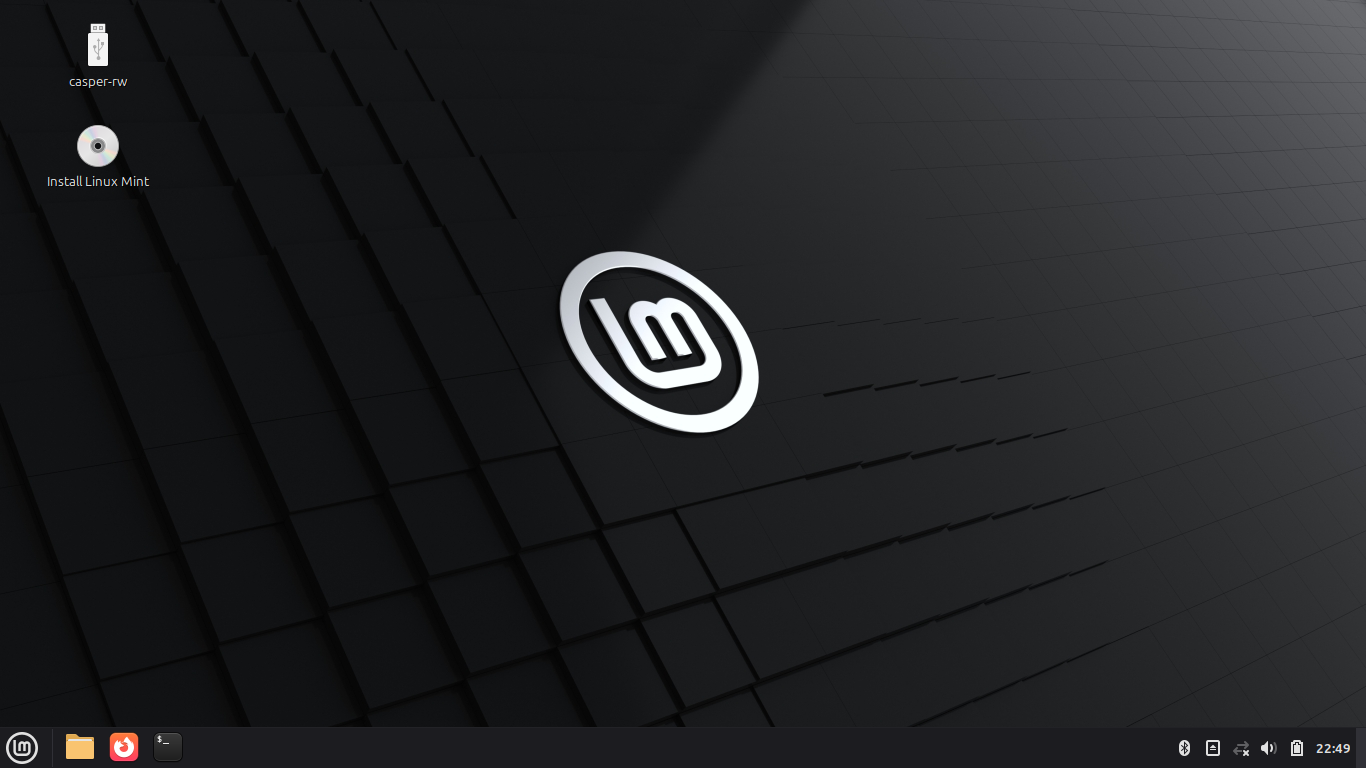
This will be our working environment for the remainder of the lab, next we will install the programs
3. Update APT Sources
Linux Mint unfortunately often comes with a broken APT configuration out of the box, let's fix this
From the Linux Mint Desktop Environment right click on the background and click on Open in Terminal:
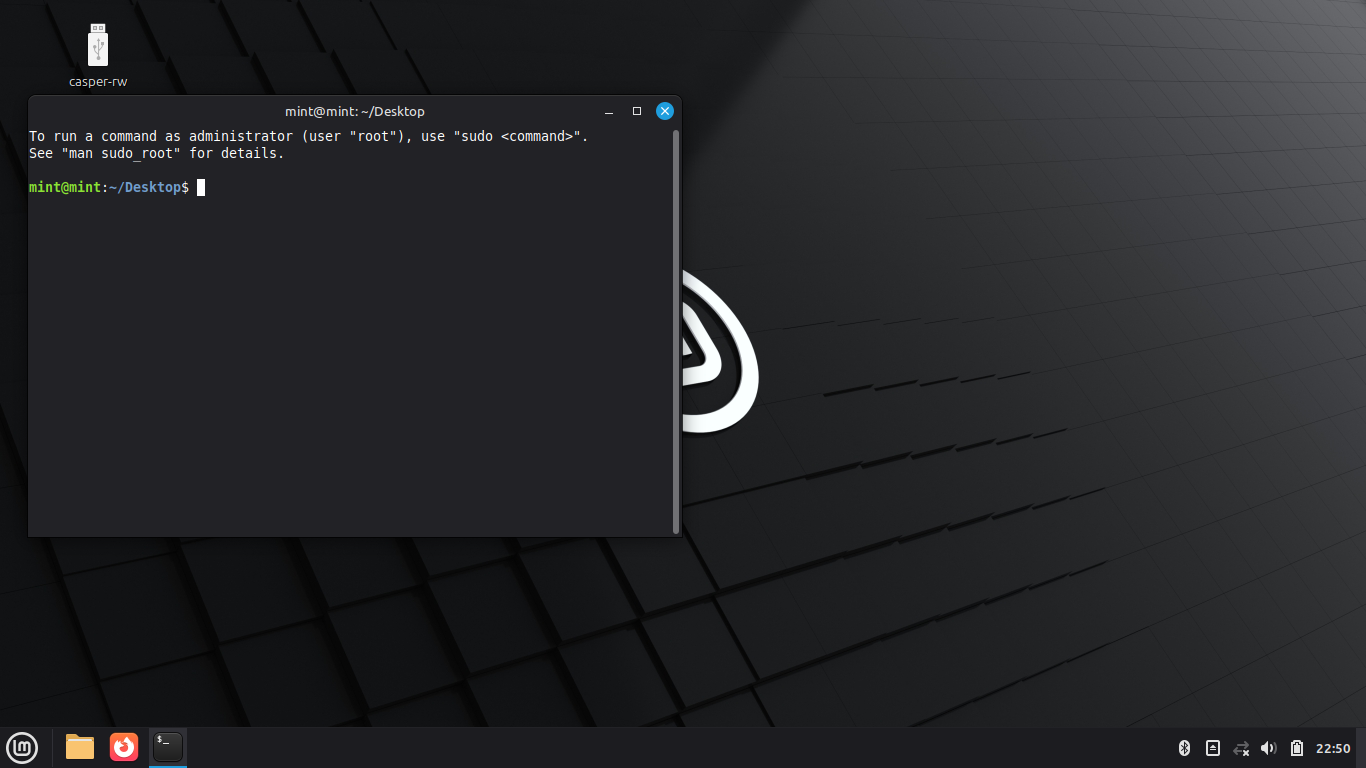
The Terminal application gives us a direct interface with the systems shell or command line interface
Run the following command from the Linux Mint Live Terminal to witness the broken APT configuration:
mint@mint:~/Desktop$ sudo apt-get update -y
Resulting Output:
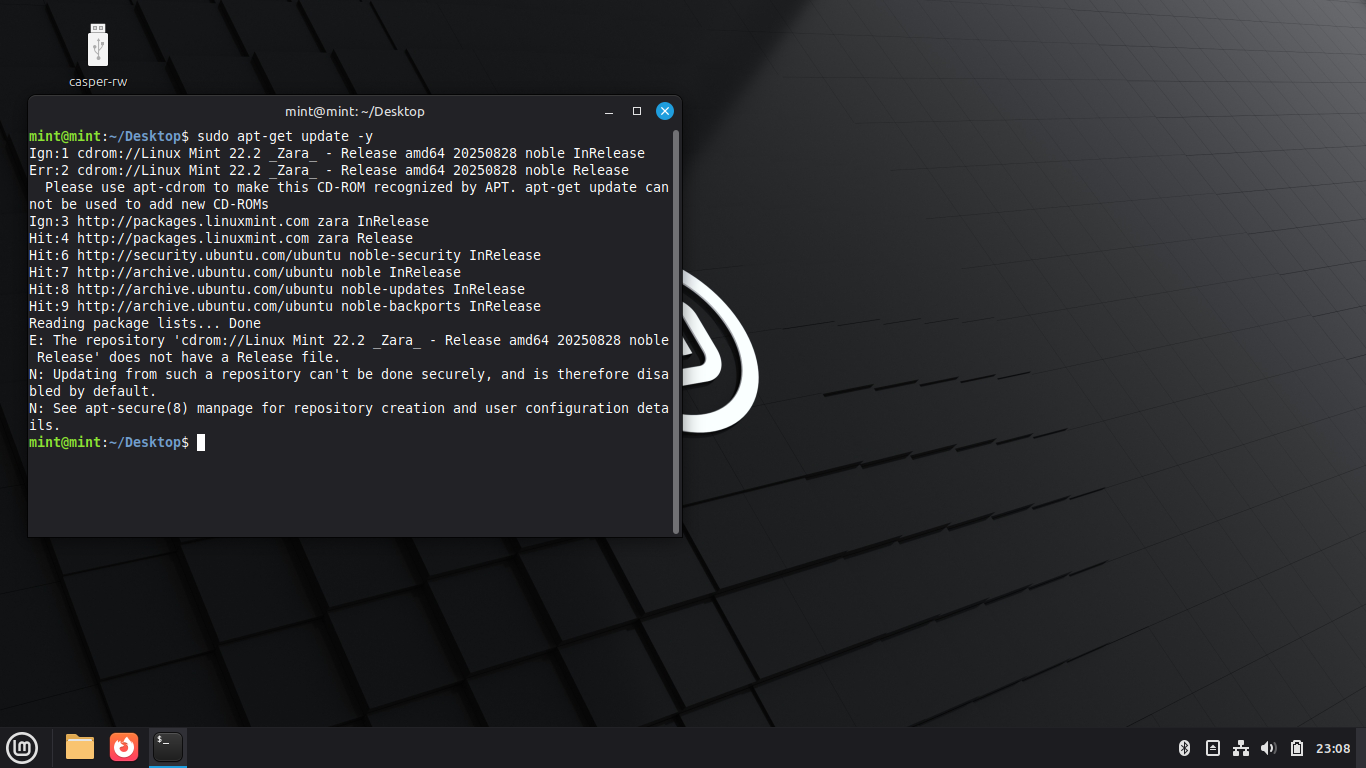
This is caused because Linux Mint uses a file rather than a link for official APT sources out of the box
Run the following command from the Linux Mint Live Terminal to edit our sources with the nano tool:
mint@mint:~/Desktop$ sudo nano /etc/apt/sources.list.d/official-package-repositories.list
Remove the comment and a bit from the first 'deb' line so that your file reads like the following:
deb http://packages.linuxmint.com zara main upstream import backport
deb http://archive.ubuntu.com/ubuntu noble main restricted universe multiverse
deb http://archive.ubuntu.com/ubuntu noble-updates main restricted universe multiverse
deb http://archive.ubuntu.com/ubuntu noble-backports main restricted universe multiverse
deb http://security.ubuntu.com/ubuntu/ noble-security main restricted universe multiverse
From the nano text editor, save the changed file using the CTRL+O keys and exit with the CTRL+X keys
Run the following commands from the Linux Mint Live Terminal to copy our sources and update the system:
mint@mint:~/Desktop$ sudo cp /etc/apt/sources.list.d/official-package-repositories.list /etc/apt/sources.list
mint@mint:~/Desktop$ sudo rm /etc/apt/sources.list.d/official-package-repositories.list
mint@mint:~/Desktop$ sudo apt-get update -y
Now our system has a working apt package manager which can be used to install software onto the system
4. Install Python, OpenSSL, Git & Mail
Python is a multi purpose general programming and scripting language which includes many useful modules
For this lab we will be using the scripting language portion to create custom cryptographic functions
Run the following command from the Linux Mint Terminal to update and upgrade the systems packages:
mint@mint:~/Desktop$ sudo apt-get update -y && sudo apt-get upgrade -y
Since this is our first boot into the live system, the upgrade specifically will likely take some time
Run the following command from the Linux Mint Terminal to install the python scripting language:
mint@mint:~/Desktop$ sudo apt-get install python3 -y
OpenSSL is a free and Open-Source software for general-purpose cryptography and secure communications
Run the following command from the Linux Mint Live Terminal to install the OpenSSL software:
mint@mint:~/Desktop$ sudo apt-get install libssl-dev -y
The Git command line tool allows us to download tools from the GitHub software sharing site from our cli
Run the following command from the Linux Mint Live Terminal to install the git command line tool:
mint@mint:~/Desktop$ sudo apt-get install git -y
The mail command line utility will later allow us to send secret encryption keys to other linux users
Run the following command from the Linux Mint Live Terminal to install the mail command line tool:
mint@mint:~/Desktop$ sudo apt-get install mailutils -y
At the Mail configuration menu, press tab then enter, then select the local configuration and confirm
We now have our basic software installed onto the system that we will use in the following sections
5. Simulate Caesar Cipher
The Caesar cipher as mentioned previously is an character cipher which shifts letters by a numerical key
We will use a pre-made python script to simulate this cipher by encrypting and decrypting some messages
Run the following command from the Linux Mint Live Terminal to download our caesar.py script from GitHub:
mint@mint:~/Desktop$ git clone https://gist.github.com/mouadkhiat/2d81326037791fb23d23dcd04a2382c3 ~/caesar
Now run the following commands from the Linux Mint Terminal to navigate to ~/caesar and run the script:
mint@mint:~/Desktop$ cd ~/caesar
mint@mint:~/caesar$ python3 caesar.py
Resulting Output:
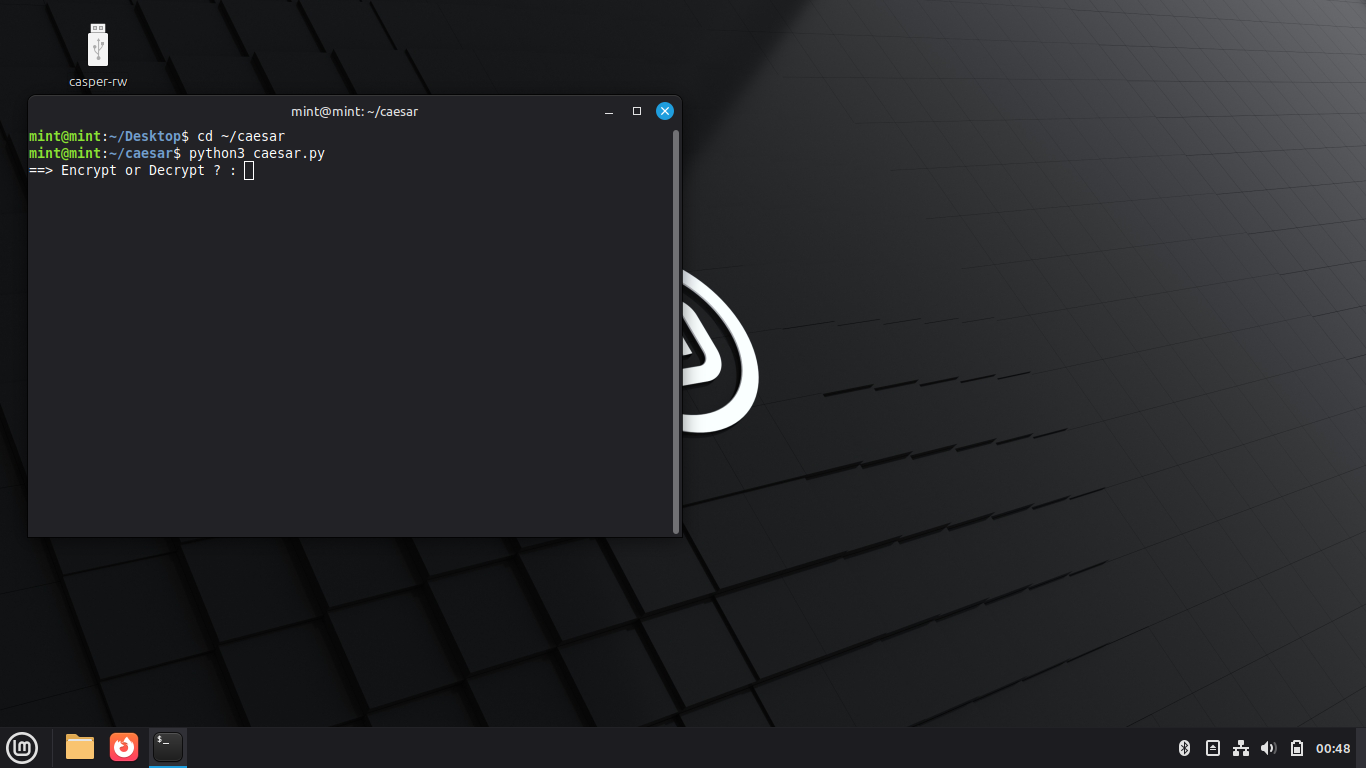
The script prompts us for the type of cryptographic operation to be performed, type in 'encrypt' and enter
The script prompts us for the string to be encrypted by the cipher, type 'Bring Caesar a Salad!' and enter
The script prompts us for the encryption key, this is the number of alphabetical shifts, type 5 and enter:
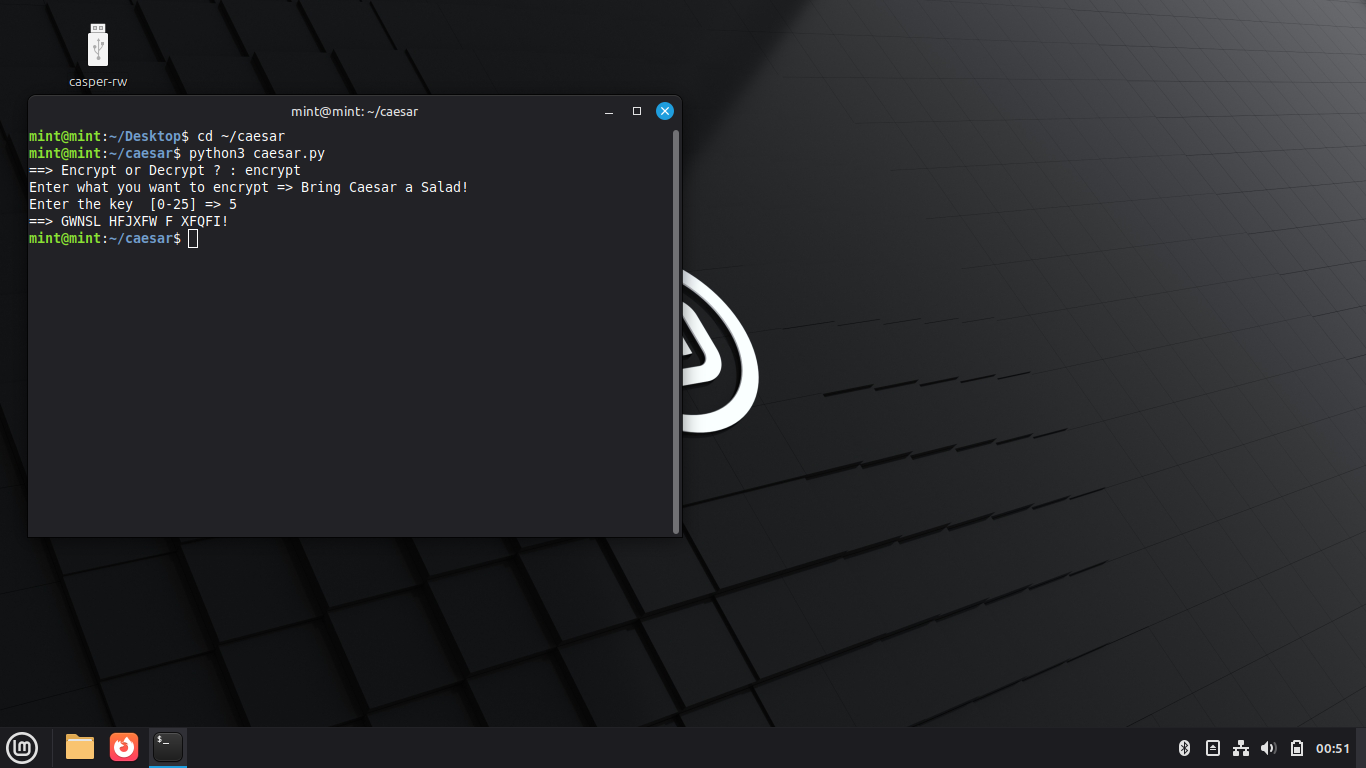
We can now see that ciphertext is displayed, each letter was shifted to 5 letters after it in the alphabet
We will now attempt to decrypt this ciphertext just like the receiver would with the same encryption key
Run the following command from the Linux Mint Live Terminal to relaunch our caesar.py script program:
mint@mint:~/caesar$ python3 caesar.py
The script prompts us for the type of cryptographic operation to be performed, type in 'decrypt' and enter
The script prompts us for the string to be encrypted by the cipher, type 'GWNSL HFJXFW F XFQFI!' and enter
The script prompts us if we have the cryptographic key, type 'y' and enter, and then type 5 and enter:
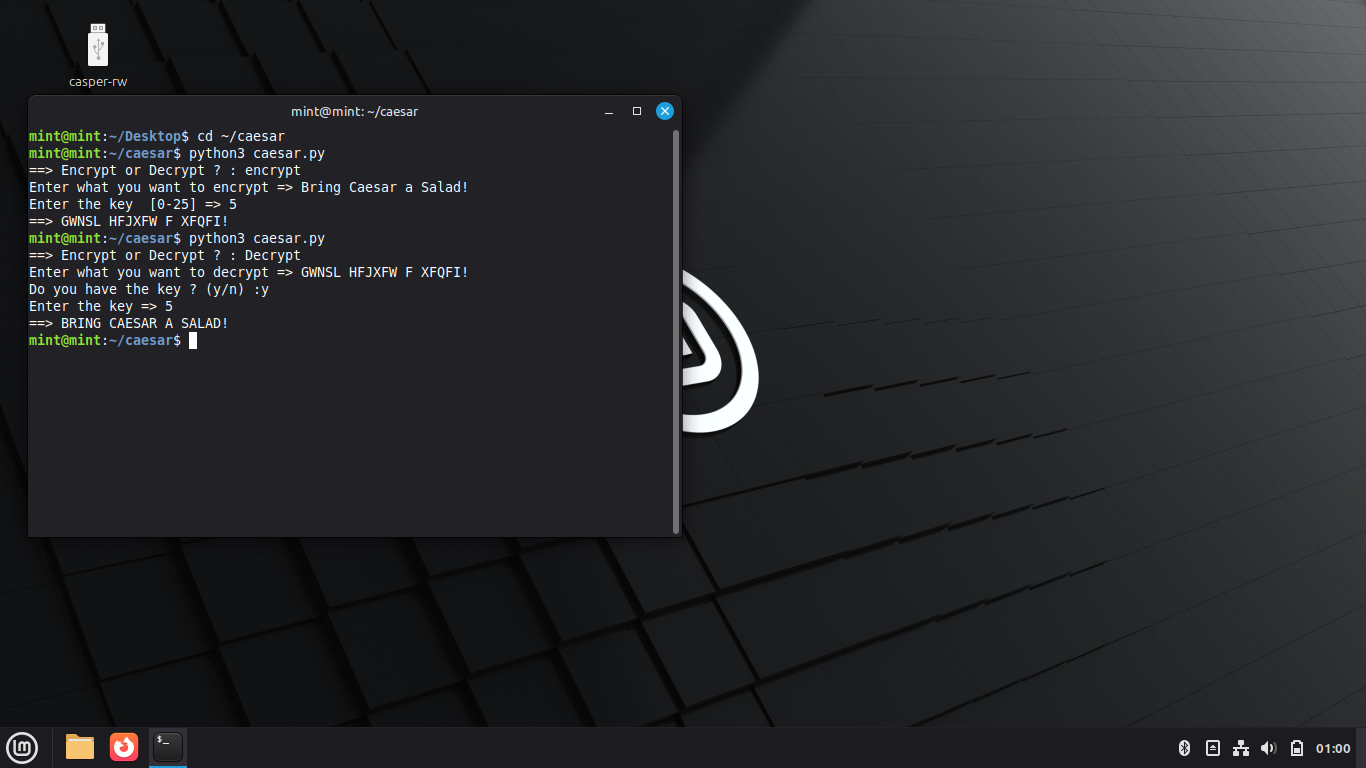
Only alphabetical characters are encrypted and decrypted, which is why the exclamation mark appears twice
The program also disregards capitalization, which is why all letters in the outputs are capitalized
Run the following command from the Linux Mint Live Terminal to relaunch our caesar.py script program:
mint@mint:~/caesar$ python3 caesar.py
The script prompts us for the type of cryptographic operation to be performed, type in 'decrypt' and enter
The script prompts us for the string to be encrypted by the cipher, type 'SLAAJ AFAAJ' and hit enter
The script prompts us if we have the cryptographic key, type 'n' and enter, it will try each possible key:

Most of the results are nonsense but we can see that key 11 returned a plaintext value of 'HAPPY PUPPY'
This is known as cryptanalysis, or the process of breaking encrypted messages by trying many possible keys
6. Symmetric Cryptography
Symmetric Cryptography is characterized by the use of a single cryptographic key to encrypt and decrypt
This single cryptographic key is typically referred to as secret key or as shared secret between parties
Symmetric Cryptography is fast and efficient, and modern symmetric algorithms like AES are very secure
Because of this Symmetric Cryptography is commonly used for bulk data encryption and at-rest encryption
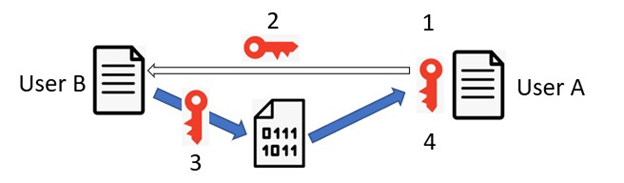
In the example above, if user A wants to send a secret message to user B, they each must posses the key
Therefore user A would need to generate the key and somehow share it with user B from a secure channel
The two users are then able to both encrypt and decrypt messages between each other with the shared key
There are two primary drawbacks to use of Symmetric Cryptography: Key Management and Key Distribution
Each pair of users requires a unique secret key which does not scale well for large scale Key Management
Any user who has the key can decrypt messages, therefore the Key Distribution channel must also be secure
Symmetric cryptography can be used along with asymmetric cryptography to create a strong hybrid solution
One of the most prominent examples of a hybrid cryptographic solution is Transport Layer Security (TLS)
7. Perform Symmetric Encryption w/ OpenSSL
In this section we will use the OpenSSL tool to demonstrate how Symmetric Cryptography operations work
We will create and share a secret key with another Linux user and use it to send encrypted messages
Run the following commands from the Linux Mint Live Terminal to create the new user and set password:
mint@mint:~/caesar$ sudo useradd -m john
mint@mint:~/caesar$ sudo passwd john
Run the following commands from the Linux Mint Live Terminal to create a new secret encryption key:
mint@mint:~/caesar$ cd ~
mint@mint:~$ openssl genpkey -algorithm rsa -out keyforjohn.key
Resulting Output:

The RSA algorithm is actually an asymmetric algorithm, but when used in this way it operates the same
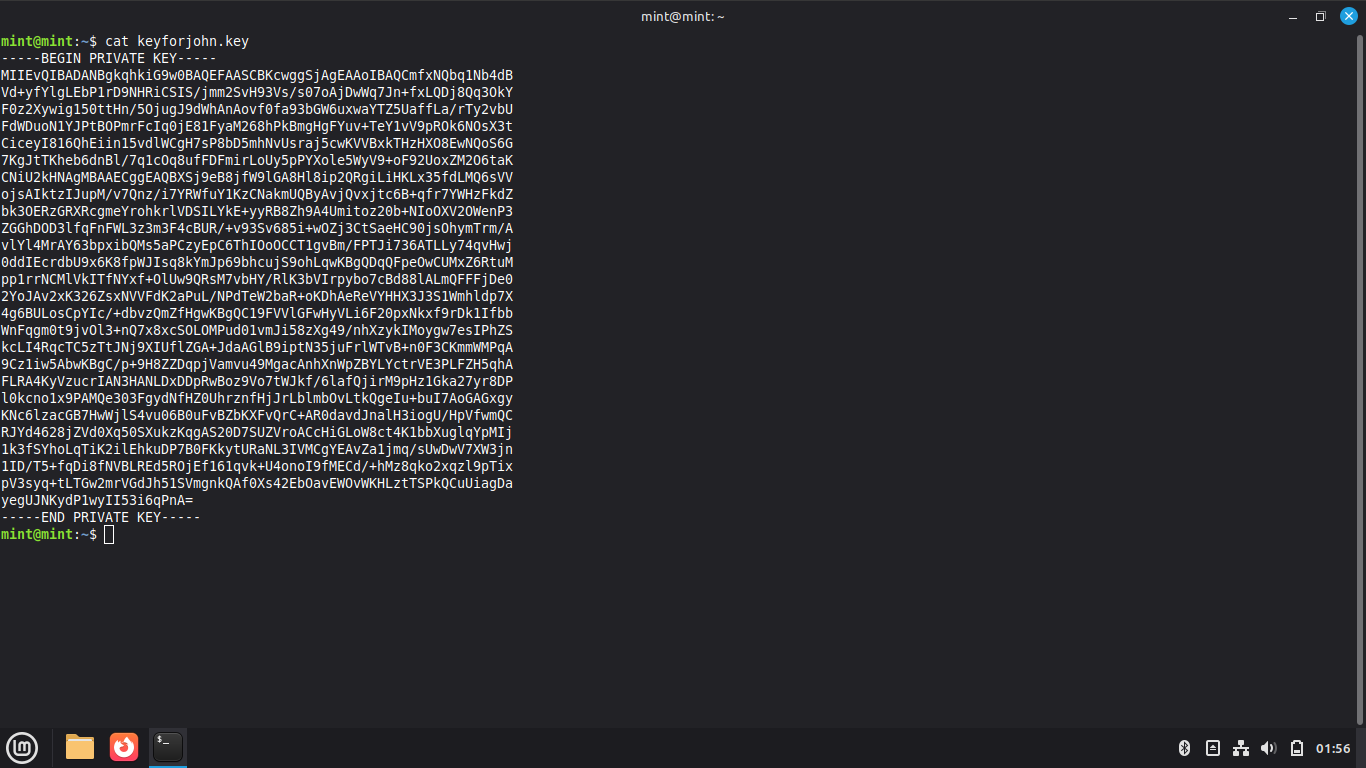
Run the following command from the Linux Mint Live Terminal to view the secret key you generated:
mint@mint:~$ cat keyforjohn.key
Resulting Output:
Run the following command from the Linux Mint Live Terminal to encode the new key into base 64:
mint@mint:~$ base64 keyforjohn.key > keyforjohn.send
Run the following command from the Linux Mint Liver Terminal to mail the secret key to the user john:
mint@mint:~$ cat keyforjohn.send | mail -s "For John" john
Our shared secret key has just been sent to linux user john using the local mail command line tool
Run the following command from the Linux Mint Live Terminal to switch users to the john account:
mint@mint:~$ su - john
You will be asked to provide authentication, enter the password you created for the account earlier
Notice that the prompt changes to $, this indicates a user shell which is unique to Linux Mint Live
Run the following commands from the User Shell to read john's local system mail inbox:
$ cd ~
Resulting Output:
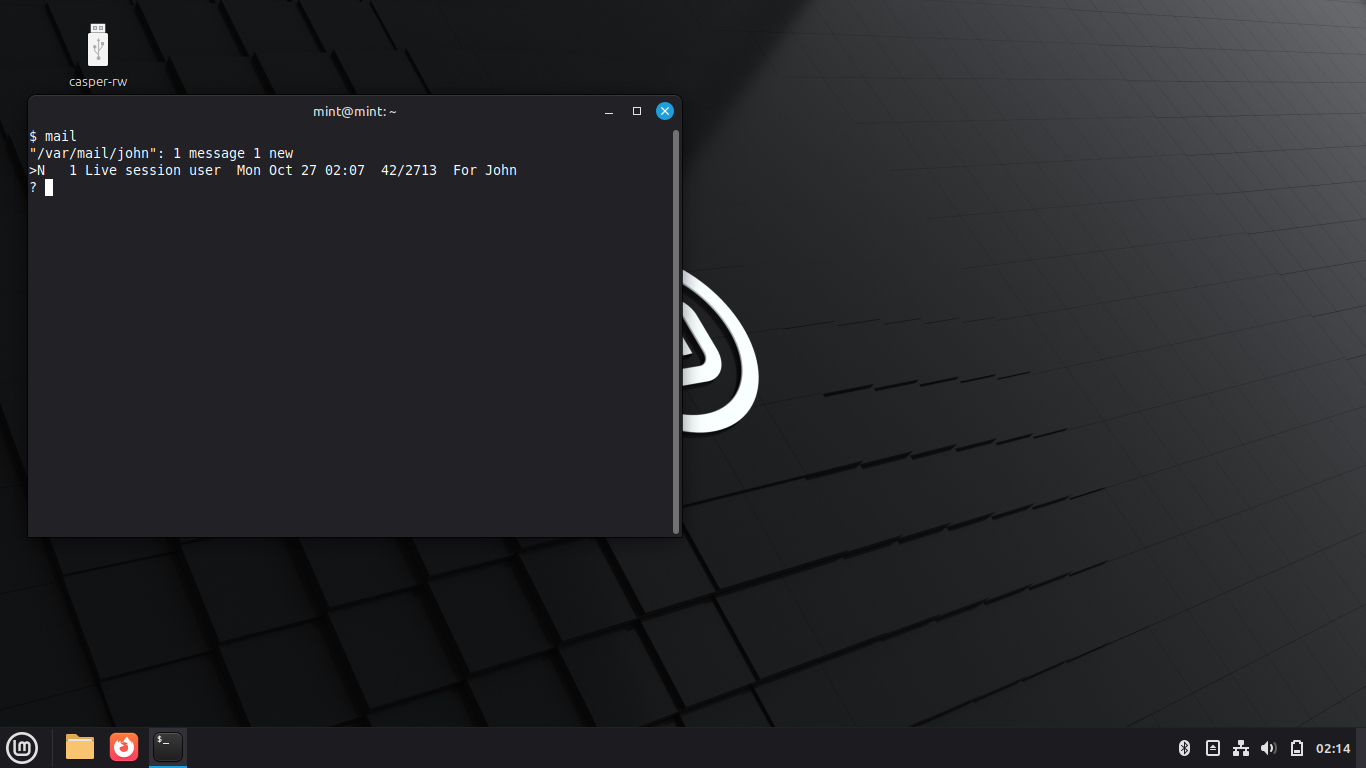
We can see that john has a message from the live user, at the ? prompt pres 1 and enter to view it:
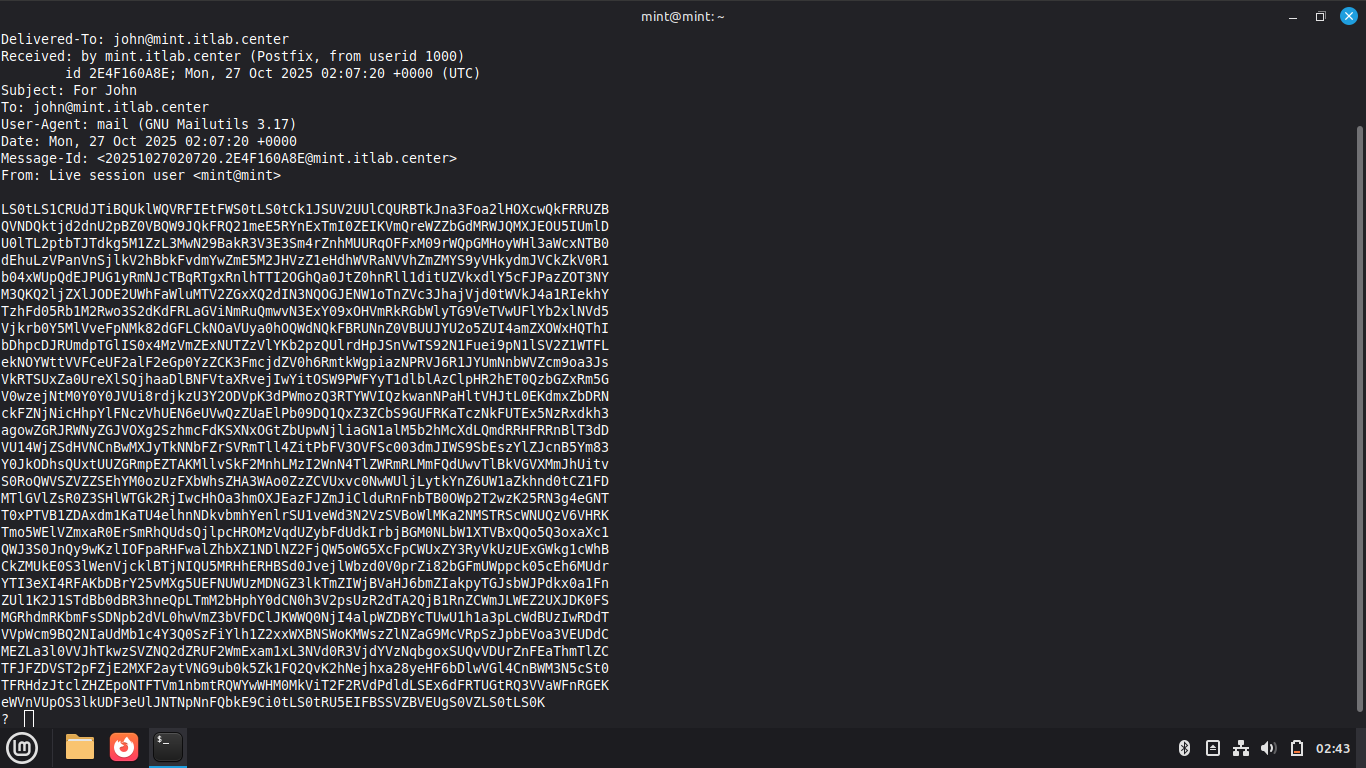
Press space to display the entire key and highlight the message body, right-click and choose copy
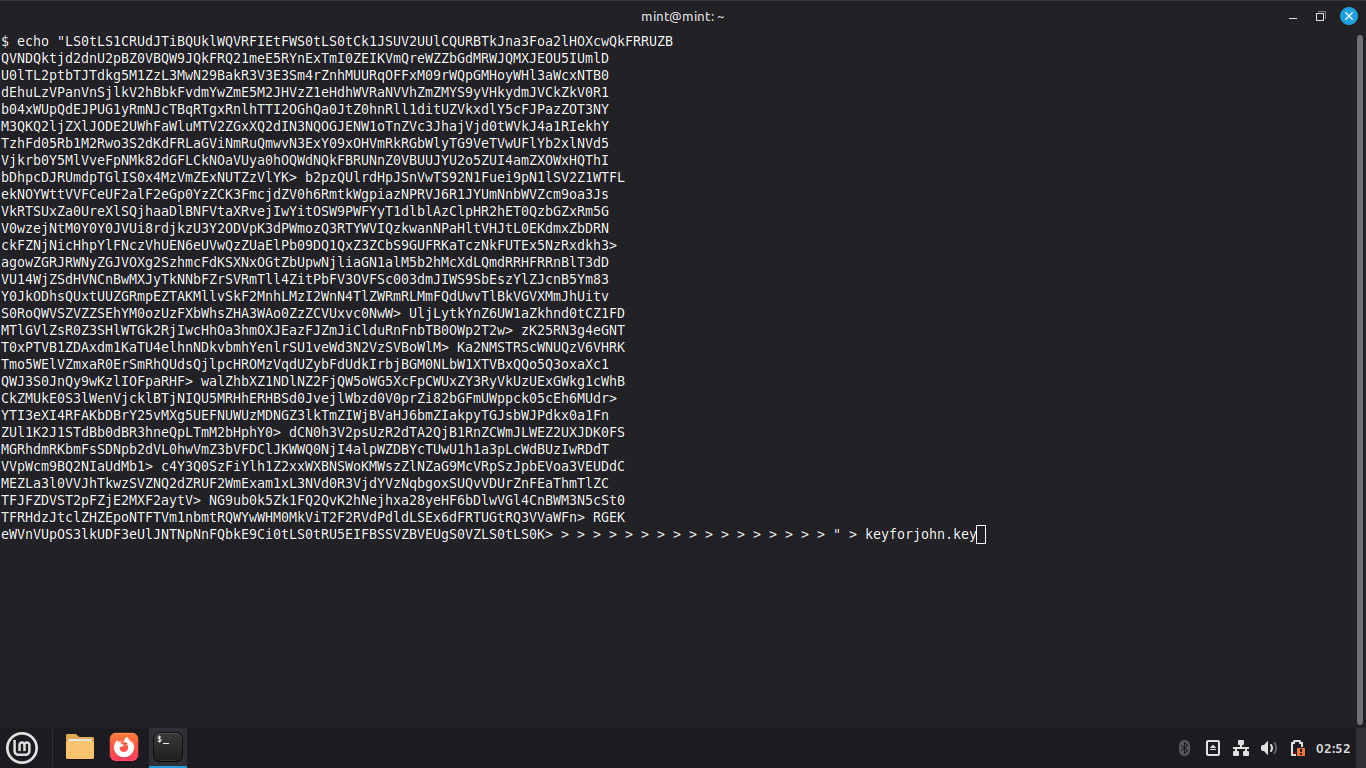
Type exit and hit enter, then type 'echo "', right click and paste, then type '" > keyforjohn.base64
Run the following commands from the User Shell Terminal to decode and display the shared key:
$ base64 -d keyforjohn.base64 > keyfromlive.key
$ cat keyfromlive.key
Resulting Output:
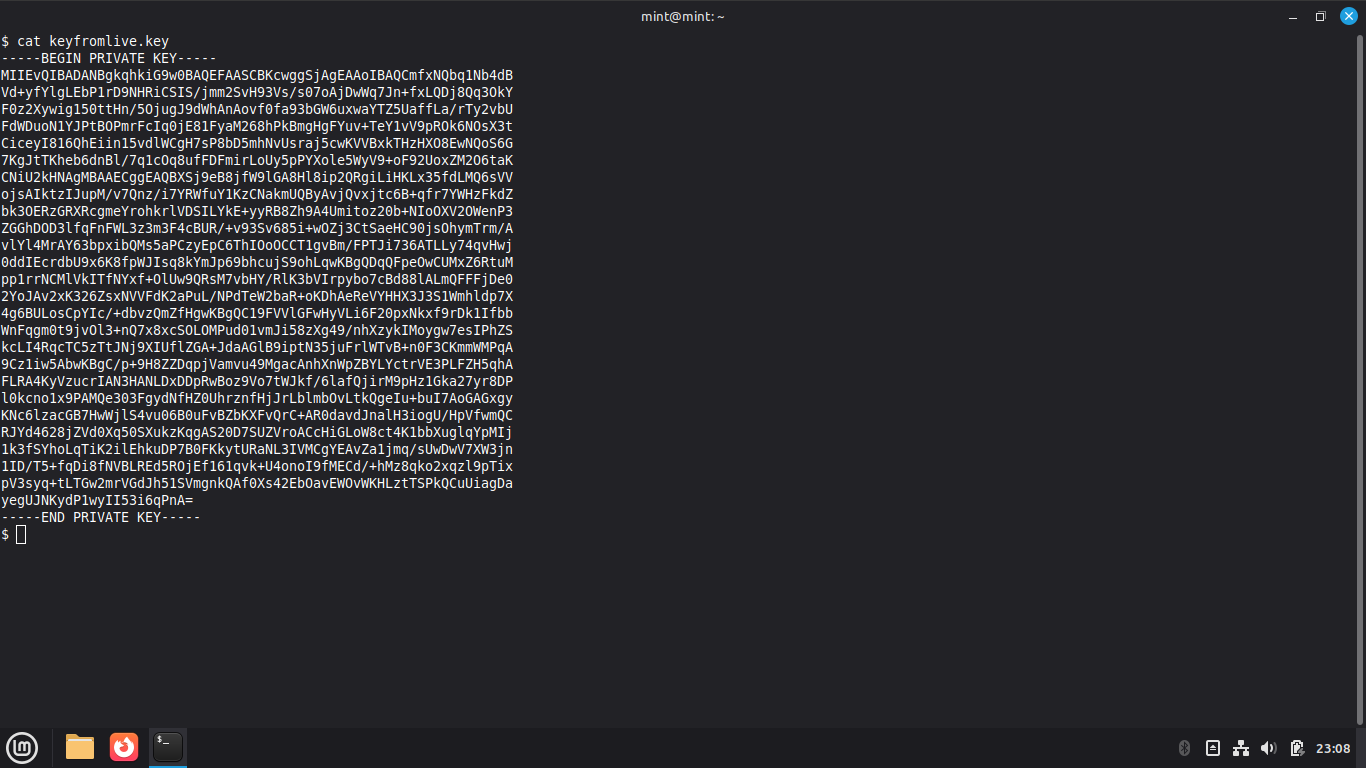
The key should now look the same as the first key did that we initially generated from the live user
Run the following commands from the User Shell to generate and encrypt a secret message with our key:
$ echo "Be sure to drink your ovaltine!" > message.txt
$ openssl pkeyutl -encrypt -inkey keyfromlive.key -in message.txt -out message.enc
$ cat message.enc
Resulting Output:
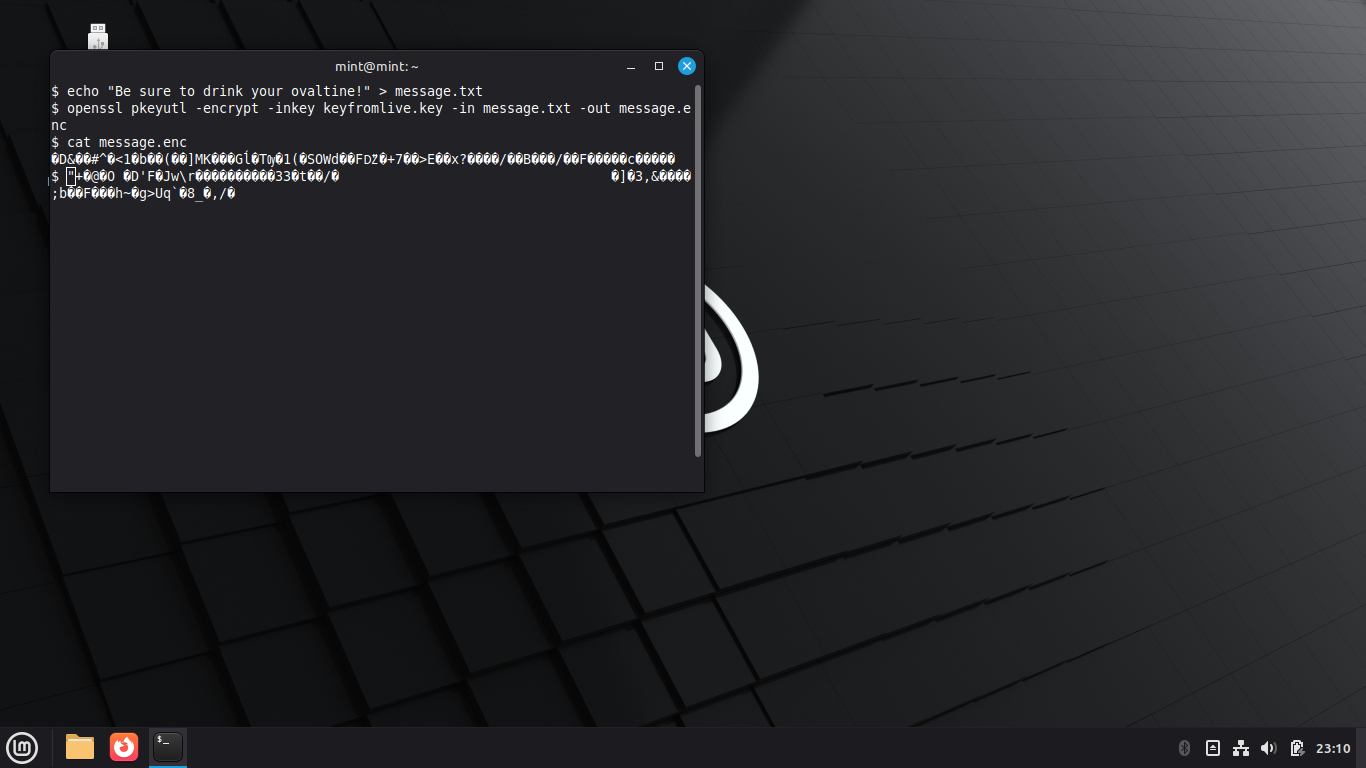
The file appears as totally illegible gibberish, we cannot simply copy and paste without encoding it:
Run the following commands from the User Shell Terminal to encode the message and send it with mail:
$ base64 message.enc > message.send
$ cat message.send | mail -s "Secret Message from John" mint
Note that encoding and encrypting are not the same, encoding allows us match the available characters
Only certain characters are available to use when sending emails and the base64 command matches them
In this last part of the Symmetric Cryptography lab we will switch back users and decrypt the message
Run the following command from the USer Shell Terminal to exit and return as the live mint user:
$ exit
Run the following command from the Linux Mint Live Terminal to open the mail application:
mint@mint:~$ mail
Resulting Output:

You can see a new message from the user john, type 1 and press enter to read the message from john:

Highlight the message body then right-click and select copy, type exit at the ? prompt to exit mail
At the mint@mint:~$ prompt type echo " then press CTRL+Shift+V to paste and type " > message.base64
Press enter then run the following command from the Linux Mint Live Terminal to decode the message:
mint@mint:~$ base64 -d message.base64 > message.enc
Run the following commands from the Linux Mint Live Terminal to decrypt the message from john:
mint@mint:~$ openssl pkeyutl -decrypt -inkey keyforjohn.key -in message.enc -out message.txt
mint@mint:~$ cat message.txt
Success, you have now encrypted and decrypted a simple message using Symmetric Cryptography
8. Asymmetric Encryption
Asymmetric Cryptography is the second type of cryptography also known as public-key cryptography
It uses two mathematically-related cryptographic keys to encrypt plaintext and decrypt ciphertext
The first key is a Public Key and can be widely distributed, used when encrypting secret messages
The second key is a Private Key which is kept secret, used to decrypt the encrypted secret messages
The secure possession of the secret key by the intended party ensure the messages confidentiality
The Private Key can also be used to sign messages, and can be verified by anyone with a public key
While these signed messages are not confidential, they provide authenticity and non-repudiation
Authenticity refers to the property of an entity demonstrably possessing the identity they claim
Non-repudiation refers to the property of an entity being unable to deny having performed an action
Asymmetric Cryptography solves the symmetric problems for both Key Distribution and Key Management
The private keys are never distributed and a single key pair can encrypt messages for many users
These improvements however come with a cost, asymmetric cryptography is slower and less efficient
For these reasons Assymetric Cryptography is not suitable for bulk transfers or extended sessions
One of the most important applications of Assymetric Cryptography is creating Digital Signatures
A Digital Signature is created using the sender's private key and sent to the desired recipient
Upon receipt, the recipient can use the sender's public key to then verify the digital signature
Verification of the digital signature provides authentication and verifies the senders identity
When combined with additional information, digital signatures can create a digital certificate
These are electronic documents that can be used to prove the authenticity of a public shared key
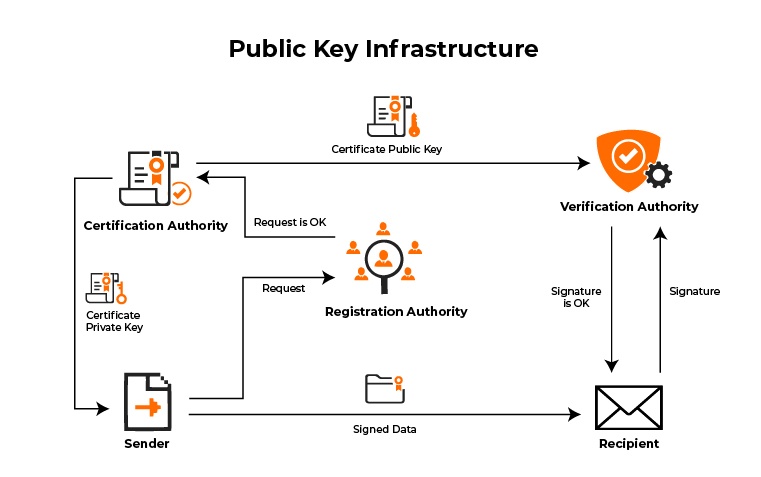
At scale these digital certificates are networked to create a Public Key Infrastructure (PKI)
Public keys can be registered with a Certificate Authority (CA) to obtain digital certificates
9. Perform Assymetric Encryption w/ OpenSSL
In this portion of the lab you will use OpenSSL to demonstrate how Assymetric Cryptography works
Recall that when using Assymetric Cryptography there are two keys, a public and private key pair
Run the following command from the Linux Mint Live Terminal to generate an RSA key pair:
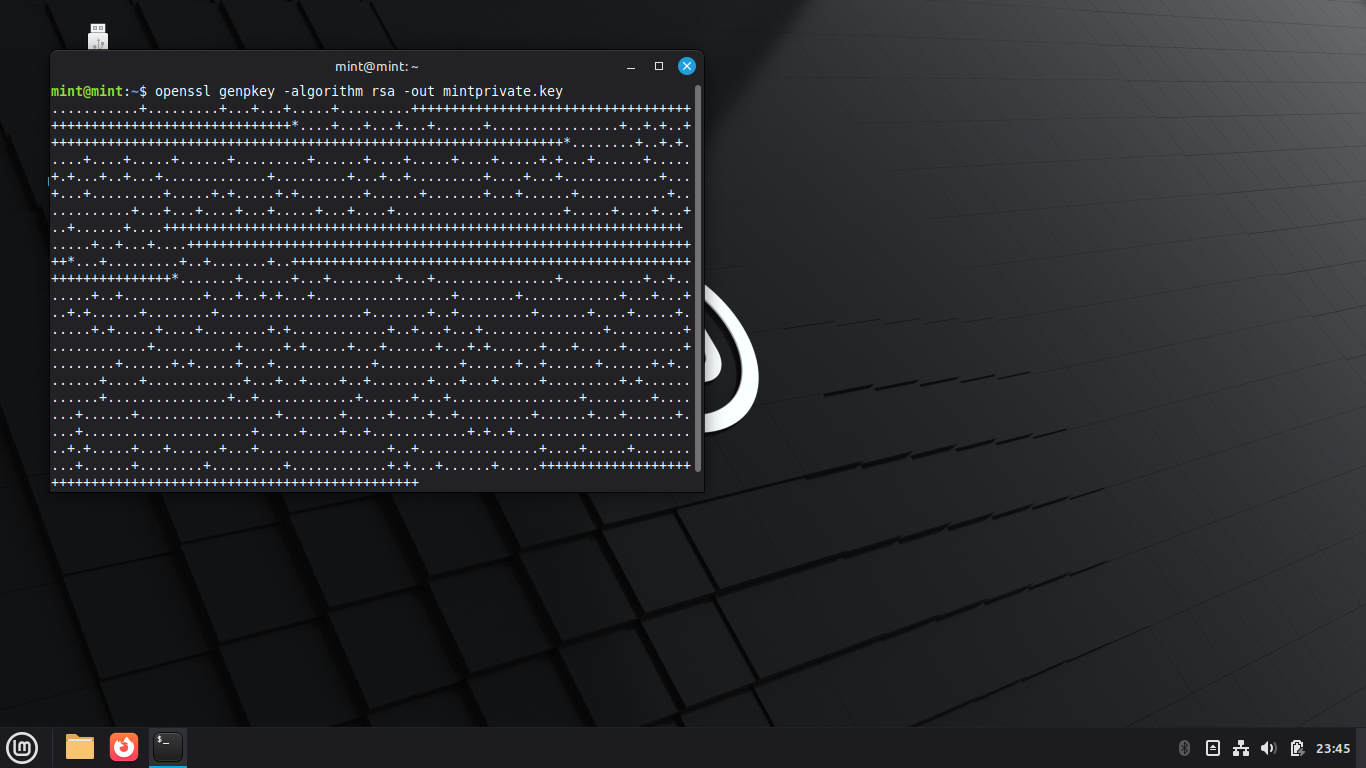
mint@mint:~$ openssl genpkey -algorithm rsa -out mintprivate.key
Resulting Output:
Run the following command from the Linux Mint Live Terminal to view our generated private key:
mint@mint:~$ cat mintprivate.key
Resulting Output:
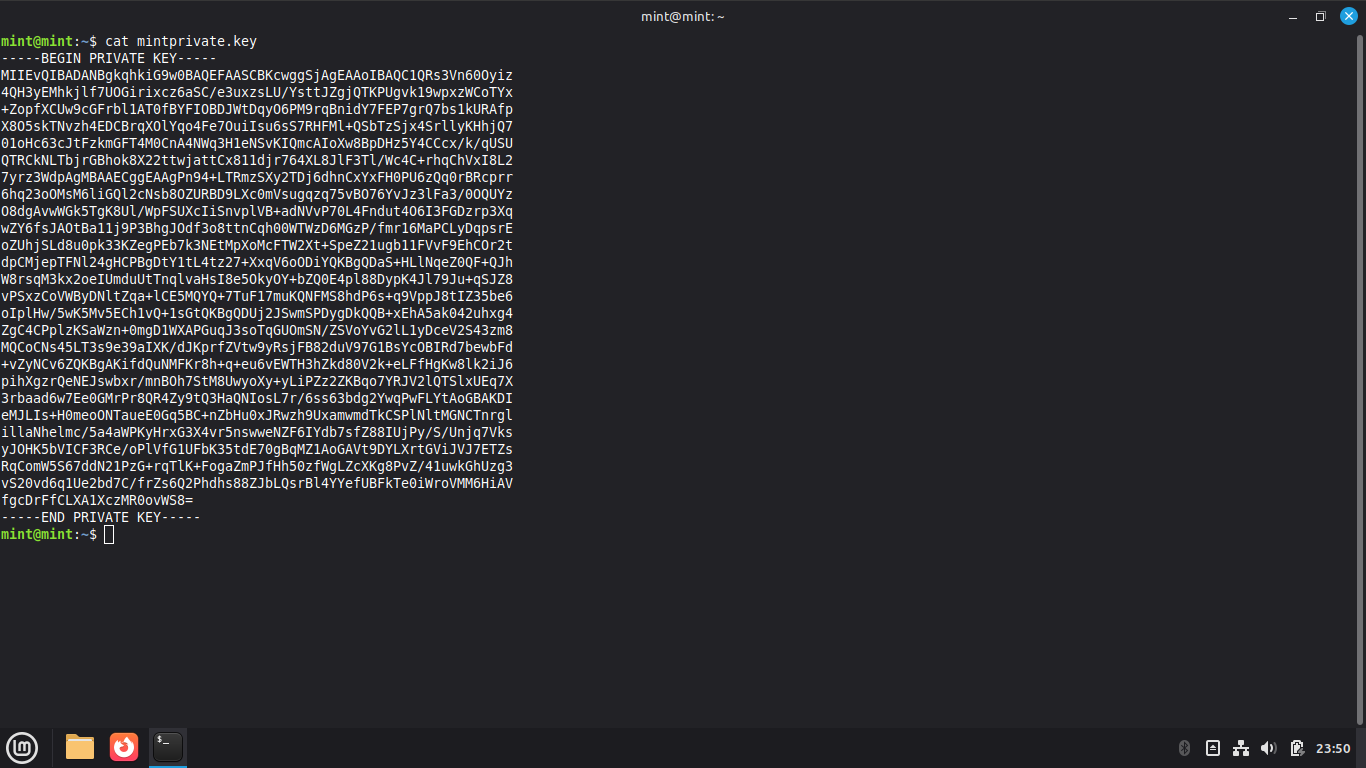
This key should never be shared, a matching public key is derived from the private key with math
Run the following command from the Linux Mint Live Terminal to derive a matching public key:
mint@mint:~$ openssl rsa -pubout -in mintprivate.key -out mintpublic.key
Public Keys are safe to share with anyone, anyone who has yours can send you encrypted messages
Next we will create a key pair for another user so that we can create and send encrypted text
Run the following command to add the john user account to the sudoers group for permissions:
mint@mint:~$ sudo usermod -aG sudo john
Run the following commands from the Linux Mint Live Terminal to create a key pair for user john:
mint@mint:~$ su - john
$ cd ~
$ openssl genpkey -algorithm rsa -out johnprivate.key
$ openssl rsa -pubout -in mintprivate.key -out johnpublic.key
Run the following command to share johns public key with the mint user account for encryption:
$ sudo cp /home/john/johnpublic.key /home/mint/johnpublic.key
Now type exit and press enter and run the ls command from the Linux Mint Live Terminal to check:

Run the following command from the Linux Mint Live Terminal to share our public key with john:
$ sudo cp /home/mint/mintpublic.key /home/john/mintpublic.key
Now that we have shared the public keys, we can proceed to send each user encrypted messages
Run the following command from the Linux Mint Live Terminal to create a secret message:
mint@mint:~$ echo "John, I have an ice cream cake at home for Sally's surprise birthday party!" > message2.txt
Run the following command from the Linux Mint Live Terminal to encrypt with johns public key:
mint@mint:~$ openssl pkeyutl -encrypt -inkey /home/mint/johnpublic.key -pubin -in message2.txt -out message2.enc
Because we are using the local mail application to transmit this message, we must encode it
Run the following command from the Linux Mint Live Terminal to encode our message in base64:
mint@mint:~$ base64 message2.enc > message2.base64
Run the following command from the Linux Mint Live Terminal so send our message to john:
mint@mint:~$ cat message2.base64 | mail -s "For John" john
For this next section of this lab we will decrypt the secret message using johns private key
Run the following commands from the Linux Mint Live Terminal to login as john and view the mail:
mint@mint:~$ su - john
Resulting Output:
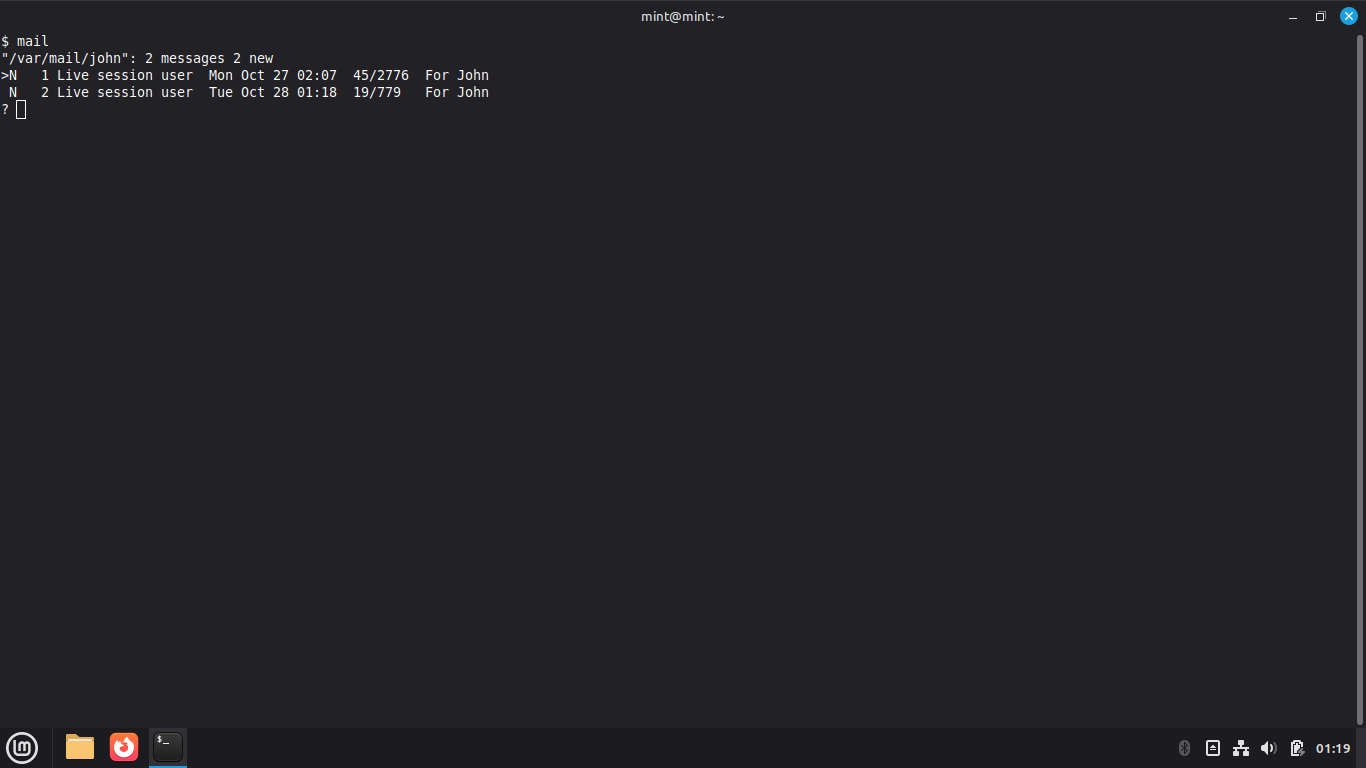
From the ? prompt, type 2 and press enter, then highlight the message body and right-click+copy:
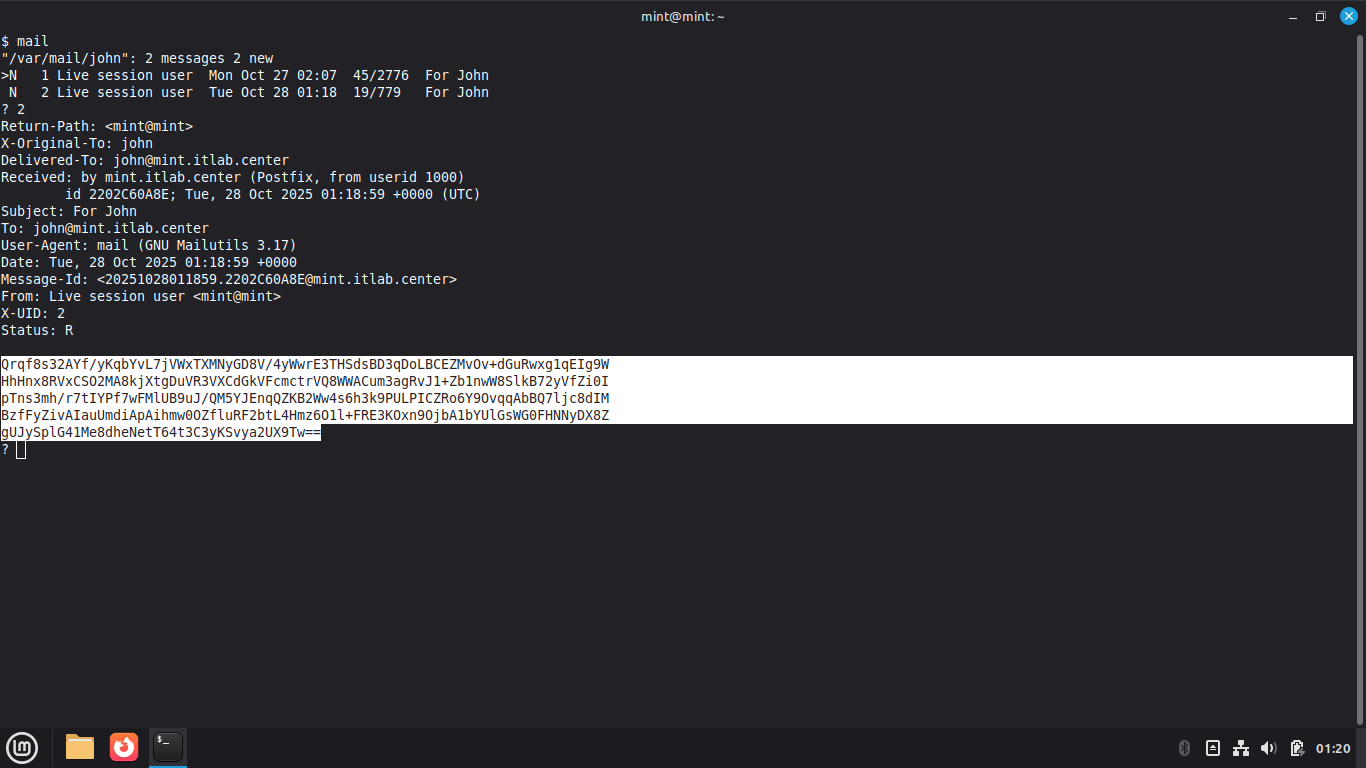
Type exit, then type echo " and paste the message with CTRL+Shift+V, type " > message2.base64:
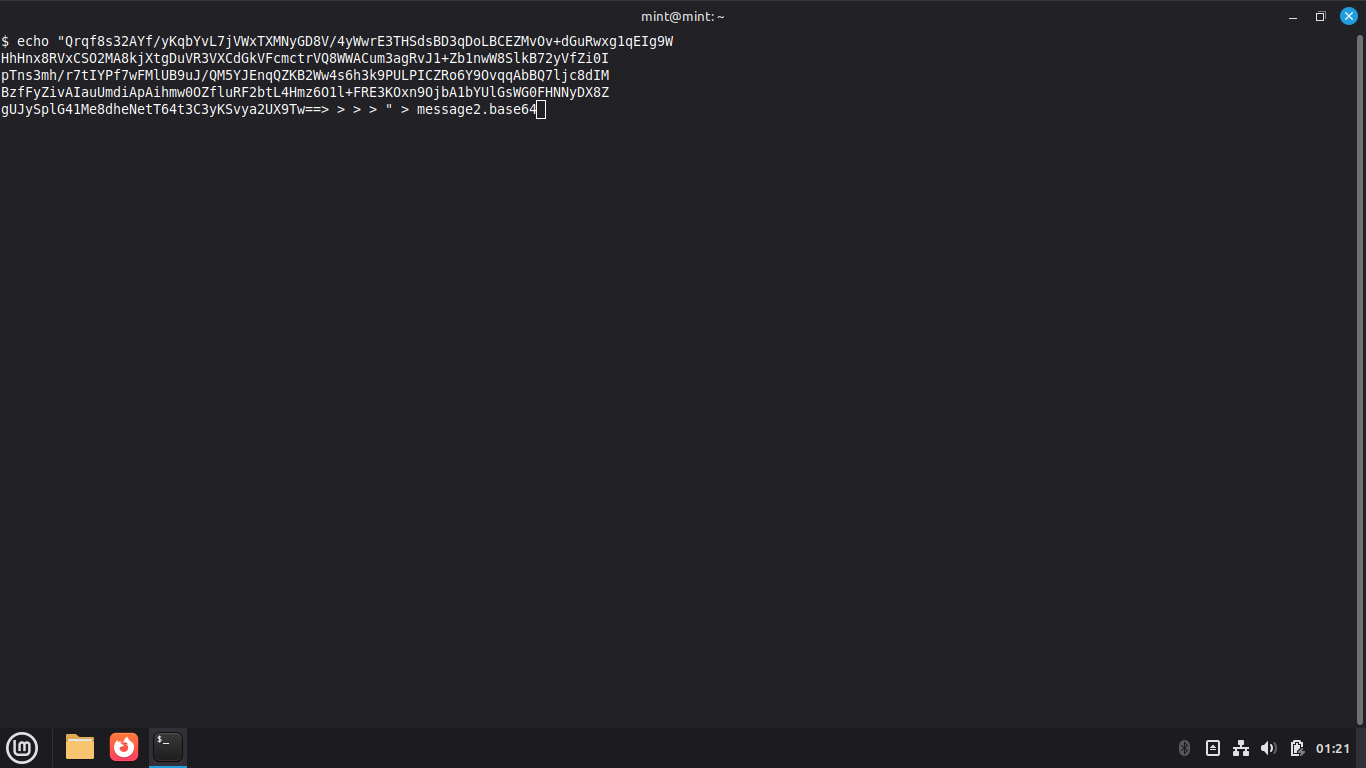
Run the following command from the User Shell Terminal to decode the encrypted message:
$ base64 -d message2.base64 > message2.enc
Run the following commands from the User Shell Terminal to decrypt and view the secret message:
$ openssl pkeyutl -decrypt -inkey johnprivate.key -in message2.enc -out message2.txt
$ cat message2.txt
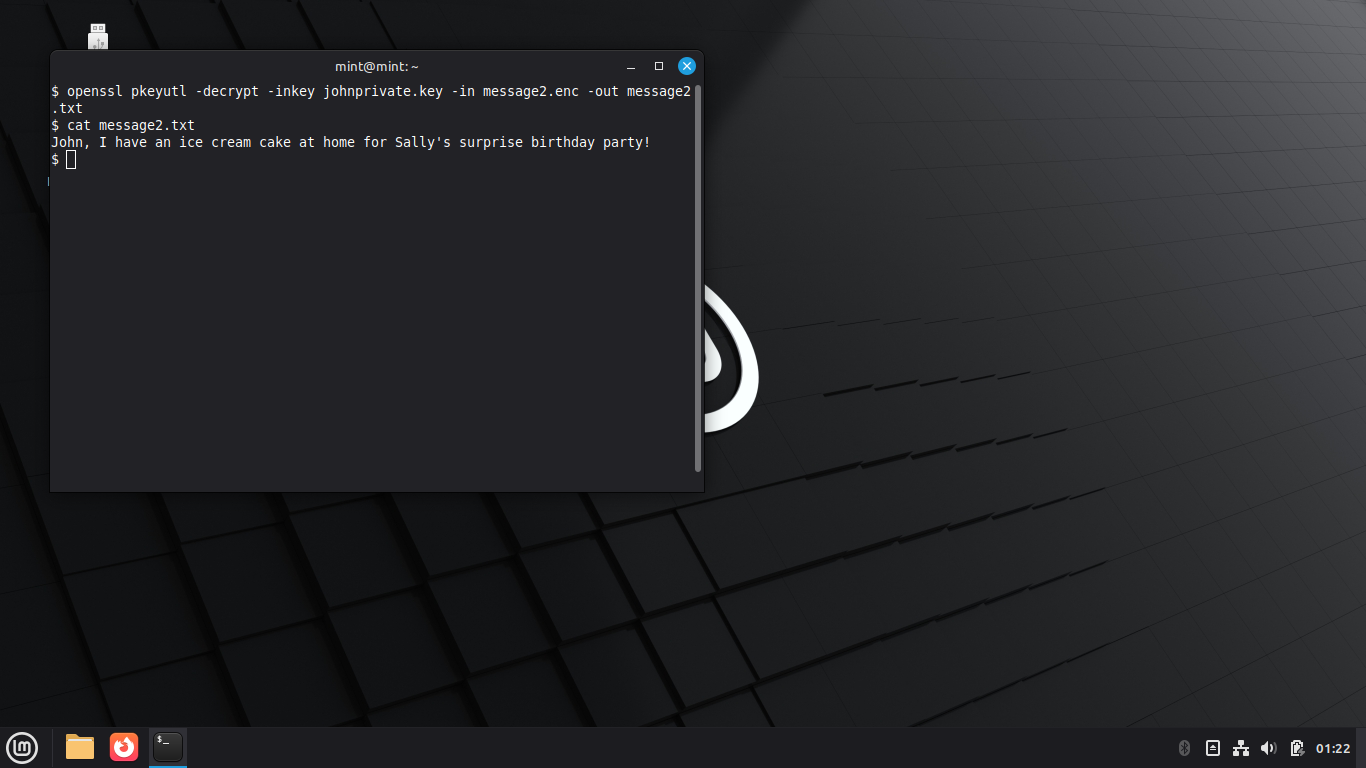
Congratulations, you have successfully performed Assymetric Encryption and Decryption operations
10. Cryptographic Hash Functions
A hash is a mathematical representation of a digital object, such as a text, email or .exe file
The object is run through a hash function, which produces an alpha-numeric string unique to it:
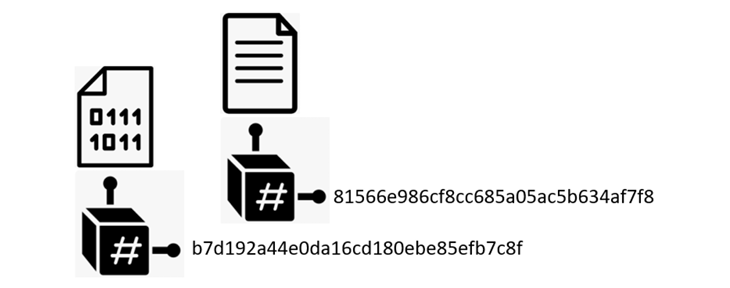
As long as the digital object is unchanged, the hash function will always produce the same result
However, even the smallest of changes will result in a completely new and wildly different result:
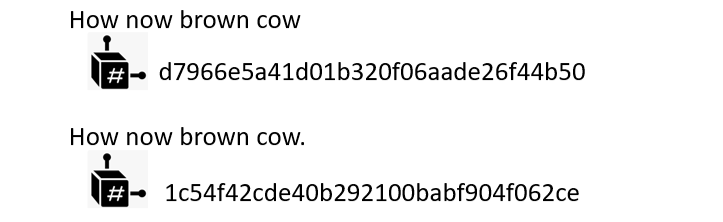
It is important to note that unlike encryption, hashing is one way and cannot be done in reverse
Hashes are not ciphertext, they are more like fingerprints of digital objects and sets of data
While they cannot be reverse, they can be attacked, dictionary attacks are a common example
|
Hash Function |
Strength |
Commonly Used For |
|
MD5 |
128-bit |
password storage, digital signatures |
|
SHA1 |
160-bit |
digital signatures |
|
SHA2 |
256-512bit |
browser encryption (TLS) |
Given there are an infinite amount of files, and a finite number of hashes, there is a problem
There is a chance that eventually two files will generate the same hash, we call this collision
The stronger the hash function, the less chance of a Collision in a given sample of objects
Thus MD5 being weaker than SHA2, is less is more likely to produce collision events than SHA2
Cryptographic Hashing has a place in cybersecurity as it performs its own function and benefits:
• Validating Installers and files downloaded from the internet
• Cross-Referencing files against known signatures of malware
• Proving the maintained integrity of Digital Evidence of crimes
11. Generate & Compare Hashes w/ OpenSSL
In this final section of our lab, we will use the OpenSSL tool to generate and compare hashes
Run the following command from the Linux Mint Live Terminal to create some folders for hashes:
mint@mint:~$ mkdir hash1 hash2 hash3
Run the following command from the Linux Mint Live Terminal to create some files in our folders:
mint@mint:~$ touch hash1/file1 hash2/file2 hash3/file3
Run the following commands from the Linux Mint Live Terminal to add some text to our files:
mint@mint:~$ echo "moo" > hash1/file1
mint@mint:~$ echo "moo" > hash2/file2
mint@mint:~$ echo "woof" > hash3/file3
There are many tools available to create hashes including, for this lab we will be using OpenSSL
Run the following commands from the Linux Mint Live Terminal to create an MD5 hash for our files:
mint@mint:~$ openssl dgst -md5 hash1/file1
mint@mint:~$ openssl dgst -md5 hash2/file2
mint@mint:~$ openssl dgst -md5 hash3/file3
Resulting Output:

Notice that the hashes for files 1 and 2 are the same, this is because the data of the files is
Hash values do not consider the names or directory locations of the files, only their contents
Run the following command from the Linux Mint Live Terminal to rename our first file:
mint@mint:~$ mv hash1/file1 hash1/happypuppy.exe
Run the following command from the Linux Mint Live Terminal to generate a new has value:
mint@mint:~$ openssl dgst -md5 hash1/happypuppy.exe
Notice that the hash value is still the same, neither the files name nor extension is considered
Run the following commands from the Linux Mint Terminal to create an SHA256 hash for our files:
mint@mint:~$ openssl dgst -sha256 hash1/happypuppy.exe
mint@mint:~$ openssl dgst -sha256 hash2/file2
mint@mint:~$ openssl dgst -sha256 hash3/file3
Resulting Output:
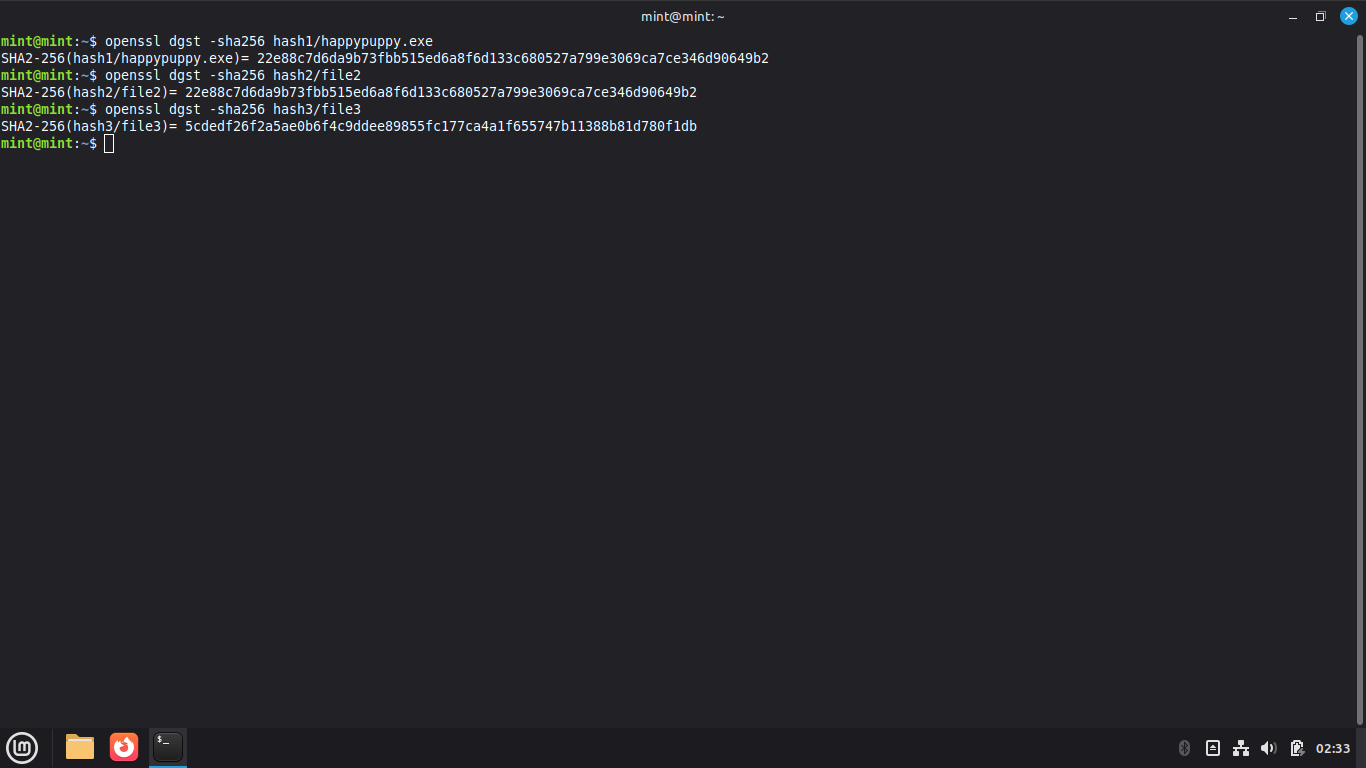
Notice that although we are using a different algorithm, the first two hashes are the same
As long as a file contains the same content, it will always create the same exact hash values
Run the following commands from the Linux Mint Live Terminal to create and view a random file:
mint@mint:~$ base64 /dev/urandom | head -c 1M > abigfile.txt
mint@mint:~$ cat abigfile.txt
Resulting Output:
Run the following command from the Linux Mint Live Terminal to create a hash for our text file:
mint@mint:~$ openssl dgst -sha256 abigfile.txt
Resulting Output:

Run the following command from the Linux Mint Live Terminal to add a space to the end of file:
mint@mint:~$ echo "" >> abigfile.txt
Run the following command from the Linux Mint Live Terminal to create a hash for our text file:
mint@mint:~$ openssl dgst -sha256 abigfile.txt
Resulting Output:

Even thought we added only a single space to this massive file, the hash is completely changed
This lab has equipped you with a foundational understanding of secure communications algorithms
As well as hands on experience with performing enabling these operations with the command line