This lab demonstrates your ability to implement and manage data backup and recovery processes in Windows Server environments. Explored how backup strategies support the Availability pillar of the CIA Triad and ensure Business Continuity and Disaster Recovery in the face of disruptive events. Study six backup types, and how organizations balance cost, performance, and risk tolerance (RPO)
Cybrary is a well established and free IT training platform with several intuitive labs to explore
A paid subscription with more advanced labs is available as well outside the scope of this platform
Head to https://www.cybrary.it to create a free account for learning available on their platform
Head to Data Backup and Recovery Basics to complete this lab for yourself or perform on homelab below
Quick Links:
Requirements:
• Windows PC w/ Internet Connection
• USB Flash Drive w/ at least 64GB Capacity
• Unused PC w/ at least 4GB of Memory
1. Data Backup and Recovery Overview
Data backup and recovery refers to the process of creating copies of computer data to save if needed
These need cases include the restoration of original data after it has been lost, damaged or stolen
This process is critical to supporting the Availability pillar for CIA Triad of Information Security
The Availability pillar means that data should always be accessible to those permitted to access it
Likewise, data backup and recovery is also key to Business Continuity, or the ability to keep open
Business Continuity is the ability of an organization to continue functioning after disruptive events
One of the most important functions of Business Continuity is Disaster Recovery, which deals with the
restoration of critical IT systems and infrastructure following a disaster while minimizing data loss
When developing a Business Continuity Plan (BCP) or Disaster Recovery Plan (DRP) formal documentation
Detailed data backup and recovery processes and procedures are the first and most important details
These include what data must be backed up, how many copies, how many locations and which backup types
There are six distinct types of data backups:
• Full
• Differential
• Incremental
• Synthetic Full
• Continuous
• Bare Metal
Full Backups are the easiest to understand: all the files and folders on a given system are backed up
However, full backups are time and resource intensive, in terms of disk space and network bandwidth
For this reason, full backups are commonly combined with both differential and incremental backups
A differential backup backs up all files that are new or that have changed since the last full backup
Incremental backups are the most granular. The first Incremental backup backs up all files that are
new or have changed since the previous full backup, then all subsequent incremental backups only back
up what is new or has changed since the last performed incremental backup. It backs up in increments

In the example above, admins take a full backup on Friday, then differentials Monday through Thursday
If there is an issue with Thursday's, Friday's backup plus the differential from Wednesday can be used
If data is restored in this way, any data created after Wednesday's backup is lost in this scenario
Only the last completed full backup plus a single differential backup is needed to restore the files
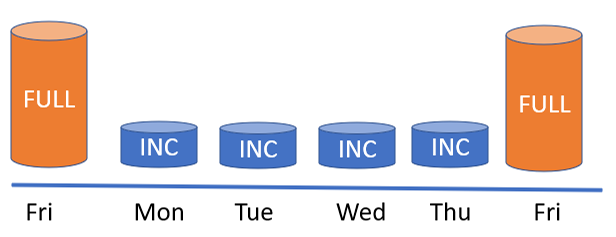
In this example above, admins again create a full backup Friday, then incremental backups Mon-Thurs
If data is lost on Thursday, the full backup from Friday plus the incremental backups from Mon-Wed
are then used to restore the data. Any data created after Wednesday's back is also lost in this case
The risk tolerance for data loss is a key part of the organization's Recovery Point Objective (RPO)
The RPO dictates how much data loss is acceptable, in some systems losing a day may be inconsequential
However, suppose the risk of losing a full day's data is too great. In that case, try hourly backups
For example, implement weekly full backups, daily differential backups, and hourly incremental backups
Ultimately, the organization must balance the cost and time of backing up systems and the data at risk
Some backup providers, especially cloud providers, offer continuous and synthetic full backup services
Continuous backups push new data to storage on an ongoing basis once a single full backup is completed
Synthetic full backups are created by combining past backups and only grabbing the most recent changes
In other words, data in storage is duplicated into a new full backup so only recent files are needed
In this way, you can combine the benefitted detail of a full back, while at the cost of an incremental
Bare metal backups are a type of full backup which can restore a complete server to a virtual machine
The primary use for this today is when the application running on the server cannot be re-installed
Bare metal backups are also used to upgrade end-user desktops and laptops to more powerful hardware
Administrators use bare metal backups to migrate from physical hardware to virtual or cloud images
In the next lesson, you will practice backing up and restoring data using Windows Server Backup tool
You will begin by creating a scheduled backup job, followed by a one-time using the wbadmin commands
Finally, you will finish by deleting and restoring the folder you've backed up using the wbadmin GUI
2. Install Windows Server 2025
Windows Server is Microsoft's enterprise-grade server operating system for hosting many applications
Companies wishing to host their web servers, databases, or file shares on windows will utilize this
Download Windows Server 2025 Disk Image (ISO): Windows Server 2025 ISO
Download Rufus Disk Imaging Software: Rufus Official Download
Insert USB Flash Drive, run rufus.exe, select target drive, select Windows Server 2025 ISO, hit start:
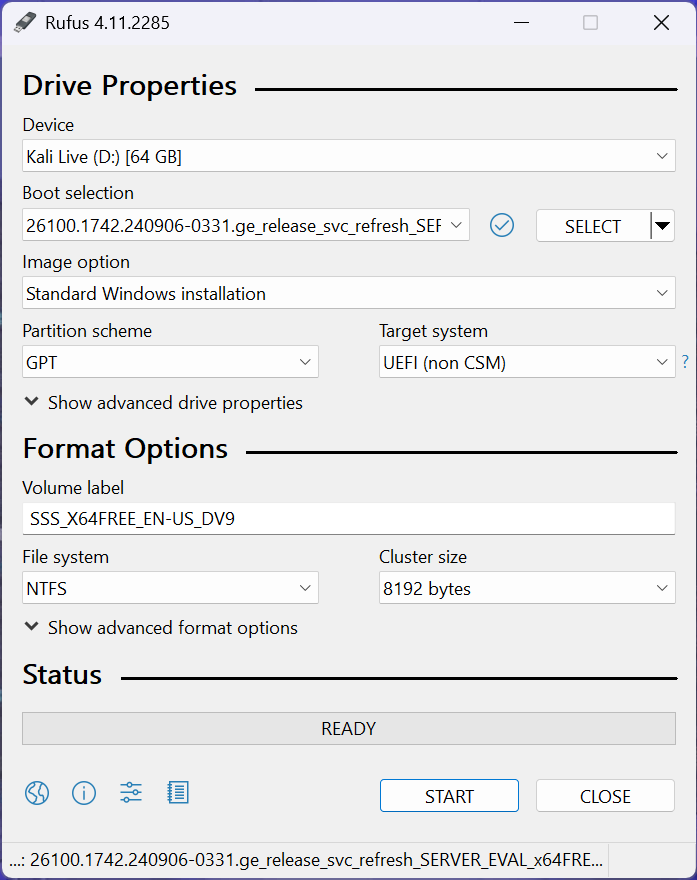
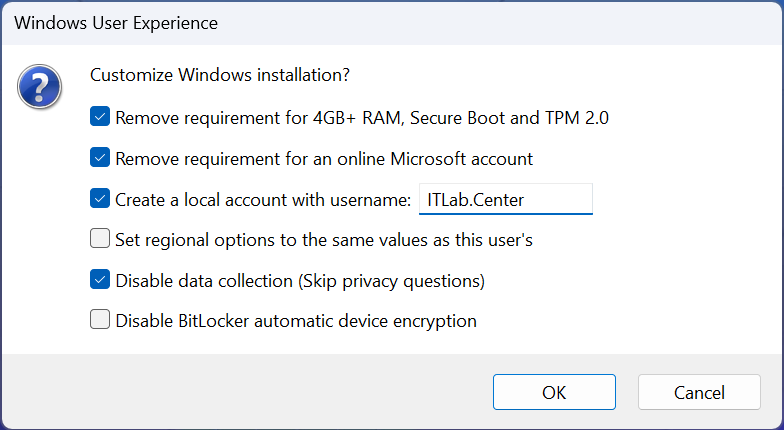
Use the rufus popup menu to customize the Windows Server 2025 installation and disable data collection:
Remove USB Flash Drive and Insert into unused PC. Start PC and press hot boot key on startup:

Navigate through the installer and select the Windows Server Standard Evaluation Desktop Experience:
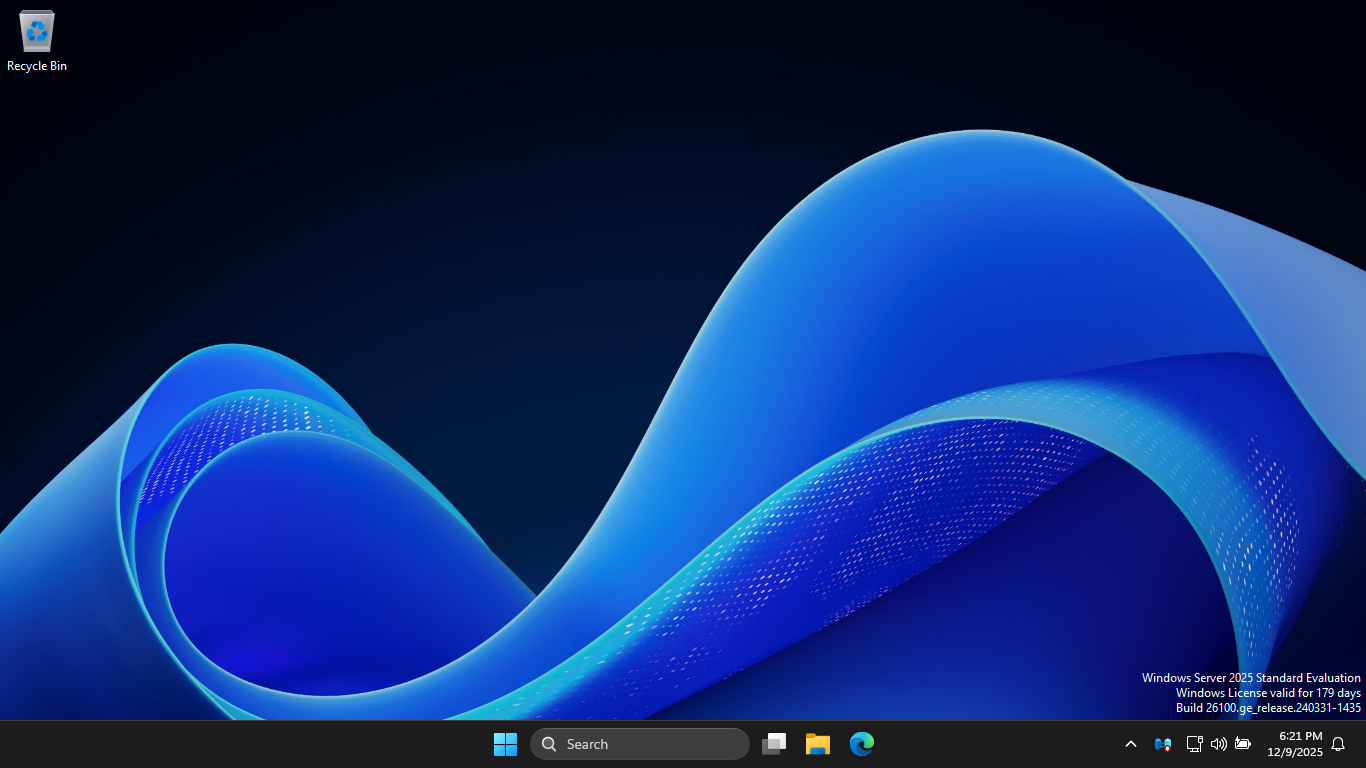
We now have our Server provisioned which will simulate our database for the following lab sections
3. Back Up Data Using Windows Server Backup
In this first part of the lab, you will practice backing up data using the Windows Server Backup tool
To get started with this activity, we will first need to install the Windows Server's Backup feature
You can install the Windows Server Backup feature using the Server Manager GUI or through PowerShell
From the search bar, type PowerShell, then click the option to run a PowerShell as an administrator:
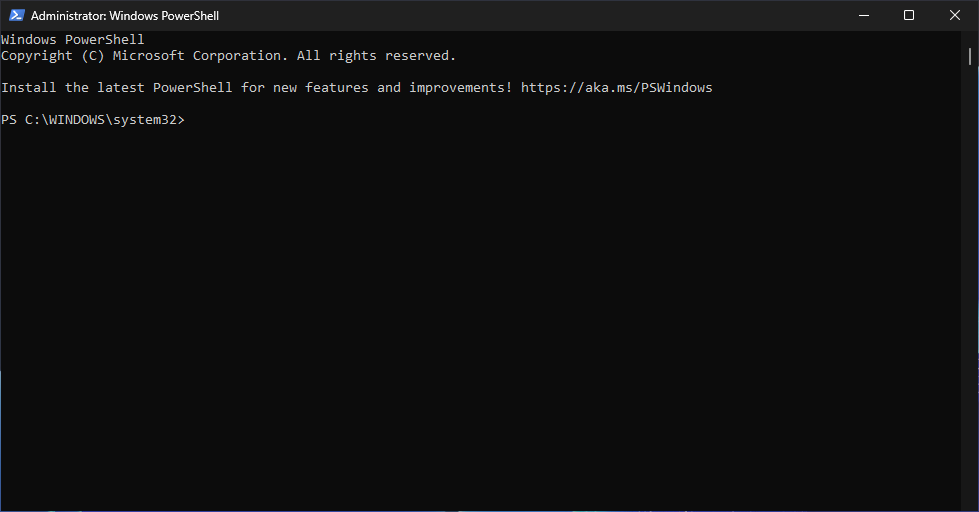
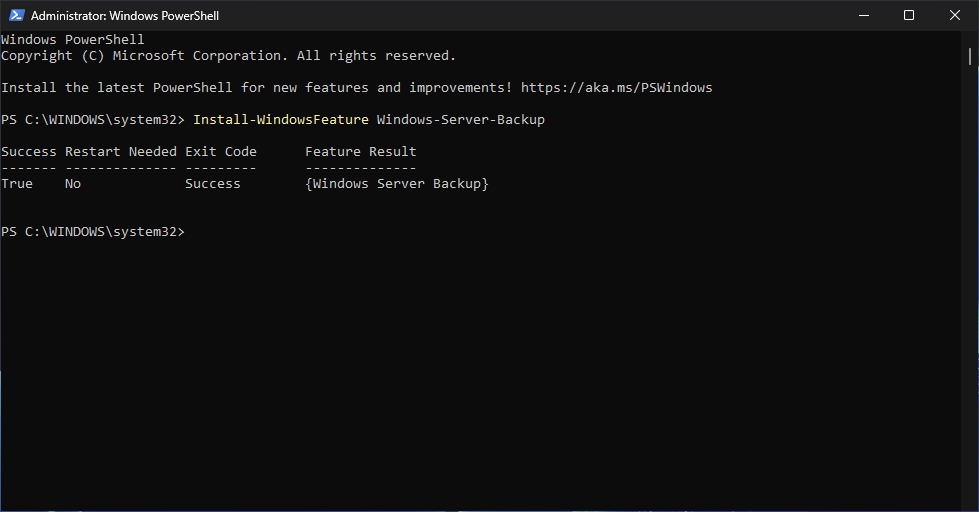
Run the following command from the PowerShell Terminal to install the Windows Server Backup feature:
PS C:\WINDOWS\system32> Install-WindowsFeature Windows-Server-Backup
Resulting Output:
Run the following commands from the PowerShell Terminal to create a sales folder and some files:
PS C:\WINDOWS\system32> New-Item -Path "C:\Sales" -ItemType Directory
PS C:\WINDOWS\system32> echo "1 Million" >> C:\Sales\Budget.txt
PS C:\WINDOWS\system32> echo "1 Billion" >> C:\Sales\Revenue.txt
PS C:\WINDOWS\system32> echo "ABC Company LLC" >> C:\Sales\Customers.txt
Run the following command from the PowerShell Terminal to create a new D: volume titled Backups:
PS C:\WINDOWS\system32> Get-Disk | Where-Object PartitionStyle -eq 'Raw' | Initialize-Disk -PartitionStyle GPT
PS C:\WINDOWS\system32> New-Partition -DiskNumber 1 -UseMaximumSize -AssignDriveLetter
PS C:\WINDOWS\system32> Format-Volume -DriveLetter D -FileSystem NTFS -NewFileSystemLabel "Backups"
Run the following command from the PowerShell Terminal to open the Windows Server's wbadmin console:
PS C:\WINDOWS\system32> wbadmin.msc
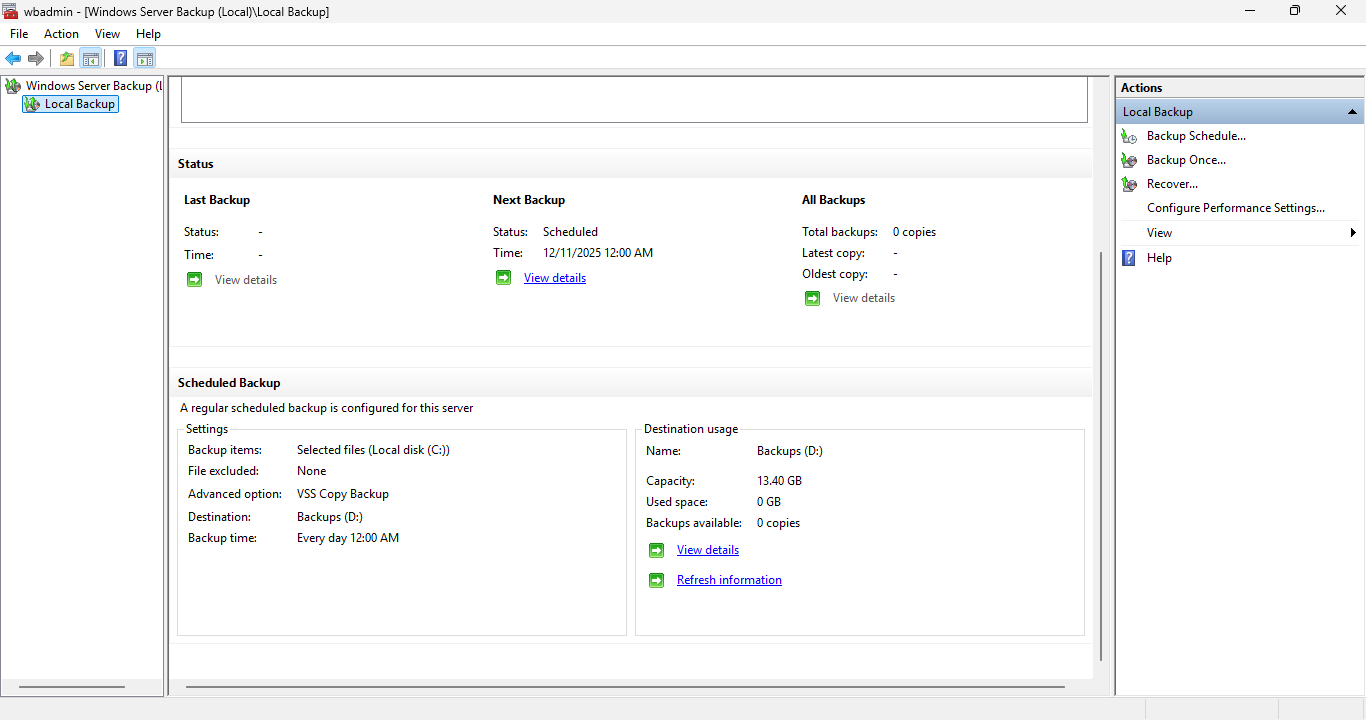
In the wbadmin window, in the left pane, click Local Backup, then wait for the center pane to refresh:
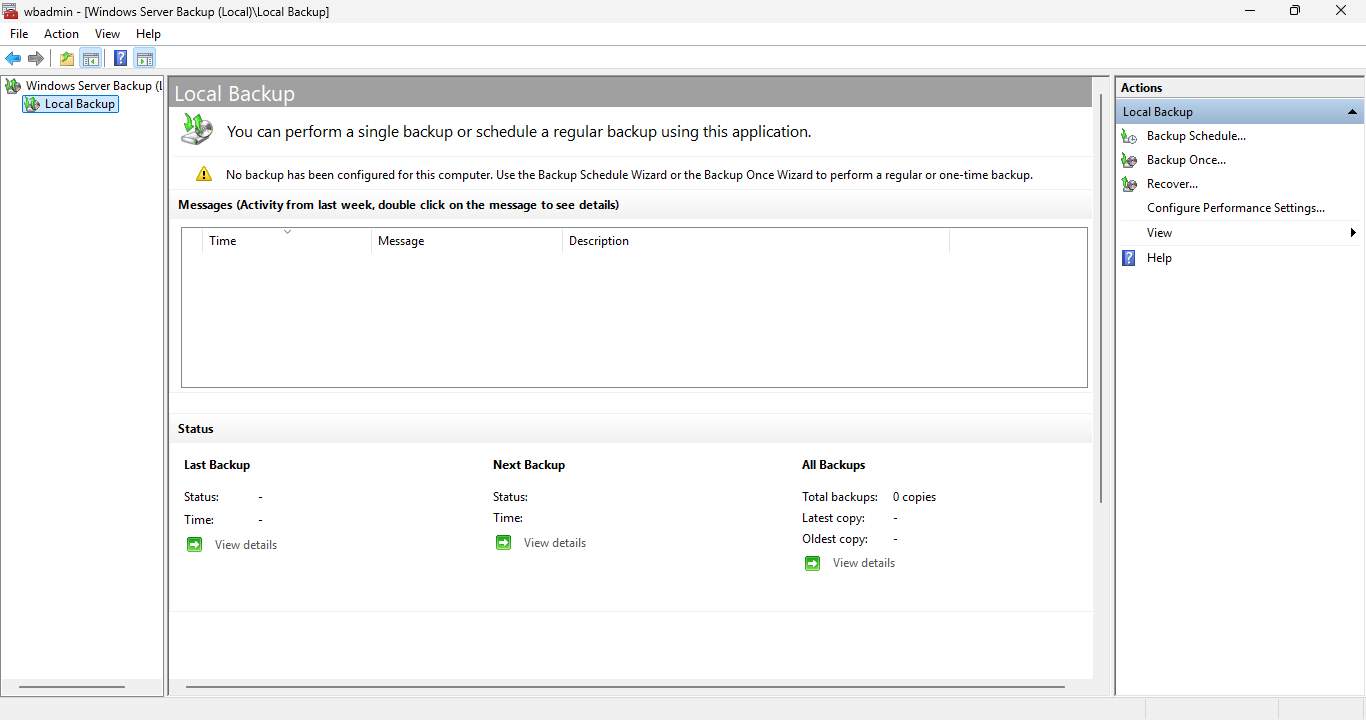
In the wbadmin window, in the Actions pane, select Backup schedule to open the Backup Schedule Wizard
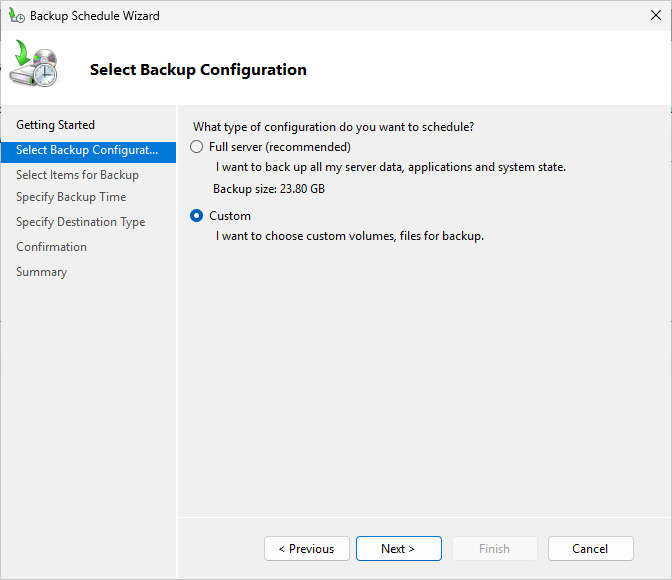
Click Next, then on the Select Backup Configuration Page, select the Custom radio button like below:
On the Select Items for Backups page, click on Add Items to open up the Select Items dialog window
In the Select Items dialog window, expand Local Disk (C:) and click the checkbox for the Sales folder
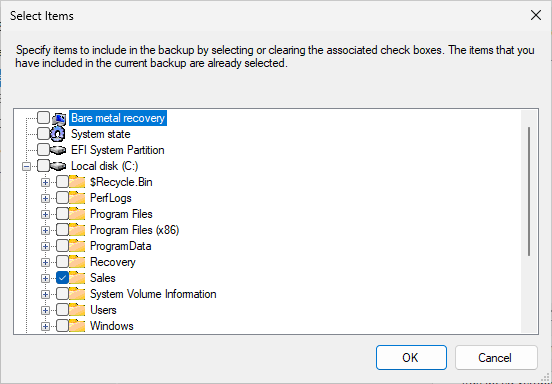
Click ok, then on the Select Backup Configuration page, you should see the C:\Sales is now selected
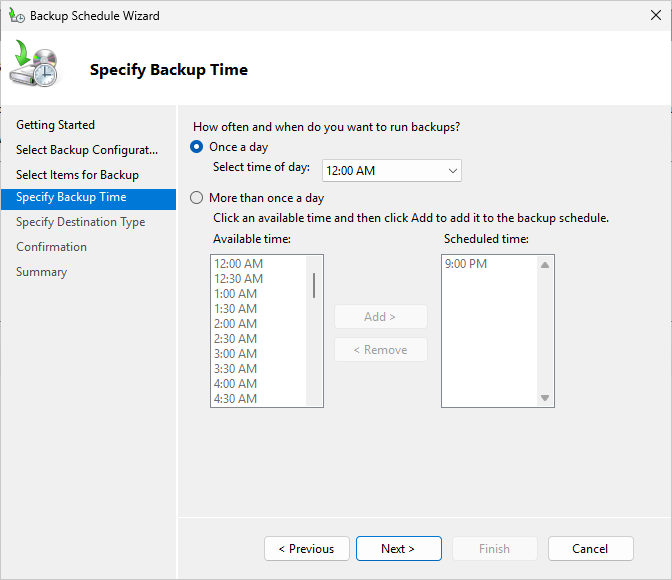
Click Next to continue, then from the Specify Backup Time page, change the Time of Day to 12:00AM:
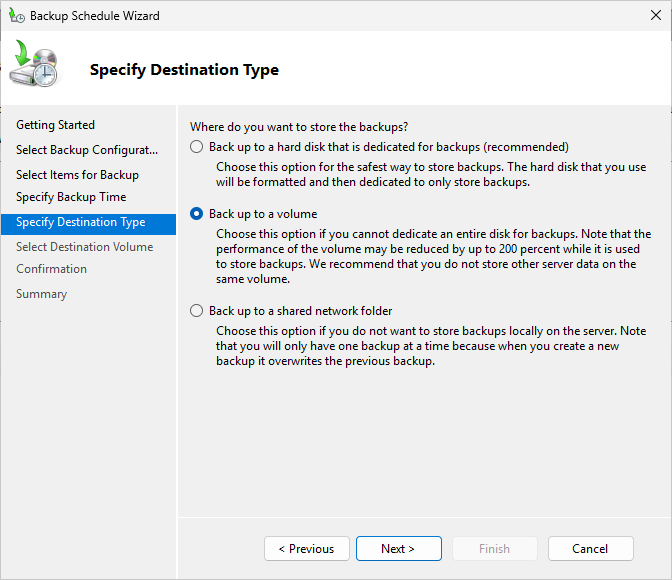
On the Specify Destination Type page, select the Back up to a volume radio button and then click next:
On the Select a Destination Volume page, click Add to open the Add Volumes box, select Backups (D:):
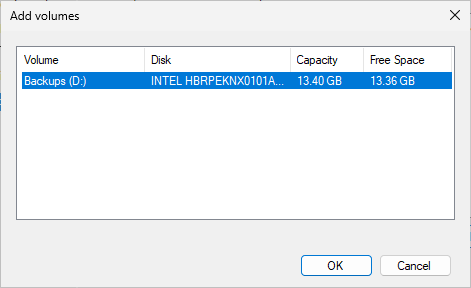
On the Select a Destination Volume page, you should now see the Backups (D:) volume is highlighted
Click Next and then click Finish. On the Summary page, click Close to close the Backup Schedule tool
In the wbadmin console, you should see that there is now a scheduled backup in the Status section:
In the Actions pane, click on Backup Schedule... to reopen the Backup Schedule Wizard application
You can use this wizard to change your scheduled backup or stop your backup from running as scheduled
For the purposes of this lab, you will cancel your scheduled backup and run a one-time backup instead
From the Modify Scheduled Backup Settings page, select the Stop backup radio button and click next:
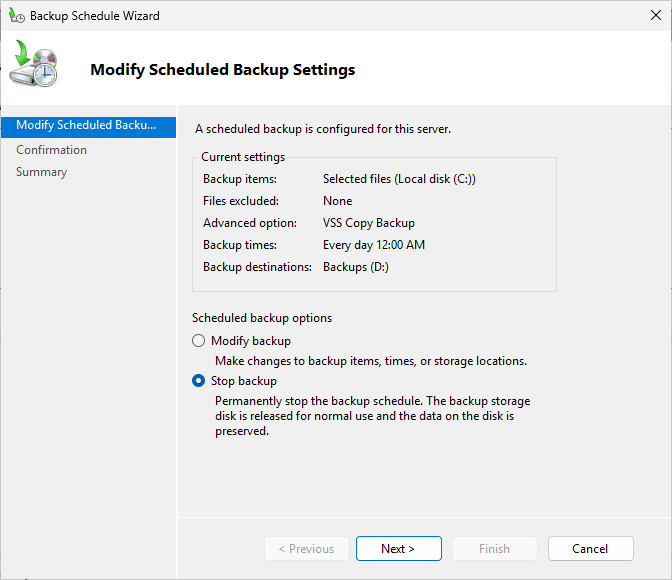
Click Next, then click Finish, click Yes when prompted, then on the Summary page click Close to apply
In the wbadmin console, you should no longer see a scheduled backup in the Status section afterwards
You can also run back ups from the command line. In the next steps you will perform a one-time backup
Run the following command from the PowerShell Terminal to perform a backup of the sales folder:
PS C:\WINDOWS\system32> wbadmin start backup -backupTarget:D: -include:C:\Sales
Resulting Output:
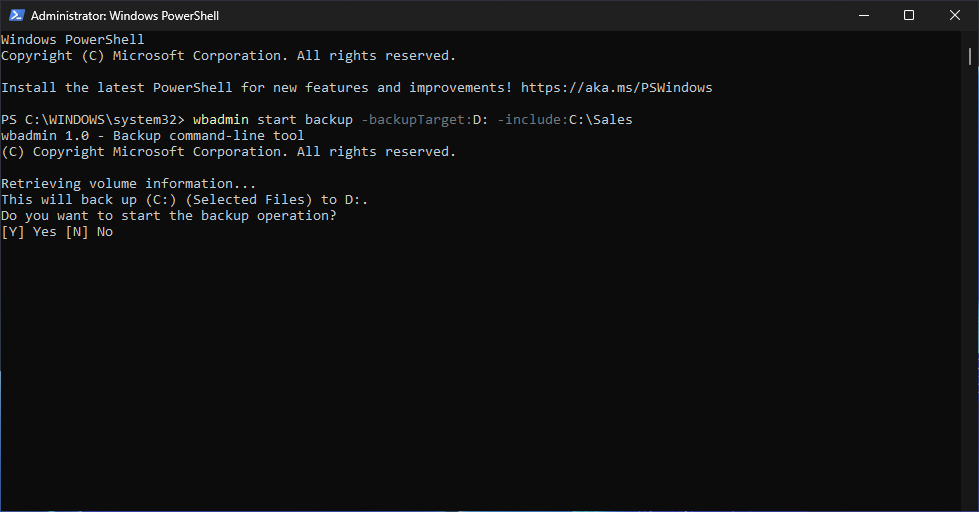
When prompted, type Y and press Enter to continue. Then wait a few minutes for the backup to complete
4. Recover Data Using Windows Server Backup
In the next steps, you will delete the Sales folder, then restore the folder using that new backup
From the taskbar, open the File Explorer, the navigate to the C:\ drive and delete the Sales folder
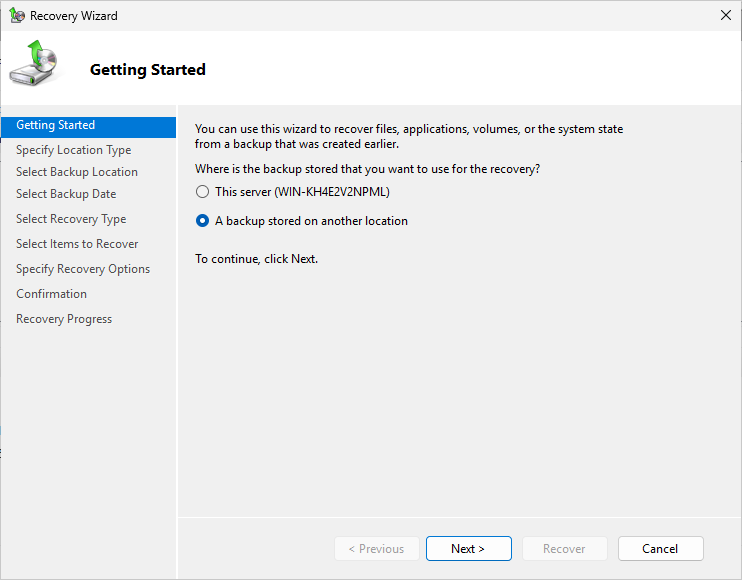
Now head back to the wbadmin console and click Recover... this will reopen the Recovery Wizard window
On the Getting Started page, click the A backup stored in another location radio button, then next:
From the Specify Location Type page, click Next to accept the default options and continue recovery
From the Select Backup Location page, click Next to accept the default options and continue recovery
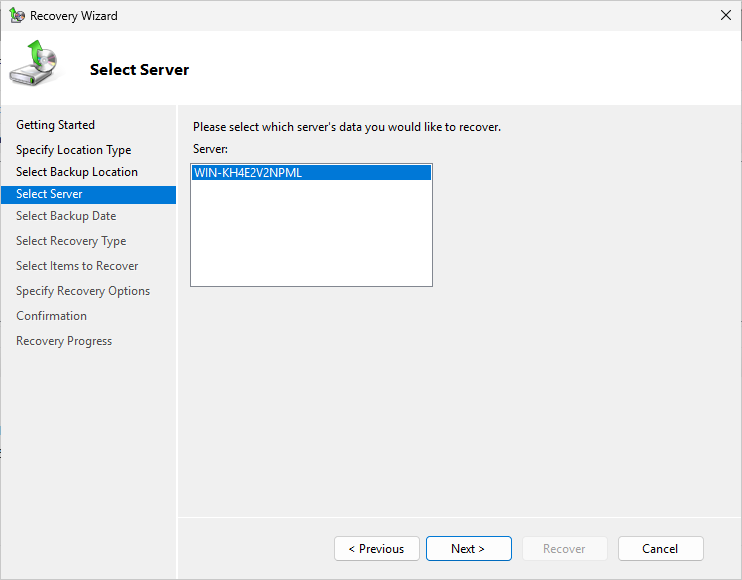
From the Select Server page, select the WIN Server, then click Next to continue with the recovery:
From the Select Backup Date page, click Next to accept the default options and continue the recovery
From the Select Recovery Type page, click Next to accept the default options and continue recovery
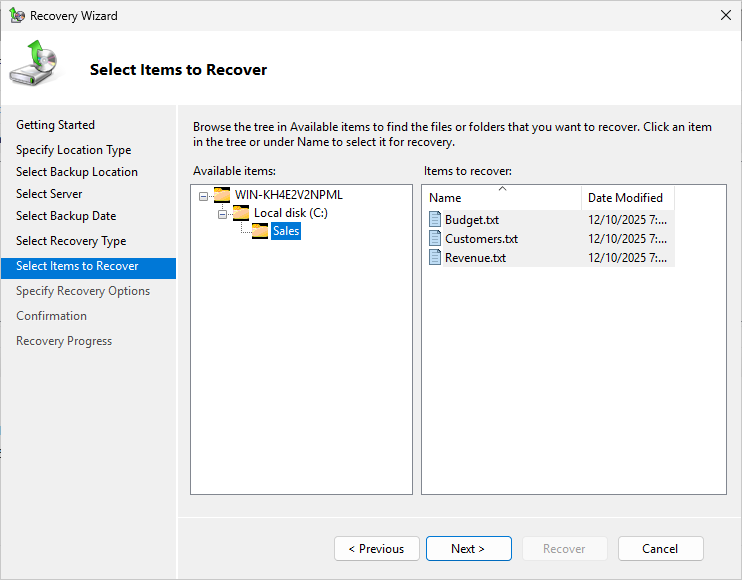
From the Select Items to Recover page, navigate to the C:\Sales folder and select it, then hit Next:
From the Specify Recover Options page, under Recovery Destination, type C:\ and hit Next to continue
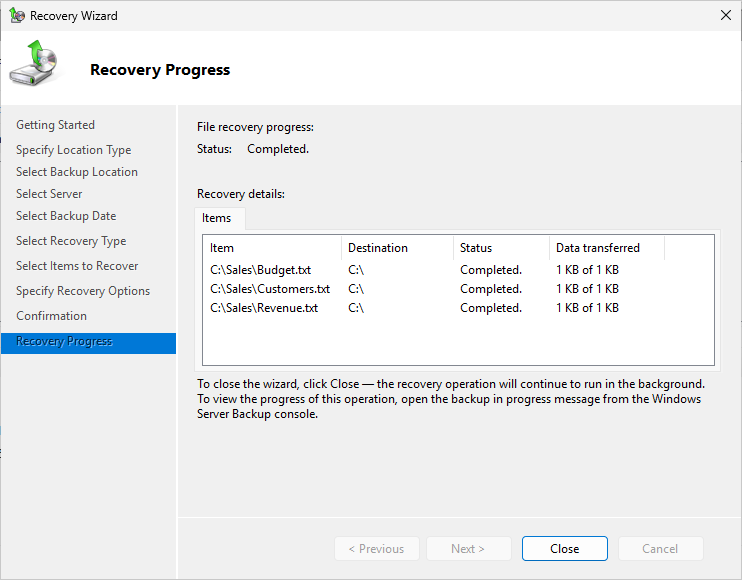
From the Confirmation page, note the location where the files will be recovered, then click Recover:
Run the following commands from the PowerShell Terminal to verify the success of the data recovery:
PS C:\WINDOWS\system32> cat C:\Budget.txt
PS C:\WINDOWS\system32> cat C:\Customers.txt
PS C:\WINDOWS\system32> cat C:\Revenue.txt
Resulting Output:
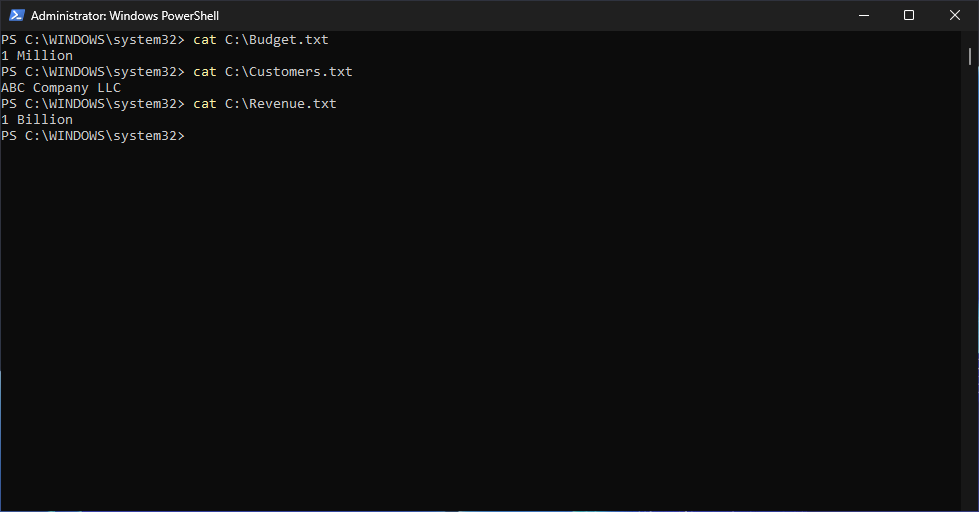
We can see that after the recovery, the files and their contents are still intact in the C:\ drive
Congratulations, you now have the skills necessary to backup and recover data using Windows Server