This project showcases a deep dive into PowerShell, Microsoft’s object-oriented scripting and automation framework. While legacy environments relied on fragmented tools like batch scripting and VBScript, this lab demonstrates the ability to utilize a unified environment for advanced system management, information gathering, and task automation
Cybrary is a well established and free IT training platform with several intuitive labs to explore
A paid subscription with more advanced labs is available as well outside the scope of this platform
Head to https://www.cybrary.it to create a free account for learning available on their platform
Head to PowerShell Basics to complete it yourself or you can perform it on your homelab below
Quick Links:
Requirements:
• Windows PC w/ Internet Connection
• USB Flash Drives w/ at least 64GB Capacity
• 2 Unused PCs w/ at least 4GB of Memory
1. PowerShell Overview
The Unix/Linux operating systems have long been recognized for their powerful command line interface tools
This includes the ability to compose scripts to automate tasks, particularly through Bourne Again Shell
During the 1980s, 1990s, however, Windows Administrators seeking to automated faced a fragmented toolset
• Batch scripting via the legacy Windows command prompt
• Visual Basic Script (VBScript for more advanced automation)
• The complex and often confusing Windows Management Instrumentation (WMI)
In 2006, Microsoft revolutionized Windows system management by introducing PowerShell, a powerful, object
oriented scripting language and automation framework. Designed to be far more than just another scripting
language, PowerShell integrated deeply with the Windows operating system and provided a unified tool for
automation, system management and administration, and information gathering from many different sources

PowerShell stands out for its object-oriented approach. Unlike text-based shells, PowerShell pipelines
pass objects, not plain text, allowing rich data manipulation. PowerShell is fully optimized for system
administration and provides a structured command syntax making commands easy to discover and remember
PowerShell is made up of thousands of cmdlets (command-lets). Cmdlets consist of both a verb and a noun
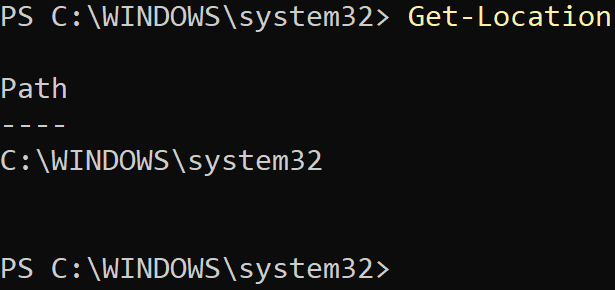
For example, you can use the Get-Location cmdlet to know or confirm the current working directory/folder
As mentioned, the Cmdlets contain a verb and a noun. For this, Get is the verb, and Location is the noun
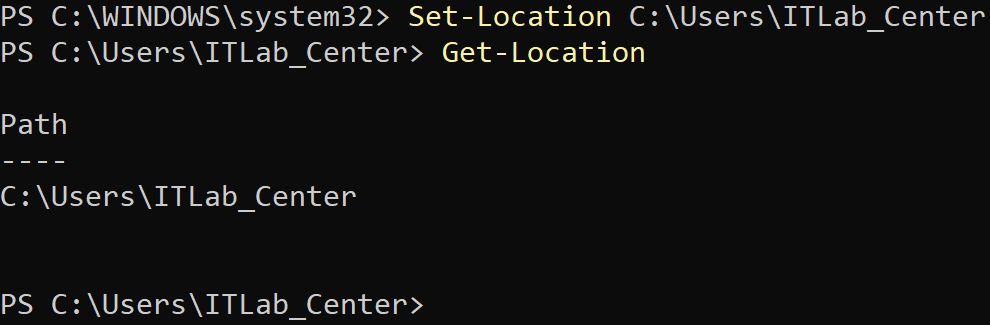
By changing the verb in the cmdlet to Set, we can instead move into another specified directory/folder
PowerShell is object-oriented. Cmdlets are objects, and the output from a cmdlet is also another object
Even variables are objects! Objects support methods which are actions that you can perform on an object
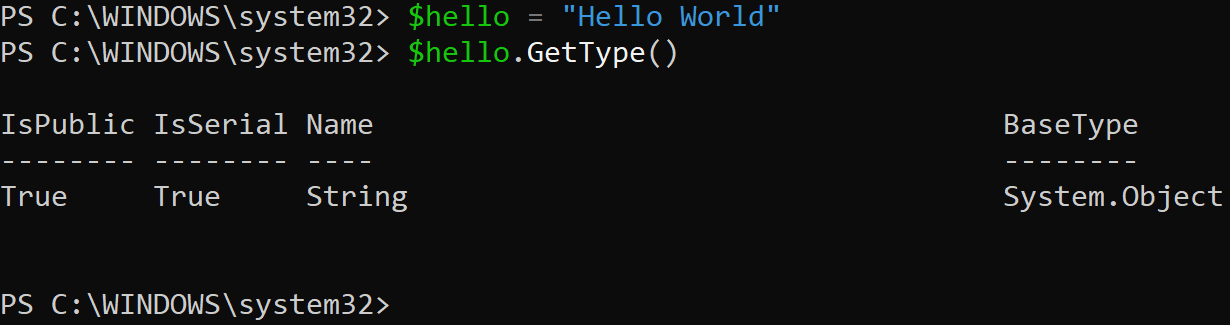
using dot notation. For example, let's assign the text "Hello World" to a variable we will name $hello
If we want to know or confirm what $hello is, we can use the .GetType() method, which will then show us
If we want to know how long $hello is, we can use the .Length method to find the character length of it

If we wanted to know if $hello contains the string "Hello", we can use the .Contains() method shown below

PowerShell is loosely typed, meaning it will make assumptions about data types for you. You do not need
to declare what a variable is beforehand. In the example above, $hello is a string. However, we did not
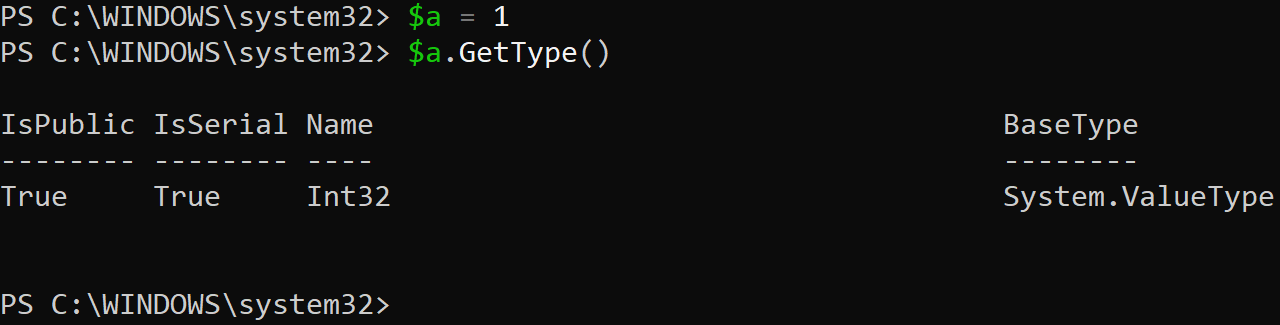
have to tell PowerShell that $hello is a string. In the example below, PowerShell assumes $a is an integer
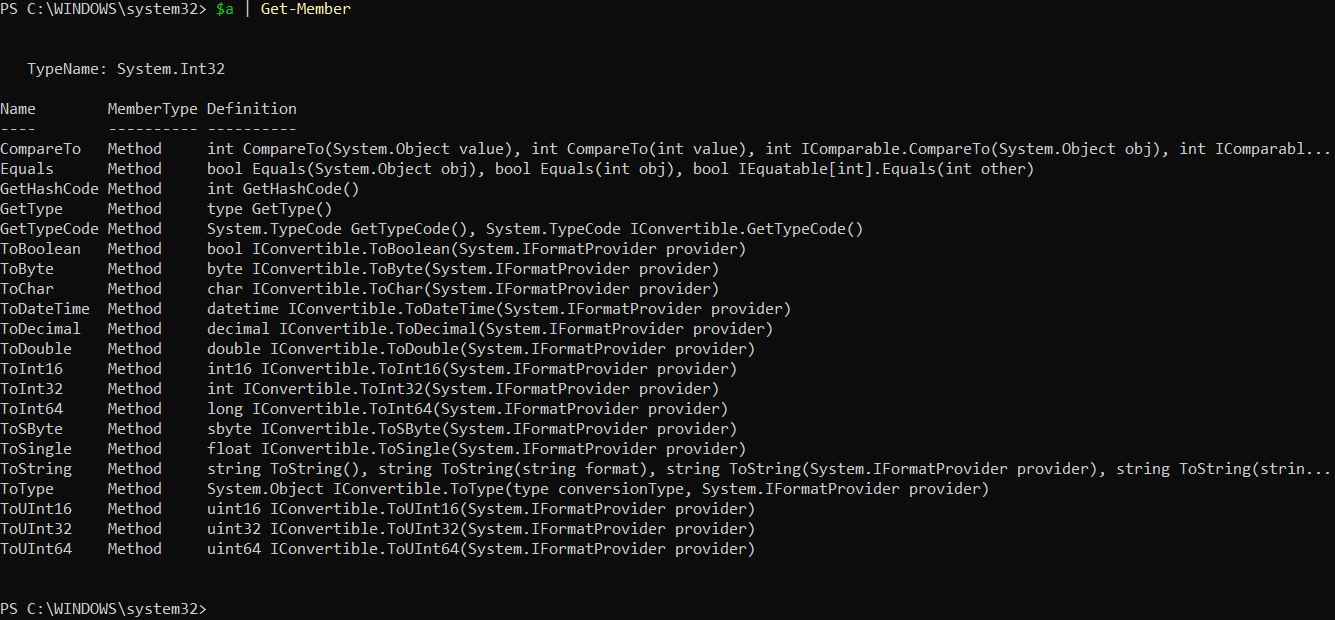
PowerShell supports piping. Piping means that one cmdlet's output can become another's input. For example
what if we want to see every method available to our Int32 variable $a? We can pipe $a to the Get-Member
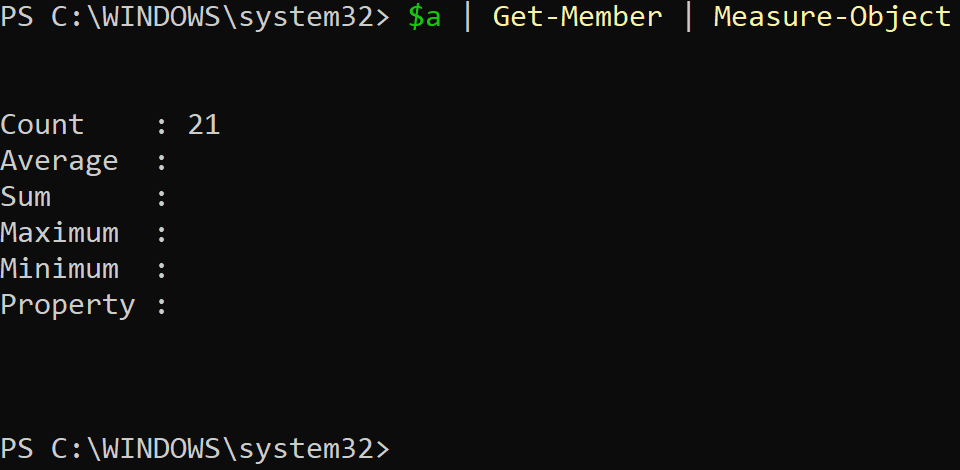
What if we wanted to count how many methods there are? We can pipe our output again to the Measure-Object
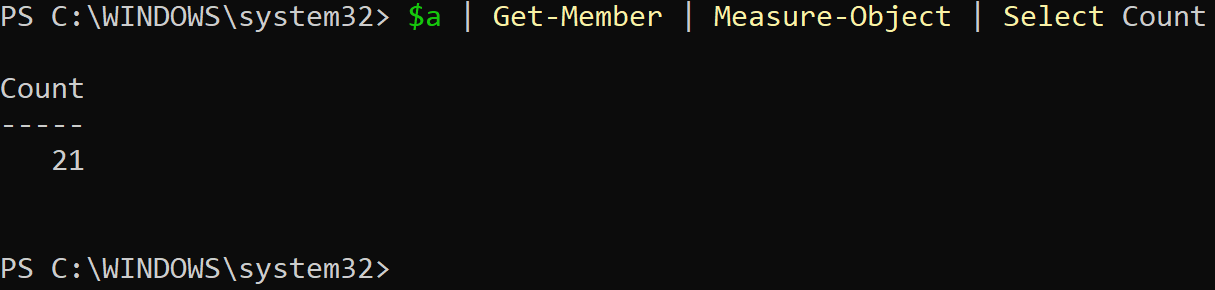
What if we only wanted the Count? We can pipe one more time using Select-Object cmdlet, as shown below:
In the next lesson, you will learn foundational PowerShell concepts through a series of hands-on examples
You will learn the most used commands, including important administrative commands, and how to make scripts
2. Install Windows 11 Pro Edition
Windows 11 is now the premier and modern desktop operating system for the vast majority of organizations
The Windows operating system family is the home of the PowerShell scripting language and command line tool

In order to demonstrate the capability of PowerShell we will be installing the pro-edition of Windows 11
The Professional edition of Windows 11 is required to join a computer to a domain, which we will get to
Download Windows 11 Disk Image (ISO): Microsoft Windows 11 ISO
Download Rufus Disk Imaging Software: Rufus Official Download
Insert USB Flash Drive, run rufus.exe, select target drive, select Windows 11 Disk Image, and hit start:
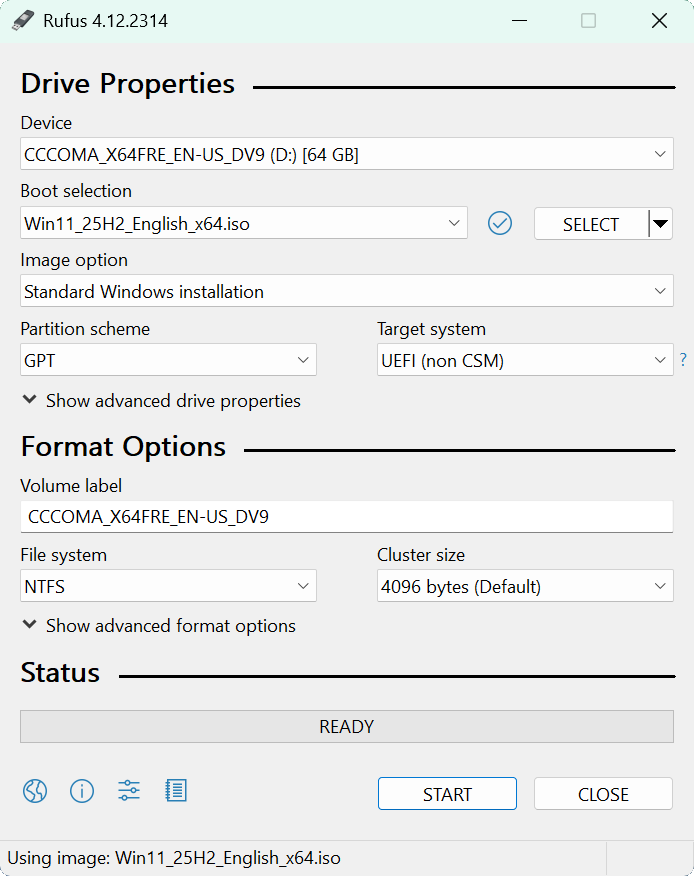
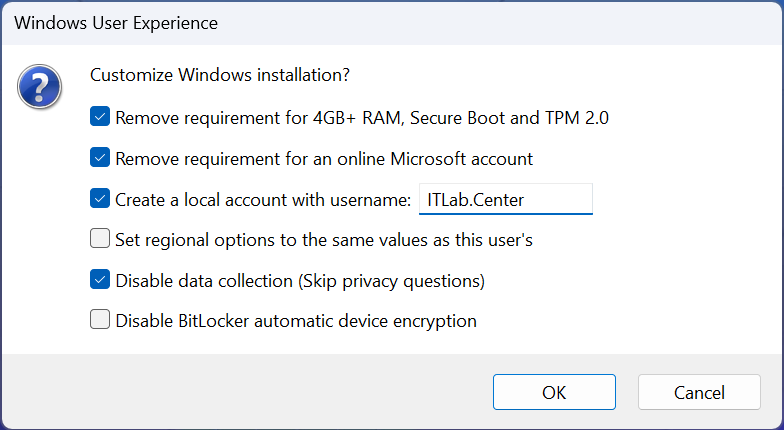
Use the rufus popup menu to customize the Windows 11 installation and disable data collection for this lab

Remove the USB Flash Drive and Insert into unused PC. Start PC and press the hot boot key at the startup:

Navigate through the installer and select the 11 Pro Edition to boot up to the Unpatched Windows Desktop
This will act as the perfect baseline for us to perform this lesson on PowerShell and PowerShell scripting
3. Navigation and File / Folder Management
In this part of the lab, you will learn some basic cmdlets for navigating PowerShell and management files
From the taskbar, search for PowerShell, then click on the option listed as Run as Administrator to launch
Run the following command from the Administrator PowerShell to count the number of cmdlets which exist
PS C:\WINDOWS\system32> Get-Command -Type Cmdlet | Measure-Object | Select-Object Count
Resulting Output:

The point of this exercise is to show that you simply cannot memorize all the possible PowerShell Cmdlets
The best way for PowerShell to stick with you is to actually start using it regularly for everyday tasks
Over time you will being to master the most common and useful cmdlets for the many different use cases
A quick side note: for the most part Windows is case-insensitive. You should feel free to use lowercase
Run the following command from the Administrator PowerShell to display the help information for a command
PS C:\WINDOWS\system32> Get-Help Get-Command
Resulting Output:
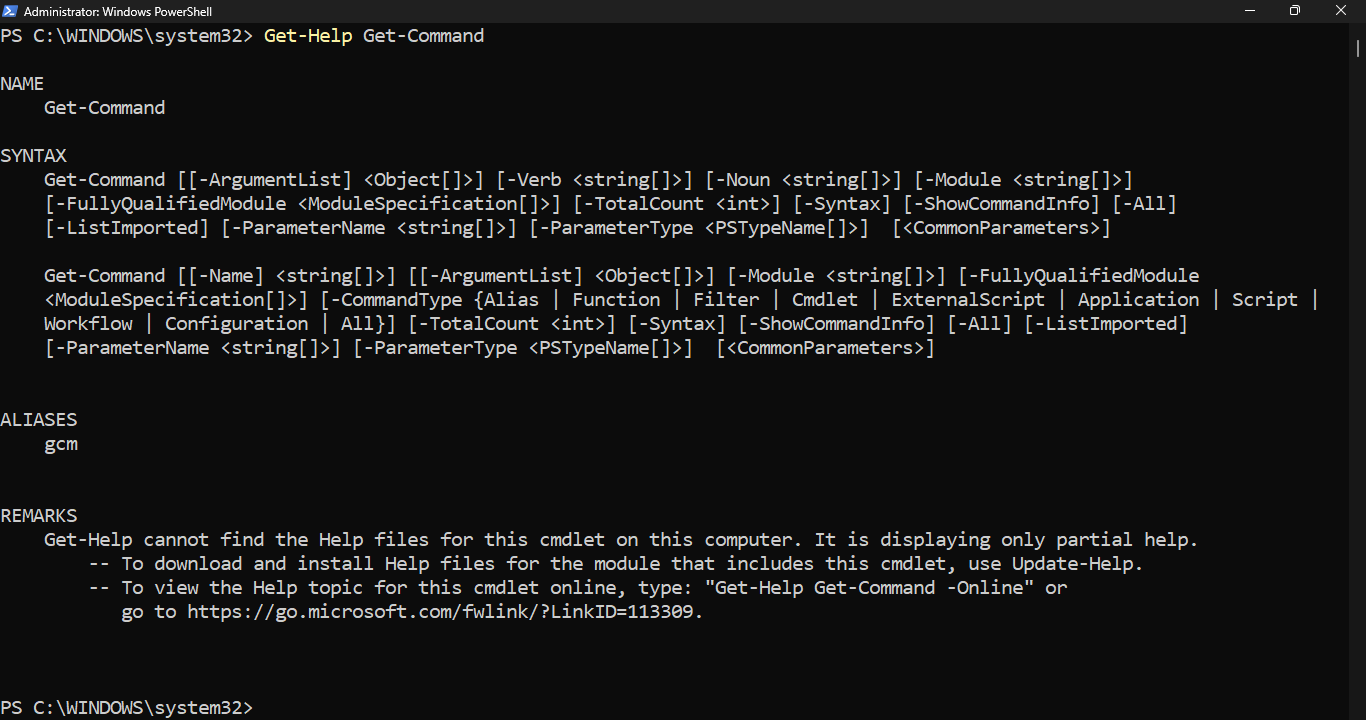
Get-Help is similar to the Linux man pages. Get-Help will explain what a cmdlet does and its usage syntax
Pay attention to the REMARKS section at the bottom. PowerShell is telling us that Get-Help is not up-to-date

Run the following command from the Administrator PowerShell and press enter to update Get-Help information
PS C:\WINDOWS\system32> Update-Help -Force -ErrorAction SilentlyContinue
Run the following command from the Administrator PowerShell and press enter to display Get-Command help
PS C:\WINDOWS\system32> Get-Help Get-Command
Resulting Output:
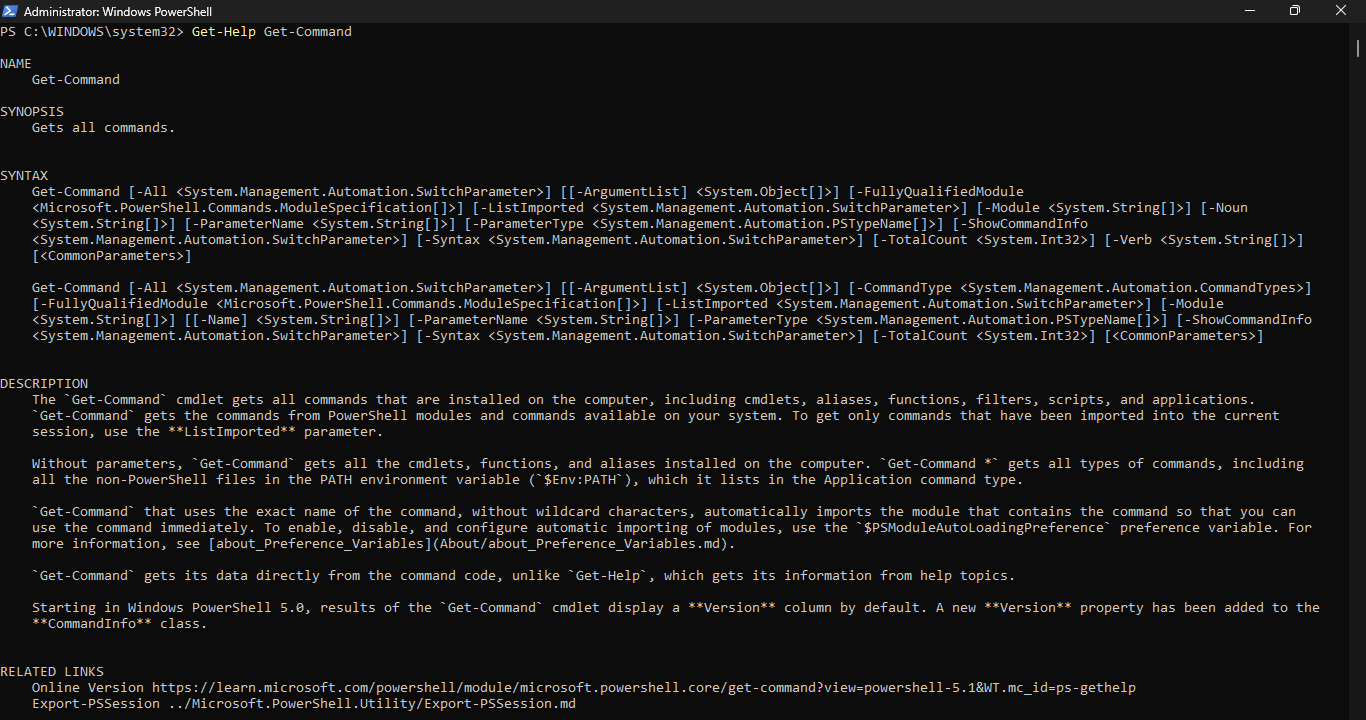
This time the command will deliver us the fully updated help listing for the Get-Command PowerShell cmdlet
Run the following command from the Administrator PowerShell and press enter to see usage examples for that
PS C:\WINDOWS\system32> Get-Help Get-Command -Examples
Resulting Output:
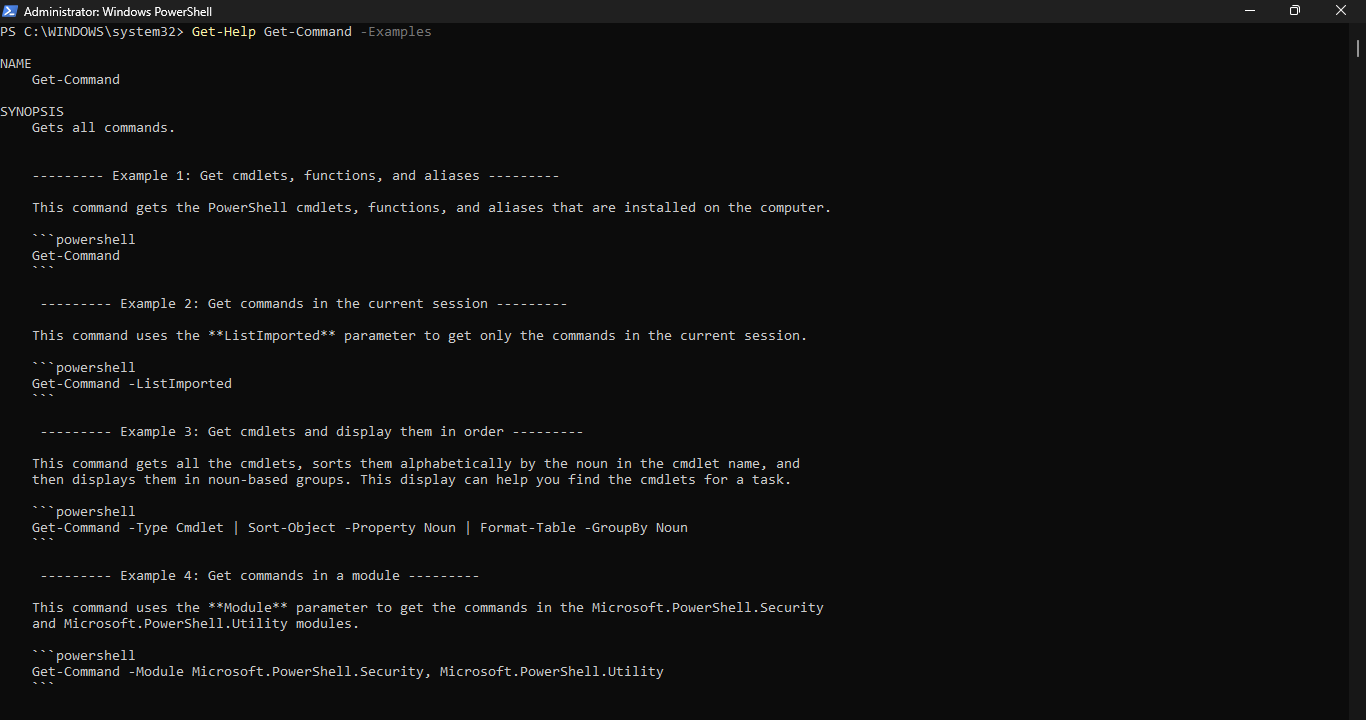
As busy administrators, we love to have Google show us everything. Nonetheless, Get-Help is a good resource
If typing is not your thing, you will be happy to learn that PowerShell supports aliases or shorter cmdlets
Recall the Get-Location cmdlet which we were using a while ago. Let's see if there is and alias for that
Run the following command from the Administrator PowerShell to check for an alias for Get-Location cmdlet
PS C:\WINDOWS\system32> Get-Alias -Definition Get-Location
Resulting Output:

Take note of the two aliases for Get-Location. You can use these in place of the cmdlet as the same tool
Run the following command from the Administrator PowerShell to check for an alias for the Get-Alias cmdlet
PS C:\WINDOWS\system32> Get-Alias -Definition Get-Alias
Resulting Output:

Run the following command from the Administrator PowerShell to display all available PowerShell aliases
PS C:\WINDOWS\system32> Get-Alias | More
Resulting Output:

With lists generated with the More command, you may need to press the space bar a few times to scroll it
Notice that many aliases match Linux commands like pwd, curl, mount, mv, cd and many other aliases listed
It is highly likely that Microsoft wanted Linux Systems Administrators to feel comfortable using PowerShell
Remember, the alias points to the cmdlet, not vice versa. For example, Set-Location is the command; cd is
the alias. PowerShell is not just some simple wrapper around those legacy command line tools for Windows
Run the following command from the Administrator PowerShell to change to the ITLab_Center users directory
PS C:\WINDOWS\system32> Set-Location C:\Users\ITLab_Center
Resulting Output:

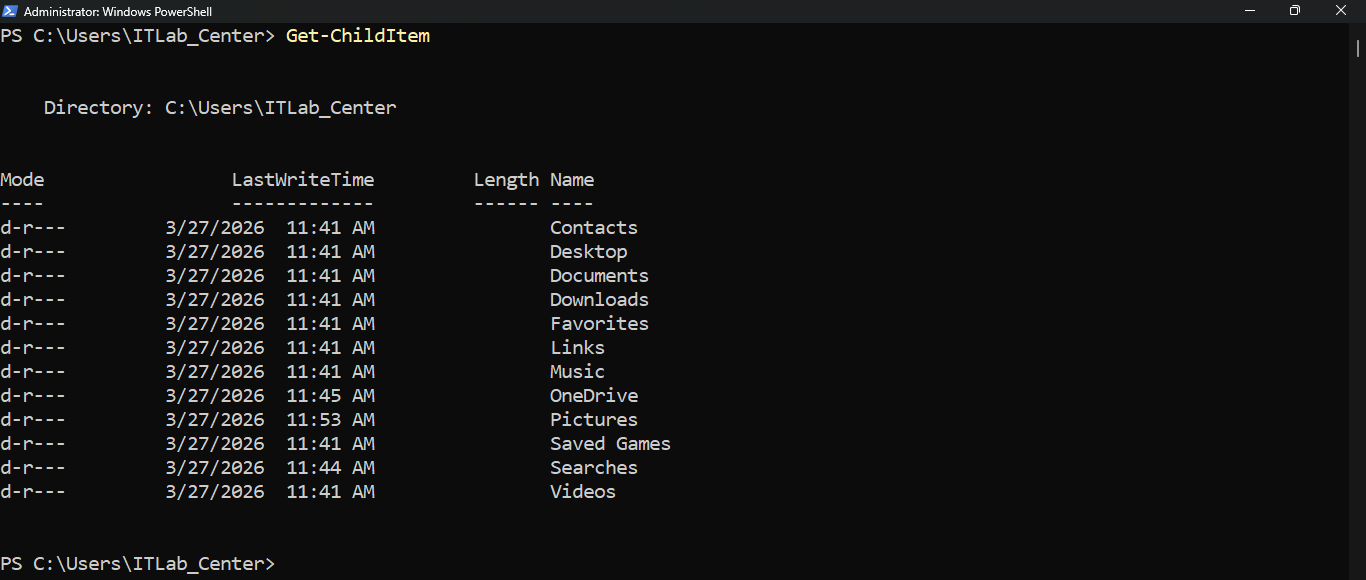
Run the following command from the Administrator PowerShell to display a listing of files and directories
PS C:\Users\ITLab_Center> Get-ChildItem
Resulting Output:
Run the following command from the Administrator PowerShell to sort folders by the time last written to
PS C:\Users\ITLab_Center> Get-ChildItem | Sort-Object LastWriteTime
Resulting Output:
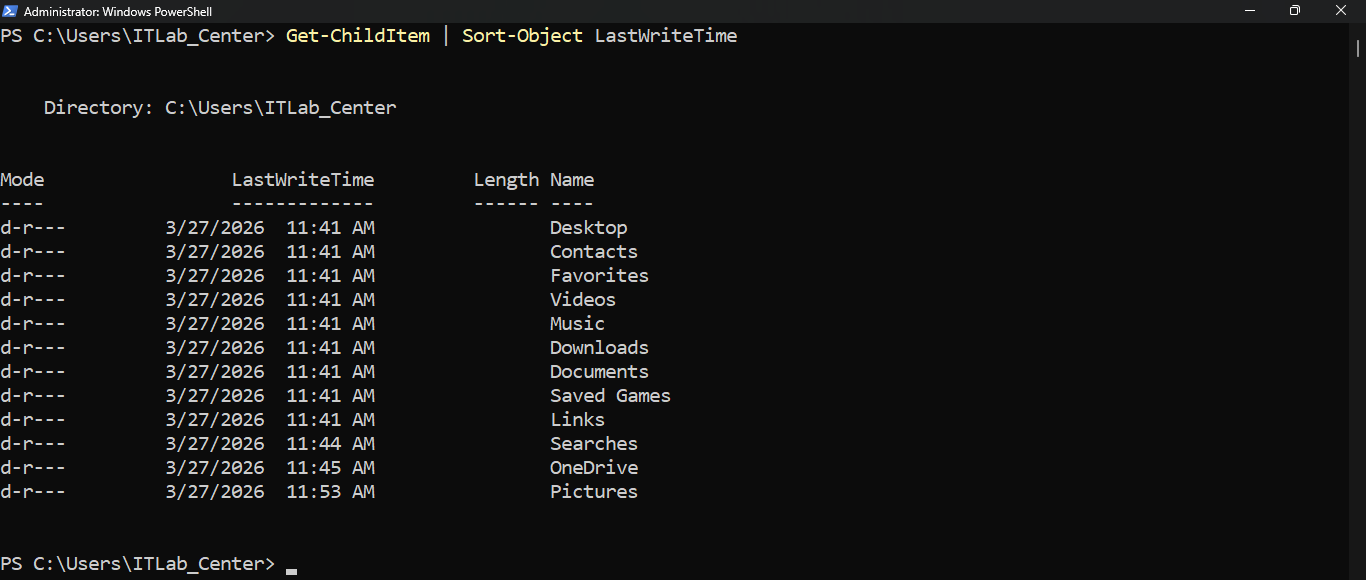
You can also sort files by creation time (CreationTime), the time last accessed (LastAccessTime) and others
Run the following command from the Administrator PowerShell to display a listing of directories within C:\
PS C:\Users\ITLab_Center> Get-ChildItem C:\
Resulting Output:

As you can see, when using Get-ChildItem, you don't have to be currently located in the target directory
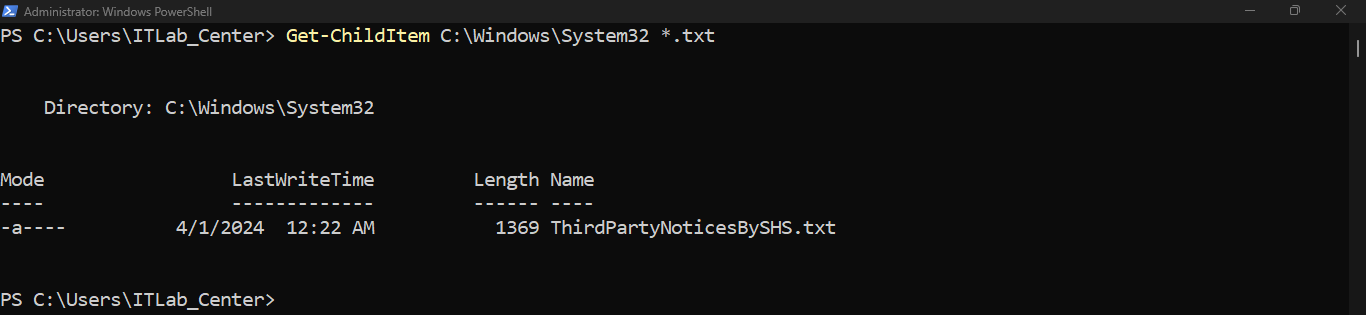
Run the following command from the Administrator PowerShell to list all text files in C:\Windows\System32
PS C:\Users\ITLab_Center> Get-ChildItem C:\Windows\System32 *.txt
Resulting Output:
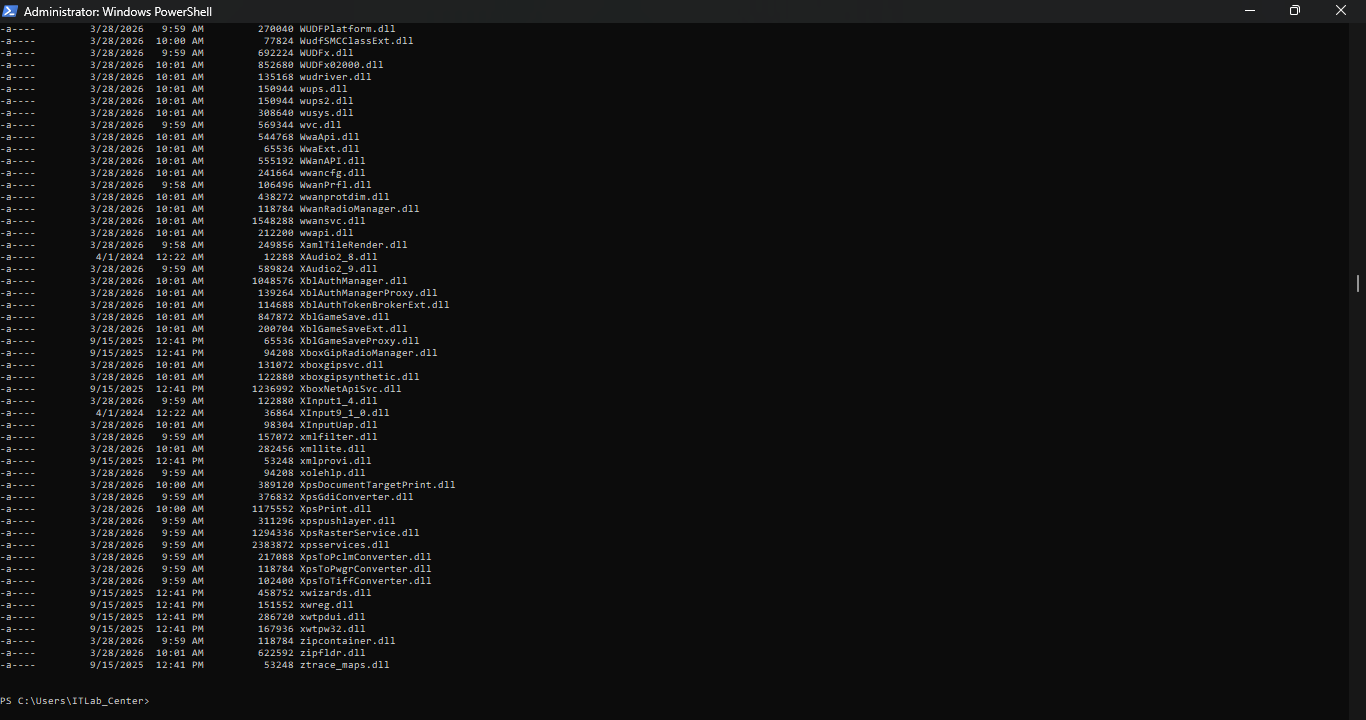
Run the following command from the Administrator PowerShell to list all DLL files in C:\Windows\System32
PS C:\Users\ITLab_Center> Get-ChildItem C:\Windows\System32 *.dll
Resulting Output:
Run the following command from the Administrator PowerShell to count the number of DLL files in System32
PS C:\Users\ITLab_Center> Get-ChildItem C:\Windows\System32 *.dll | Measure-Object | Select-Object Count
Resulting Output:

Run the following command from the Administrator PowerShell to change location to the Desktop directory
PS C:\Users\ITLab_Center> Set-Location Desktop
Resulting Output:

Run the following command from the Administrator PowerShell to create a new text file containing "Hello"
PS C:\Users\ITLab_Center\Desktop> Set-Content Hello.txt "Hello"
Resulting Output:
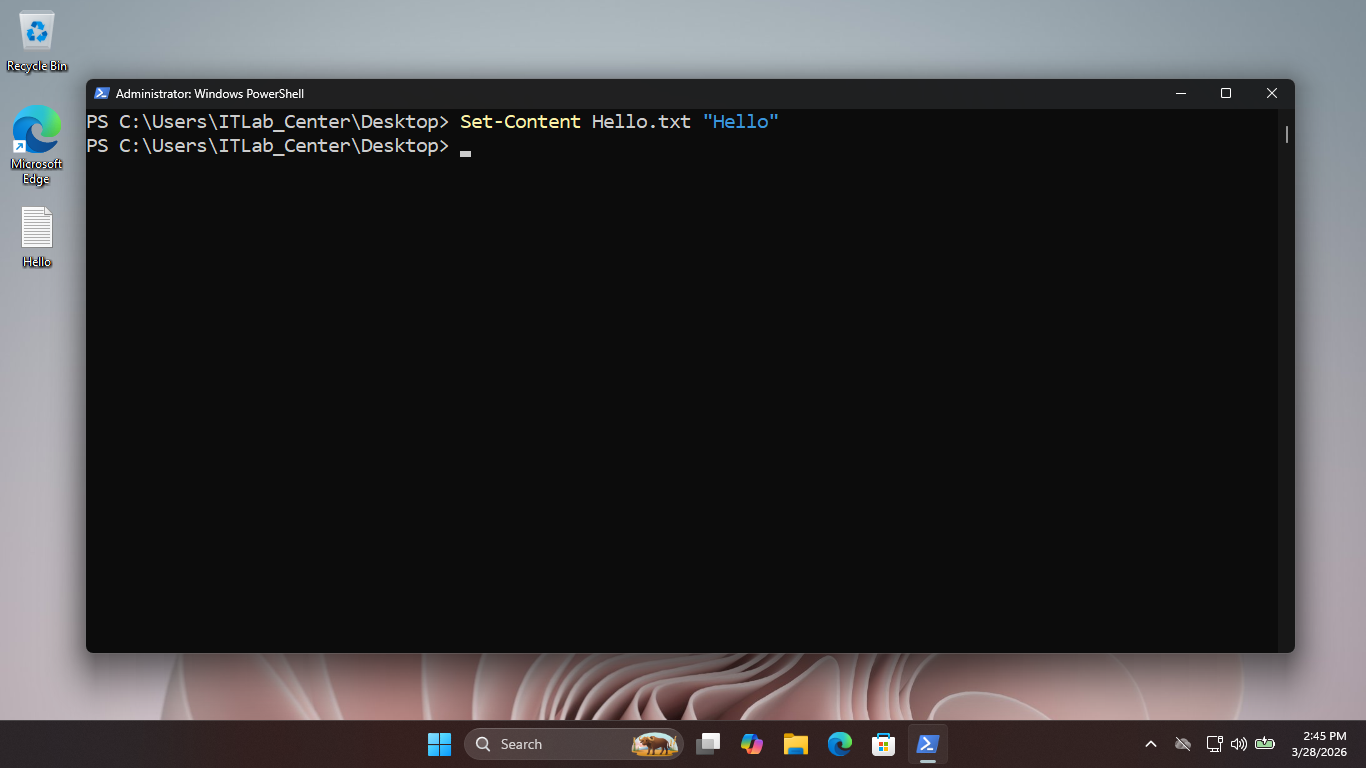
Note that you may see this command written as Set-Content -Path Hello.txt -Value "Hello" as written online
The -Path and -Value parameters are optional but add clarity for those who love to type things out fully
Run the following command from the Administrator PowerShell to read the contents of our Hello.txt file
PS C:\Users\ITLab_Center\Desktop> Get-Content Hello.txt
Resulting Output:

Run the following commands from the Administrator PowerShell to append a "Goodbye" to the Hello.txt file
PS C:\Users\ITLab_Center\Desktop> Add-Content Hello.txt "Goodbye"
PS C:\Users\ITLab_Center\Desktop> Get-Content Hello.txt
Resulting Output:

Notice that when using Add-Content, the new content is placed on the next available line, called appending
Run the following command from the Administrator PowerShell to store the files contents to a new variable
PS C:\Users\ITLab_Center\Desktop> $Hello = Get-Content Hello.txt
Run the following command from the Administrator PowerShell to see what type of data structure $Hello is
PS C:\Users\ITLab_Center\Desktop> $Hello.GetType()
Resulting Output:

Notice $Hello is an array. An array is a collection of items of the same data type stored at contiguous
memory locations, which you can reference by their numerical location. Because this is an array we should
be able to access each item contained by its reference number (e.g., 0, 1, 2, etc.). Let's test this out
Run the following commands from the Administrator PowerShell to access each array item by reference number
PS C:\Users\ITLab_Center\Desktop> $Hello.Item(0)
PS C:\Users\ITLab_Center\Desktop> $Hello.Item(1)
Resulting Output:

Note that you can also use Hello[0] and Hello[1] instead of the .Item() method to access array elements
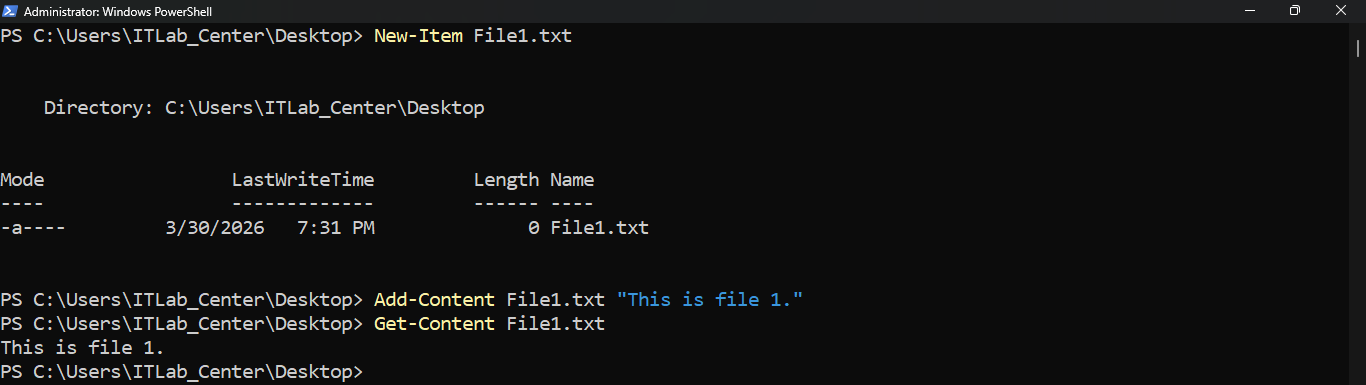
Run the following commands from the Administrator PowerShell to create, add content to and list contents
PS C:\Users\ITLab_Center\Desktop> New-Item File1.txt
PS C:\Users\ITLab_Center\Desktop> Add-Content File1.txt "This is file 1."
PS C:\Users\ITLab_Center\Desktop> Get-Content File1.txt
Resulting Output:
Run the following commands from the Administrator PowerShell to create a copy of our file and list content
PS C:\Users\ITLab_Center\Desktop> Copy-Item File1.txt File2.txt
PS C:\Users\ITLab_Center\Desktop> Get-Content File2.txt
Resulting Output:

Run the following commands from the Administrator PowerShell to Rename File2.txt and display its contents
PS C:\Users\ITLab_Center\Desktop> Move-Item File2.txt File3.txt
PS C:\Users\ITLab_Center\Desktop> Get-Content File3.txt
Resulting Output:

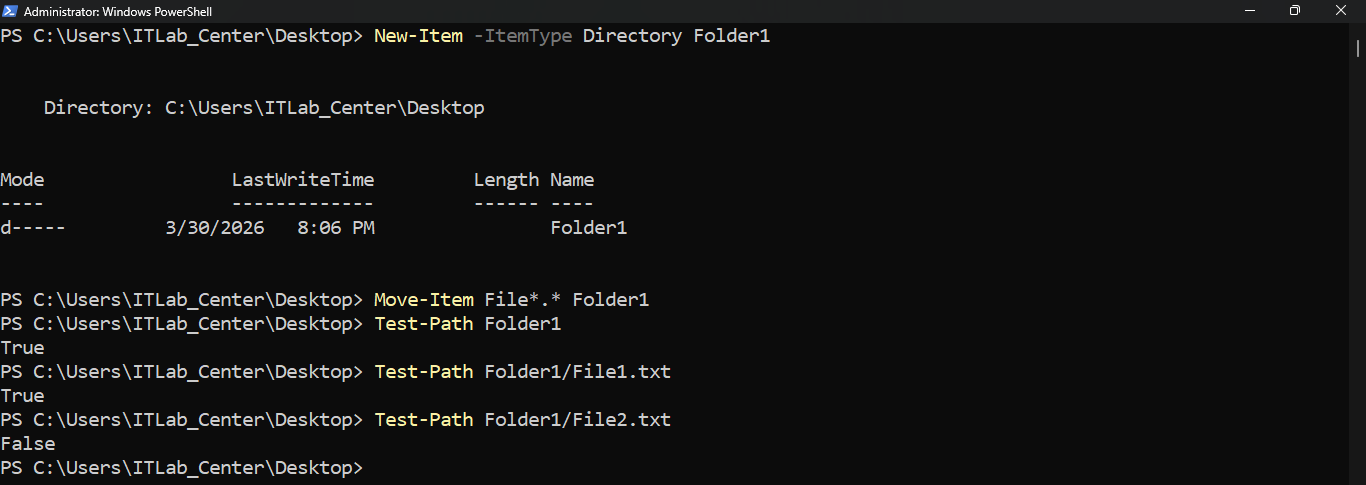
Run the following command from the Administrator PowerShell to create a new folder in the Desktop folder
PS C:\Users\ITLab_Center\Desktop> New-Item -ItemType Directory Folder1
Run the following command from the Administrator PowerShell to move our text files into this new folder
PS C:\Users\ITLab_Center\Desktop> Move-Item File*.* Folder1
Run the following commands from the Administrator PowerShell to test that our folders and file paths exist
PS C:\Users\ITLab_Center\Desktop> Test-Path Folder1
PS C:\Users\ITLab_Center\Desktop> Test-Path Folder1\File1.txt
PS C:\Users\ITLab_Center\Desktop> Test-Path Folder1\File2.txt
Resulting Output:
Run the following commands from the Administrator PowerShell to remove the files and verify with Test-Path
PS C:\Users\ITLab_Center\Desktop> Remove-Item -Recurse -Force Folder1
PS C:\Users\ITLab_Center\Desktop> Test-Path Folder1\File1.txt
PS C:\Users\ITLab_Center\Desktop> Test-Path Folder1\File3.txt
PS C:\Users\ITLab_Center\Desktop> Test-Path Folder1
Resulting Output:

The recurse option removes the item and all child items associated. We can validate these are removed above
4. Information Gathering
Now that we have learned how to move around and manage files and folder, see what else PowerShell can do
Once of the more powerful ways to use PowerShell is for information gathering to correlate lots of data
Run the following commands from the Administrator PowerShell to view information associated with this PC
PS C:\Users\ITLab_Center\Desktop> Set-Location C:\Windows\System32
PS C:\Windows\System32> Get-ComputerInfo | More
Resulting Output:
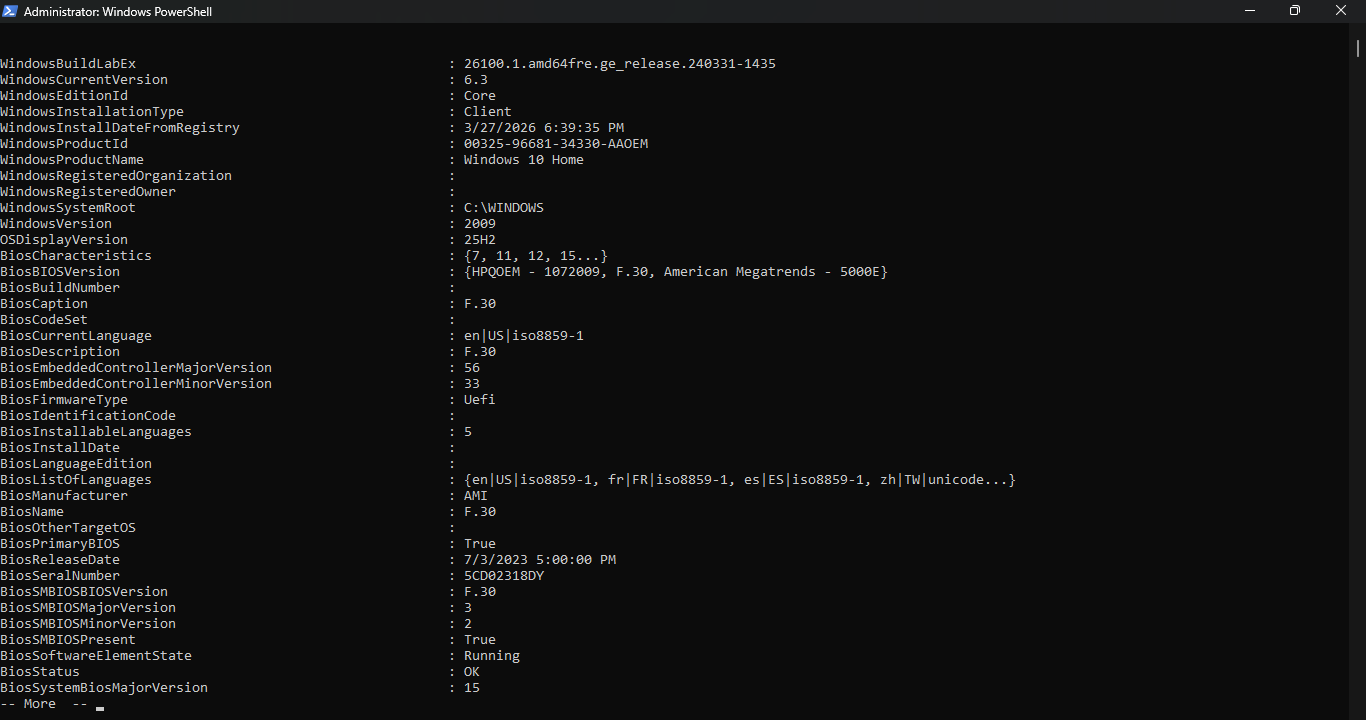
You would need to scroll through to read everything as there is a ton of information provided with this
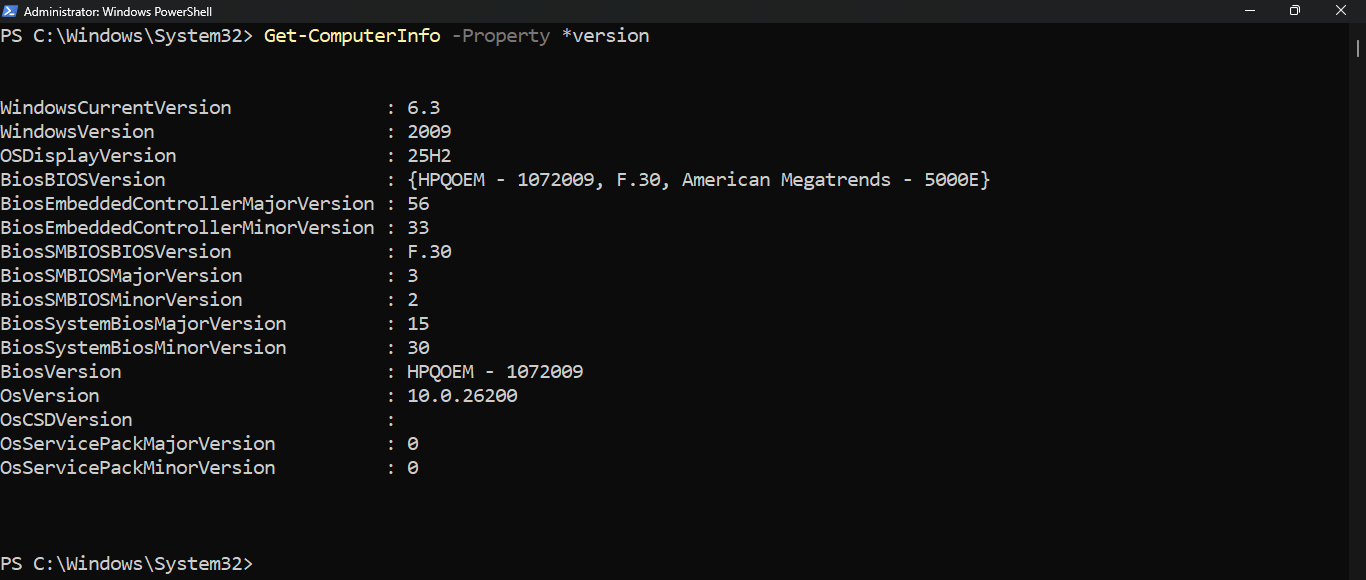
Run the following command from the Administrator PowerShell to display only the version numbers of the PC
PS C:\Windows\System32> Get-ComputerInfo -Property *version
Resulting Output:
Run the following command from the Administrator PowerShell to see only the number of hotfixes on this PC
PS C:\Windows\System32> Get-ComputerInfo -Property *hot*
Resulting Output:

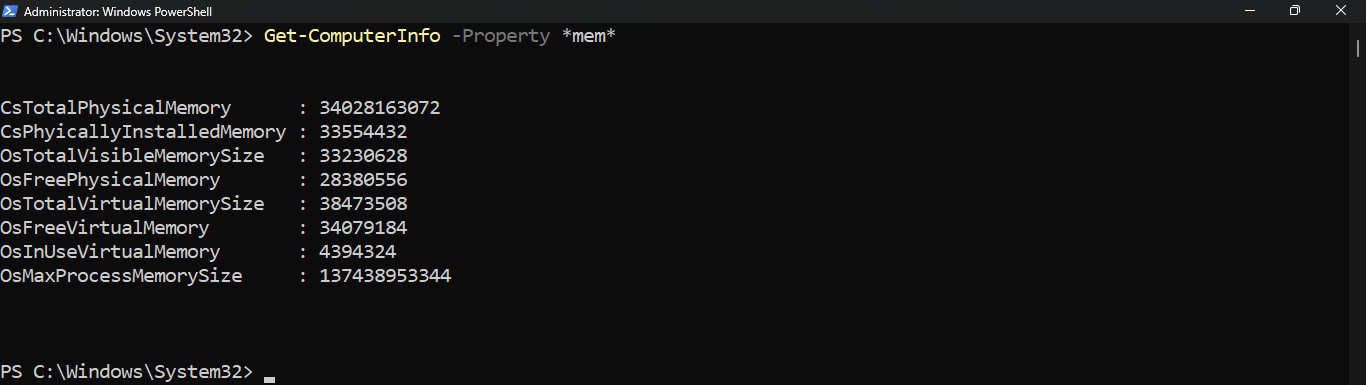
Run the following command from the Administrator PowerShell to list all of the memory related information
PS C:\Windows\System32> Get-ComputerInfo -Property *mem*
Resulting Output:
Run the following command from the Administrator PowerShell to view the system name and domain membership
PS C:\Windows\System32> Get-CimInstance -ClassName Win32_ComputerSystem
Resulting Output:

Run the following command from the Administrator PowerShell to display information about the systems CPU
PS C:\Windows\System32> Get-CimInstance -ClassName Win32_Processor
Resulting Output:

Run the following command from the Administrator PowerShell to display the systems memory total capacity
PS C:\Windows\System32> Get-CimInstance -ClassName Win32_PhysicalMemory | Select-Object Capacity
Resulting Output:

Run the following command from the Administrator PowerShell to see the allocated SSD size and free space
PS C:\Windows\System32> Get-CimInstance -ClassName Win32_LogicalDisk
Resulting Output:

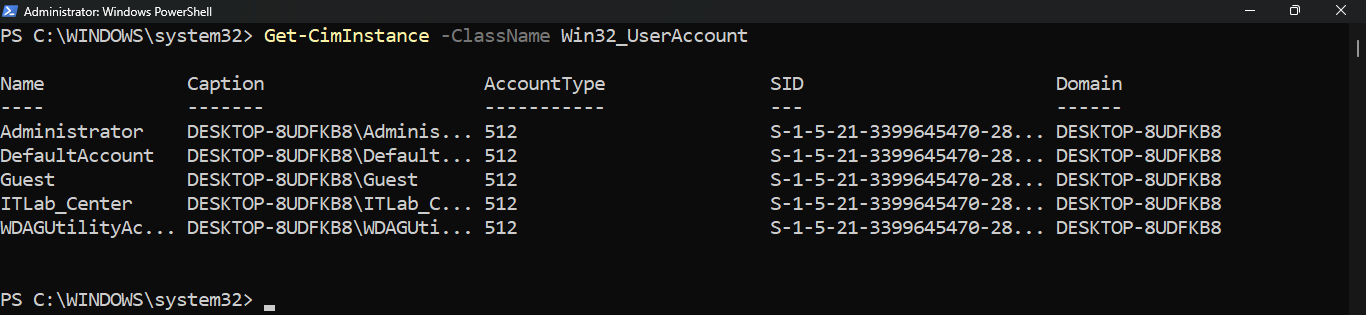
Run the following command from the Administrator PowerShell to list out each of the local user accounts
PS C:\Windows\System32> Get-CimInstance -ClassName Win32_UserAccount
Resulting Output:
Run the following command from the Administrator PowerShell to list out each of the local user groups
PS C:\Windows\System32> Get-CimInstance -ClassName Win32_Group
Resulting Output:
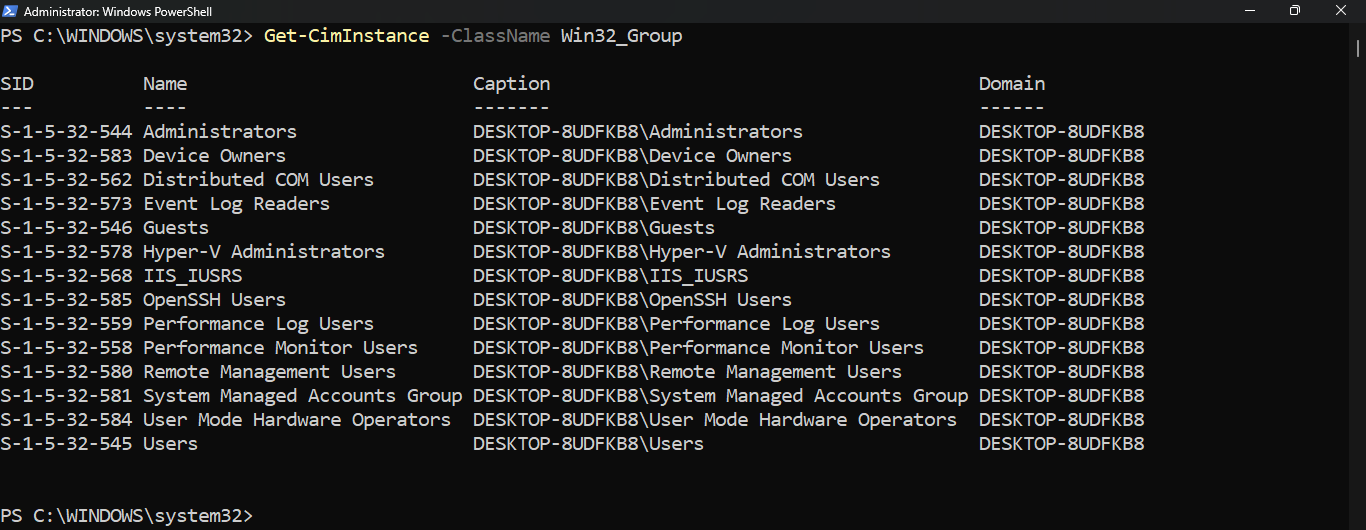
Note that it is more common to use the Get-LocalUser and Get-LocalGroup cmdlets for this type of action
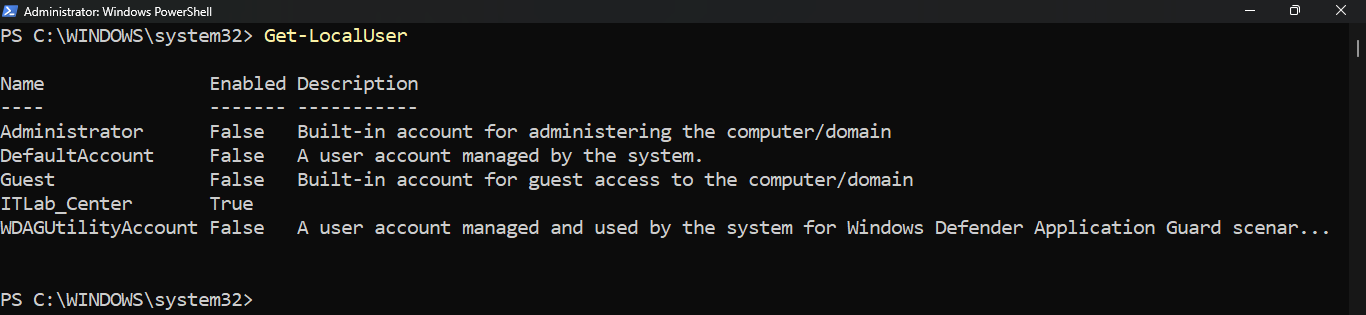
Run the following command from the Administrator PowerShell to list out each of the local user accounts
PS C:\Windows\System32> Get-LocalUser
Resulting Output:
Run the following command from the Administrator PowerShell to count the number of local users on the PC
PS C:\Windows\System32> Get-LocalUser | Measure-Object | Select-Object Count
Resulting Output:

Run the following commands from the Administrator PowerShell to display just the names for local accounts
PS C:\Windows\System32> $Users = Get-LocalUser
PS C:\Windows\System32> $Users.Name
Resulting Output:

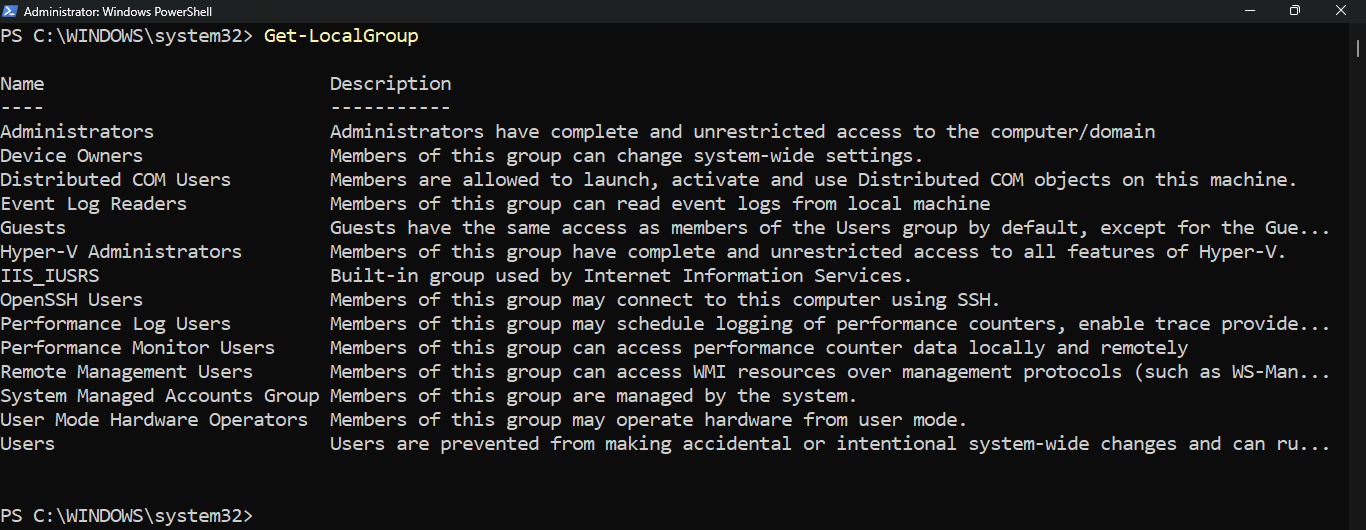
Run the following command from the Administrator PowerShell to list out each of the local user groups
PS C:\Windows\System32> Get-LocalGroup
Resulting Output:
Run the following command from the Administrator PowerShell to count the number of local groups on the PC
PS C:\Windows\System23> Get-LocalGroup | Measure-Object | Select-Object Count
Resulting Output:

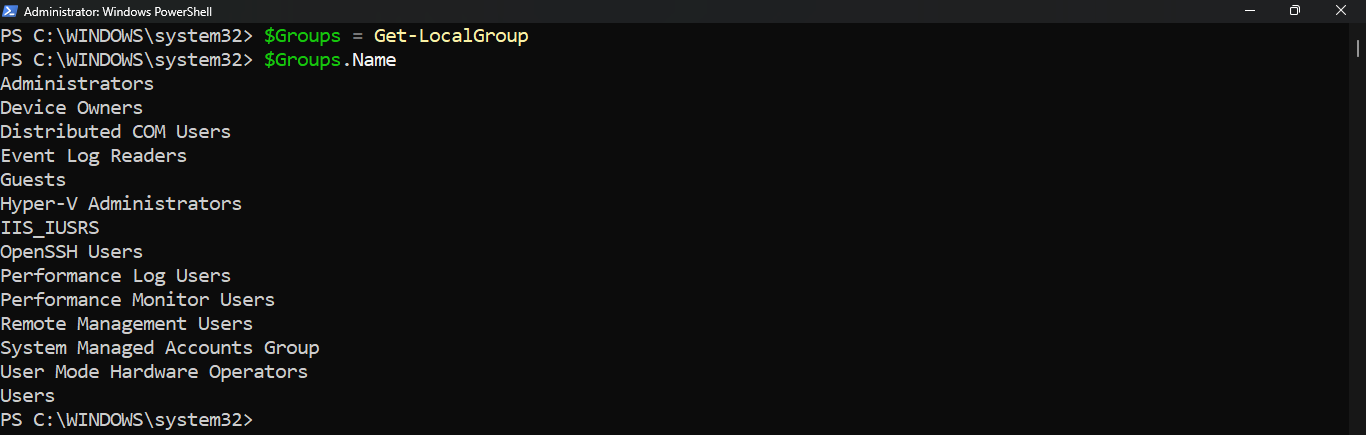
Run the following commands from the Administrator PowerShell to display just the names for local groups
PS C:\Windows\System32> $Groups = Get-LocalGroup
PS C:\Windows\System32> $Groups.Name
Resulting Output:
Run the following command from the Administrator PowerShell to list running processes and their CPU usage
PS C:\Windows\System32> Get-Process -Verbose | More
Resulting Output:
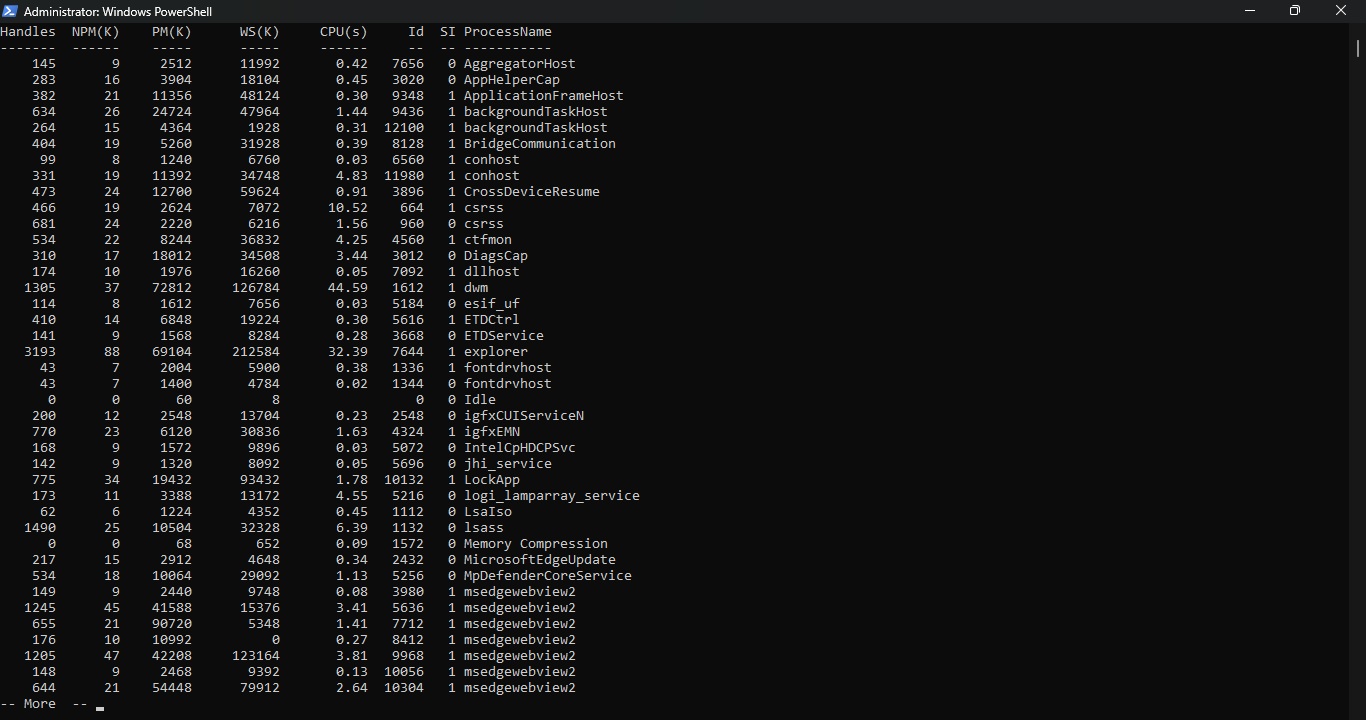
Note that you can stop and start windows processes by using the Stop-Process and Start-Process cmdlets
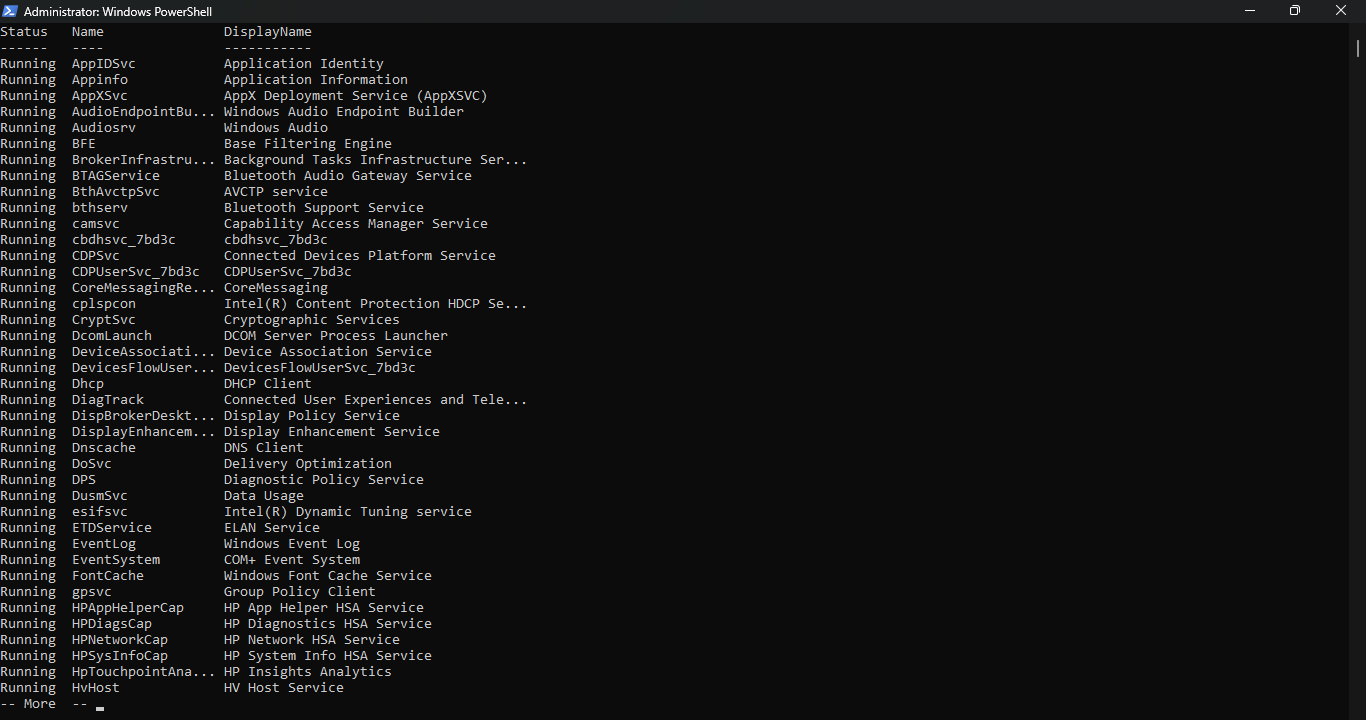
Run the following command from the Administrator PowerShell to display all running services on the system
PS C:\Windows\System32> Get-Service | Where-Object Status -EQ Running | More
Resulting Output:
Run the following command from the Administrator PowerShell to display all stopped services on the system
PS C:\Windows\System32> Get-Service | Where-Object Status -EQ Stopped | More
Resulting Output:
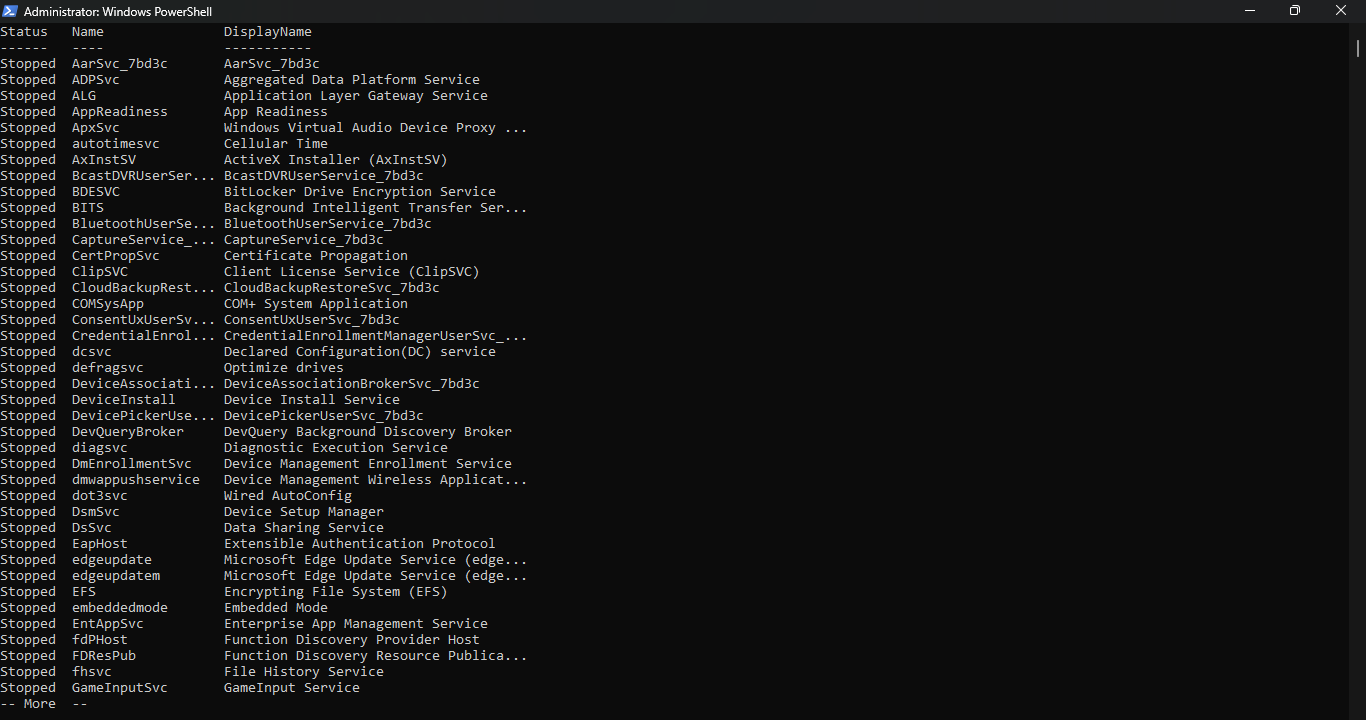
Note that the Get-Service cmdlet by itself will show you all system services running, stopped and disabled
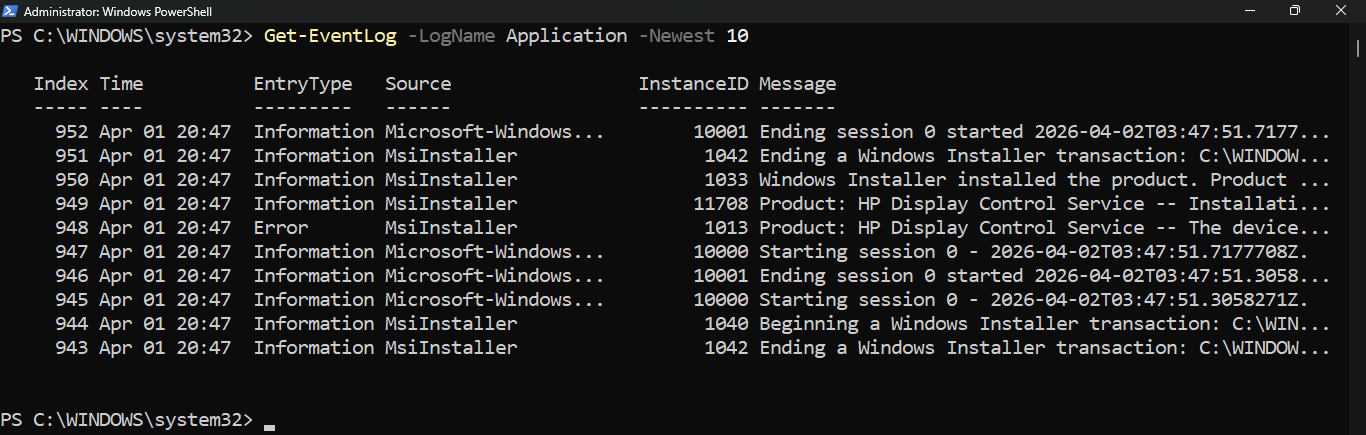
Run the following command from the Administrator PowerShell to see the ten most recent Application logs
PS C:\Windows\System32> Get-EventLog -LogName Application -Newest 10
Resulting Output:
Log out of your user account and attempt to log in with the wrong password a few times, then log back in
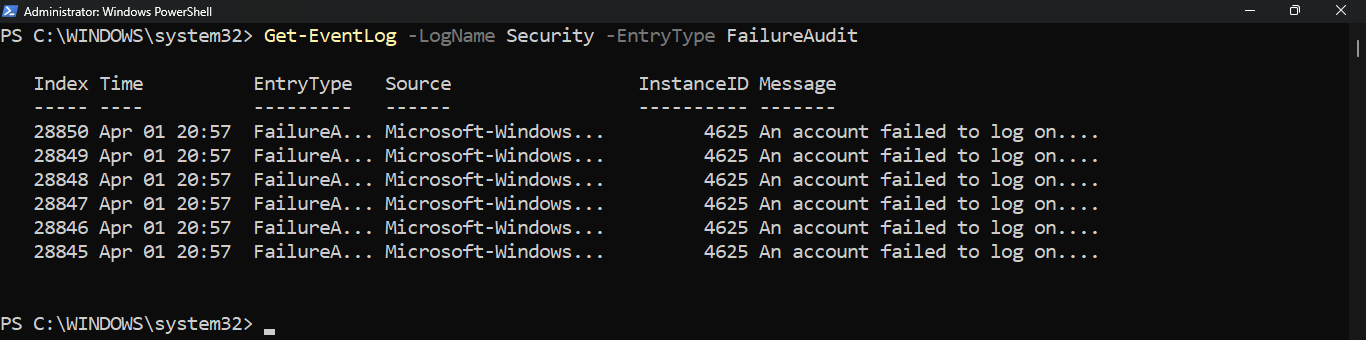
Run the following command from the Administrator PowerShell to see all the audit failures in Security logs
PS C:\Windows\System32> Get-EventLog -LogName Security -EntryType FailureAudit
Resulting Output:
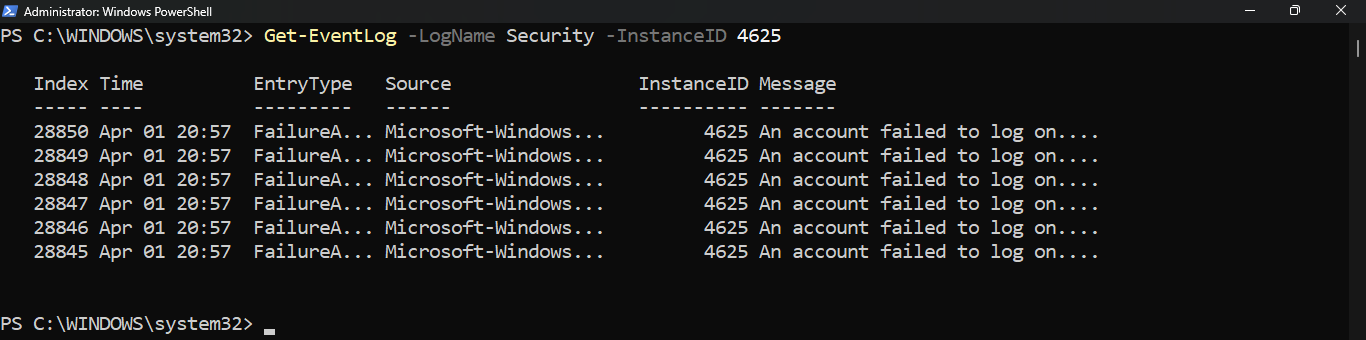
Run the following command from the Administrator PowerShell to list all of the account logon failure events
PS C:\Windows\System32> Get-EventLog -LogName Security -InstanceID 4625
Resulting Output:
Run the following commands from the Administrator PowerShell to see error messages in the System Event Log
PS C:\Windows\System32> $Errors = Get-EventLog -LogName System -EntryType Error
PS C:\Windows\System32> $Errors.Message | More
Resulting Output:
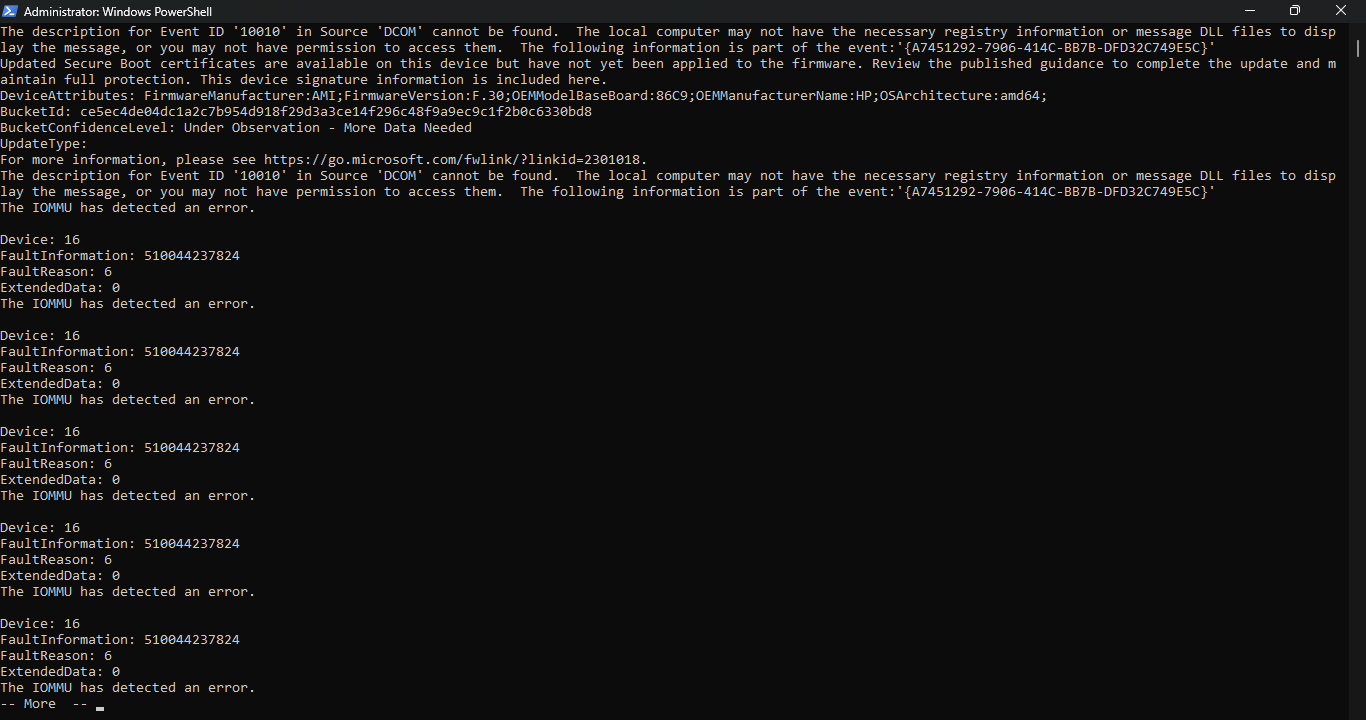
Note that trying to read individual Event Log messages via PowerShell is cumbersome. However, using the
PowerShell to find logs of interest (logon failures) across many systems is an effective use of the tool
What if we wanted to use PowerShell to audit other systems on the network? Connecting to each system takes
time an effort. With PowerShell, all you need to add is the -ComputerName parameter to a given command to
run this command on the remote system. For example, to check for login failures on a system named Desktop:
PS C:\Windows\System32> Get-EventLog -ComputerName Desktop -LogName Security -InstanceID 4625
What if we wanted to check login failures on several computers? Here is an example of how that could look
PS C:\Windows\System32> $Computers = "Server1","Server2","Server3"
PS C:\Windows\System32> foreach ($Computer in $Computers) {
>> Get-EventLog -ComputerName $Computer -LogName Security -InstanceID 4625
>> }
Note that in order to accomplish this you must have permissions to run PowerShell on all the remote PCs
Feel free to try this script in the lab, but you will get failures as the remote computers do not exist
Not every cmdlet has a -ComputerName parameter. In cases where -ComputerName is unavailable, you can use
Invoke-Command as show in the example below to perform the same function as the -ComputerName parameter
PS C:\Windows\System32> $Computers = "Server1","Server2","Server3"
PS C:\Windows\System32> $Command = {Get-EventLog -LogName Security -InstanceID 4625}
PS C:\Windows\System32> foreach ($Computer in $Computers) {
>> Invoke-Command -ComputerName $Computer -ScriptBlock $Command
>> }
Using Invoke-Command is much faster than relying on the -ComputerName parameter in a cmdlet and preferred
An amazing feature of PowerShell is that it is extensible. New tools are developed every day in order to
make administration tasks easier. PowerShell even allows us to import new features on demand. For example
what if we want to check if our lab server is fully updated? A Google search might yield Get-WindowsUpdate
Run the following command from the Administrator PowerShell to check if your workstation is fully updated
PC C:\Windows\System32> Get-WindowsUpdate
Resulting Output:
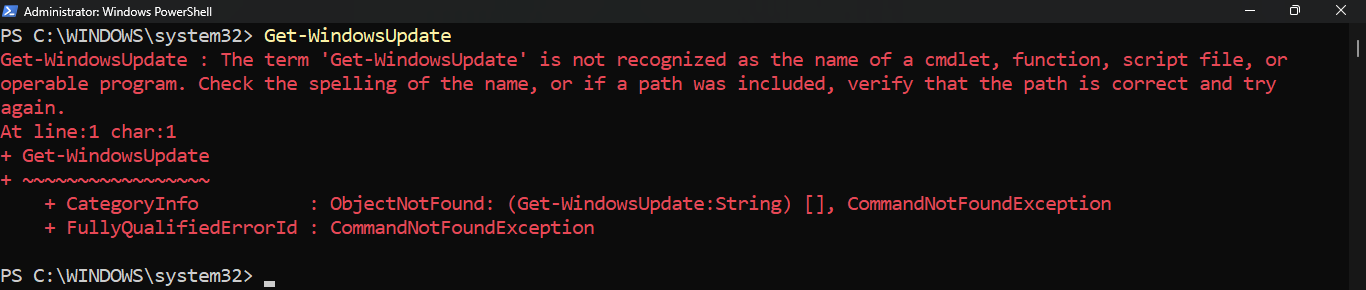
Uh oh, we get an error. To fix this, we need to import the module that enables this cmdlet. In the case of
the Get-WindowUpdate cmdlet, the module we need is PSWindowsUpdate. After installation we run the cmdlet
Run the following commands from the Administrator PowerShell to install PSWindowsUpdate PowerShell module
PS C:\Windows\System32> Install-Module -Name PSWindowsUpdate -Force
PS C:\Windows\System32> Set-ExecutionPolicy RemoteSigned -Scope LocalMachine
PS C:\Windows\System32> Import-Module PSWindowsUpdate
Those who are security conscious may wonder about installing modules from an untrusted repository. Many
honest developers are creating valid and useful tools for PowerShell administration. Ultimately you will
need to decide if using something not strictly released from Microsoft officially is worth the risk using
Run the following command from the Administrator PowerShell to display available updates for the system
PS C:\Windows\System32> Get-WindowsUpdate
Resulting Output:

You can go ahead and close the PowerShell window now. In the next section we will move onto another tool
5. PowerShell Scripting
Let's talk about scripting in PowerShell. Running scripts directly from the command line is ok for small
jobs, but you will want to use an editor for most real work. Many admins simply use Notepad or the paid
version of Notepad++. Microsoft provides two other environments to ease PowerShell development: ISE & VSC
Note that as of 2026 ISE is depreciated as Microsoft wants to move all future PowerShell to Visual Studio
From the taskbar, search for PowerShell ISE, then click on the option provided to Run as Administrator
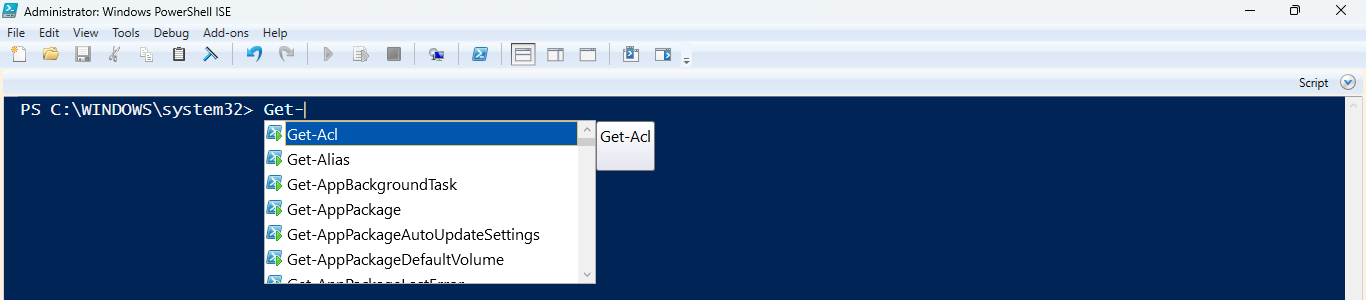
At the prompt type Get- and wait. You should see a pop-up window with cmdlet completion suggestions listed
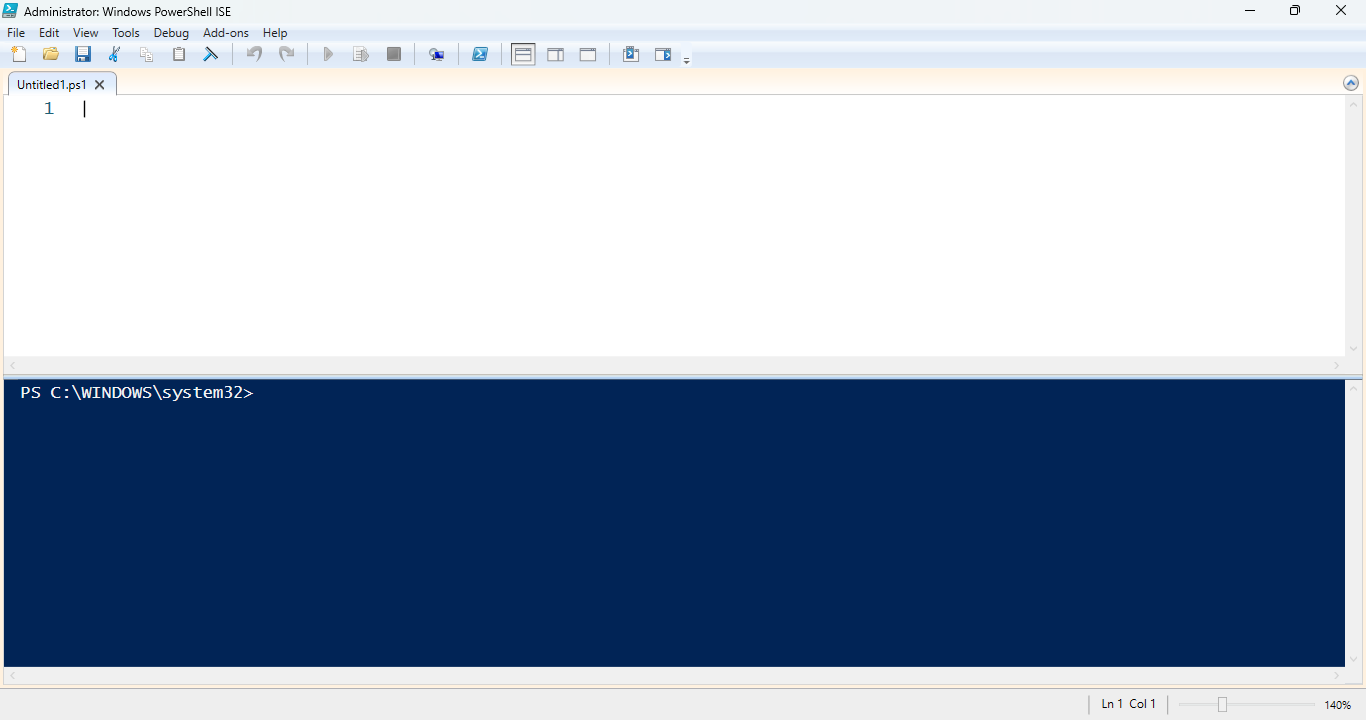
From the top menu of the PowerShell ISE application, click view, then check the Show Script Pane option
You should now have two open panes in ISE: a notepad for writing scripts at the top and PowerShell below
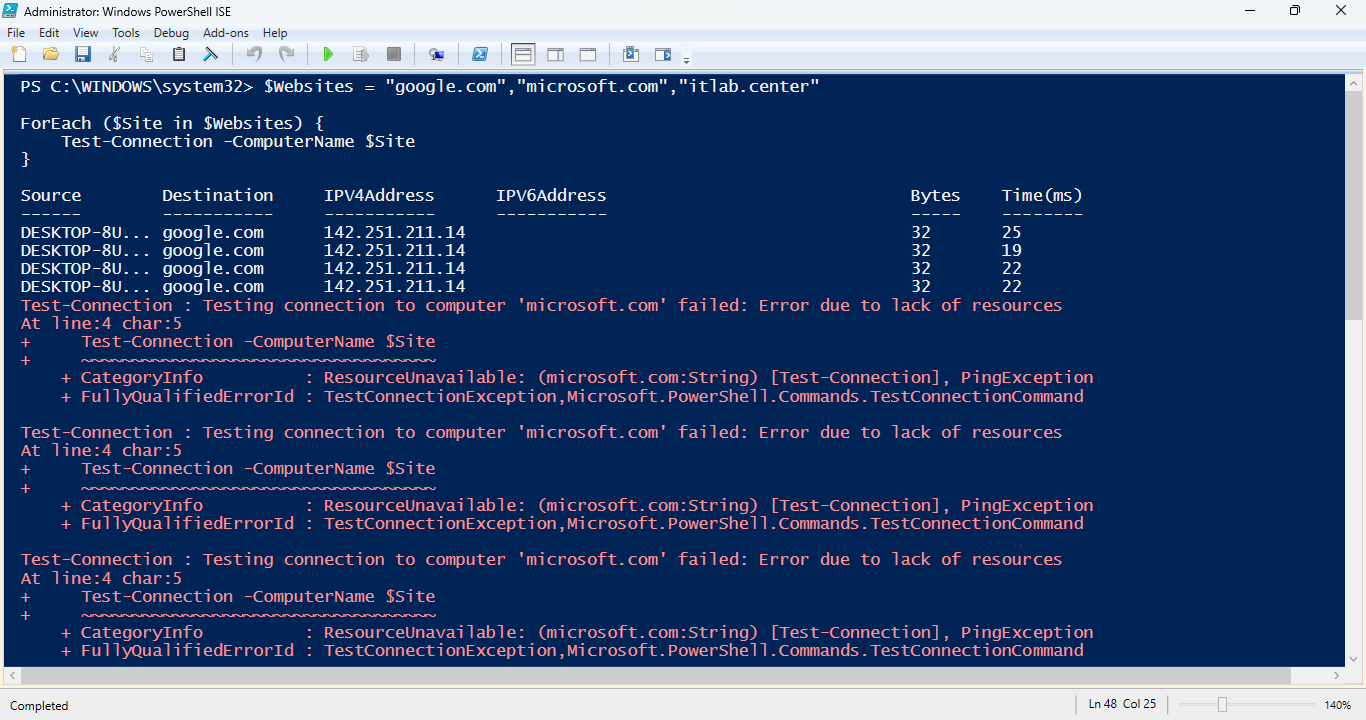
In the next steps we will create a network ping utility to test connections to websites with PowerShell ISE
Type out the following script in the top panel of the PowerShell ISE Utility, then hit the green RUN arrow
$Websites = "google.com","microsoft.com","itlab.center"
ForEach ($Site in $Websites) {
Test-Connection -ComputerName $Site
}
This script creates an array with three websites, then uses a simple loop (ForEach) to ping each website
Observe the results in the PowerShell pane. Notice that when a site does not respond to ICMP it errors
Modify the script to use the -Quite parameter for the Tes-Connection cmdlet, then hit the green RUN arrow
$Websites = "google.com","microsoft.com","itlab.center"
ForEach ($Site in $Websites) {
Test-Connection -ComputerName $Site -Quiet
}
Notice the difference in output. If the site responds to a ping request, then the output is True and False
when is doesn't. Also, notice that the ISE echoes the entire script before execution, essentially pasting

Click File > Save As... and name the new file ping.ps1. Re run the script from PowerShell ISE after saving

Notice that there is no echo, most administrators save the script they are working on to avoid this echo
Modify the ping script by including an If / Else statement as shown below, then hit the green RUN arrow
$Websites = "google.com","microsoft.com","itlab.center"
ForEach ($Site in $Websites) {
If (Test-Connection -ComputerName $Site -Quiet) {
Write-Host "$Site is pingable"
} Else {
Write-Host "$Site is not pingable"
}
}
If the output from Test-Connection is True, we write out that the host is pingable. If it is False, we
write out that the host is not pingable. Click the save button then re-run the script and view the output

Go ahead and close the PowerShell ISE. Let's move on to the more modern Visual Basic Studio Code Editor
Download VSCode: VSCodeUserSetup-x64-1.114.0
Run the installation executable, then search Visual Studio Code from the taskbar and Run as Administrator
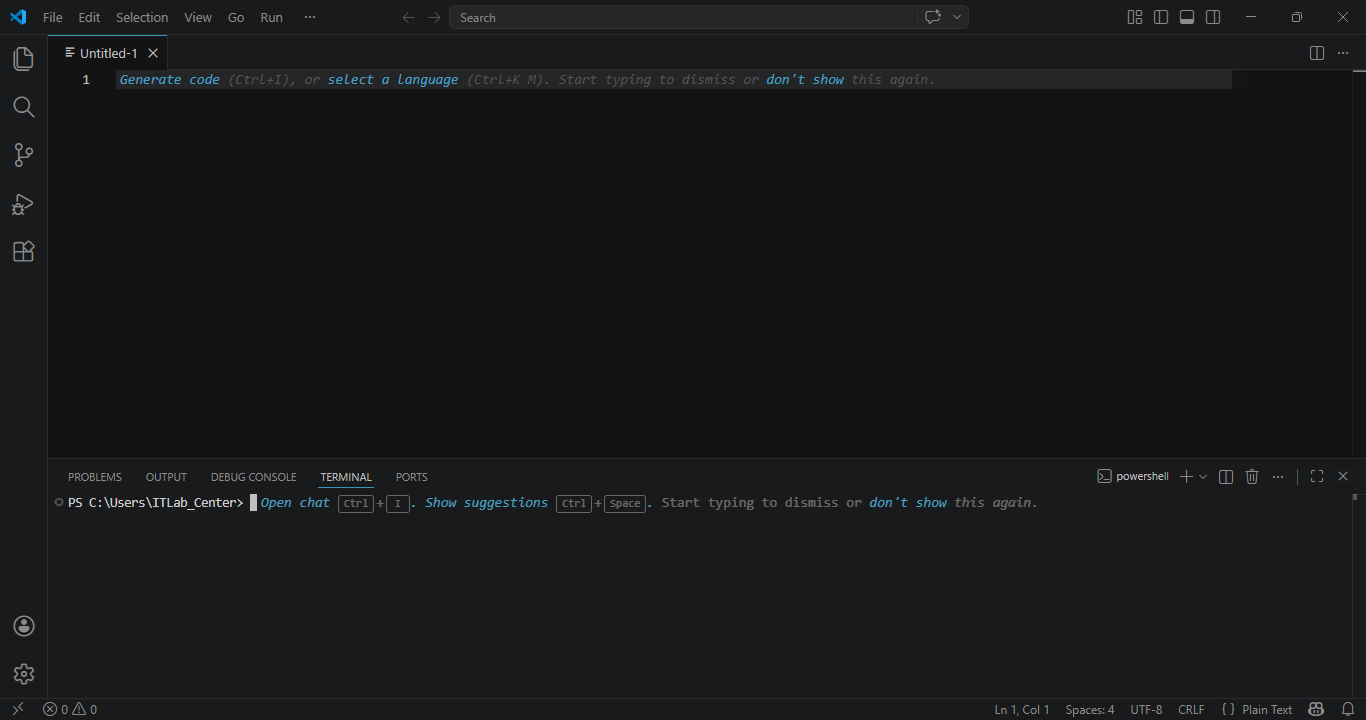
Notice that, like the ISE, there is a scripting console at the top and a terminal window at the bottom.
A project called Untitled-1 was already created for you. Hit File > Save as... and save this as .ps1 file
Type out the following script below and hit File > Save when done. Then hit Run > Run without debugging
$Users = Get-LocalUser
ForEach ($User in $Users) {
Write-Host "Found User: $User"
}
Resulting Output:
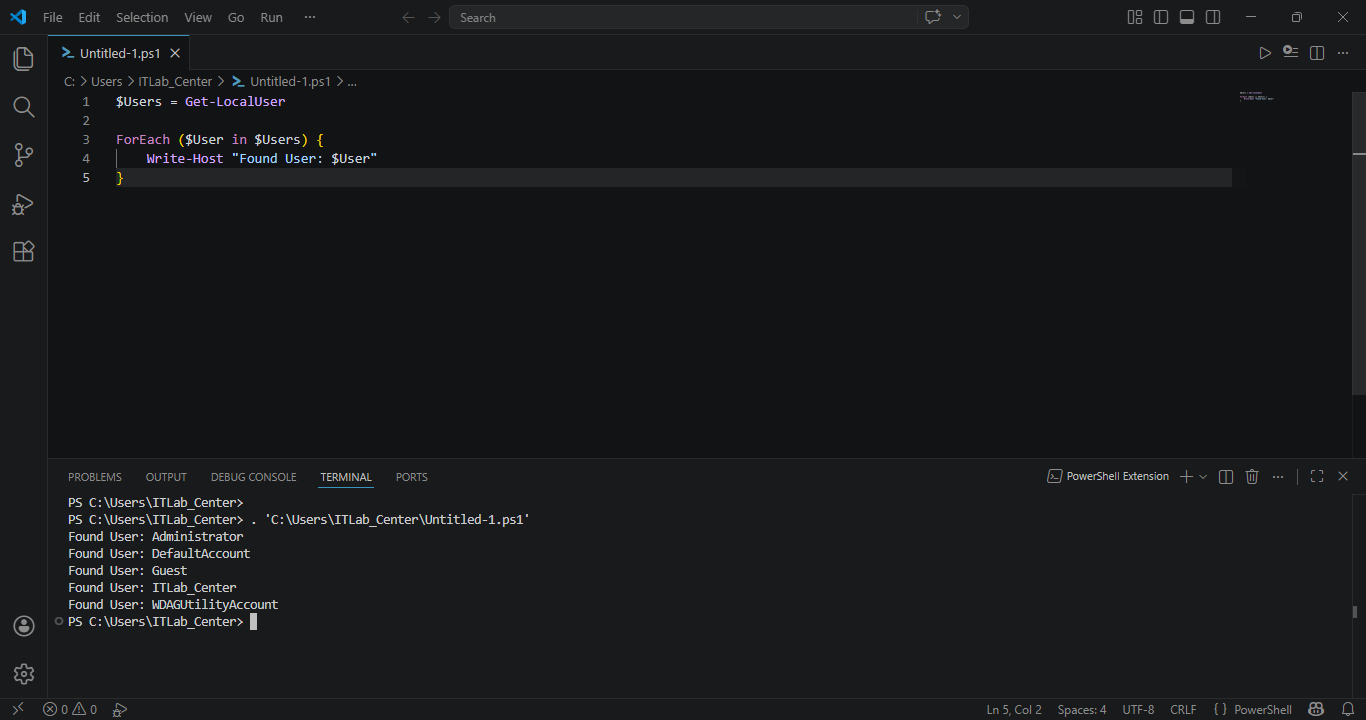
As you type, Visual Studio will pop up a list of commands it thinks you may be looking for, much like ISE
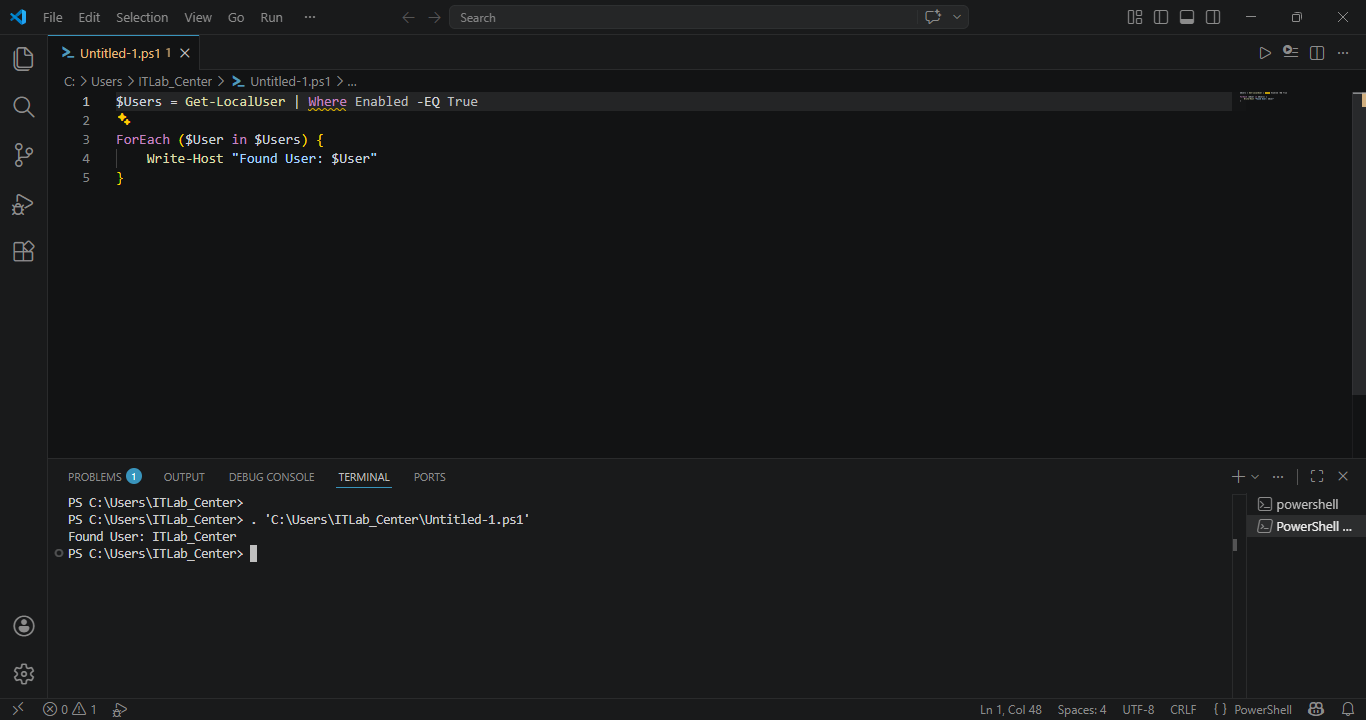
What if we only want to see a list of enabled user accounts? Alter the first line of the code shown below
$Users = Get-LocalUser | Where Enabled -EQ True
ForEach ($User in $Users) {
Write-Host "Found User: $User"
}
Now hit File > Save, then re-run the script by hitting Run > Run without Debugging at the top menu panel
Now let's edit our script to include information gathering to local Groups as shown below, save and run
$Users = Get-LocalUser | Where Enabled -EQ True
ForEach ($User in $Users) {
Write-Host "Found User: $User"
}
$Groups = Get-LocalGroup
ForEach ($Group in $Groups) {
$Members = Get-LocalGroupMember $Group
ForEach ($Member in $Members) {
Write-Host "$Member is in $Group"
}
}
Resulting Output:
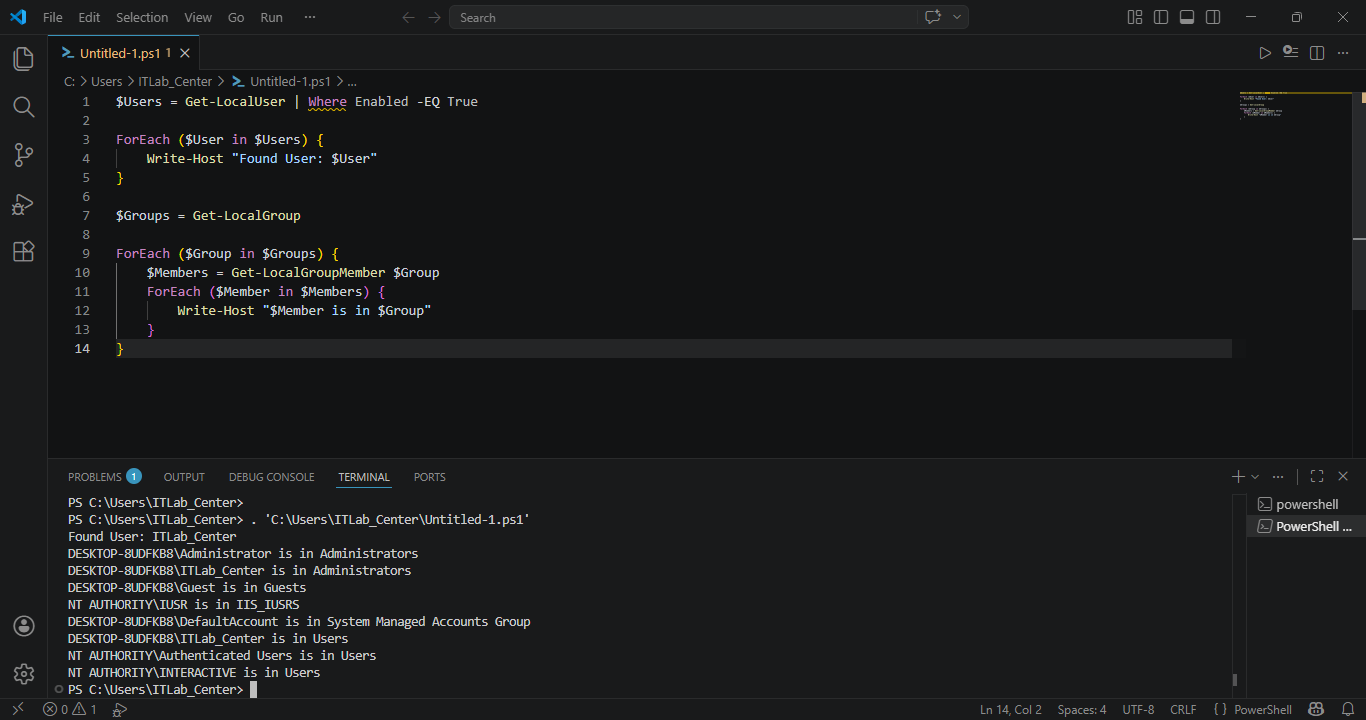
Notice that we can find enabled users, groups, and group members using just a few lines of code. We could
add another loop to enumerate through computer names and then send the output to a text file for audit
purposes. Doing this same audit using a GUI would be an extremely time-consuming and error-prone endeavor
6. Configure an Active Directory Environment
One of the most powerful ways to use PowerShell is by utilizing it within an Active Directory environment
Here we will step beyond the basic local modules we have been using up to this point to an enterprise tool
We will start by setting up our Active Directory environment using Windows Server as our Domain Controller
Download Windows Server 2025 Disk Image (ISO): Windows Server 2025 ISO
Download Rufus Disk Imaging Software: Rufus Official Download
Insert USB Flash Drive, run rufus.exe, select target drive, select Windows Server 2025 ISO, hit start:
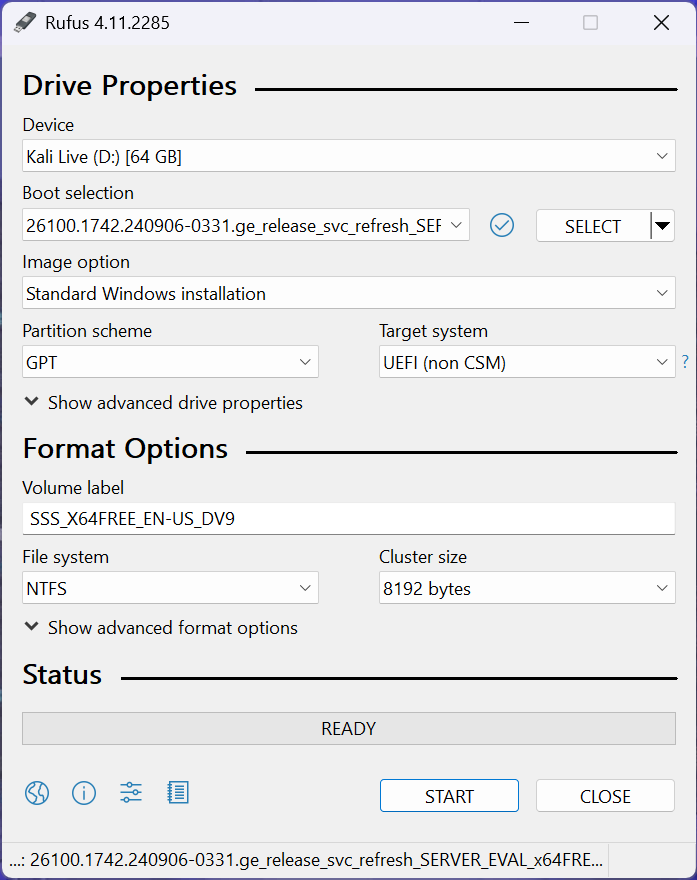
Use the rufus popup menu to customize the Windows Server 2025 installation and disable data collection:
Remove USB Flash Drive and Insert into unused PC. Start the PC and press the hot boot key at the startup:
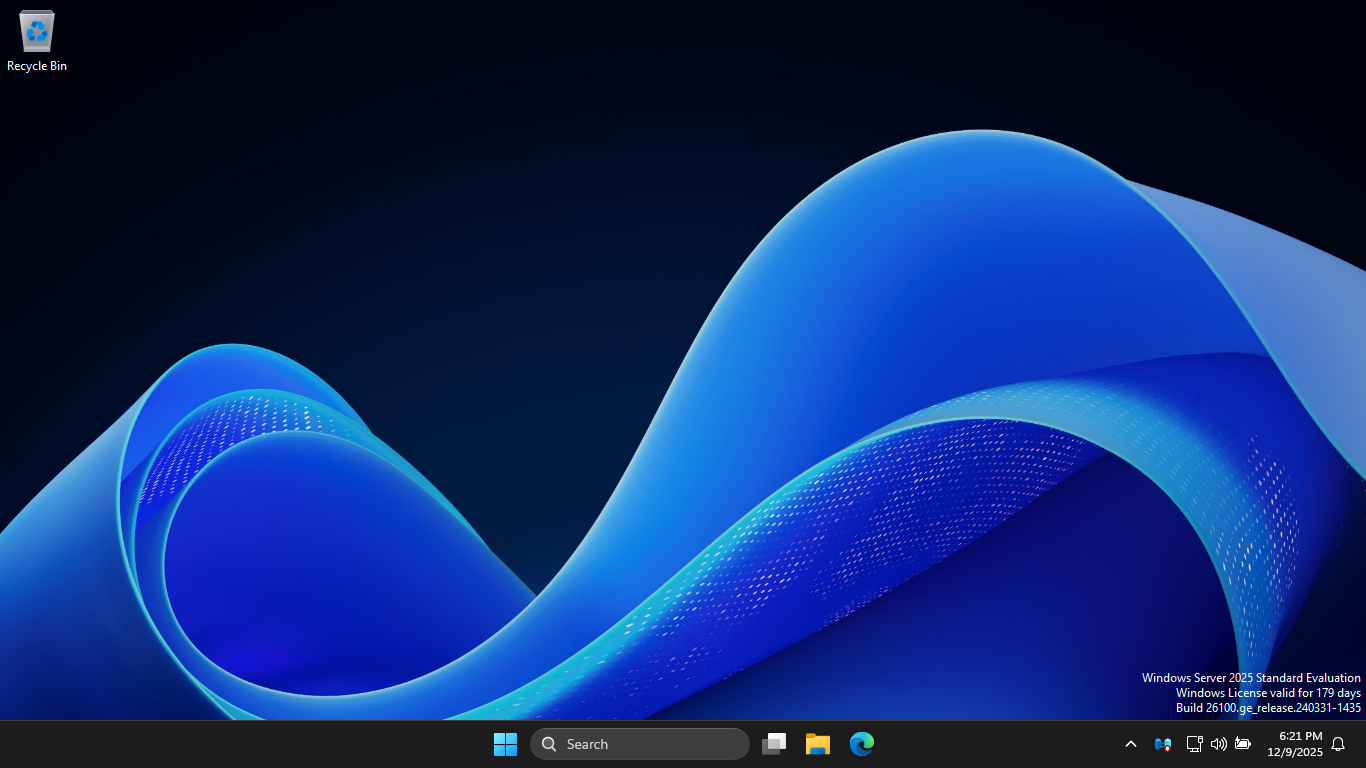
Navigate through the installer and select the Windows Server Standard Evaluation Desktop Experience option:
Now that we have our Server operating, the next step is to promote this server to an AD domain controller
On the taskbar, click the Windows Start icon, then click the Server Manager to open the Windows Manager:
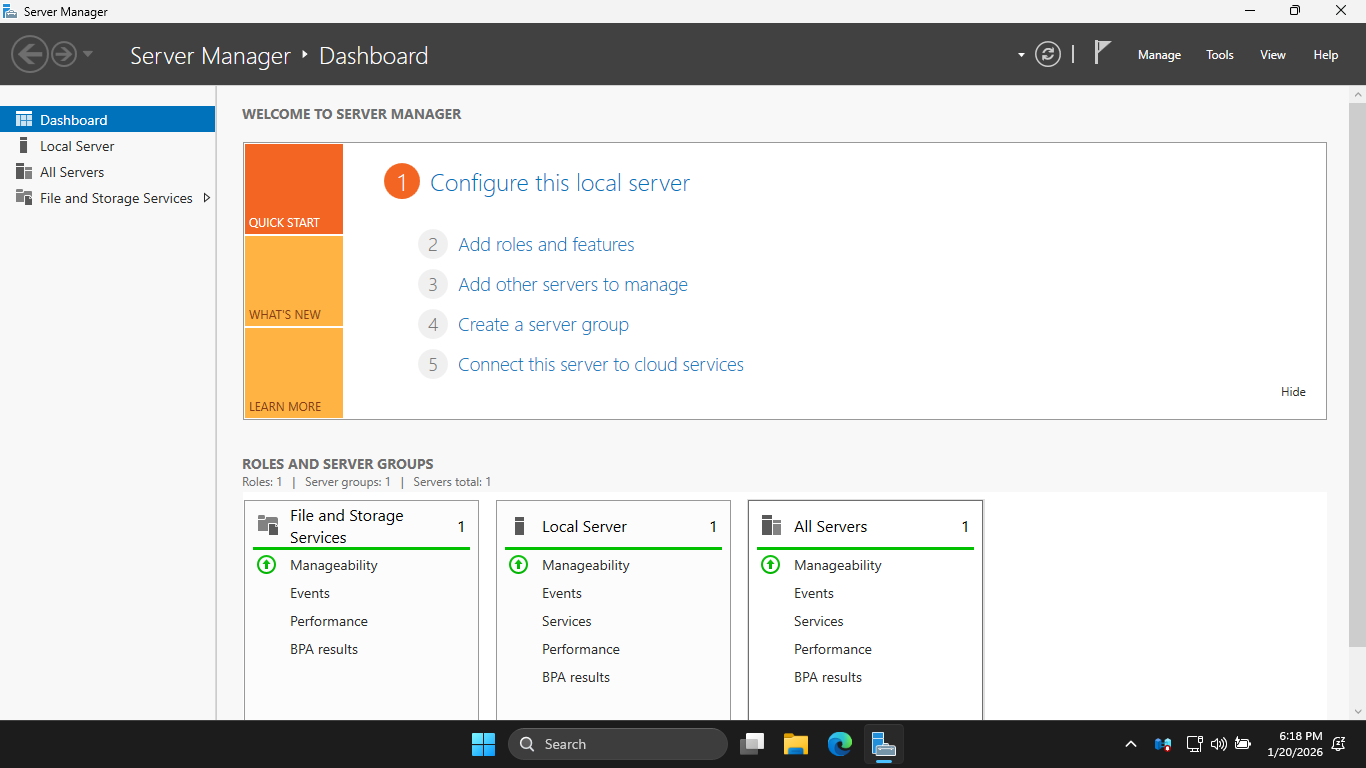
In the Server Manager, click the Add Roles and Features link to open the Add Roles and Features Wizard
Hit Next > Next > Next > Active Directory Domain Services > Add Features > Next > Next > Next > Install
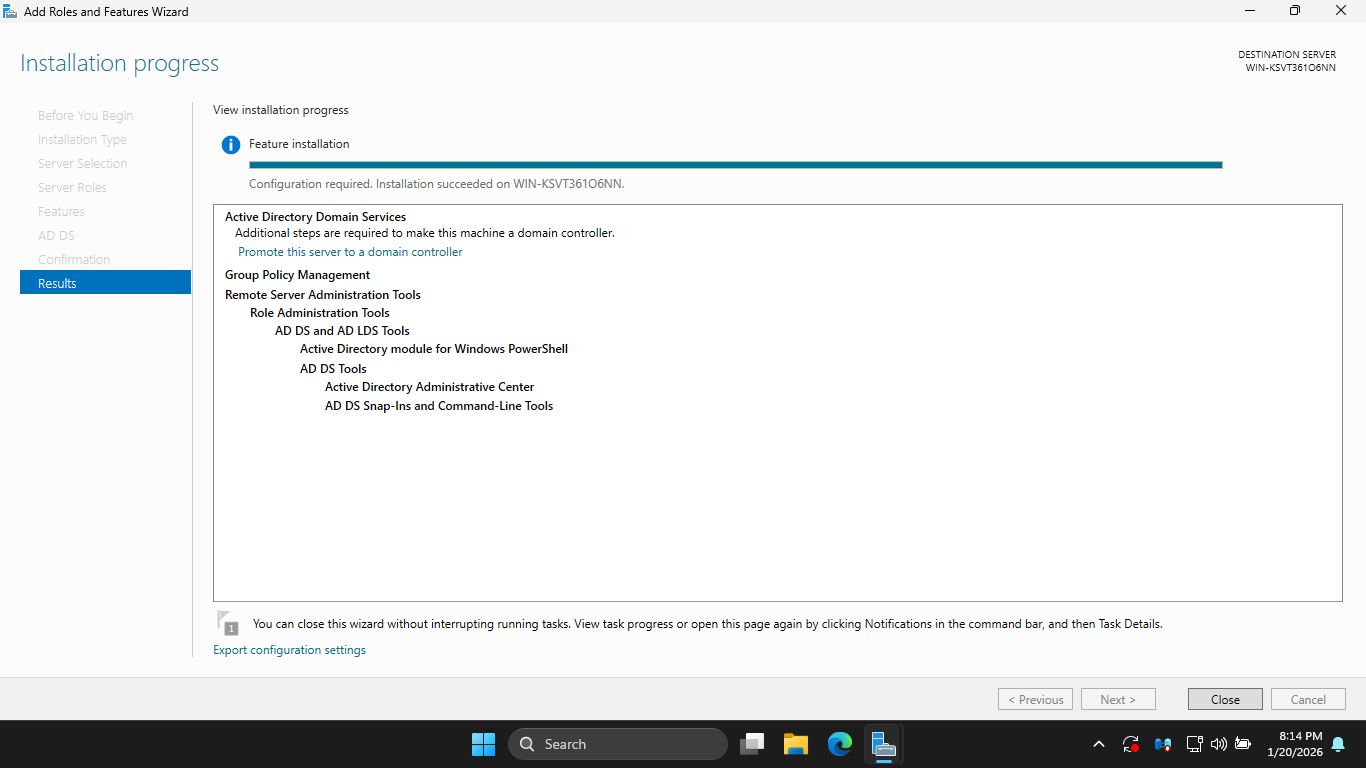
Now hit Promote this Server to a Domain Controller > Add a new forest > Root Domain Name: itlab.local

Hit Next, then enter the root password and hit Next > Next > Next > Next > Next > and finally Install
This installation may take some time, a new Domain Controller can take up to 5 minutes to fully boot up
Once our domain controller has booted up, we can move on to joining the endpoint to the itlab.local domain
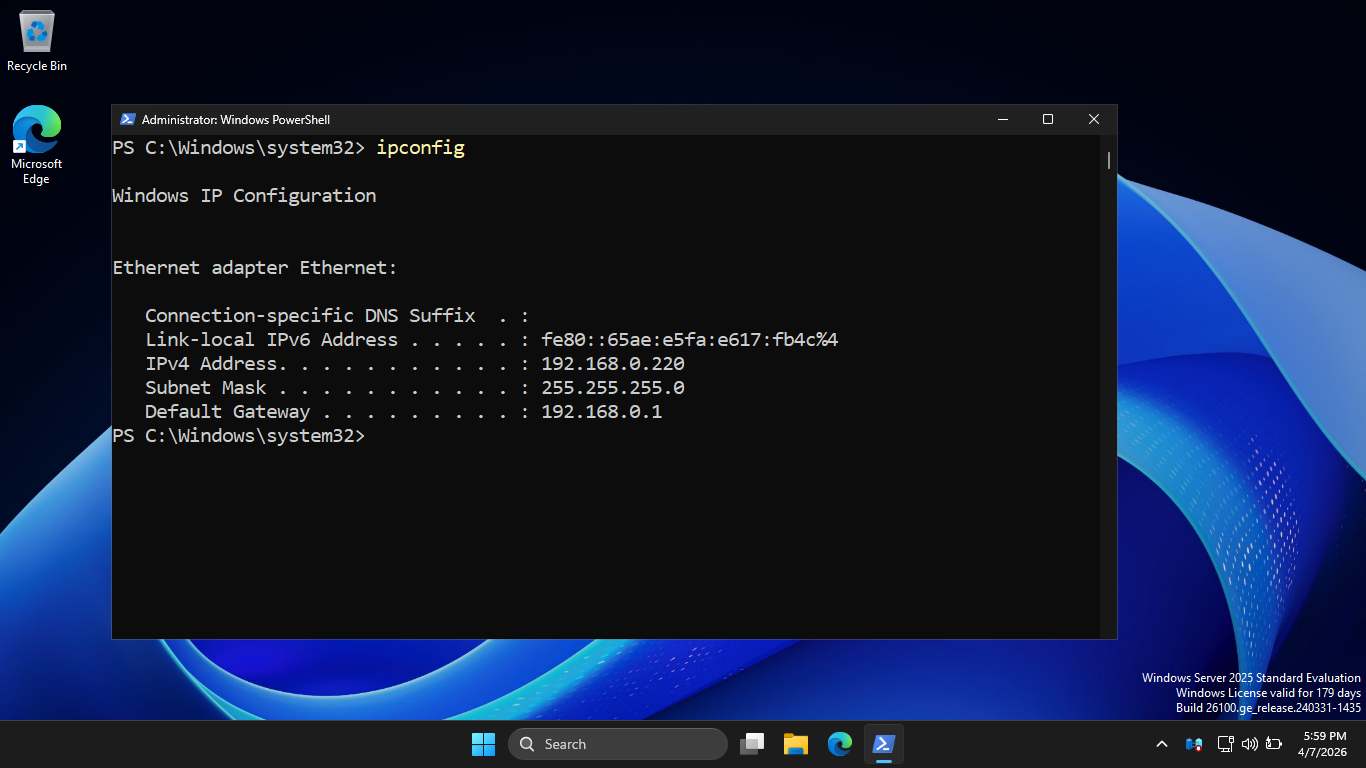
Run the following command from the Servers Administrator PowerShell to find the servers local IP address
PS C:\Windows\System32> ipconfig
Resulting Output:
Head back over to our Windows 11 workstation and open an administrator PowerShell using the search bar
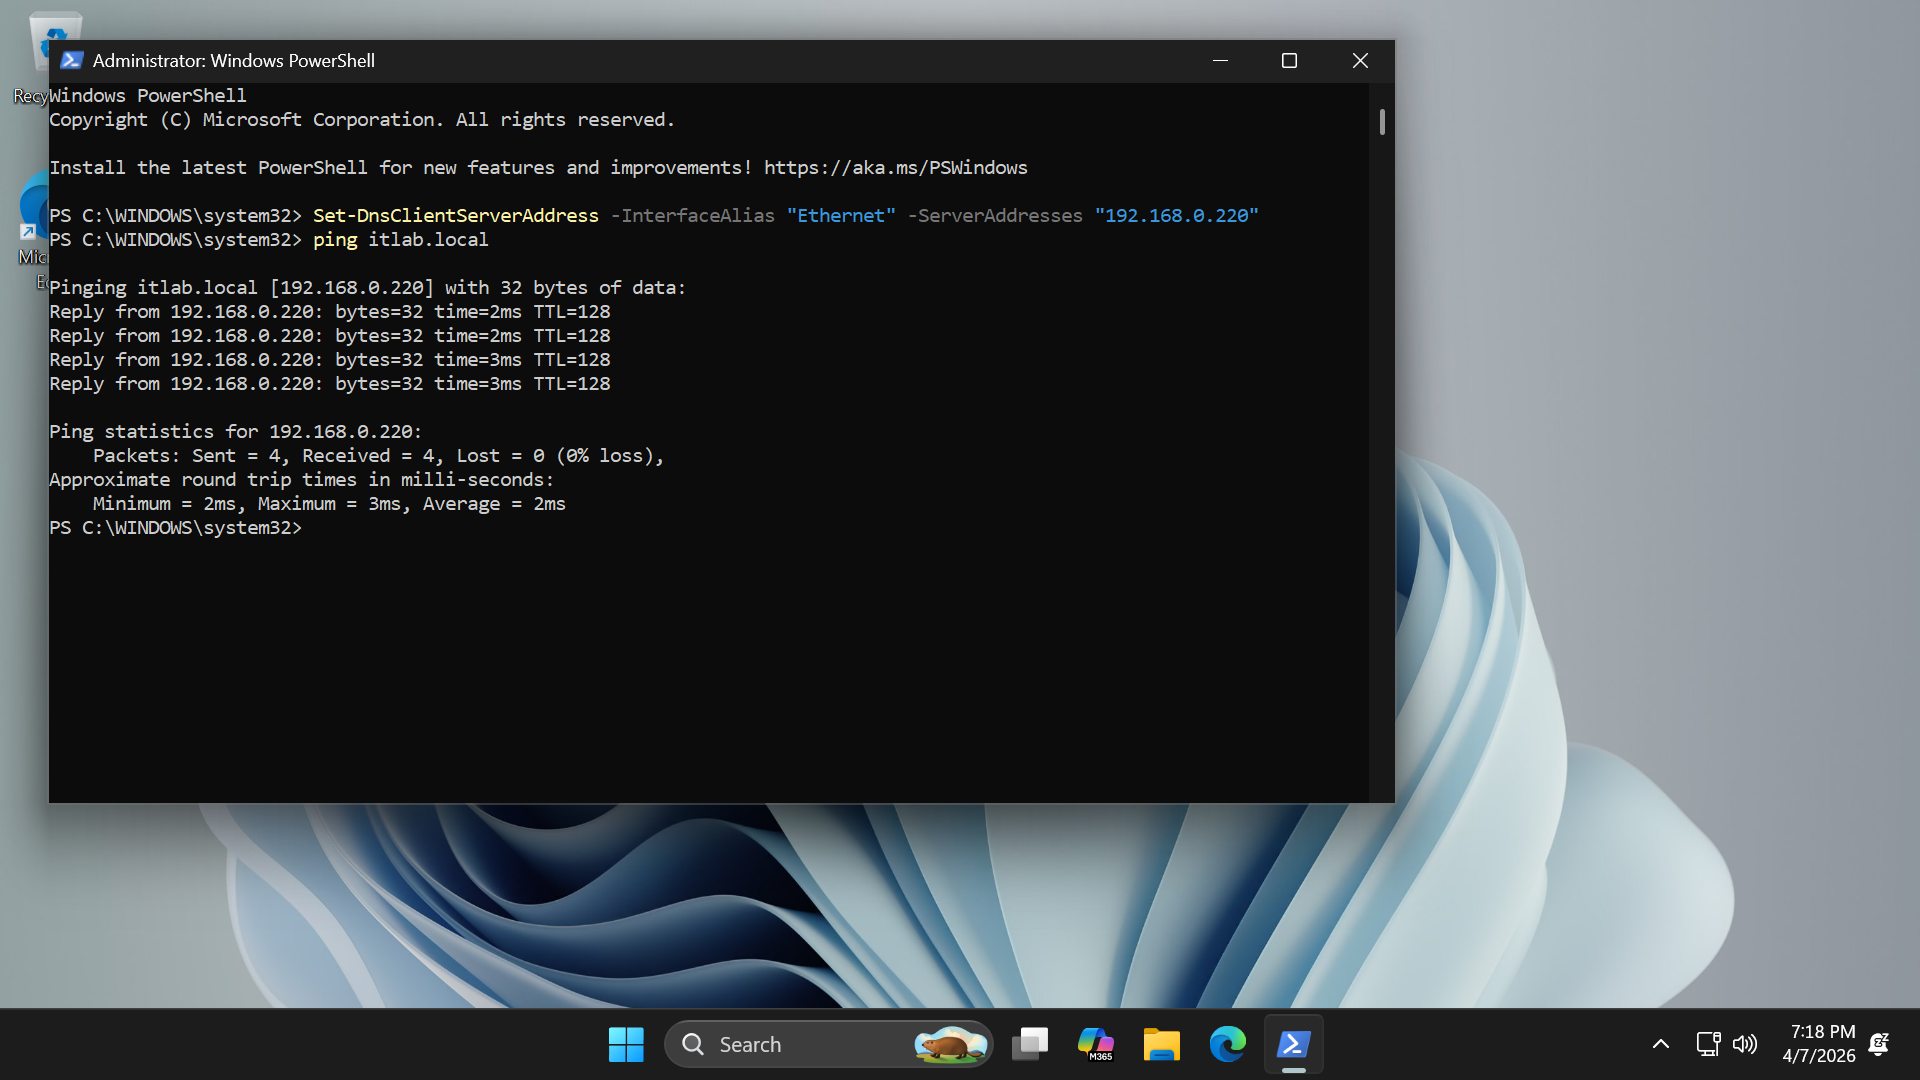
Run the following commands from the Endpoints Administrator PowerShell to point set DC as the DNS Server
PS C:\Windows\System32> Set-DnsClientServerAddress -InterfaceAlias "Ethernet" -ServerAddresses "192.168.0.220"
PS C:\Windows\System32> ping itlab.local
Resulting Output:
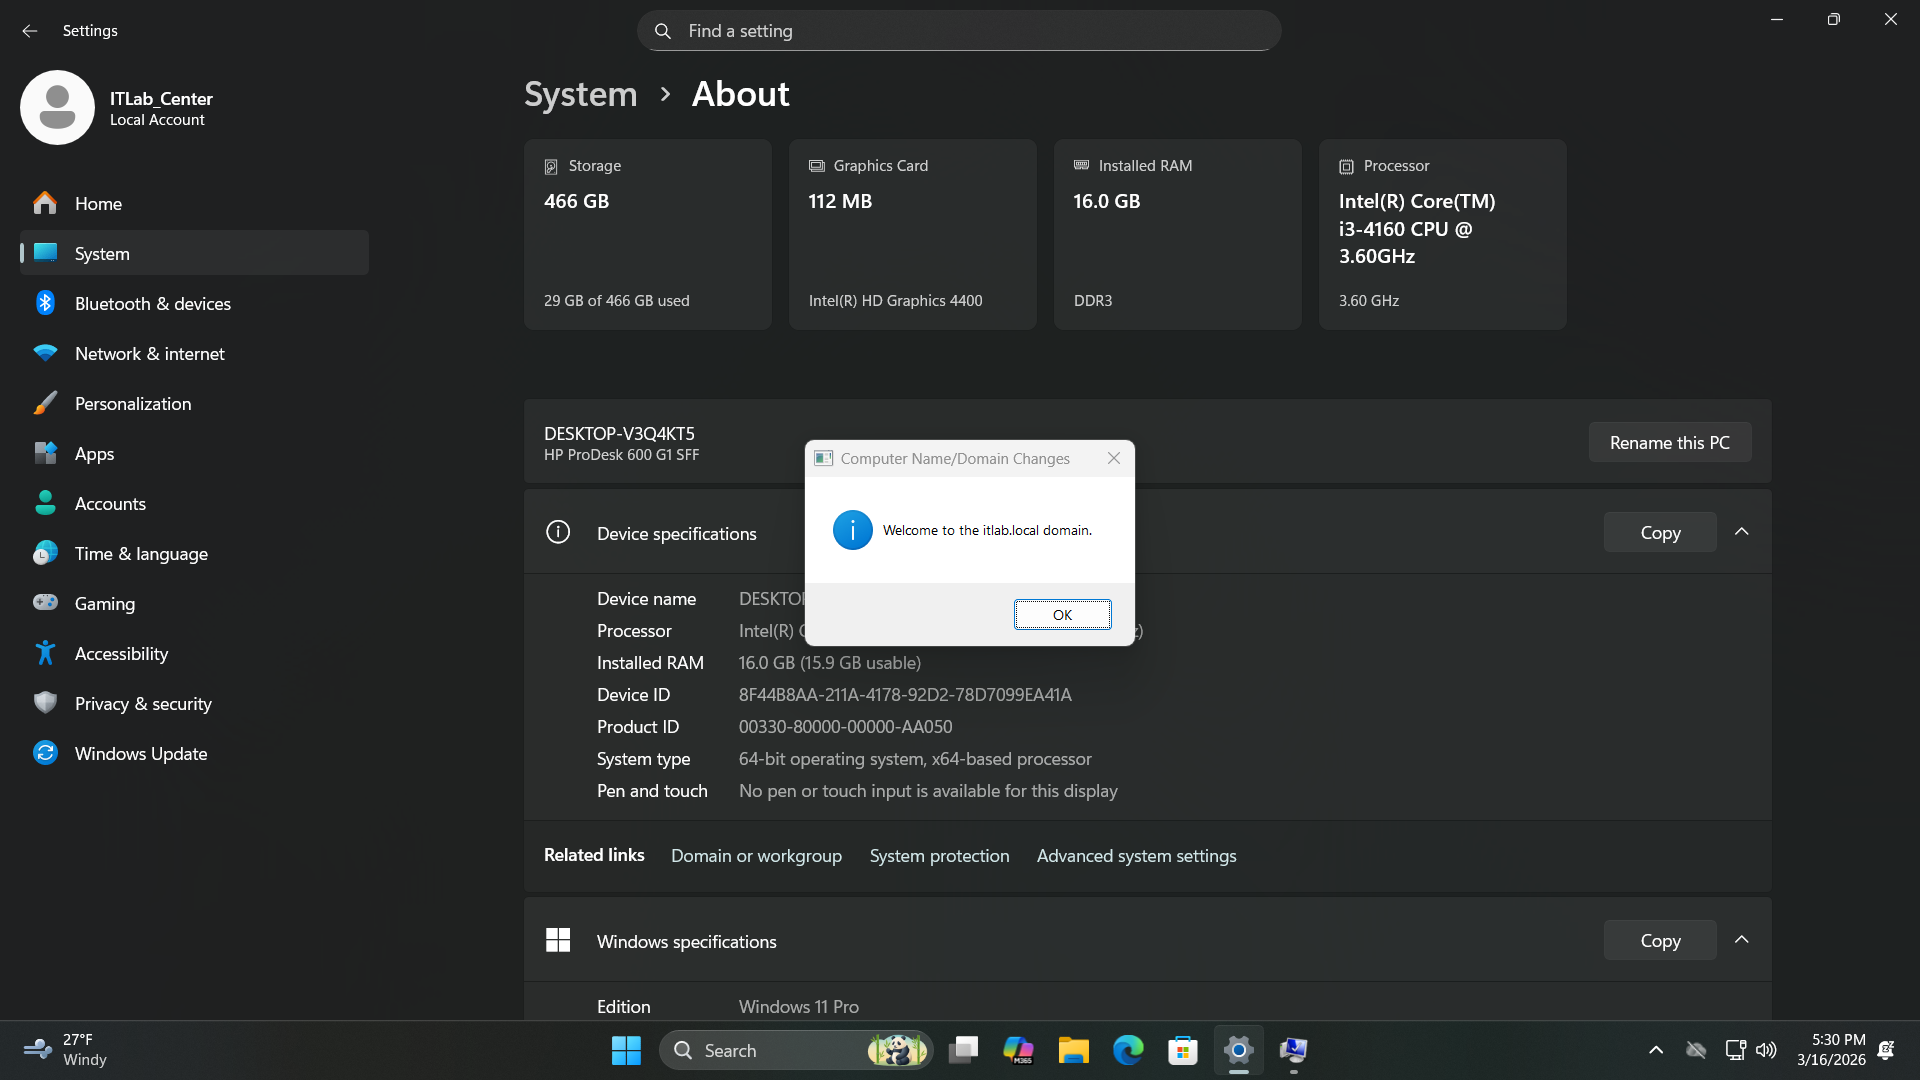
Now to join our endpoint to the domain. From the search bar type in Settings and open the Settings program
Now from the Settings, head to System > About, then hit the Domain or workgroup option under related links
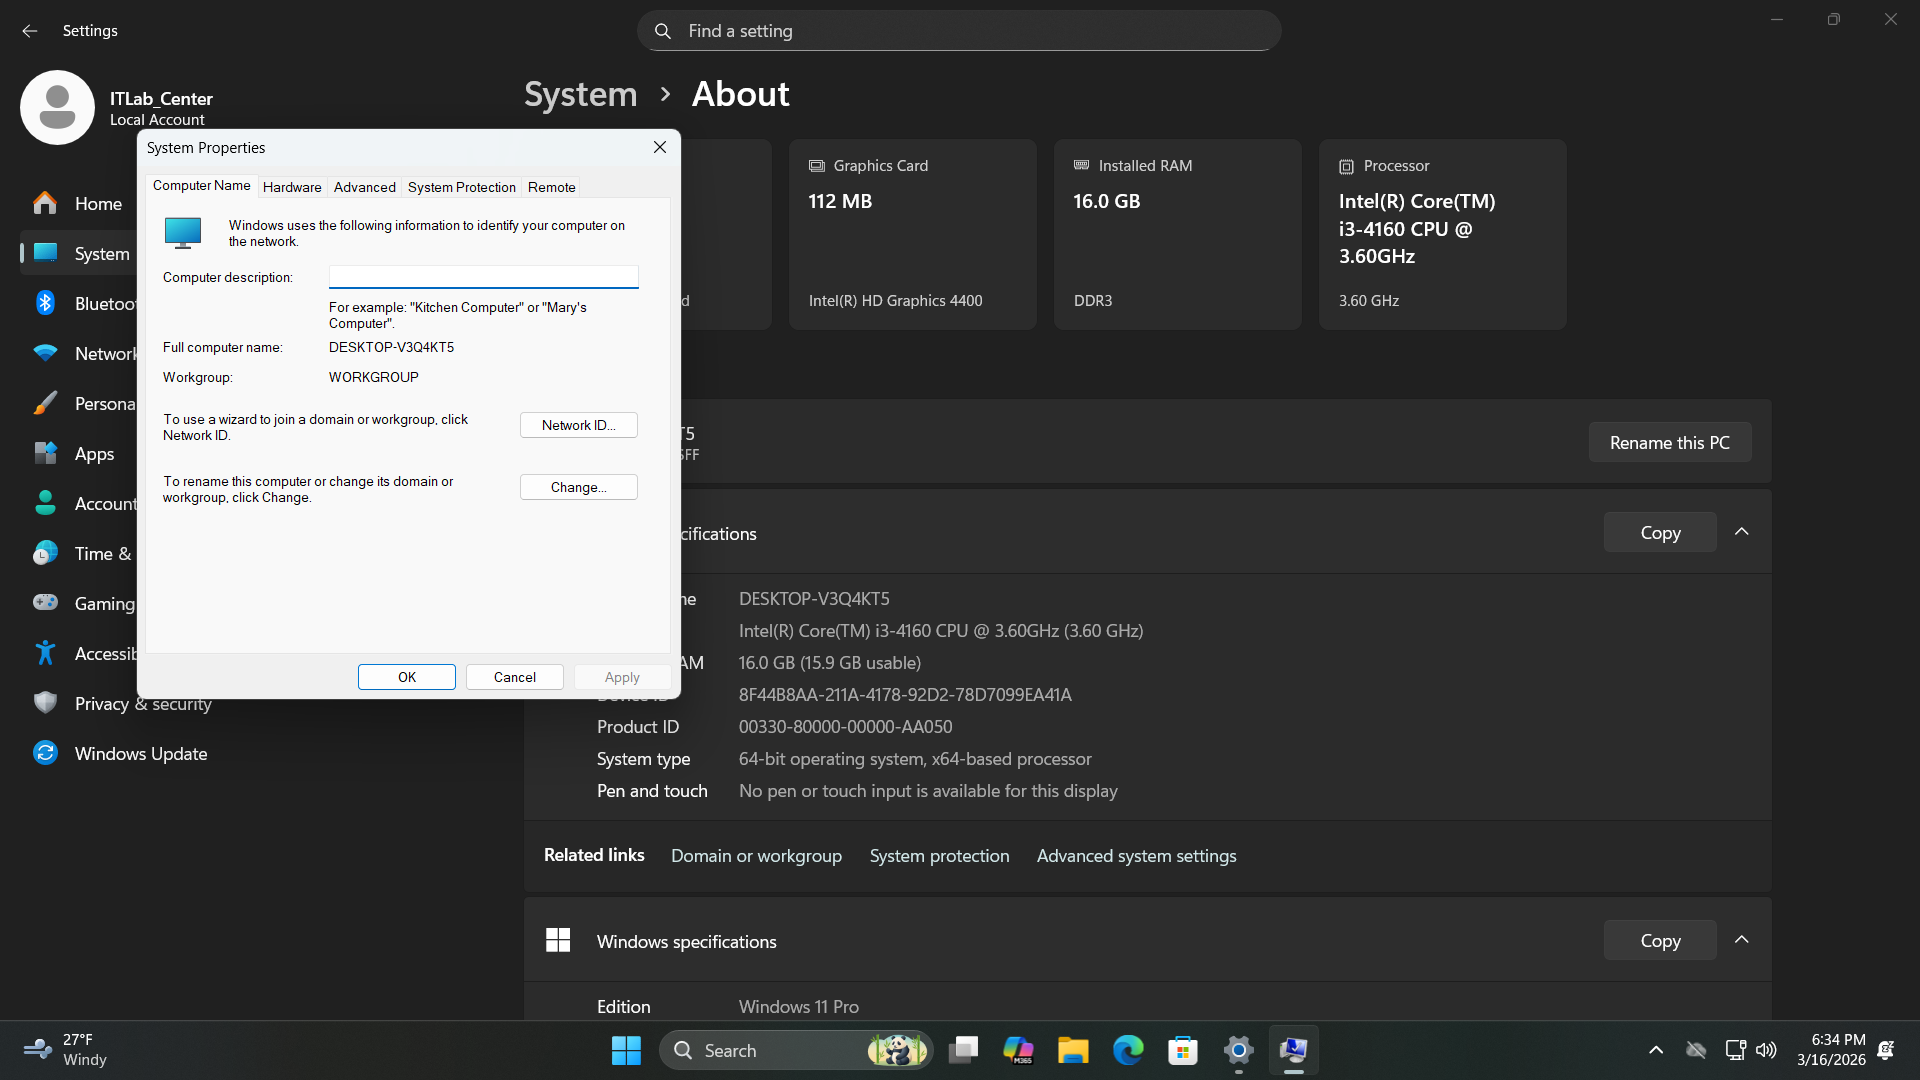
Now click Change > Domain and enter itlab.local into the domain bar. Change your hostname to ENDPOINT > OK
You will be prompted for authentication, enter Administrator as the username and the servers admin password
Run the following commands from the Endpoints Administrator PowerShell to restart and join to the domain
PS C:\Windows\System32> shutdown /r
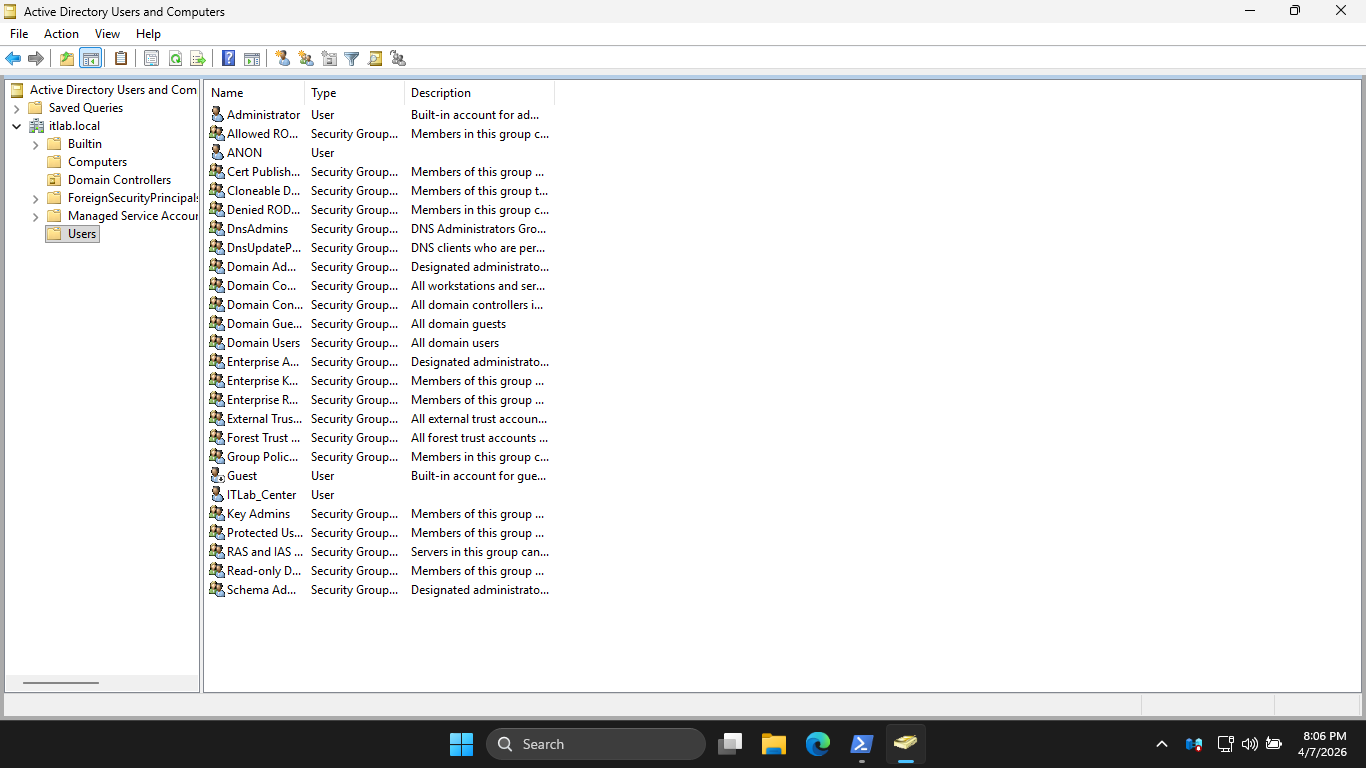
Run the following command from the Domain Controller PowerShell to open the Active Directory application
PS C:\Windows\System32> dsa.msc
Resulting Output:
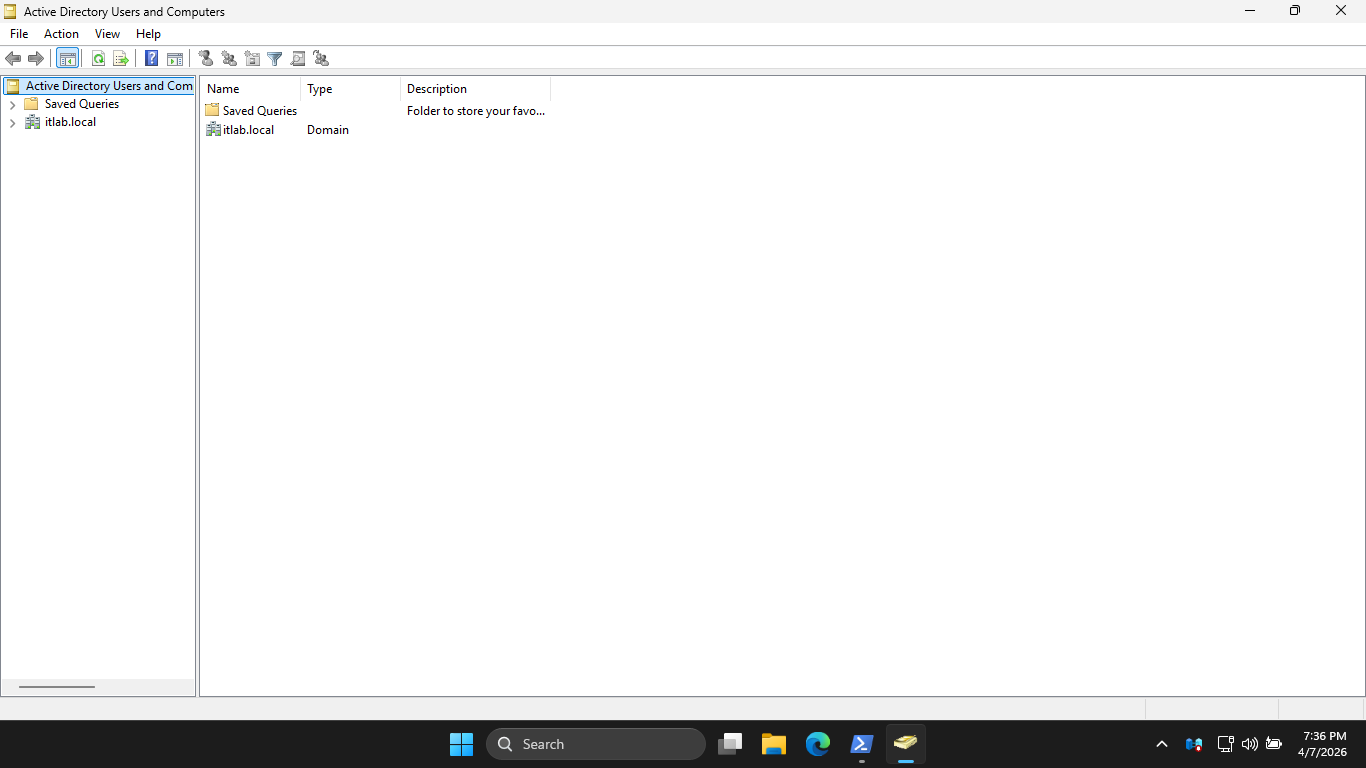
The Active Directory Users and Computers application serves as the GUI interface for the Active Directory
There is a ton of information that can be gathered from this panel, Expand itlab.local and hit Computers
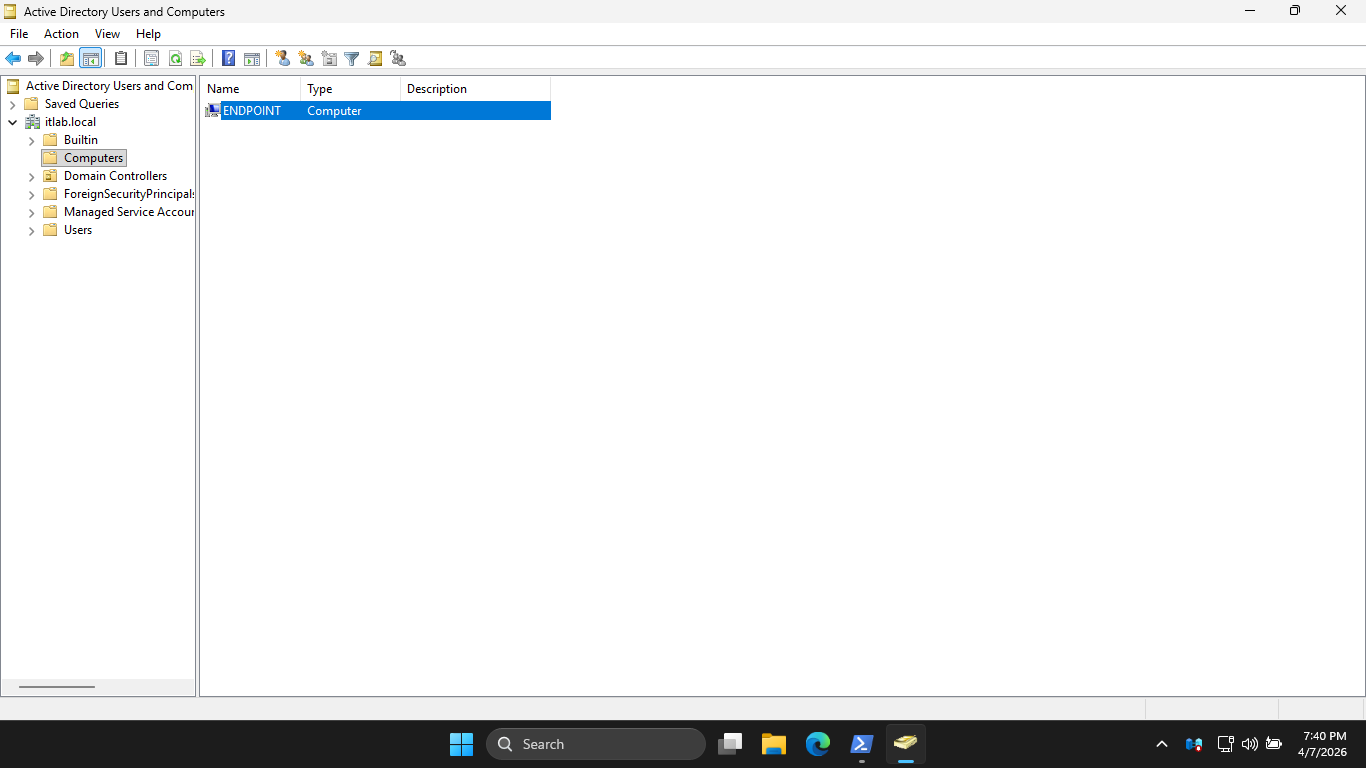
Here we can see our Endpoint Listed in the Computers OU. Select Users and hit the create new user button
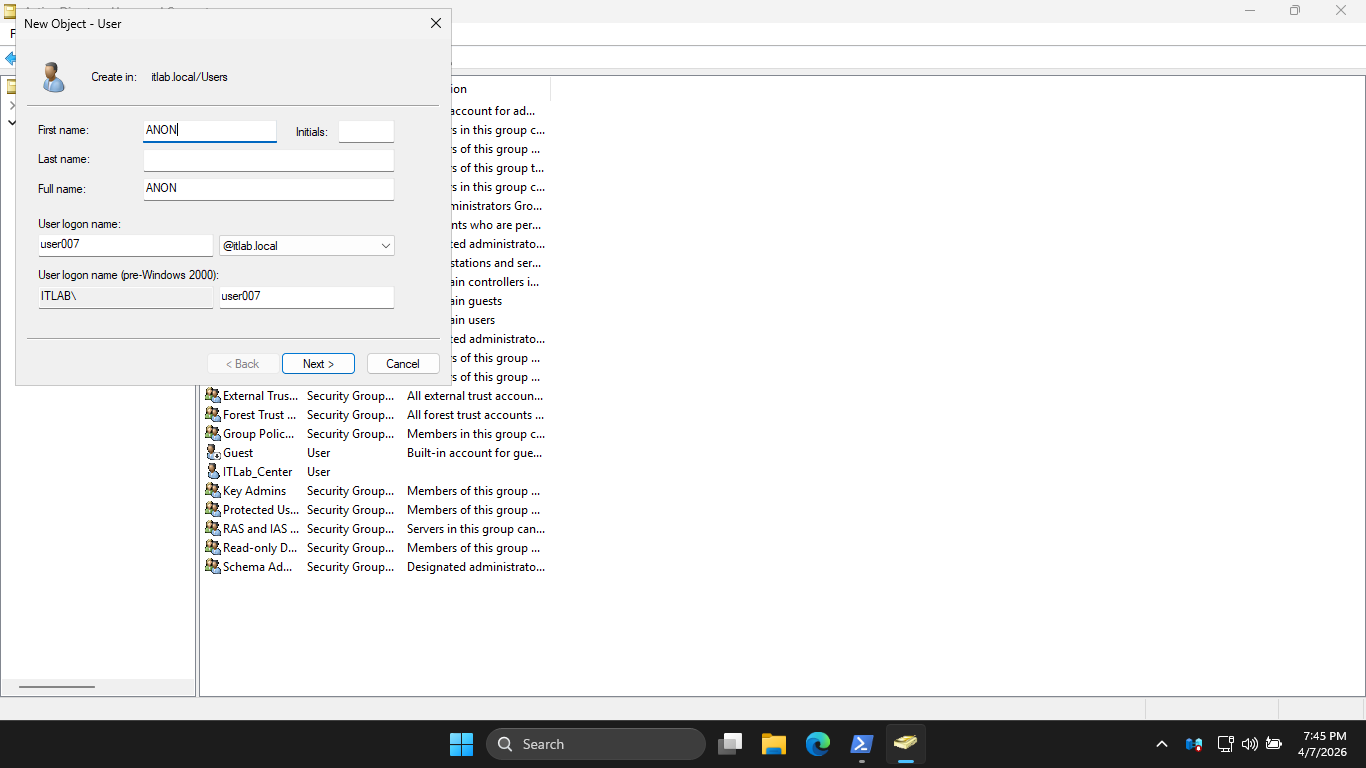
Enter in the user information above then click Next and set the new users password, then hit Next > Finish
Much of the information we are looking for can be acquired here with the Graphical Interface, but that
process is slow and painful. Let's explore using PowerShell to automate the information gathering phase
7. Active Directory Information Gathering
Before Querying the domain, the environment needs the proper tool set. The Active Directory PowerShell
module is required. On Windows Server, this is added via Optional Features and can be imported into PS
Run the following command from the Domain Controller PowerShell to import the Active Directory Module
PS C:\Windows\System32> Import-Module ActiveDirectory
Before diving into the customer scripts we can create with this module, let's look at some basic commands
Run the following command from the Domain Controller PowerShell to view domain information for user007
PS C:\Windows\System32> net user /domain user007
Resulting Output:
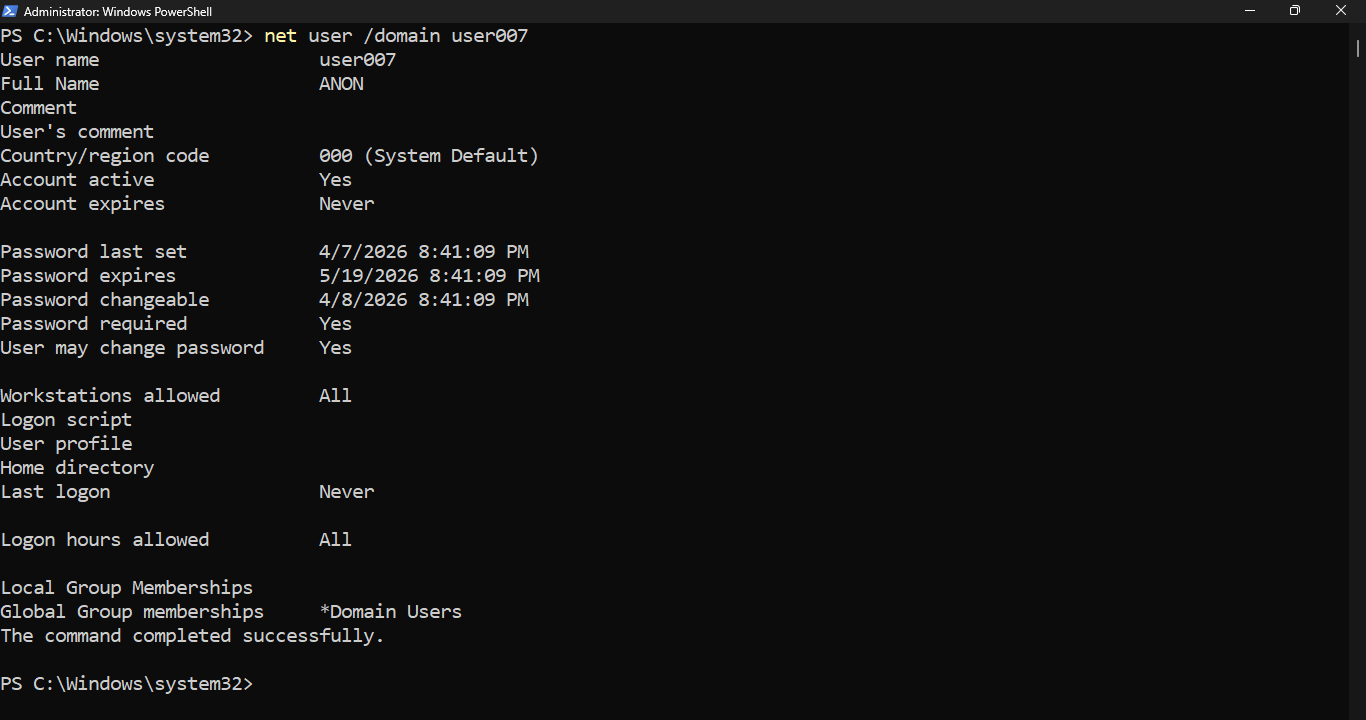
The command above gives us a high level overview of much of the useful information available for a user
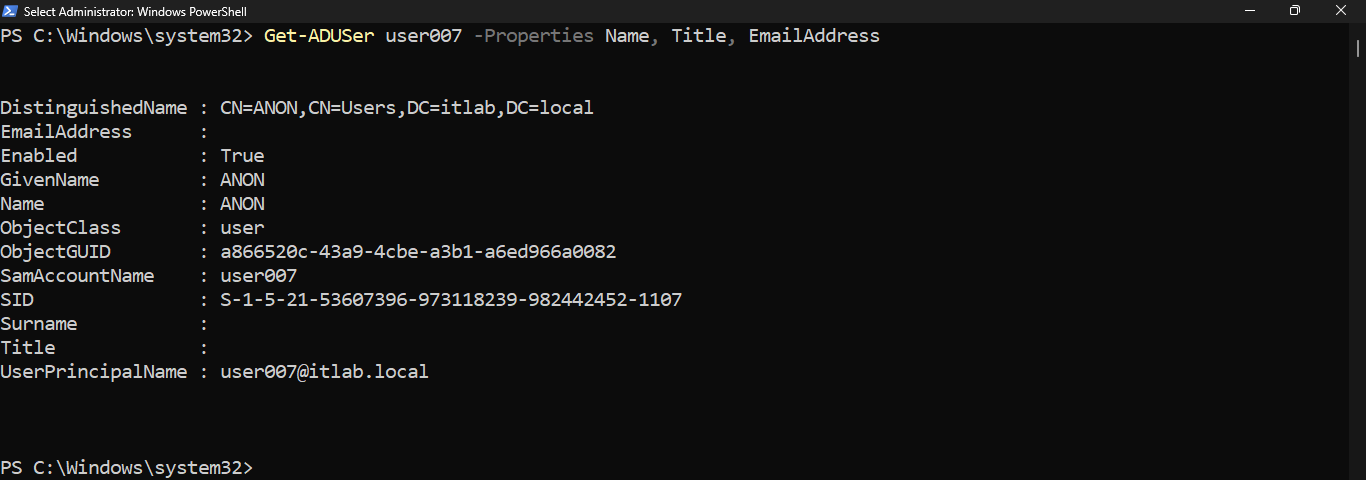
The Get-ADUser command can be used with many different properties to further hone in on specific datapoints
Run the following command from the Domain Controller PowerShell to view the users Name, Title and Email
PS C:\Windows\System32> Get-ADUser user007 -Properties FullName, Title, EmailAddress
Resulting Output:
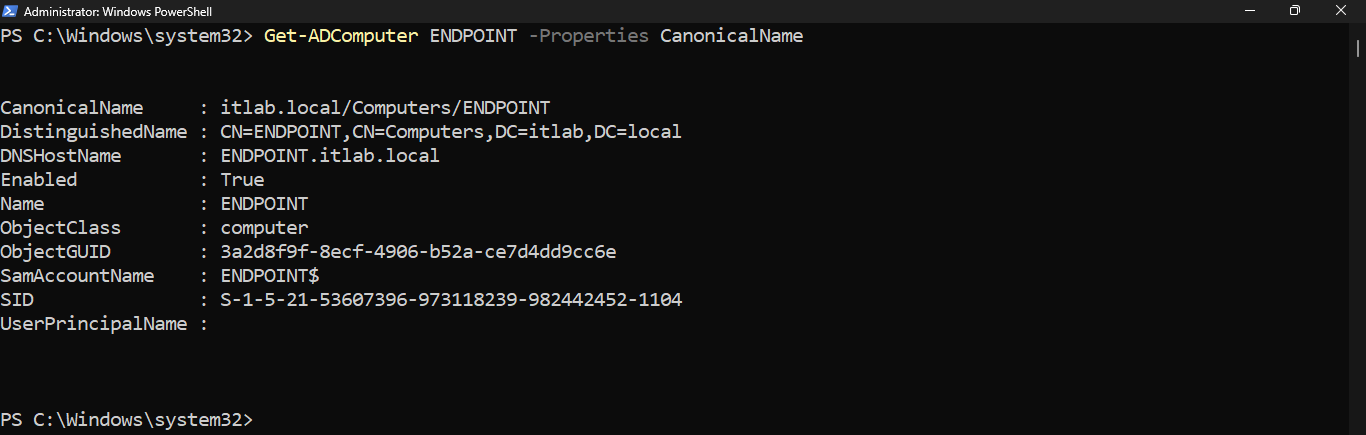
Similarly, the Get-ADComputers command can be used with several properties to collect workstation info
Run the following command from the Domain Controller PowerShell to display our PCs Organizational Unit
PS C:\Windows\System32> Get-ADComputer ENDPOINT -Properties CanonicalName
Resulting Output:
From the taskbar, search for PowerShell ISE, then click on the option provided to Run as Administrator
Since the PowerShell ISE utility is installed locally on our Domain Controller, we will work from here
In order for us to demonstrate the power of using PowerShell to gather information in an Active Directory
Environment, we need to build some accounts and flesh out their details for us to have data to collect
To flesh out these accounts we have to divide the attributes into two categories: Standard Attributes
(which we can actually write to) and System-Managed Attributes (which require AD mechanics to update)
Instead of creating the accounts and then modifying their standard attributes, the most efficient method
is to assign all those standard attributes at the exact moment of creation by utilizing the New-ADUser
This script takes your array of fictional employees and uses splatting (a PowerShell technique that packs
parameters into a has table) to cleanly create the accounts, assign standard attributes, and enable them
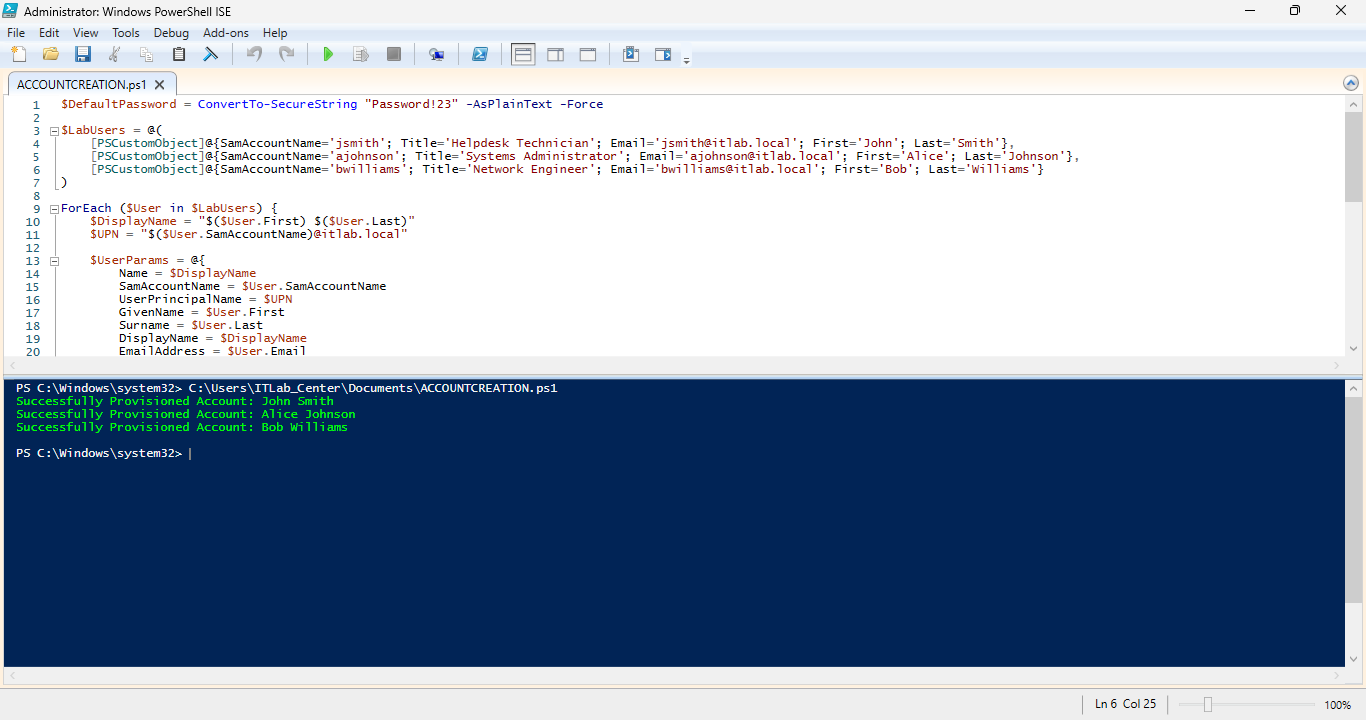
From the PowerShell ISE application hit File > Save As > and name the script ACCOUNTCREATION.ps1 and save
Type out the following script below to to create our Active Directory Accounts and then hit save and run
$DefaultPassword = ConvertTo-SecureString "Password!23" -AsPlainText -Force
$LabUsers = @(
[PSCustomObject]@{SamAccountName='jsmith'; Title='Helpdesk Technician'; Email='jsmith@itlab.local'; First='John'; Last='Smith'},
[PSCustomObject]@{SamAccountName='ajohnson'; Title='Systems Administrator'; Email='ajohnson@itlab.local'; First='Alice'; Last='Johnson'},
[PSCustomObject]@{SamAccountName='bwilliams'; Title='Network Engineer'; Email='bwilliams@itlab.local'; First='Bob'; Last='Williams'}
)
ForEach ($User in $LabUsers) {
$DisplayName = "$($User.First) $($User.Last)"
$UPN = "$($User.SamAccountName)@itlab.local"
$UserParams = @{
Name = $DisplayName
SamAccountName = $User.SamAccountName
UserPrincipalName = $UPN
GivenName = $User.First
Surname = $User.Last
DisplayName = $DisplayName
EmailAddress = $User.Email
Title = $User.Title
AccountPassword = $DefaultPassword
Enabled = $true
}
try {
New-ADUser @UserParams -ErrorAction Stop
Write-Host "Successfully Provisioned Account: $DisplayName" -ForegroundColor Green
}
catch {
Write-Warning "Failed to create $($User.SamAccountName). It may already exist. Error: $_"
}
}
Resulting Output:
Even though the accounts are created, Active Directory still considers them as never being use to log in
To complete the illusion of a living environment, we loop through that exact same $LabUsers array to force
a network authentication event against the Domain Controller's SYSVOL share, populating the LastLogonDate
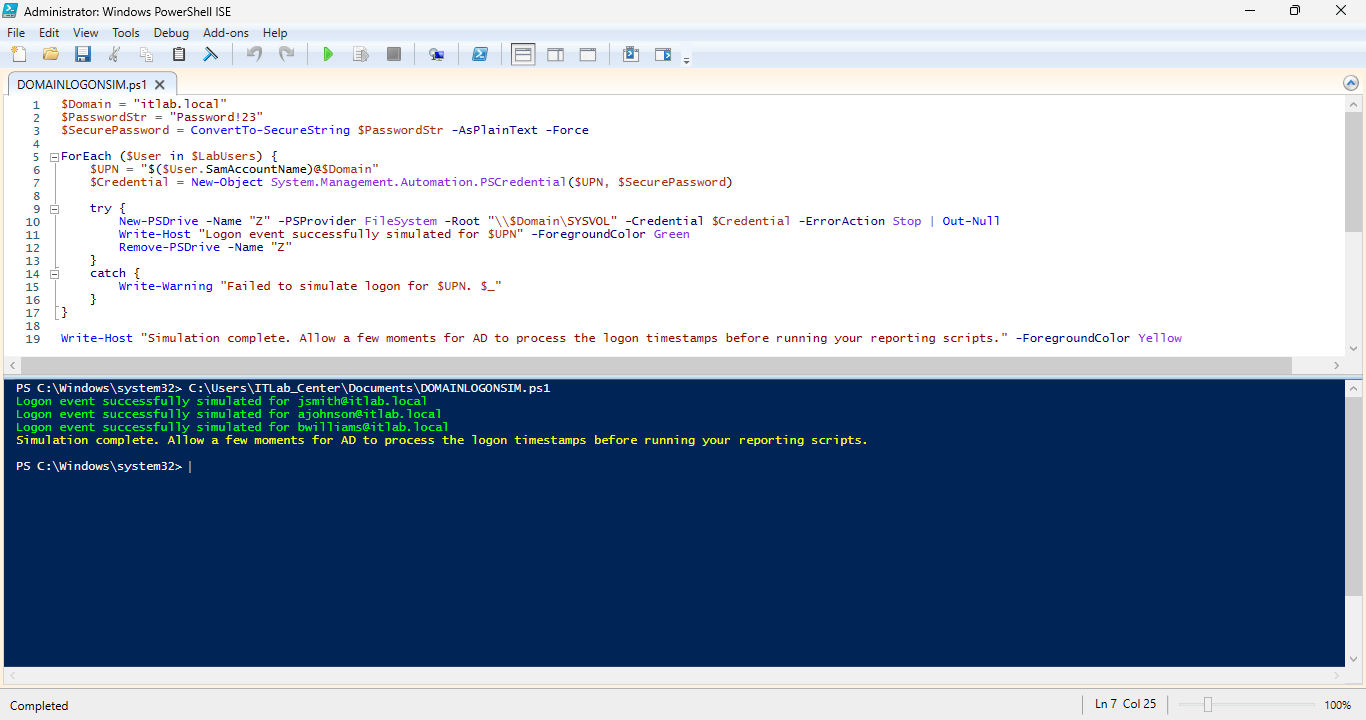
From the PowerShell ISE application hit File > Save As > and name the script DOMAINLOGONSIM.ps1 and save
Type out the following script below to to simulate a user logon event by forcing Domain Controller Auth
$Domain = "itlab.local"
$PasswordStr = "Password!23"
$SecurePassword = ConvertTo-SecureString $PasswordStr -AsPlainText -Force
ForEach ($User in $LabUsers) {
$UPN = "$($User.SamAccountName)@$Domain"
$Credential = New-Object System.Management.Automation.PSCredential($UPN, $SecurePassword)
try {
New-PSDrive -Name "Z" -PSProvider FileSystem -Root "\\$Domain\SYSVOL" -Credential $Credential -ErrorAction Stop | Out-Null
Write-Host "Logon event successfully simulated for $UPN" -ForegroundColor Green
Remove-PSDrive -Name "Z"
}
catch {
Write-Warning "Failed to simulate logon for $UPN. $_"
}
}
Write-Host "Simulation complete. Allow a few moments for AD to process the logon timestamps before running your reporting scripts." -ForegroundColor Yellow
Resulting Output:
Simply running Get-ADUser dumps a lot of raw, unformatted data. Instead we will demonstrate how to filter
for enabled accounts, extract meaningful security data, and decode complex active directory attributes
A great challenge to tackle here is the lastLogon attribute. Unlike LastLogonDate, the raw lastLogon
attribute is not replicated across Domain Controllers, meaning you have to query it carefully when needed
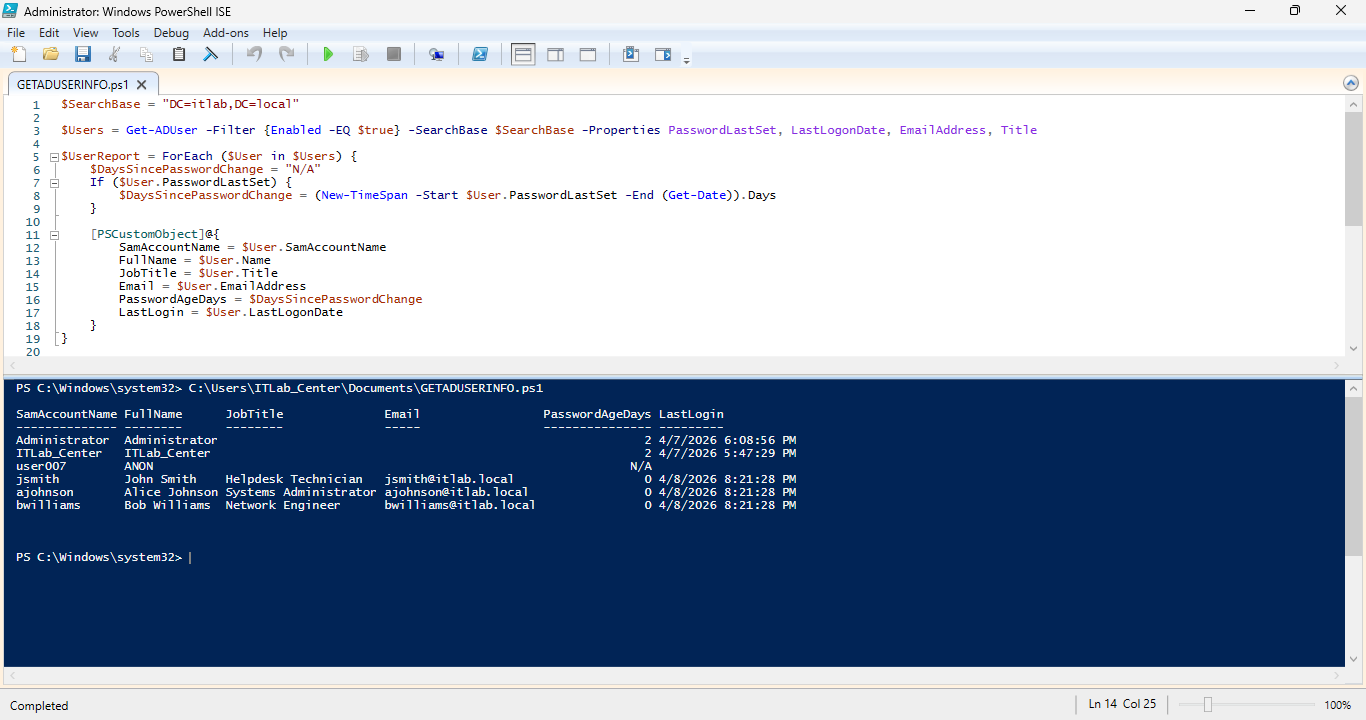
From the PowerShell ISE application hit File > Save As > and name the script GETADUSERINFO.ps1 and save
Type out the following script below to to probe Active Directory for Information and then save and run
$SearchBase = "DC=itlab,DC=local"
$Users = Get-ADUser -Filter {Enabled -EQ True} -SearchBase $SearchBase -Properties PasswordLastSet, LastLogonDate, EmailAddress, Title
$UserReport = ForEach ($User in $Users) {
$DaysSincePasswordChange = "N/A"
If ($User.PasswordLastSet) {
$DaysSincePasswordChange = (New-TimeSpan -Start $User.PasswordLastSet -End (Get-Date)).Days
}
[PSCustomObject]@{
SamAccountName = $User.SamAccountName
FullName = $User.Name
JobTitle = $User.Title
Email = $User.EmailAddress
PasswordAgeDays = $DaysSincePasswordChange
LastLogin = $User.LastLogonDate
}
}
$UserReport | Format-Table -AutoSize
Resulting Output:
For Endpoints, an IT professional usually needs to separate active workstations from stale, disconnected
or dead records in AD. This script pulls computer objects, filters by Operating System to exclude servers
and flags computers that haven't authenticated to the domain in over 30 days, let's demonstrate this task
From the PowerShell ISE application hit File > Save As > and name the script GETCOMPUTERINFO.ps1 and save
Type out the following script below to to probe Active Directory for Information and then save and run
$SearchBase = "DC=itlab,DC=local"
$StaleThresholdDays = 30
$CurrentDate = Get-Date
$Computers = Get-ADComputer -Filter {OperatingSystem -like "*Windows 10*" -or OperatingSystem -like "*Windows 11*" } -SearchBase $SearchBase -Properties OperatingSystem, IPv4Address, PasswordLastSet, LastLogonDate
$EndpointReport = ForEach ($PC in $Computers) {
$IsStale = $false
If ($PC.PasswordLastSet) {
$AccountAge = (New-TimeSpan -Start $PC.PasswordLastSet -End $CurrentDate).Days
If ($AccountAge -gt $StaleThresholdDays) {
$IsStale = $true
}
} Else {
$IsStale = $true
}
[PSCustomObject]@{
Hostname = $PC.Name
OperatingSystem = $PC.OperatingSystem
IPAddress = $PC.IPv4Address
StaleRecord = $IsStale
LastActivity = $PC.LastLogonDate
}
}
$EndpointReport | Sort-Object Hostname | Format-Table -AutoSize
Resulting Output:
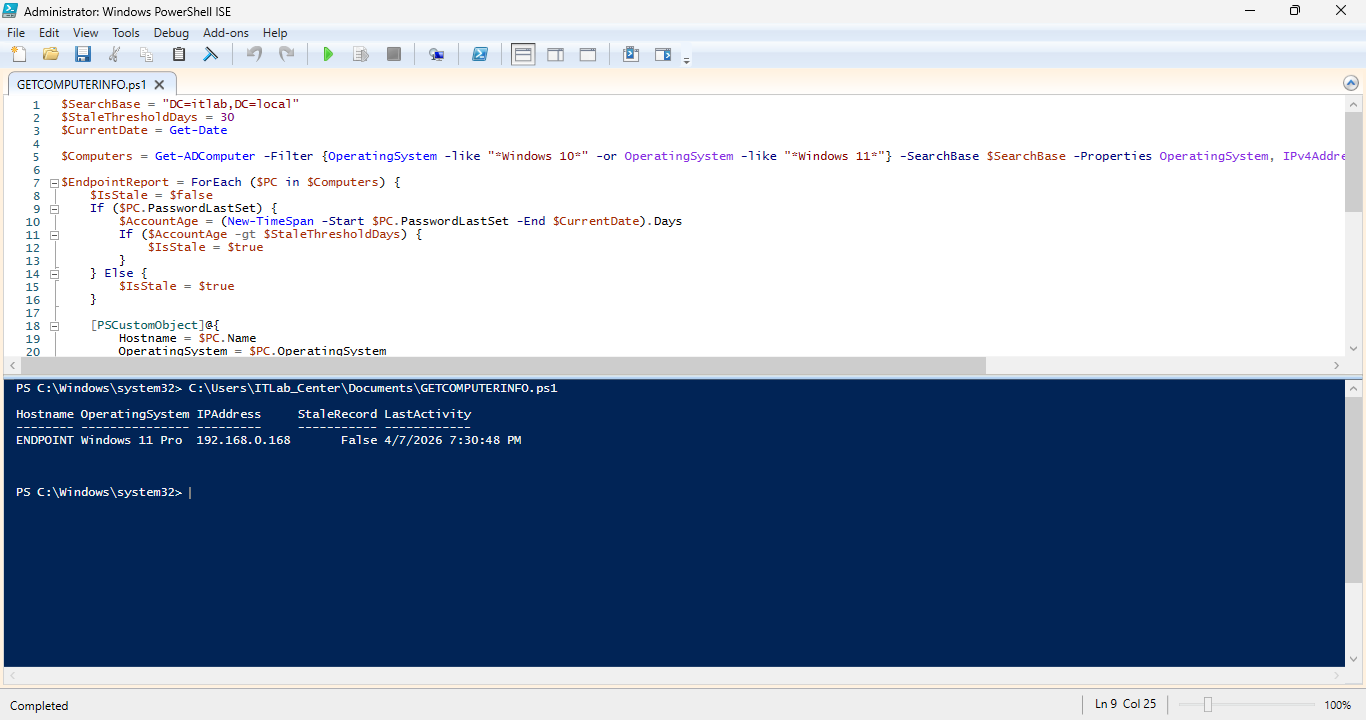
We just simulated an enterprise workflow of auditing the domain for active user accounts and endpoints
8. Configure an SCCM / MECM Environment
We previously discussed the ability to run scripts remotely on computers using the -ComputerName attribute
This is an extremely powerful and overly permissive tool that is not always suitable for enterprise work
Let's demonstrate just what kinds of havoc we can wreak with this ability on our remote endpoint below
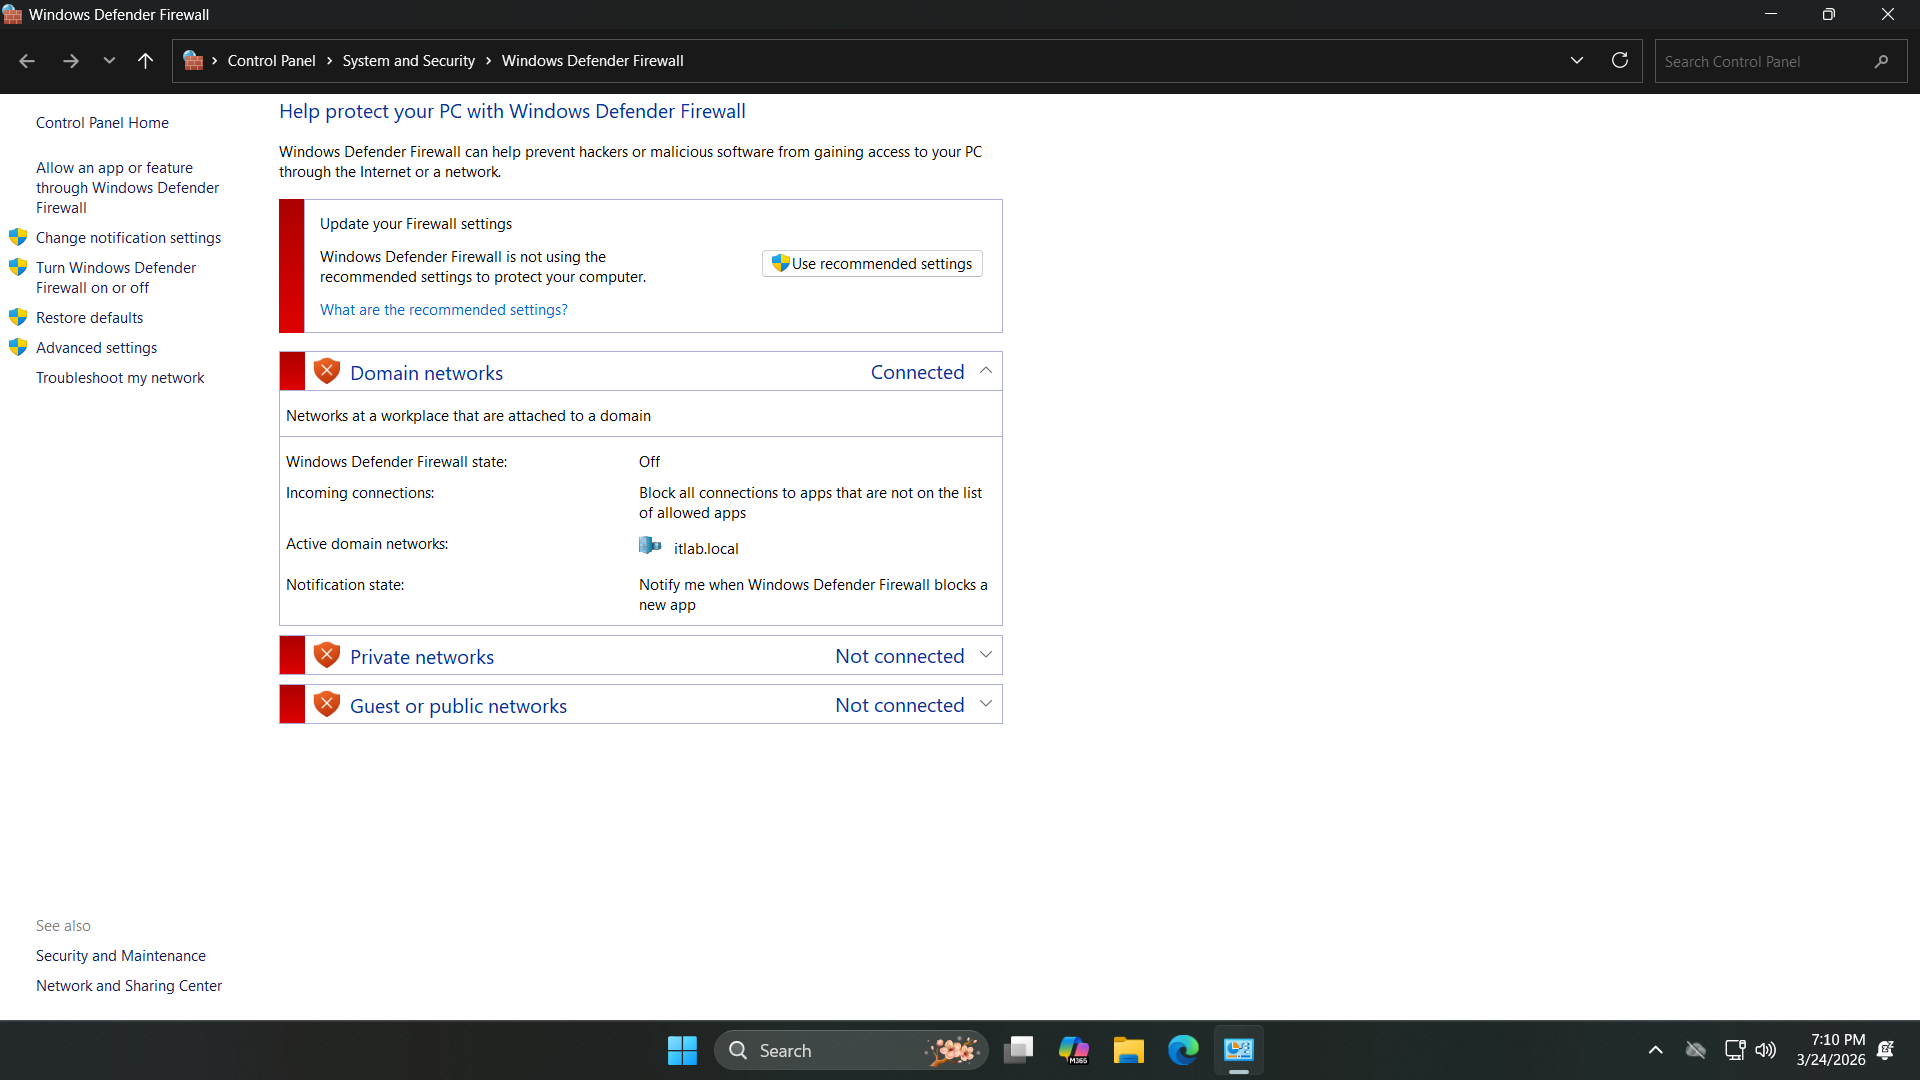
We must disable the Firewall on both the Endpoint and the Server, search for Firewall from the search bar
Select Windows Defender Firewall > Turn Windows Defender Firewall on or off and turn all options to off
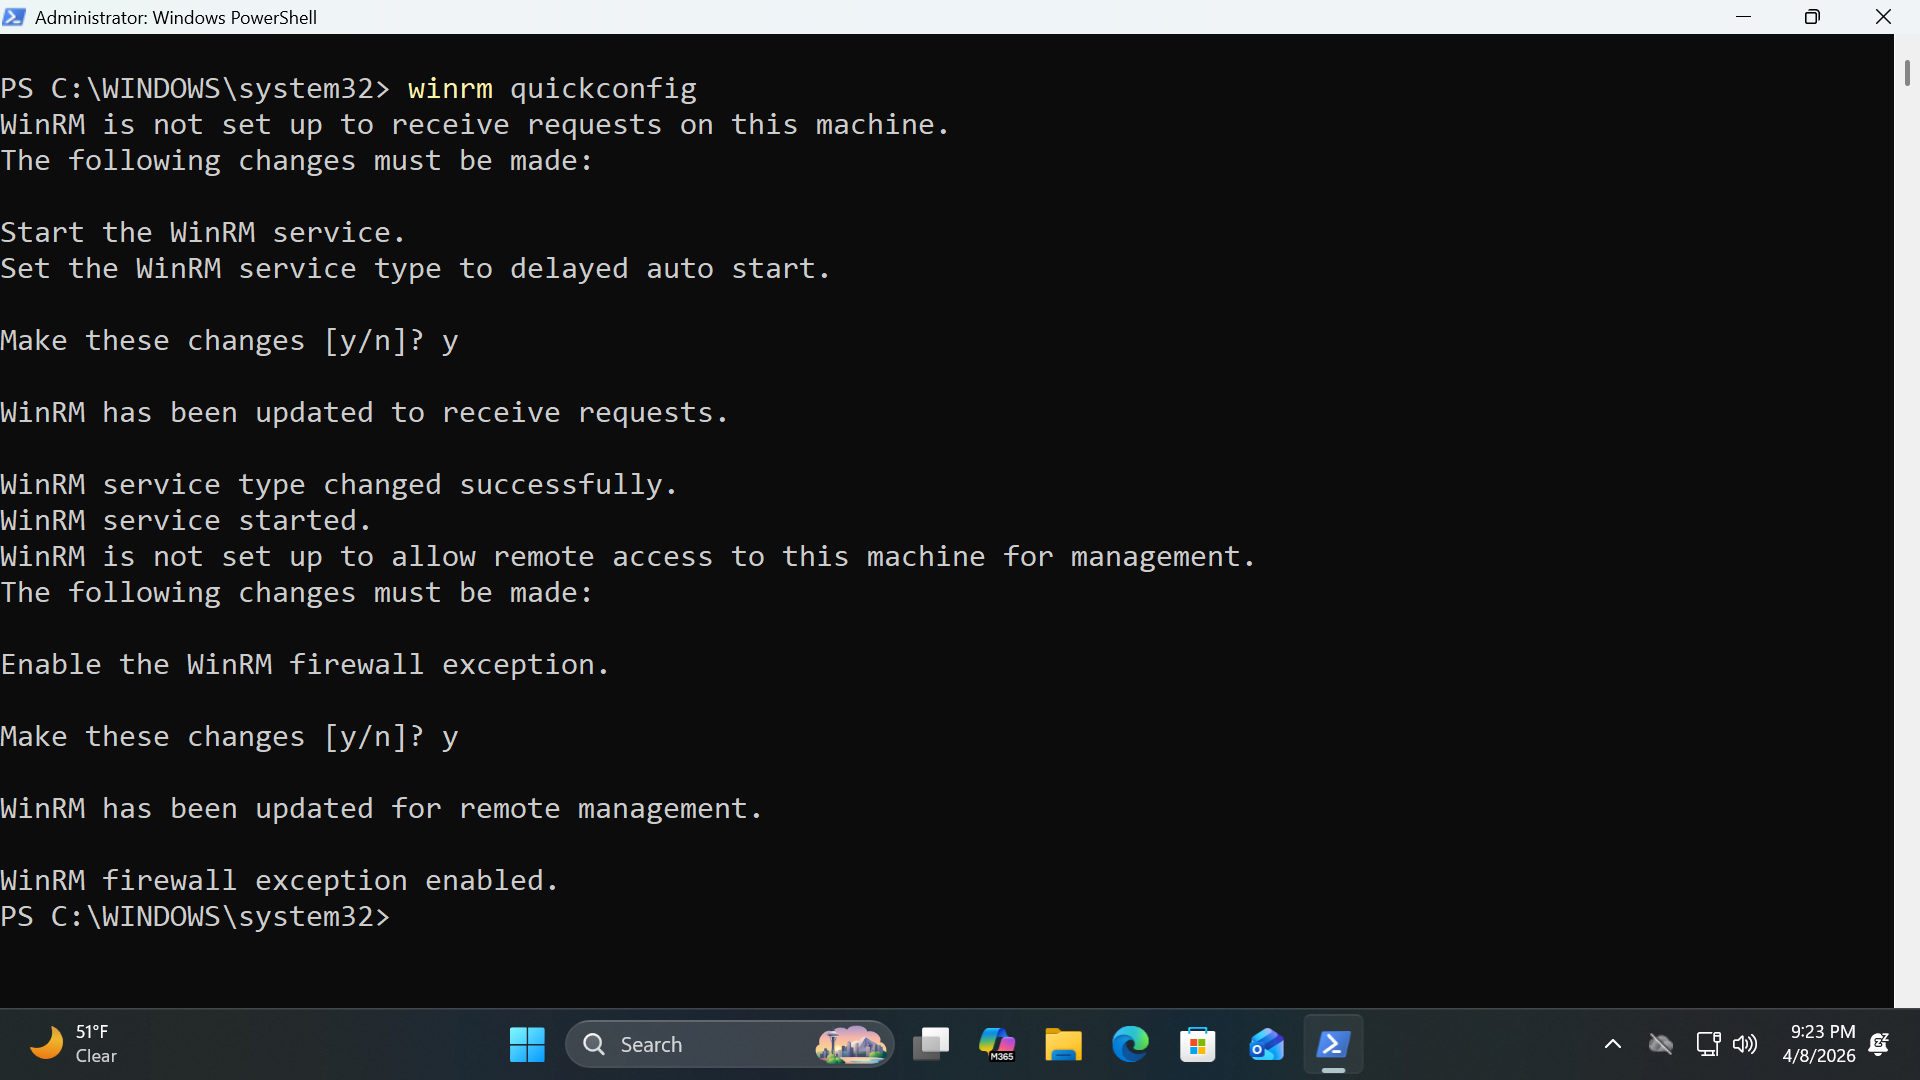
Run the following command from the Endpoints Administrator PowerShell to enable remote PowerShell scripts
PS C:\Windows\System32> winrm quickconfig
Resulting Output:
Sign out of the ITLab_Center account on the Domain controller and sign back in as the Administrator user
Run the following command from the Domain Controller PowerShell for BitLocker Drive Encryption Protectors
PS C:\Windows\System32> Invoke-Command -ComputerName ENDPOINT -ScriptBlock {bdehdcfg -target C: shrink}
PS C:\Windows\System32> Invoke-Command -ComputerName ENDPOINT -ScriptBlock {manage-bde -protectors -add C: -rp}
Resulting Output:
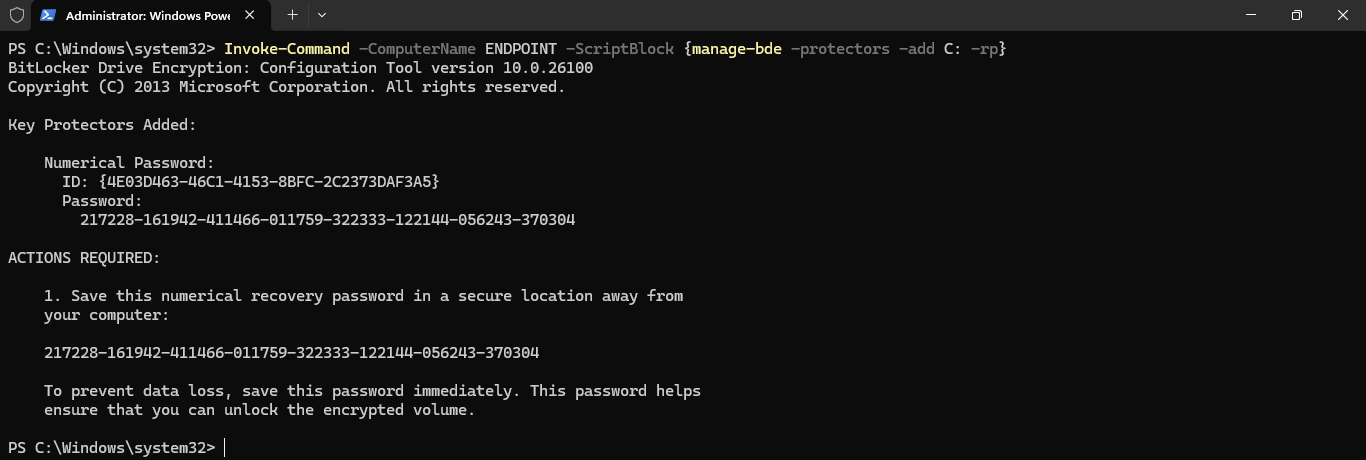
Run the following commands from the Domain Controller PowerShell to lock our endpoints C: with BitLocker
PS C:\Windows\System32> Invoke-Command -ComputerName ENDPOINT -ScriptBlock {manage-bde -on C:}
PS C:\Windows\System32> Invoke-Command -ComputerName ENDPOINT -ScriptBlock {shutdown /r}
Resulting Output:
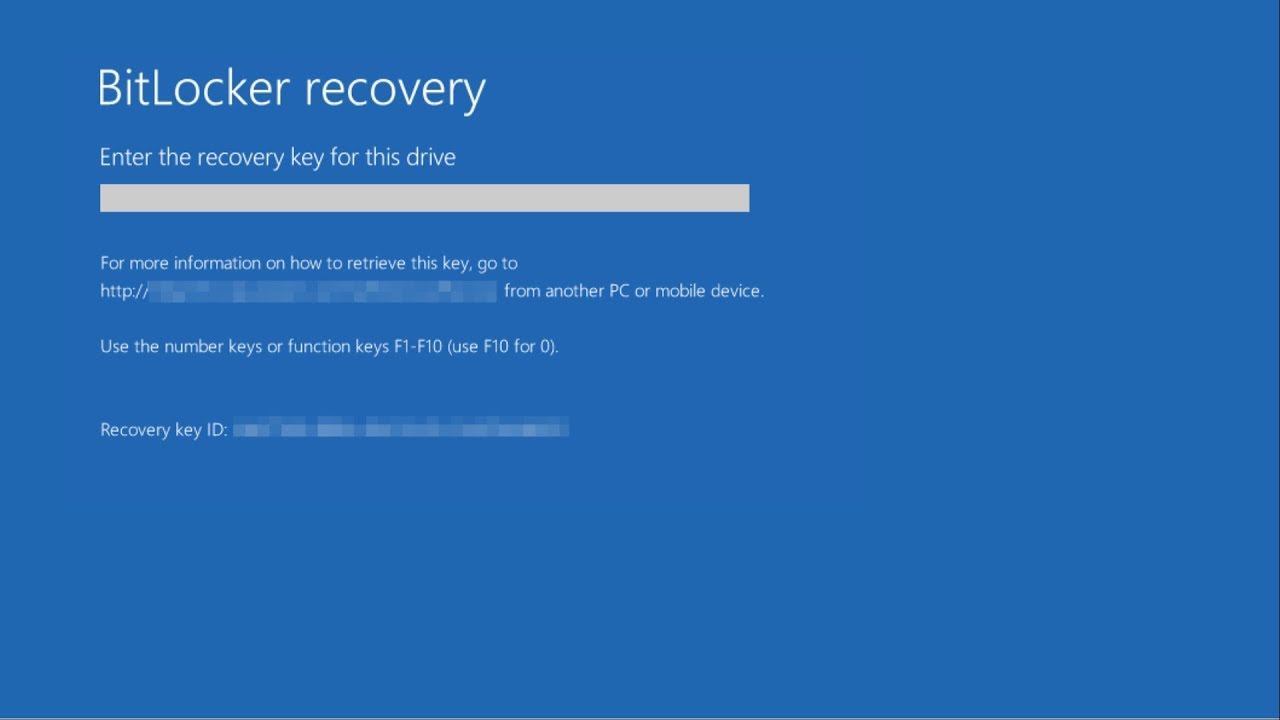
Now we have encrypted the entire workstations hard drive, you can unlock it with the recovery password
Run the following command from the Domain Controller PowerShell to remove the BitLocker Drive Encryption
PS C:\Windows\System32> Invoke-Command -ComputerName ENDPOINT -ScriptBlock {manage-bde -off C:}
You can see how this is less than ideal as a malicious insider could do this on every PC in the company
There exists a need for enterprises to allow administrators to run controlled remote scripts from a pre
defined list of available and pre-made scripts. This is where SCCM comes in to make this setup possible
Sign back in as the ITLab_Center account, we must prepare our device for the SQL and MECM server install
When installing these services, you cannot use the default "Local System" account, we must create more
From the search bar, enter in PowerShell ISE and launch it as an admin and create a script: File > New
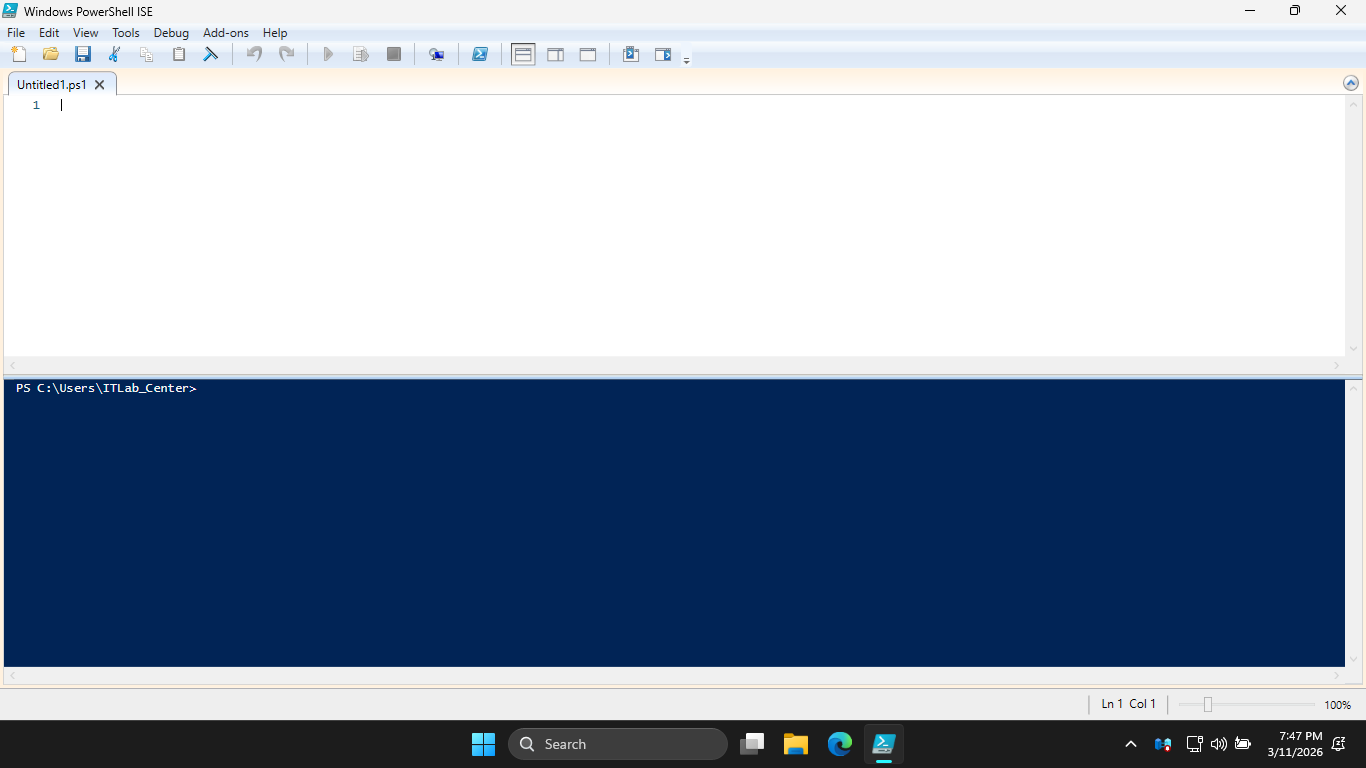
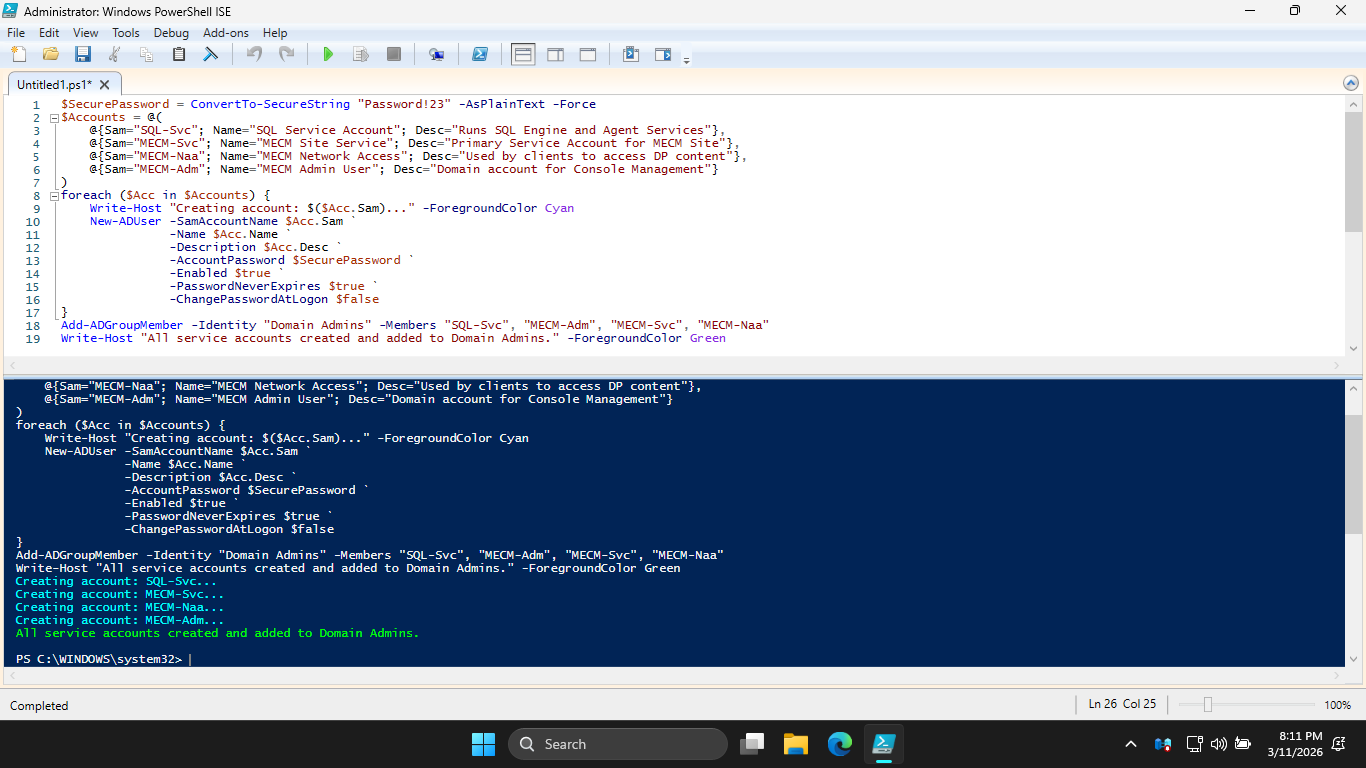
We can use a script to fully automate the creation of our service accounts, type this out then press run
$SecurePassword = ConvertTo-SecureString "Password!23" -AsPlainText -Force
$Accounts = @(
@{Sam="SQL-Svc"; Name="SQL Service Account"; Desc="Runs SQL Engine and Agent Services"},
@{Sam="MECM-Svc"; Name="MECM Site Service"; Desc="Primary Service Account for MECM Site"},
@{Sam="MECM-Naa"; Name="MECM Network Access"; Desc="Used by clients to access DP content"},
@{Sam="MECM-Adm"; Name="MECM Admin User"; Desc="Domain account for Console Management"}
)
foreach ($Acc in $Accounts) {
Write-Host "Creating account: $($Acc.Sam)..." -ForegroundColor Cyan
New-ADUser -SamAccountName $Acc.Sam `
-Name $Acc.Name `
-Description $Acc.Desc `
-AccountPassword $SecurePassword `
-Enabled $true `
-PasswordNeverExpires $true `
-ChangePasswordAtLogon $false
}
Add-ADGroupMember -Identity "Domain Admins" -Members "SQL-Svc", "MECM-Adm", "MECM-Svc", "MECM-Naa"
Write-Host "All service accounts created and added to Domain Admins." -ForegroundColor Green
Resulting Output:
For an enterprise environment, the Principle of Least Privilege would apply, but Domain Admins is ok here
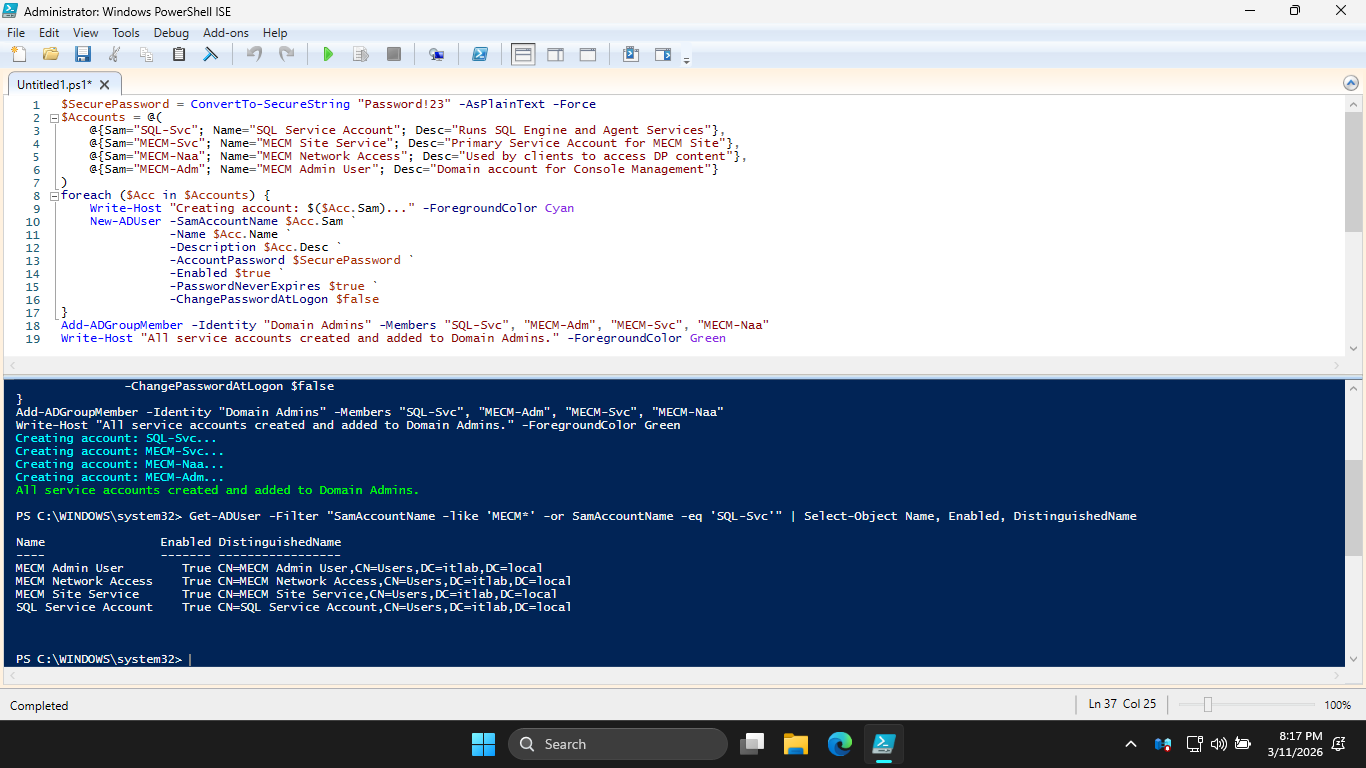
Run the following command from the lower PowerShell Terminal to list our accounts and ensure they are on
PS C:\WINDOWS\system32> Get-ADUser -Filter "SamAccountName -like 'MECM*' -or SamAccountName -eq 'SQL-Svc'" | Select-Object Name, Enabled, DistinguishedName
Resulting Output:
Head back to the Server Manager > Add Roles and Features. Proceed to Features and add .NET Framework 3.5
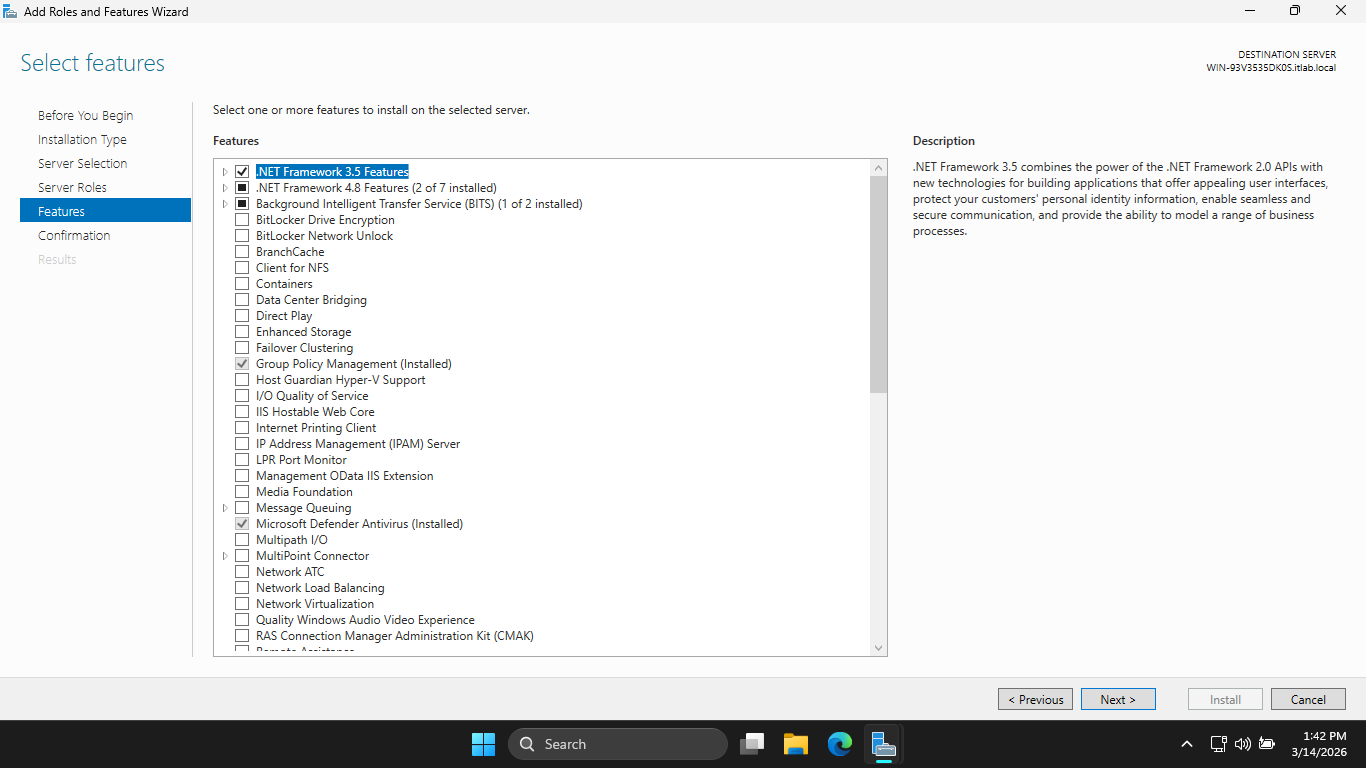
Now click Next > Install. This feature is a requirement for the MECM installation later. Now click close
Our Domain Controller and Service Accounts are now set up. Next step is to install Microsoft SQL Server
This server manages the database of software available to each workstation in the Active Directory Setup
Download the Executable: SQL Server 2025 64-bit
Most configurations fail here because the SQL server needs very specific flags set to work well with MECM
Run the installer executable, when prompted for administrator privilege hit yes, then hit custom install
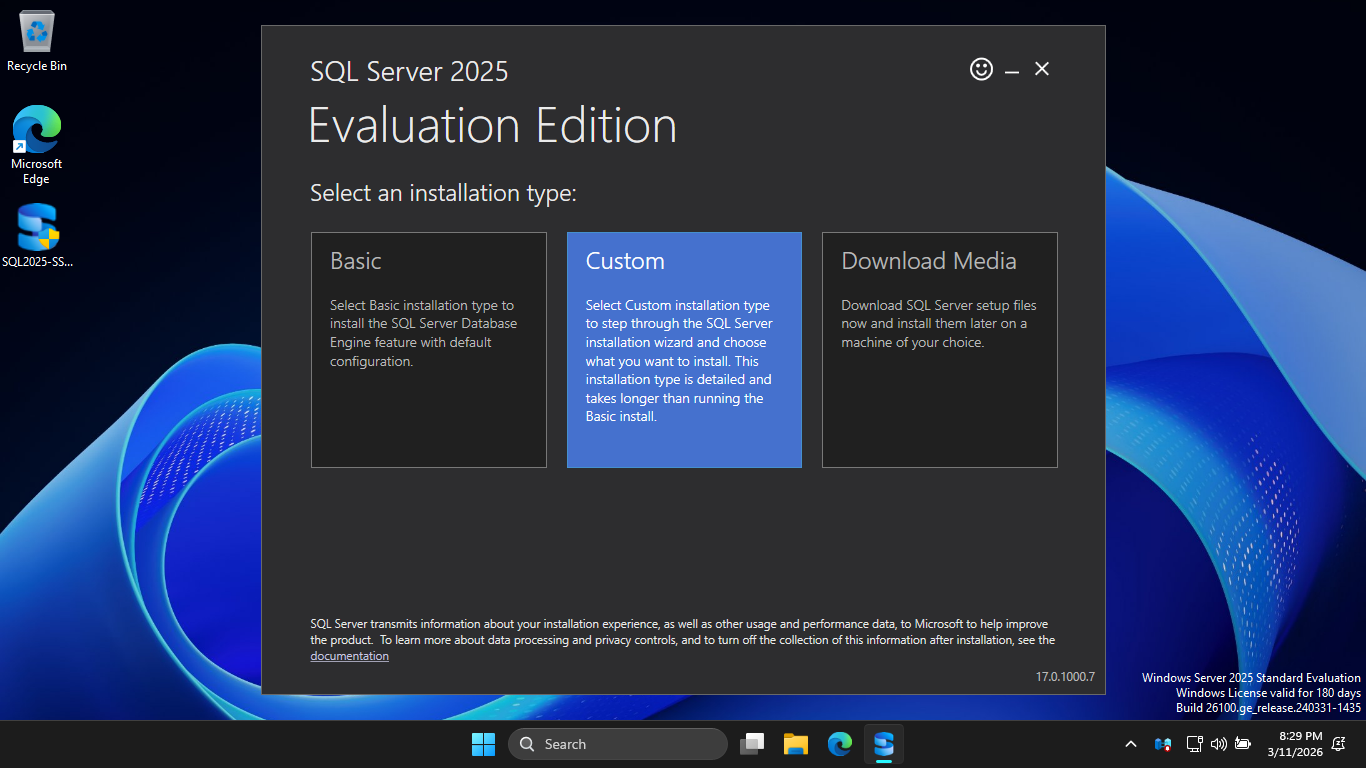
Click Install to download the installation medium onto the C drive under the default directory C:\SQL2025
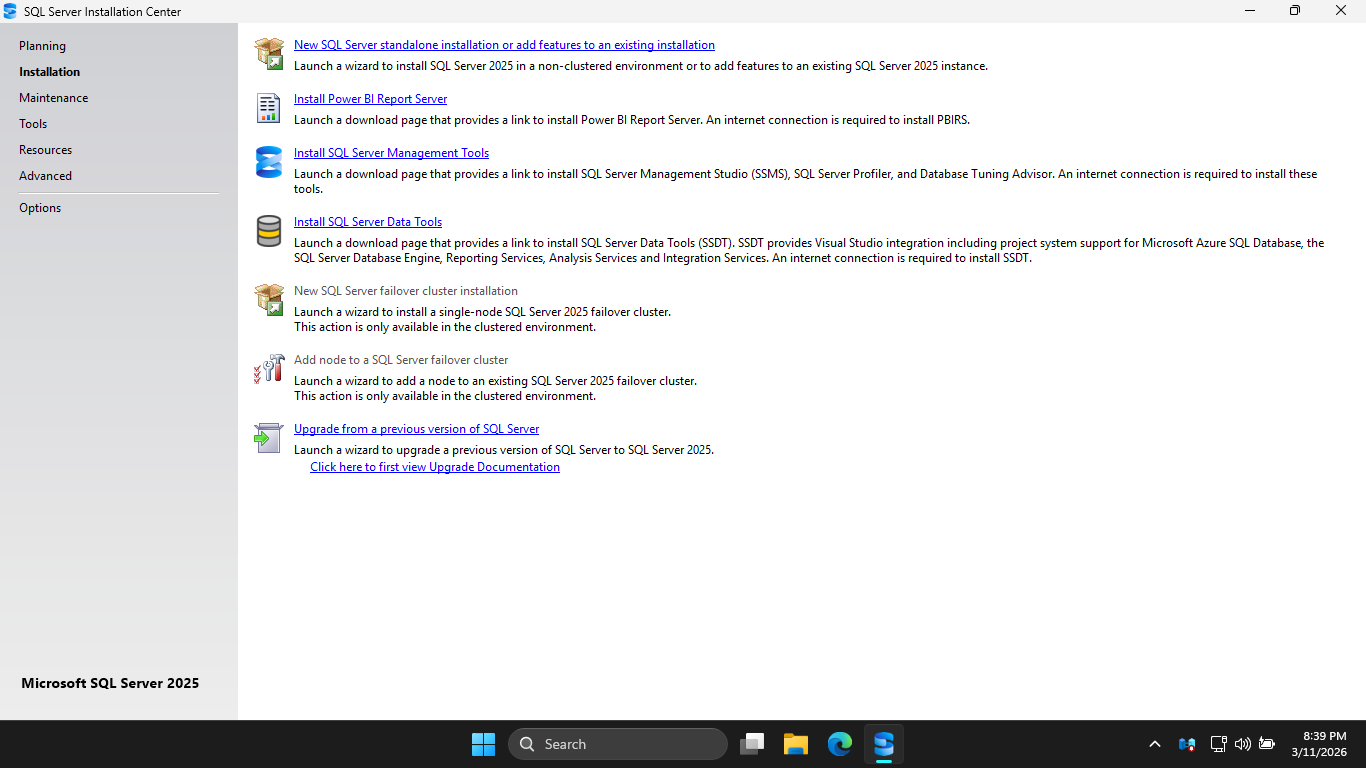
Now click Installation > New SQL Server standalone installation or add features to an existing installation
Navigate through the installer and select these options, a single missed check can ruin our MECM setup:
• Edition: Evaluation
• License Terms: Accept the Terms
• Global Rules: Ensure All Checks Pass
• Microsoft Update: Leave Unchecked
• Install Rules: Ensure there are no Failures, Warnings are fine
• Azure Extension for SQL Server: Leave Unchecked
• Feature Selection: Database Engine Services + Full-Text and Semantic Extractions for Search
• Instance Configuration: Default Instance
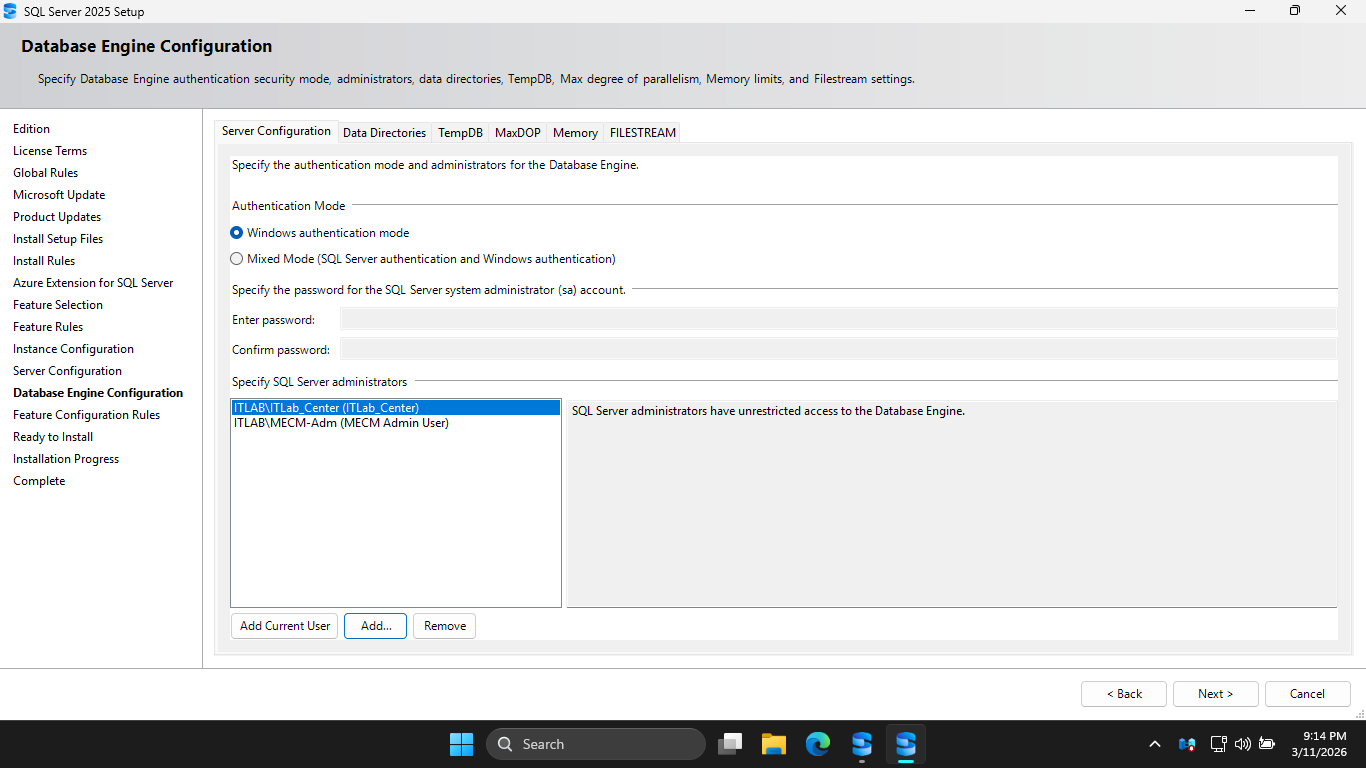
Under the Server Configuration section, we must select our SQL-Svc account for both the first two accounts
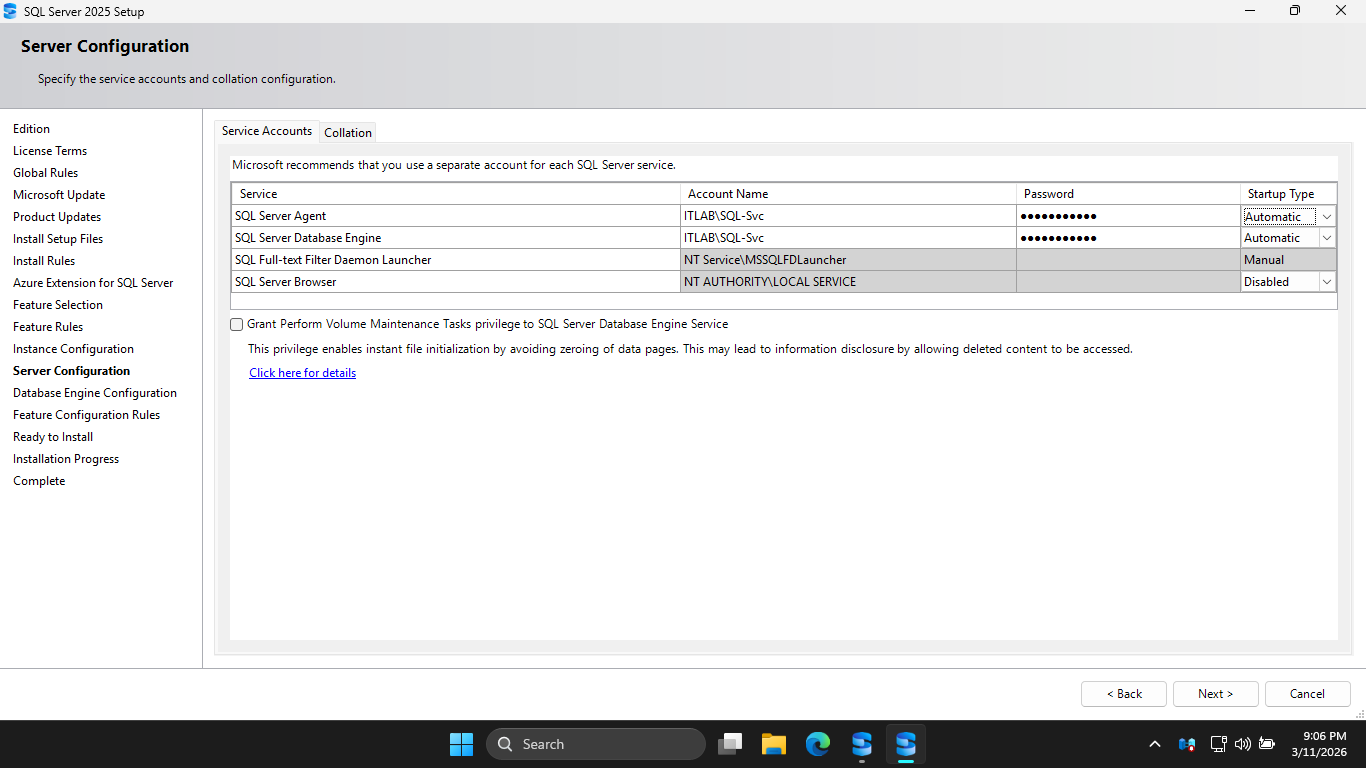
Change the Startup Type for the SQL Server Agent to Automatic and enter Password!23 in the password field
Under Database Engine Configuration, hit Add Current User, additionally add the ITLAB\MECM-Adm account
Head to the Memory tab and hit the Recommended radio button, then set the maximum memory to 2048 Megabytes
This is vital on a Domain Controller so SQL Server doesn't starve the Active Directory services of memory
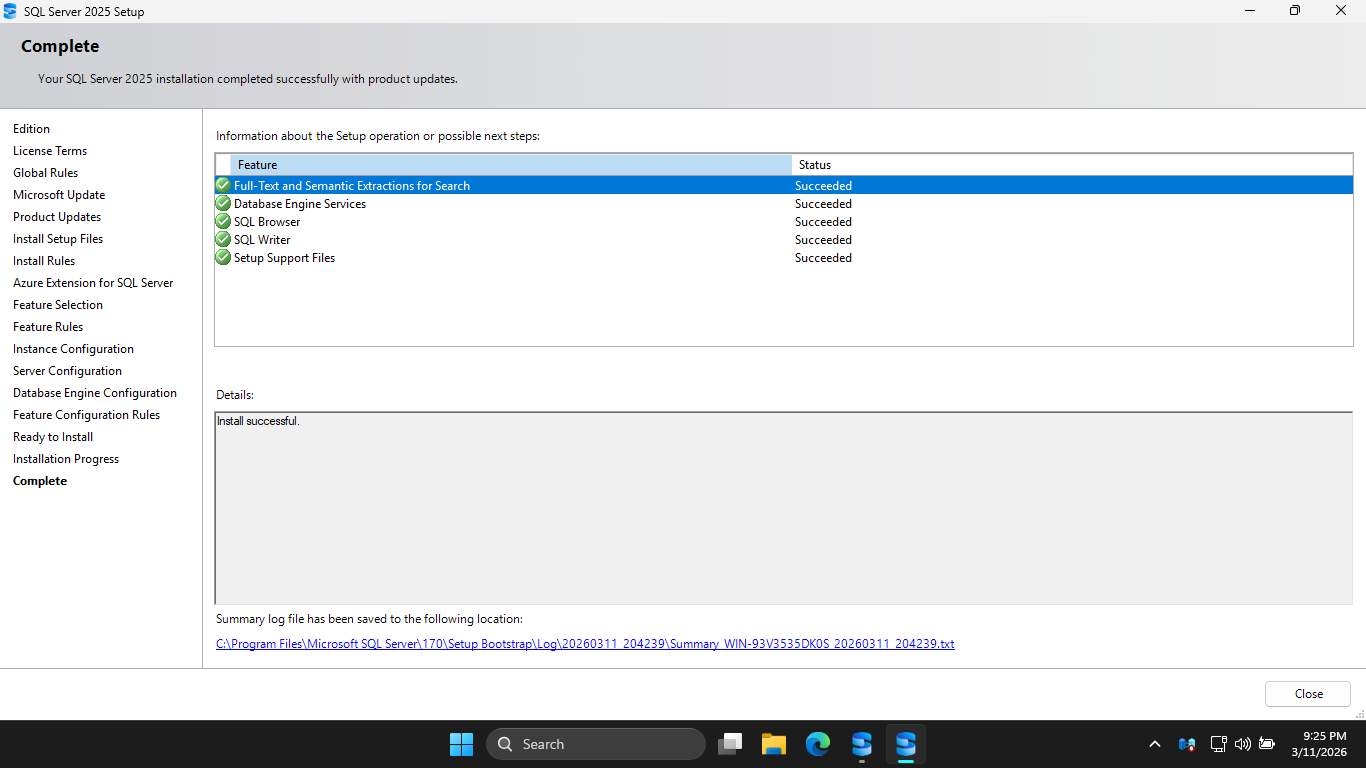
Click the checkbox to accept the recommended memory options for SQL Server, then hit Next > and Install
Now that we have the SQL Server set up, we need MECM prep. MECM is an orchestrator, it requires extra tools
Run the following command from an Administrator PowerShell Terminal to install the additional Windows tools
PS C:\Windows\system32> Install-WindowsFeature Web-Static-Content, Web-Default-Doc, Web-Dir-Browsing, Web-Http-Errors, Web-Http-Logging, Web-Stat-Compression, Web-Filtering, Web-IP-Security, Web-ISAPI-Ext, Web-ISAPI-Filter, Web-Metabase, Web-WMI, BITS, RDC
Download the following executables on your domain controller windows server to prepare our MECM install
Windows ADK: adksetup.exe
WinPE Add-On: adkwinpesetup.exe
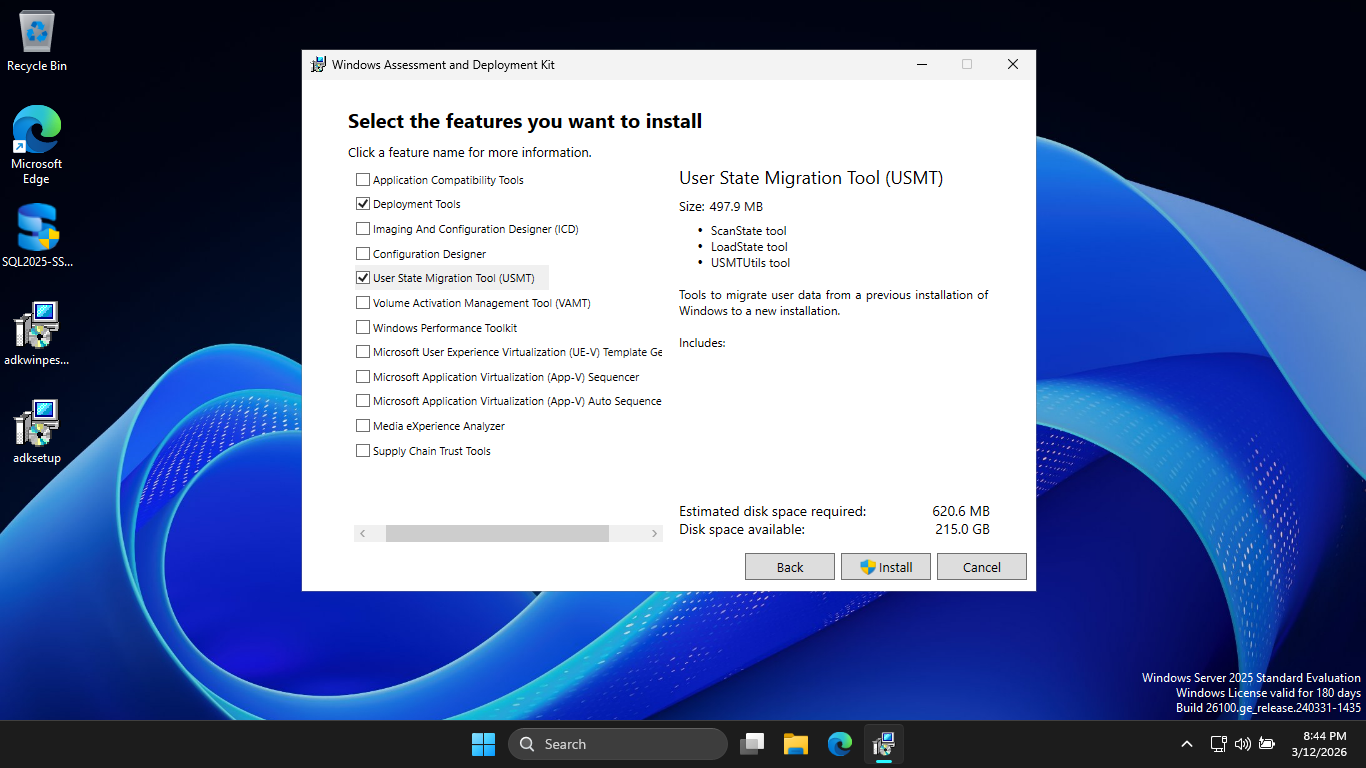
The Windows Assessment and Deployment Kit (ADK) is the mechanical arms, while MECM decides what goes where
Run the adksetup.exe, then hit Next > Next > Accept. Then select only Deployment Tools and USMT options:
Click Install, then hit yes when prompted for admin privileges. Once this completes, run adkwinpesetup.exe
Click Next > Next > Accept > and finally Install. Now it is finally time to download the MECM executable
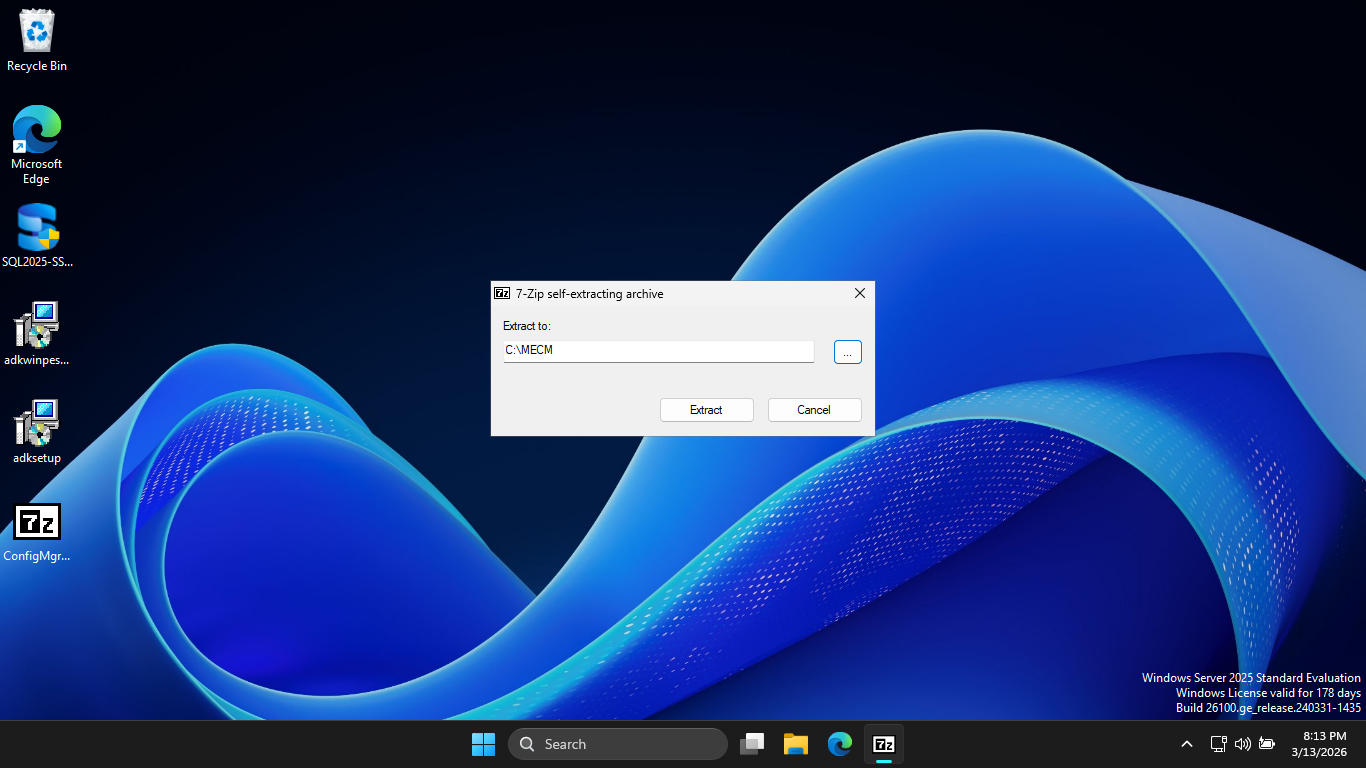
MECM Download: ConfigMgr_2509.exe
Run mkdir C:/MECM from an Administrator PowerShell. Then run the ConfigMgr_2509.exe and extract to C:\MECM
Extending the Active Directory Schema is a one-time operation that prepares your domain to understand MECM
Without this, you MECM site cannot publish its location to AD, and your clients won't find its location
Run the following commands from an Administrator PowerShell to add your user account to the Schema Admins
PS C:\Windows\system32> Add-ADGroupMember -Identity "Schema Admins" -Members "ITLab_Center"
PS C:\Windows\system32> shutdown /r
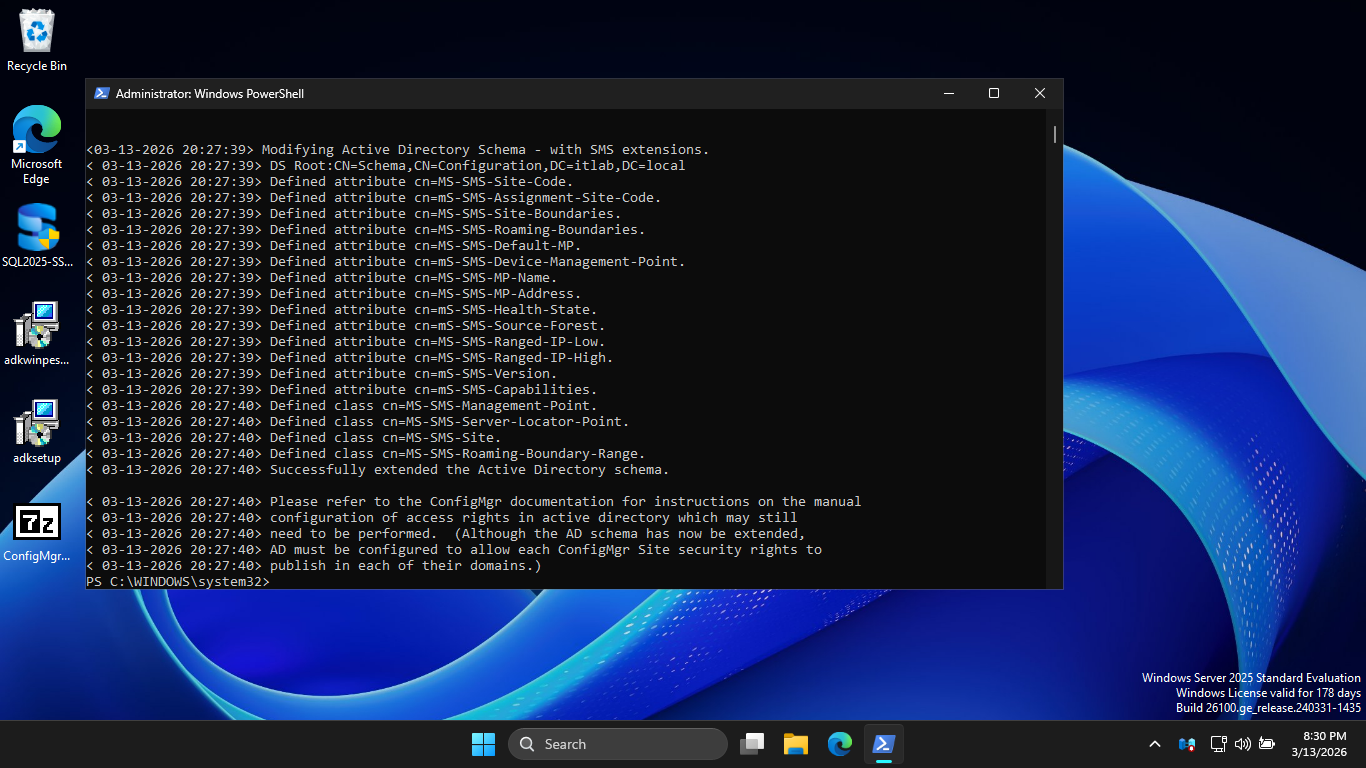
Using the File Explorer, navigate to C:\MECM\SMSSETUP\BIN\X64 and run the extadsch.exe executable program
Run the following command from an Administrator PowerShell to verify Extension of Active Directory Schema
PS C:\Windows\system32> cat C:\ExtADSch.log
Resulting Output:
Run the following command from an Administrator PowerShell for Active Directory Services Interfaces Editor
PS C:\Windows\system32> adsiedit.msc
Resulting Output:
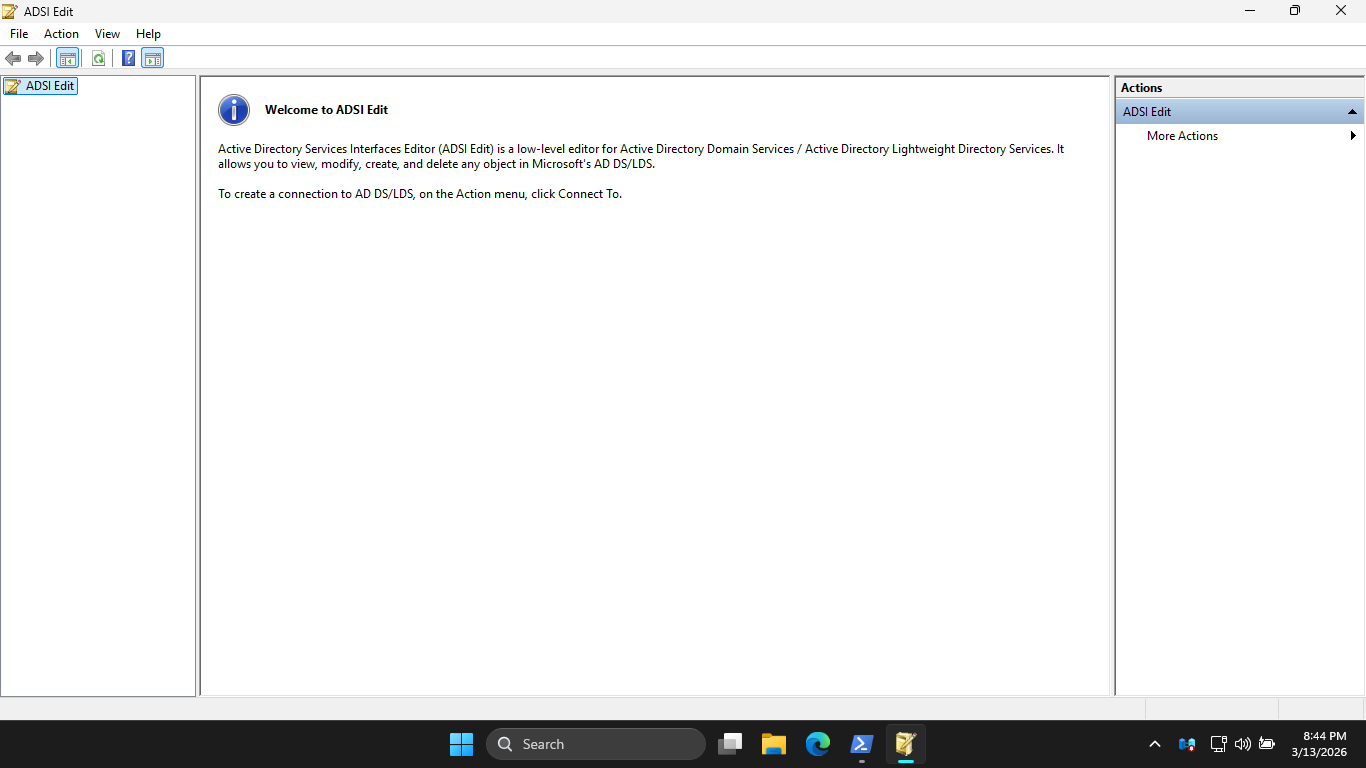
Click More Actions > Connect to... > OK. Then expand Default naming context and click on Domain Controller

Right-click CN=System > New > Object > Container > Next and type the name System Management > Next > Finish
Run the following command from an Administrator PowerShell to open the Active Directory Users and Computers
PS C:\Windows\system32> dsa.msc
Resulting Output:
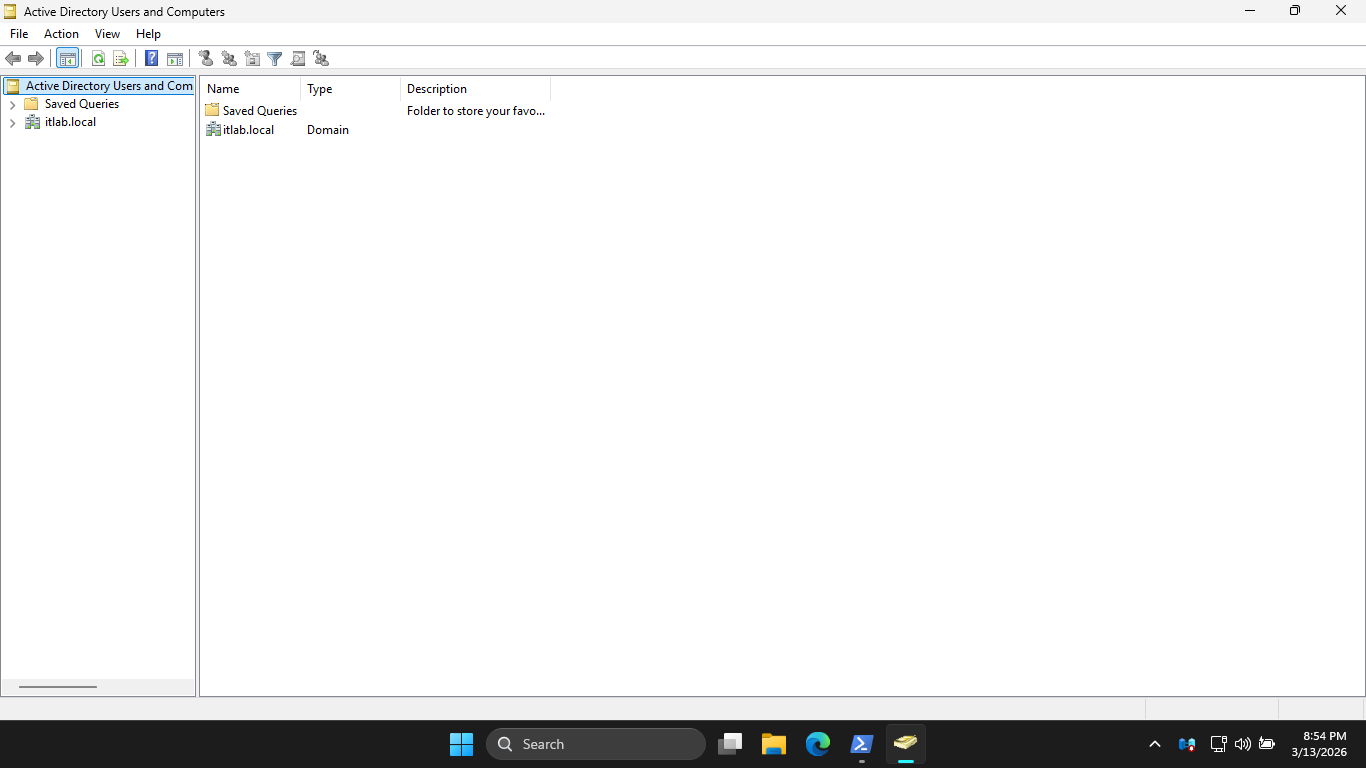
Hit View > Advanced Features. Then expand itlab.local > System, right-click System Management > Properties
Now click Add > Object Types and check Computers. Then hit OK and type out the name of your server below:
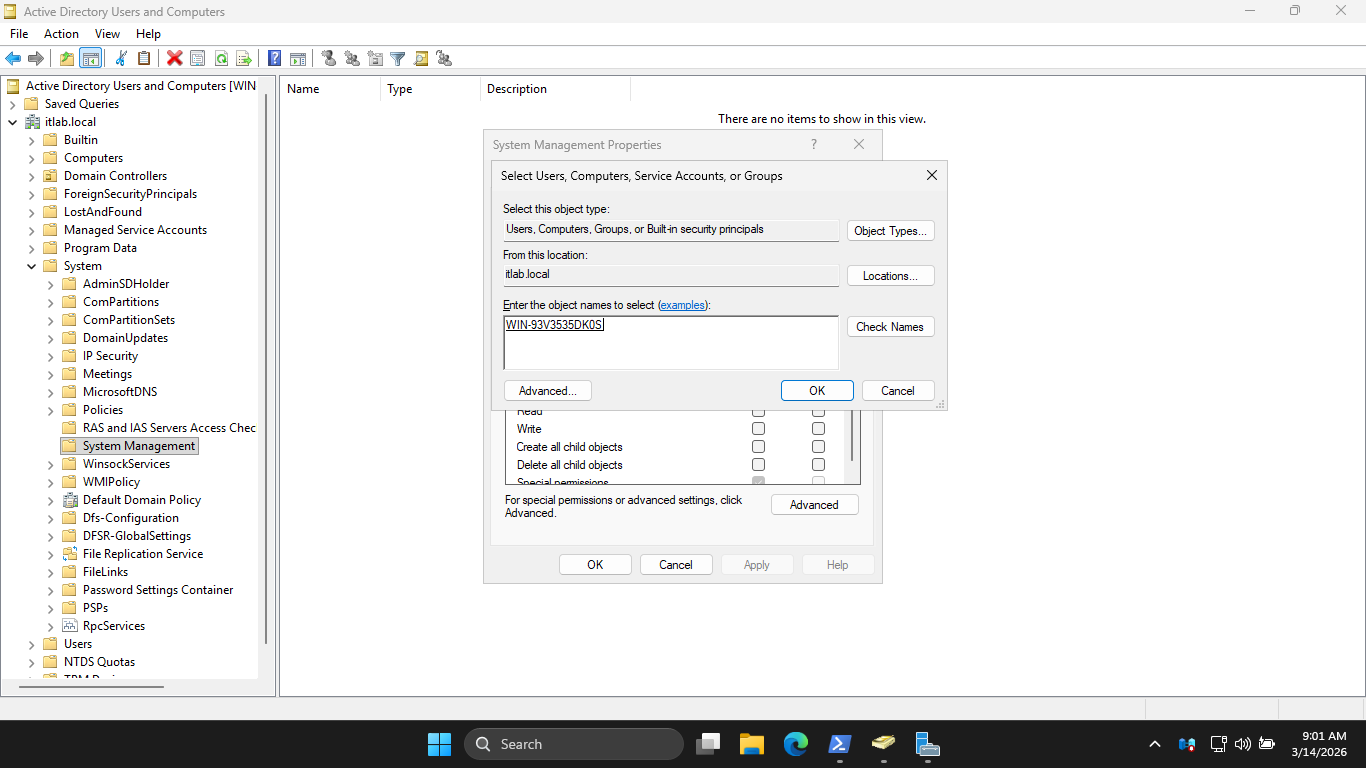
Now Click OK > Advanced > Your Server Name > Edit, and check the Full Control Box. Lastly in the Applies
to dropdown menu, change the selection from This object only to This object and all descendant objects:
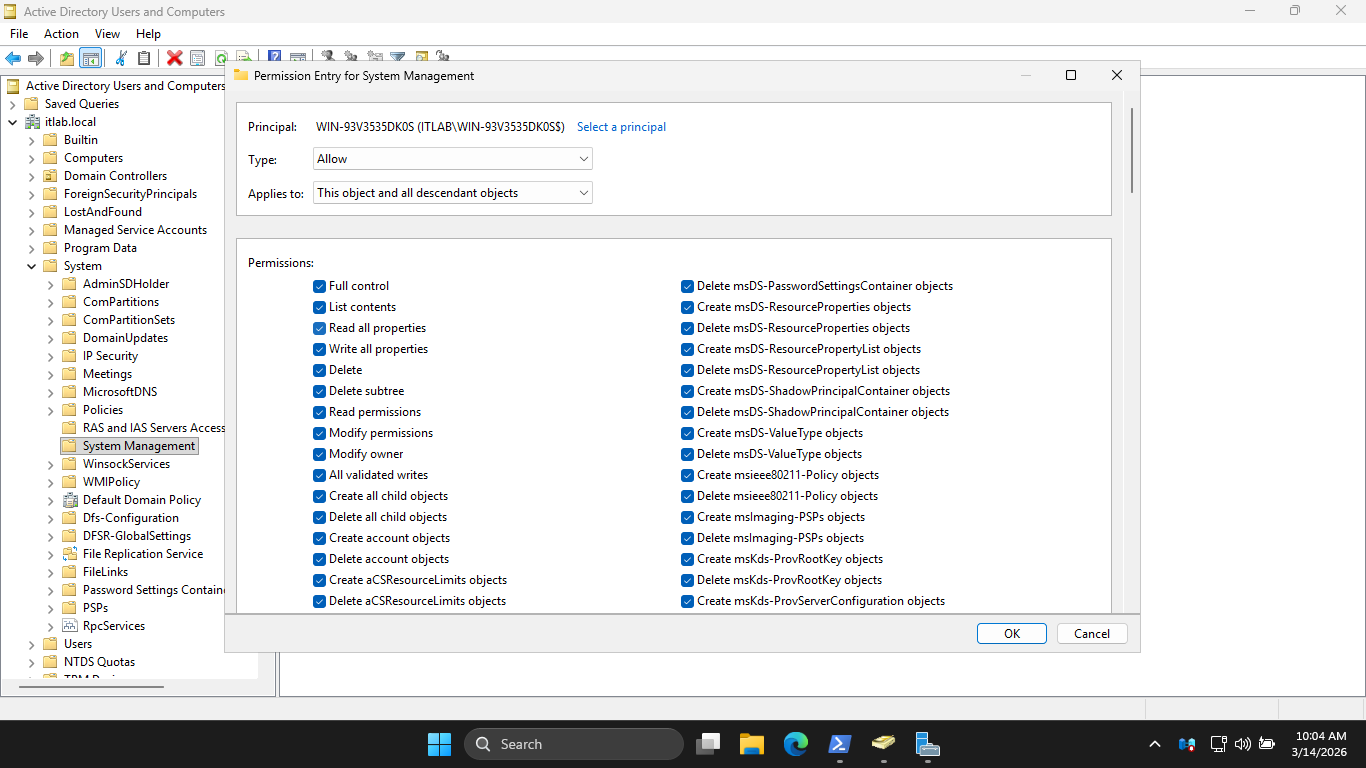
Click OK > Apply > OK > OK. Now it's time to install MECM, run the C:\MECM\splash.hta installation program
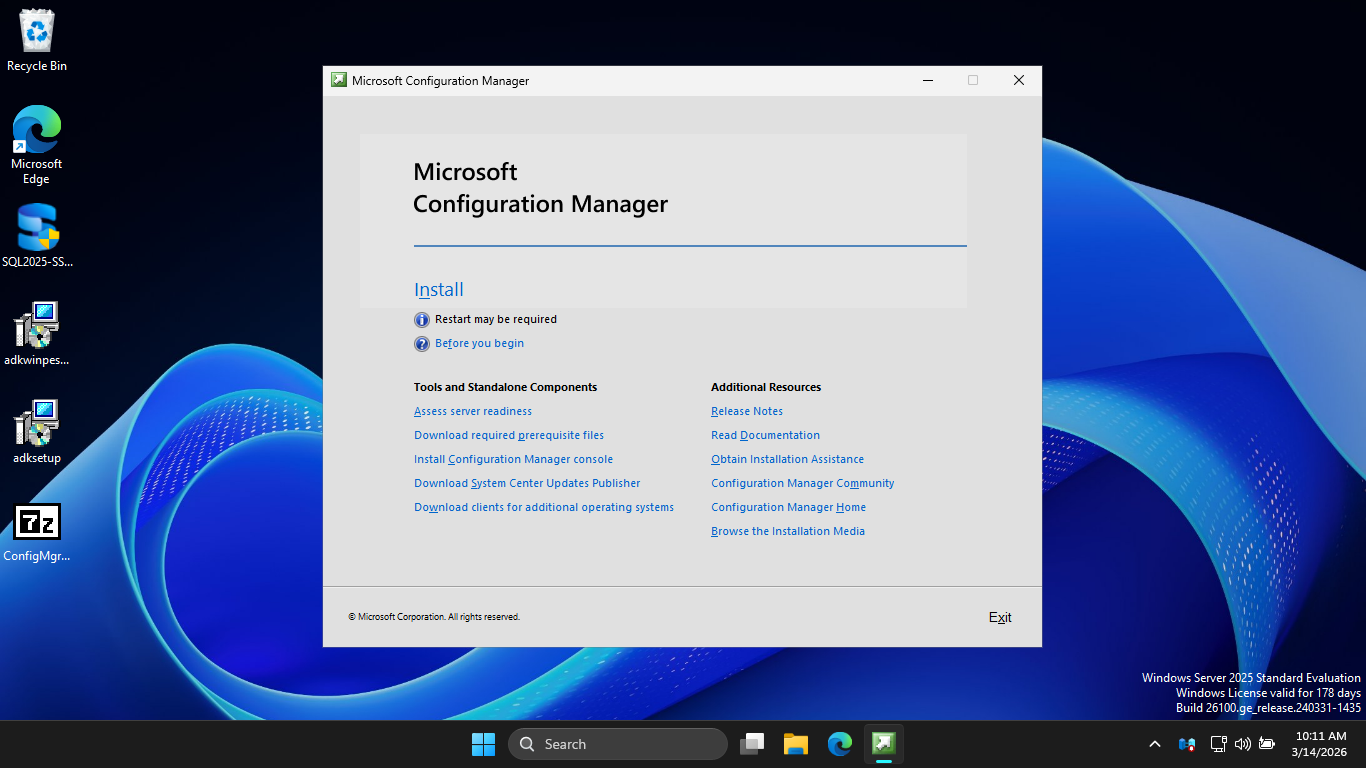
Now click Install > Next > Next > Install the evaluation edition of this product > Next > Accept Licenses
Hit Next, then enter C:\MECM for the Path. Hit Next, this will begin the download of all required files
Hit Next > Next. Then enter SO1 as the Site Code and enter Lab Primary Site as the Site Name like below
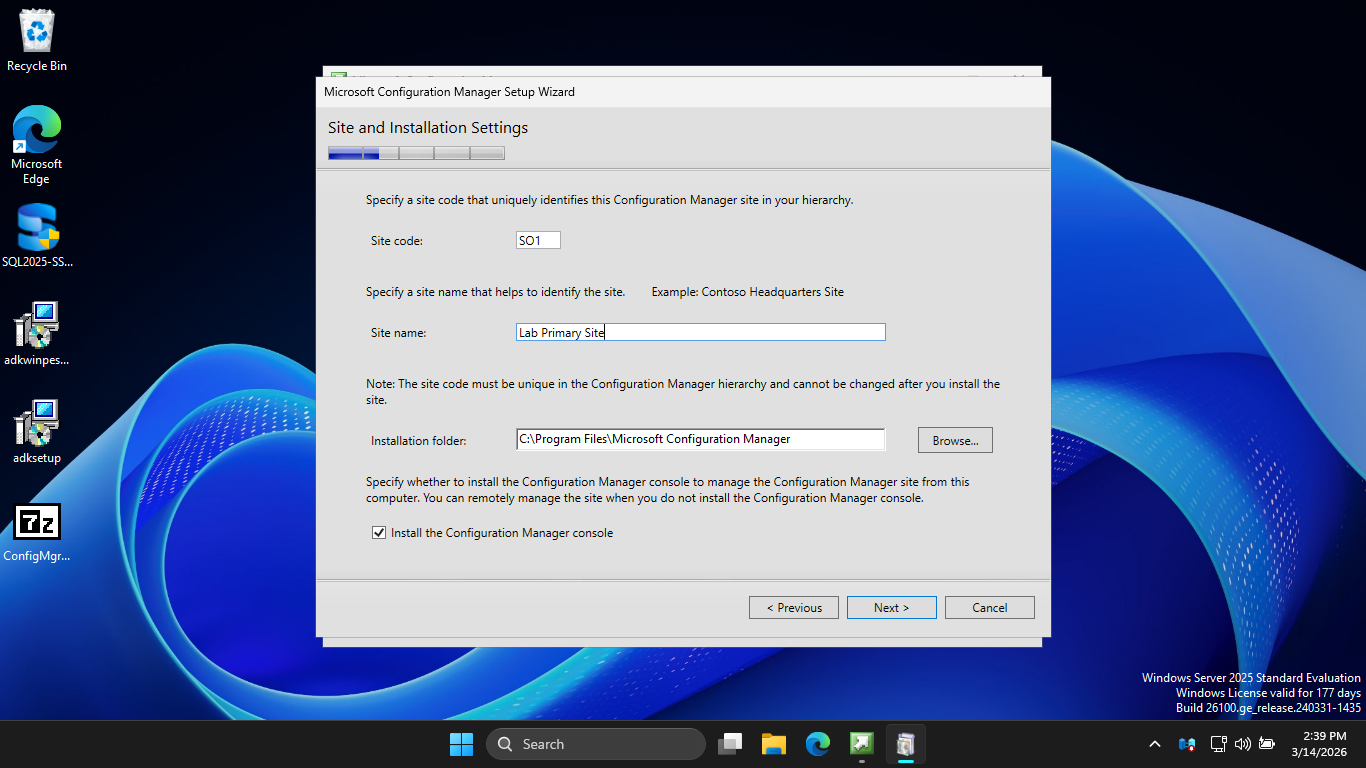
Hit Next, then select the option to Install the primary site as a stand-alone site. Now hit Next > Yes
Now hit Next > Next > Next, then check the option to Configure the communication method on each site system
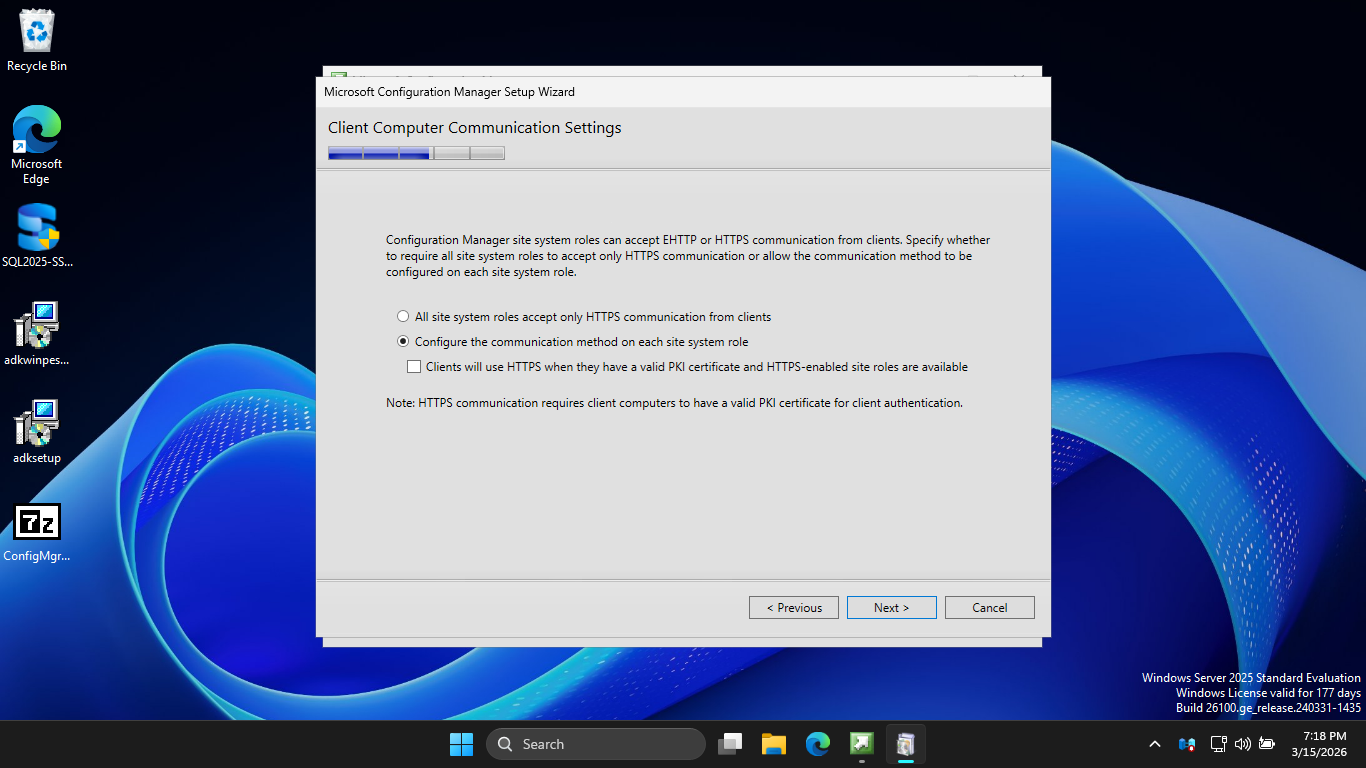
Hit Next > Next > Next > Next > Next > Begin Install. This may take several minutes to complete the install

With MECM finally installed, we can move on to initiating a secure script execution to our Workstation
From your MECM Server, search for Configuration Manager Console and select the tab run as Administrator
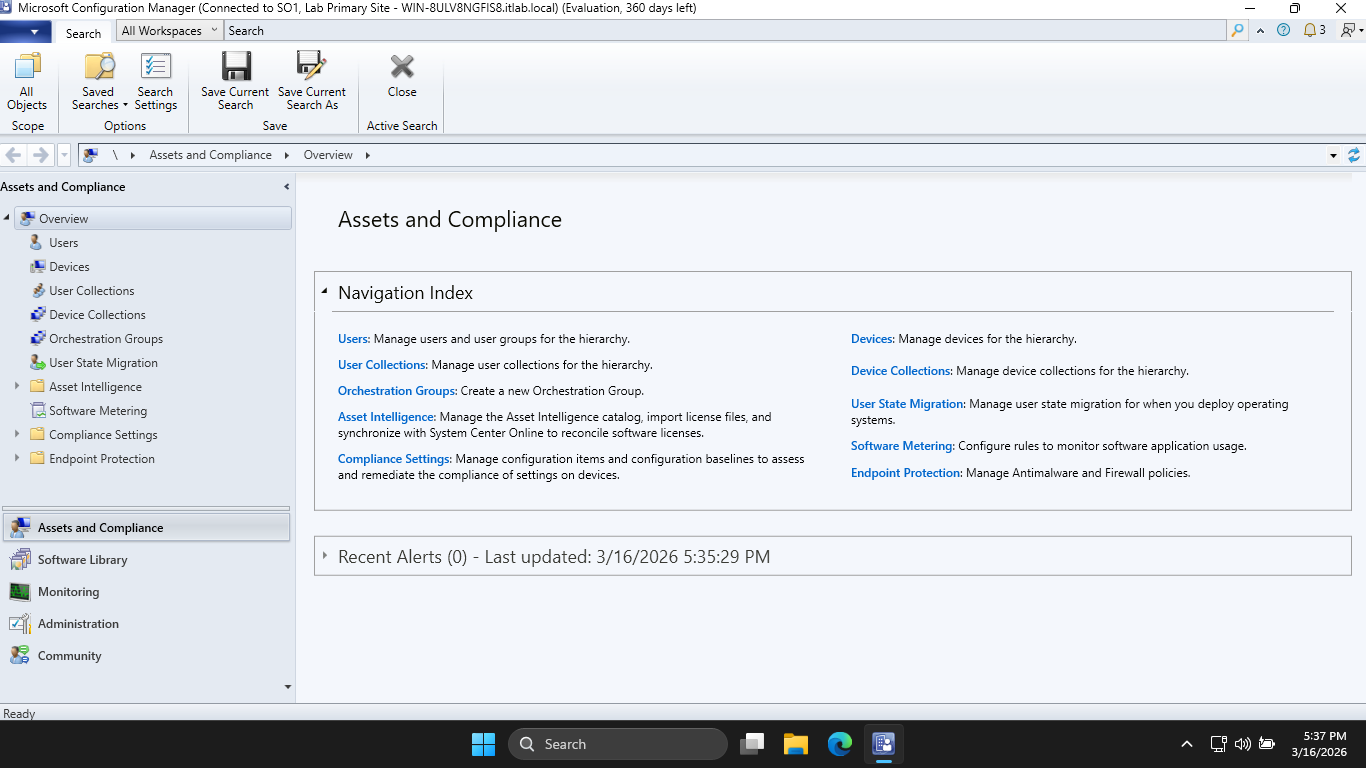
This panel is the MECM console, formerly known as SCCM. These two terms are used interchangeably these days
From here head to Administration > Hierarchy Configuration > Boundaries and hit Create Boundary at top-left
• Description: Lab Deployment
• Type: IP subnet
• Network: 192.168.0.0
• Subnet Mask: 255.255.255.0
Enter in the information above, then click Apply > Ok. Now head to Boundary Groups > Create Boundary Group
Enter 'Lab-Boundary-Group' in for the Name, then hit Add... > Lab Deployment > OK > then head to References
Check to box the Use this boundary group for site assignment, then click Add... > SO1 > OK > Apply > and OK
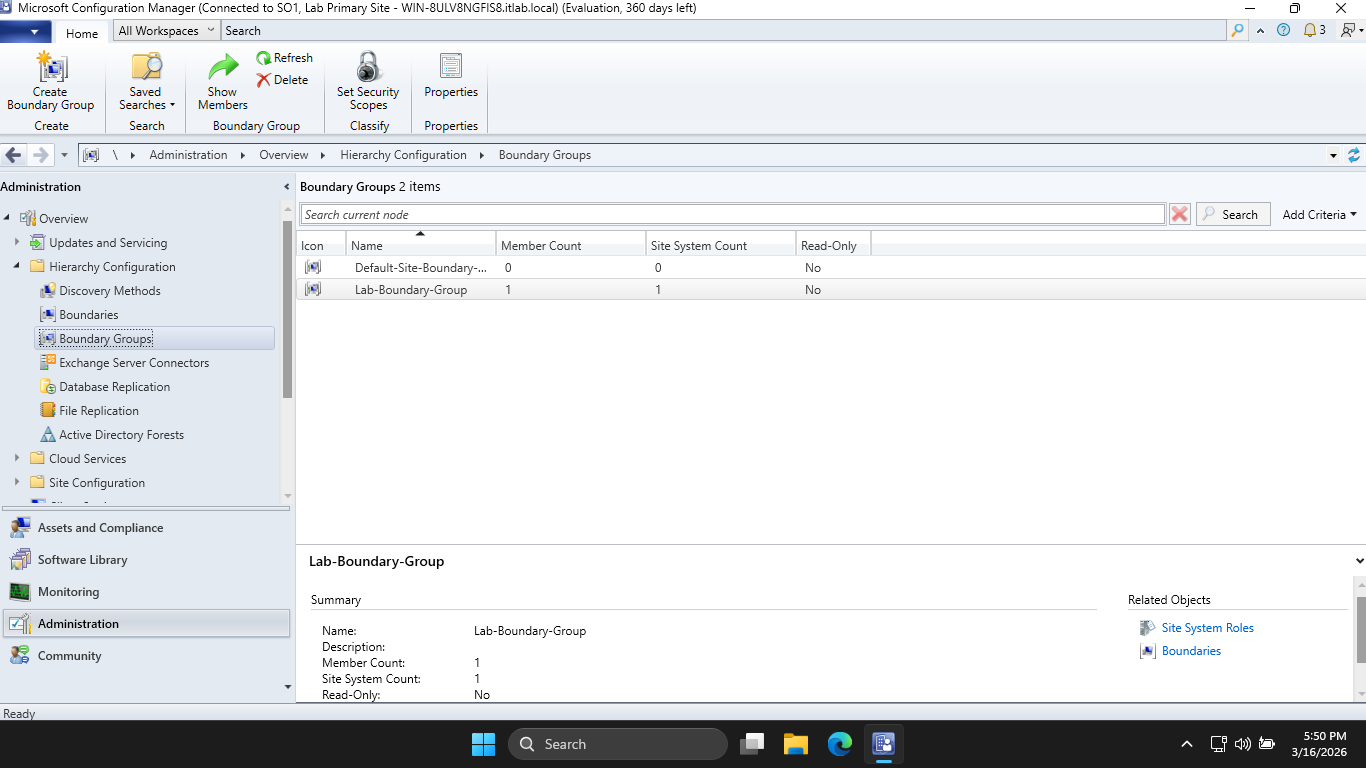
MECM will not manage a client unless it known the client is within a boundary, we have created this now
Expand Site Configuration and head to Sites, then right-click SO1 > and hover Client Installation Settings
Hit Client Push Installation > Accounts > Star Icon > New Account and enter in the following information:
• User Name: ITLAB\Administrator
• Password: Password!23 / Your Set Password
Now hit Apply > OK to set our push installation account. This account is needed for administrator rights
The server needs to install its agent (CcmExec.exe) onto the Windows 11 Endpoint to manage deployments
Head to Discovery Methods at the left and right-click Active Directory System Discover > and Properties
Check the box to Enable Active Directory System Discovery > Star Icon > Browse... > itlab.local > and OK
Now hit Apply > OK. Then head to Assets and Compliance > Devices and we can see that our endpoint is listed
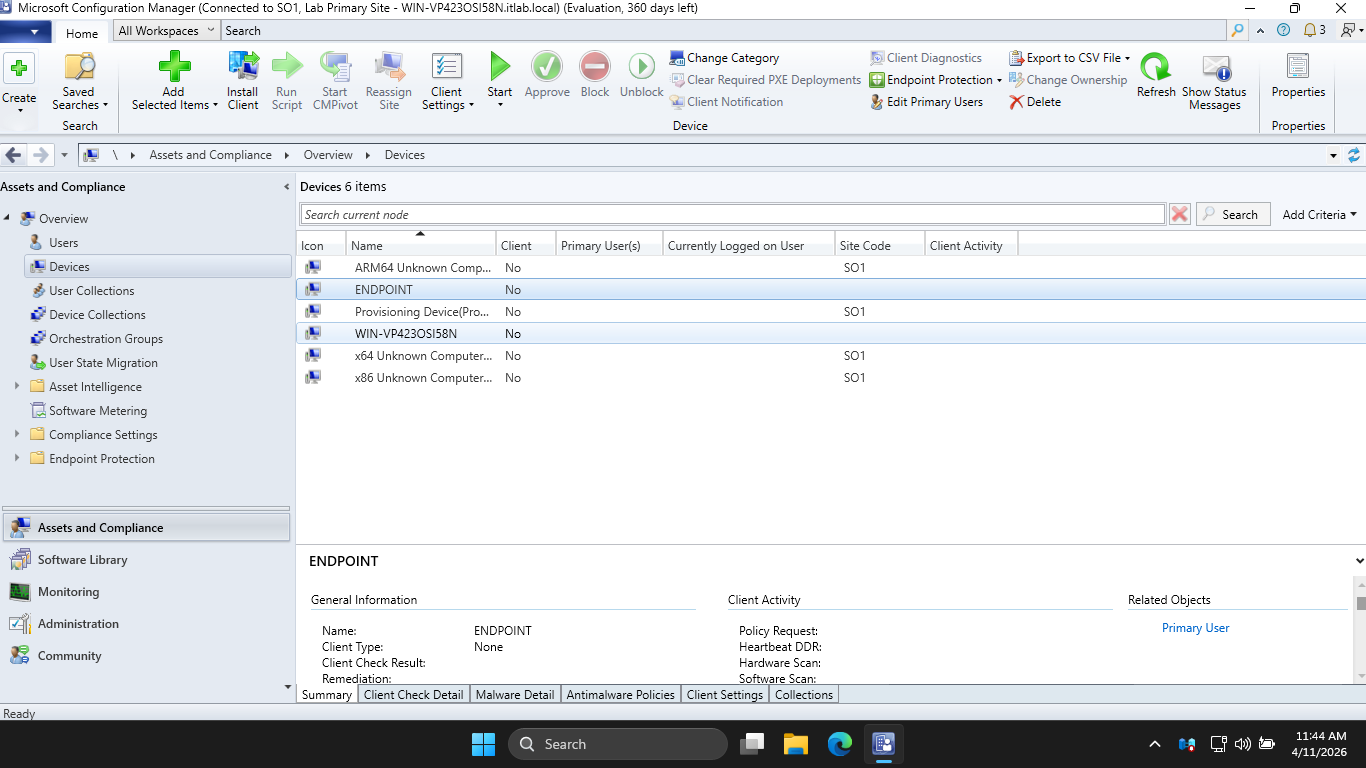
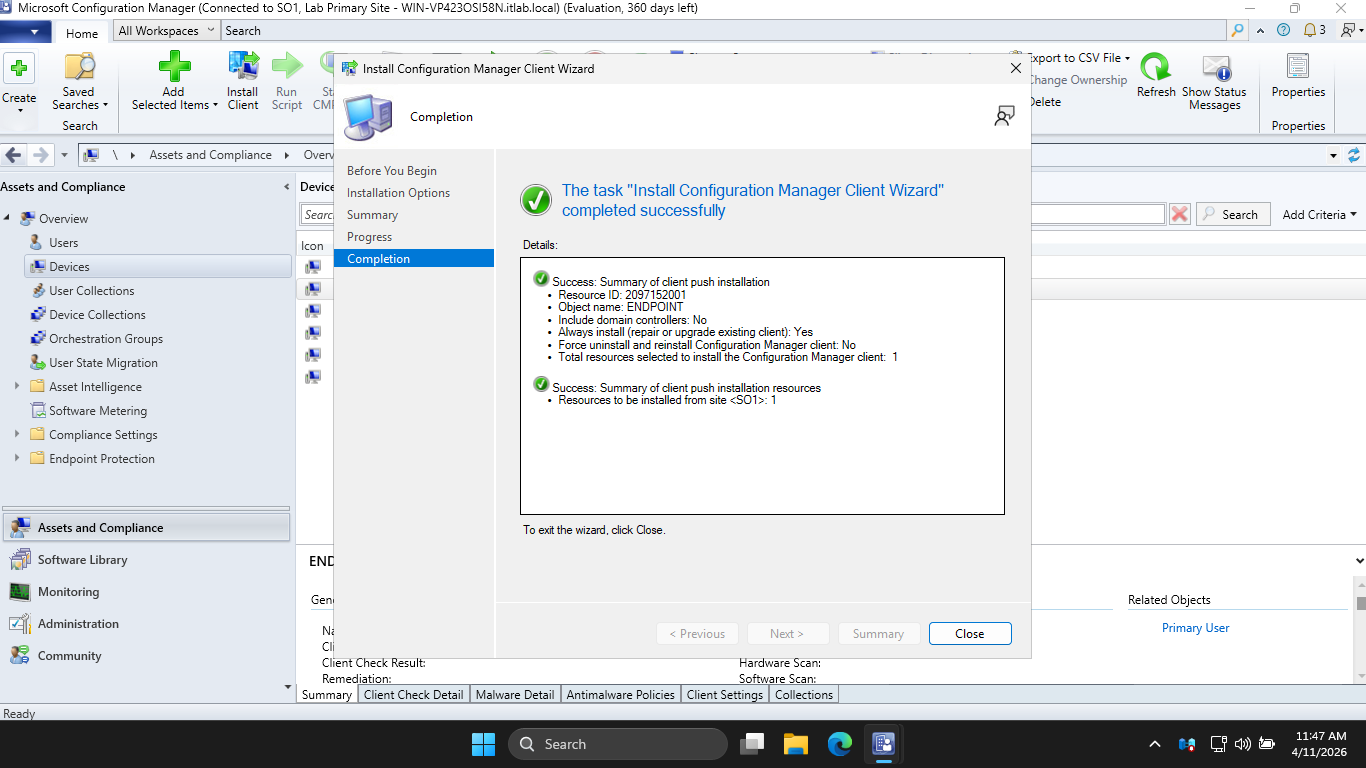
Right-click our Windows 11 endpoint and hit Install Client > Next > and check the two boxes listed below
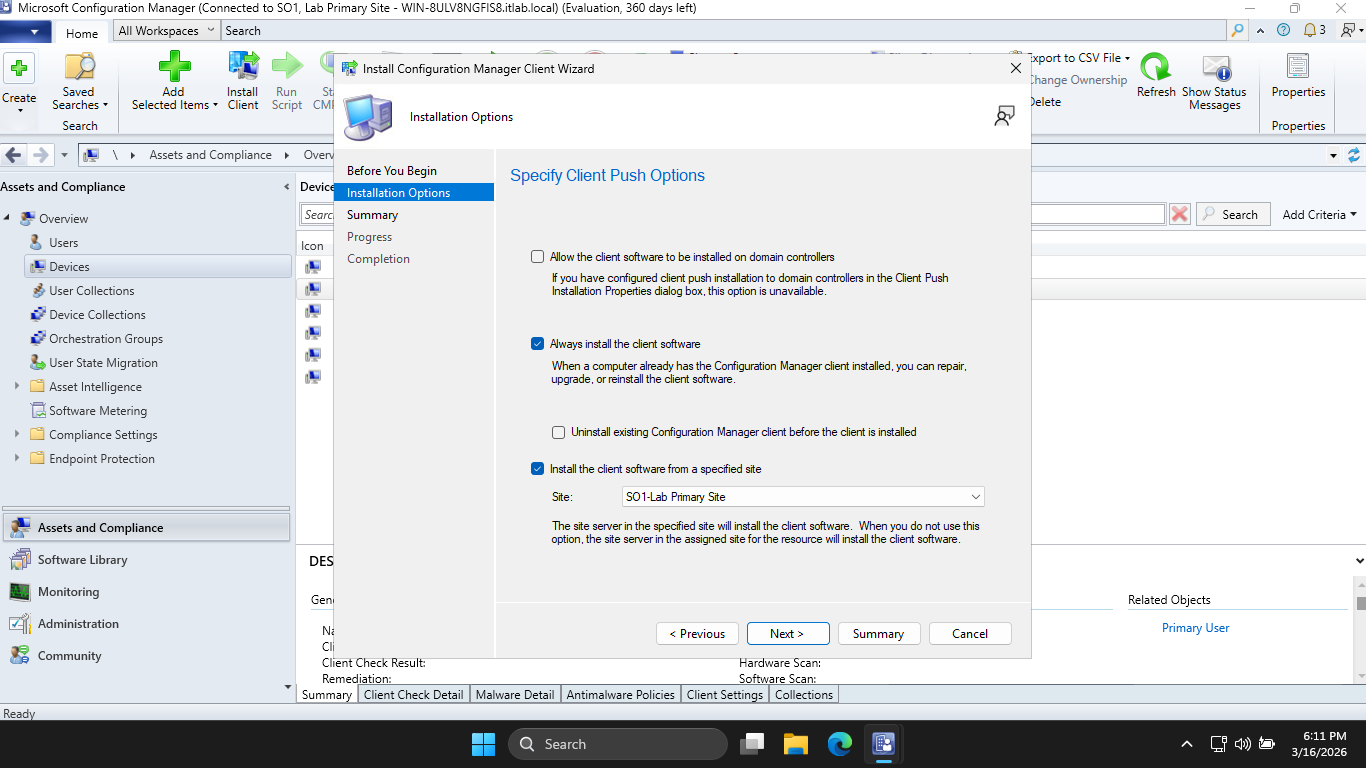
Now hit Next > Next, and you should see a screen indicating successful completion of the deployment task
Run the following commands from the Endpoints Administrator PowerShell to open the Task Manager program
PS C:\Windows\system32> taskmgr
We should first see ccmsetup.exe running, and after some time this will change to the CcmExec.exe program
From SCCM select our Endpoint then hit Approve at the top, now from the workstation run control smscfgrc

Now hit Actions > Machine Policy Retrieval and Evaluation Cycle > Run Now to configure the endpoint client
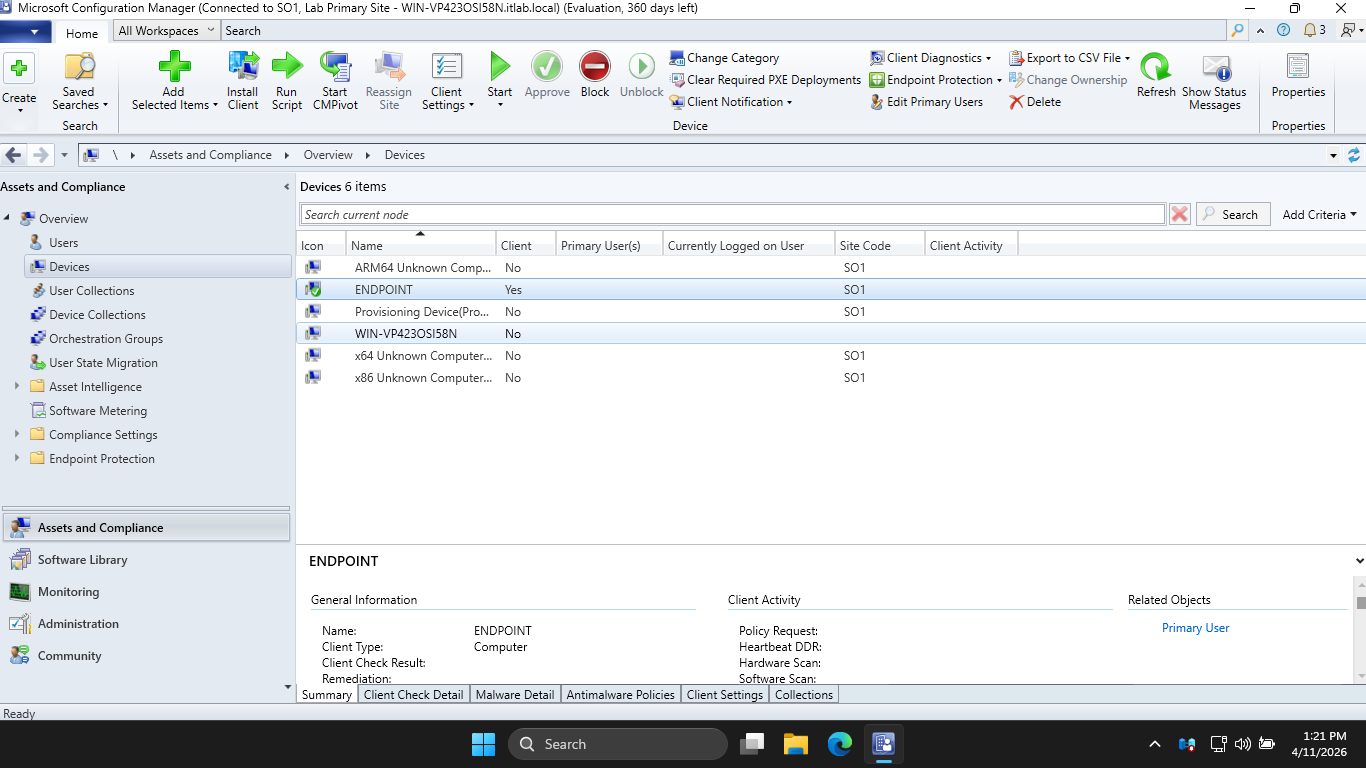
Now we are able to push applications and set up the remote scripts. The green check mark shows site setup
9. Create & Execute Remote Scripts
In SCCM, the Scripts feature is one of the most powerful tools for a technician. This allows the company
to provide a pre-approved list of scripts which can be run remotely without needing to open the door to
all remote execution activities. Unlike Configuration Items or packages, Scripts run in near real-time
using the BGB (Big Green Button) fast channel, meaning you get results in seconds rather than waiting for
a policy polling cycle. By default, SCCM prevents you from approving your own scripts for security reasons
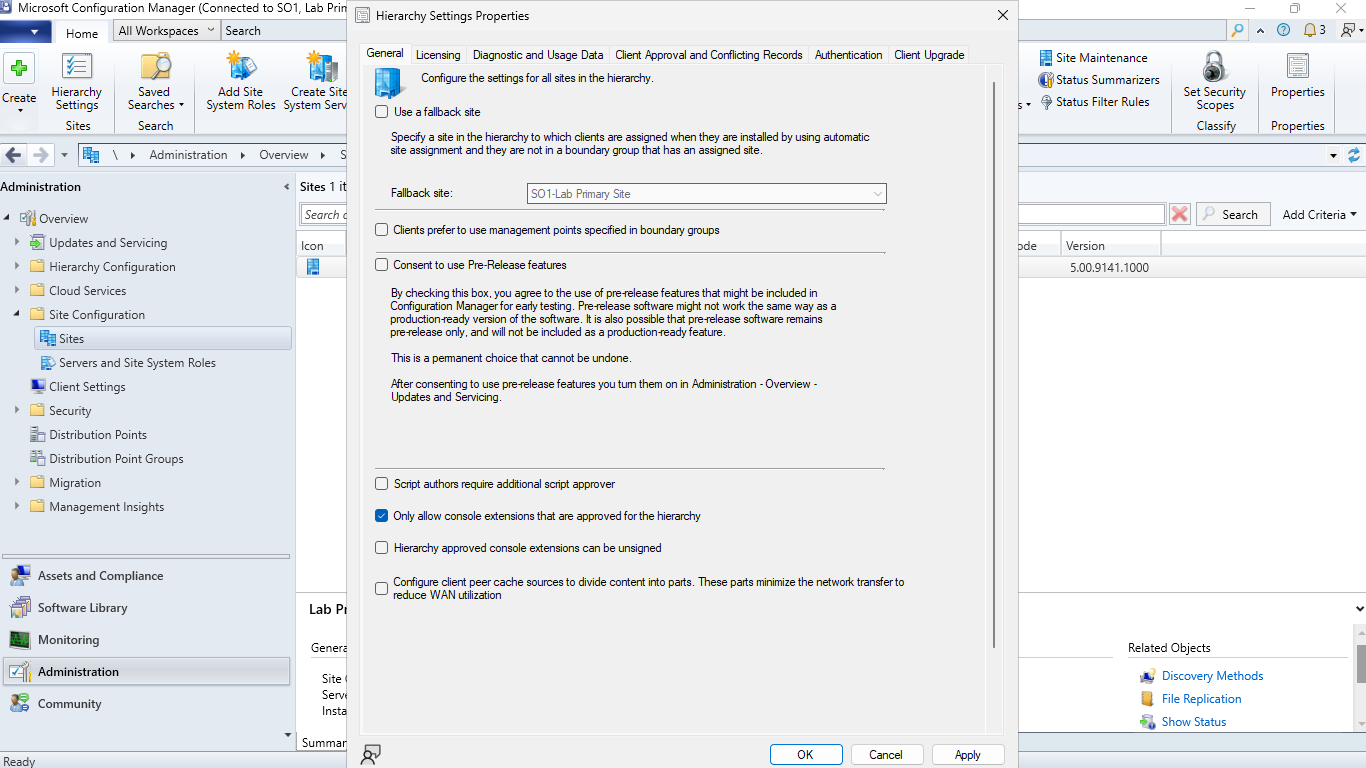
In a lab environment, we'll want to toggle this so we can test immediately. In the SCCM console, head to
Administration > Site Configuration > Sites and hit Hierarchy Settings at the top menu. Then under General
Uncheck the option for "Script Authors Require Additional Script Approver", then click on Apply and OK
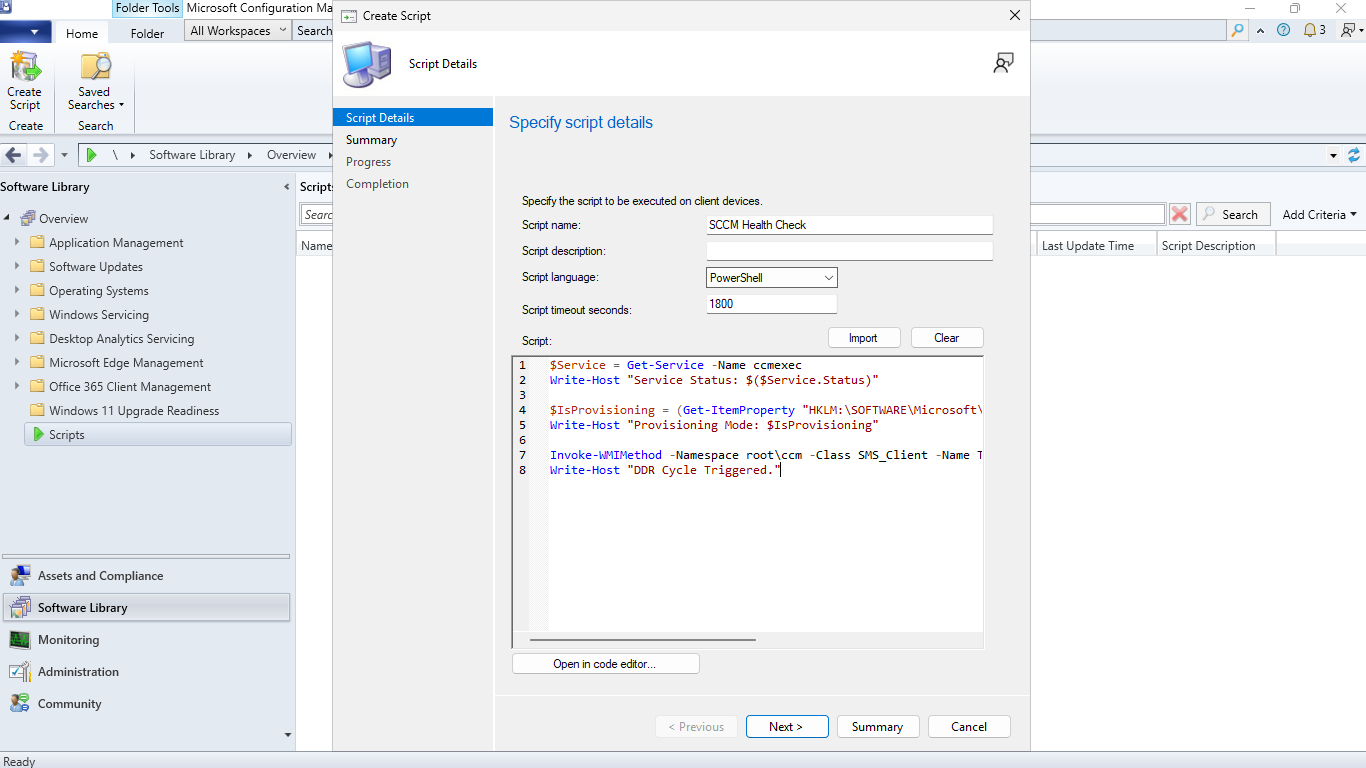
In the Software Library workspace, navigate to Scripts and click Create Script, here are some essentials
This script checks if the core SCCM agent services are running and forces a discovery cycle, client repair
# Check SMS Agent Host Service
$Service = Get-Service -Name ccmexec
Write-Host "Service Status: $($Service.Status)"
# Check if the client is currently in a maintenance window
$IsProvisioning = (Get-ItemProperty "HKLM:\SOFTWARE\Microsoft\CCM\CcmExec").ProvisioningMode
Write-Host "Provisioning Mode: $IsProvisioning"
# Trigger a Discovery Data Cycle (DDR)
Invoke-WMIMethod -Namespace root\ccm -Class SMS_Client -Name TriggerSchedule "{00000000-0000-0000-0000-000000000003}"
Write-Host "DDR Cycle Triggered."
Type out the script above into the script box, enter the name and enter the Script Timeout as 1800 seconds
Now click Next > Next and you should see an SCCM task screen showing the script was created successfully
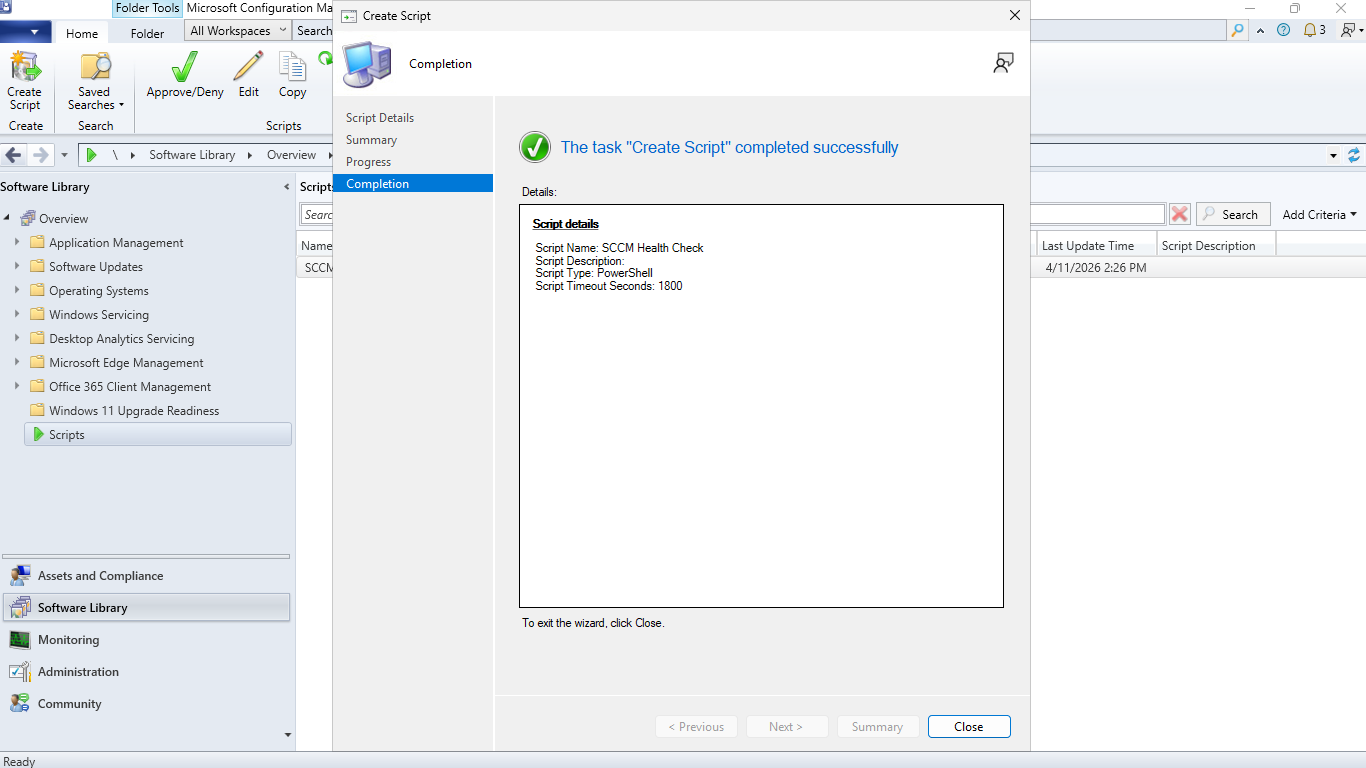
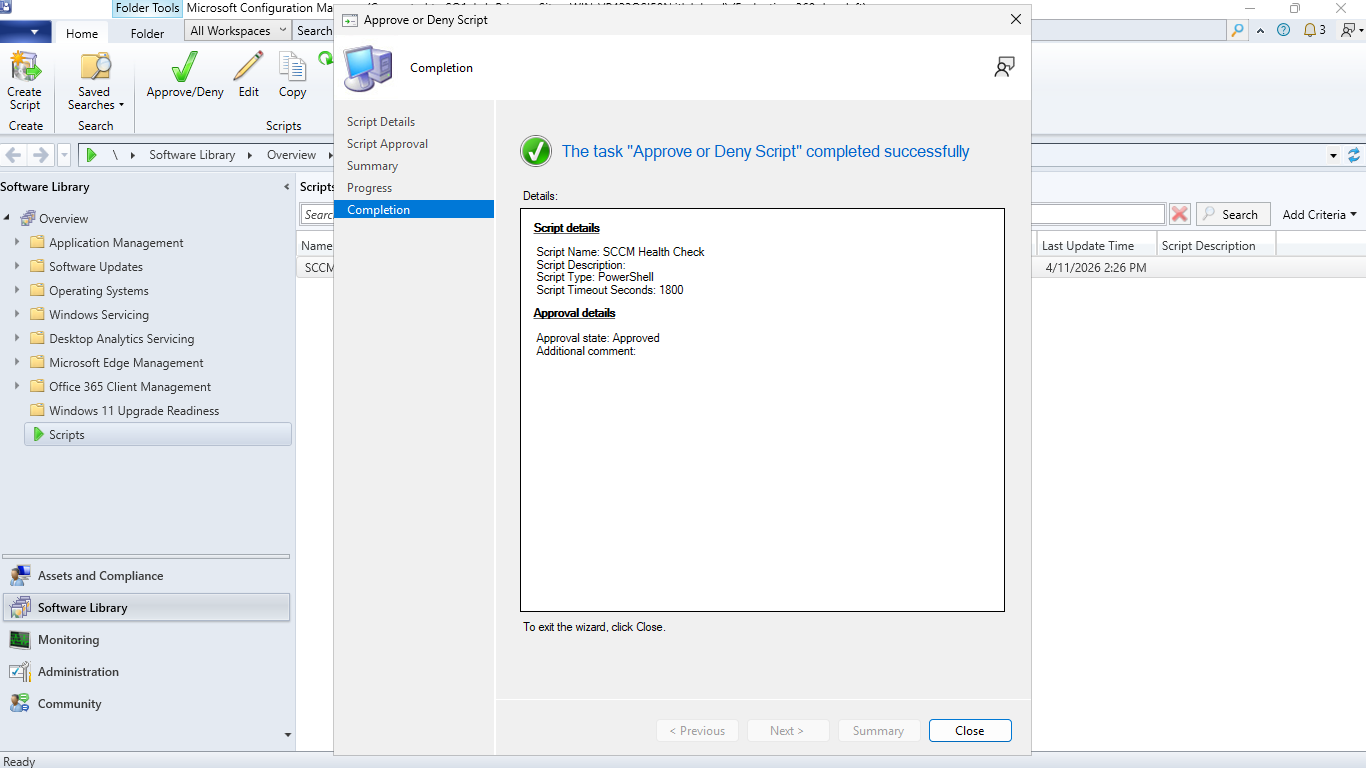
Now click close, right-click the script and hit Approve > Next > Next > Next, and you will see approval
Now hit Close > Assets and Compliance > Devices and right click ENDPOINT > Run Script > SCCM Health Check
Hit Next, and you can see we can choose to schedule the script, click next to run it immediately instead
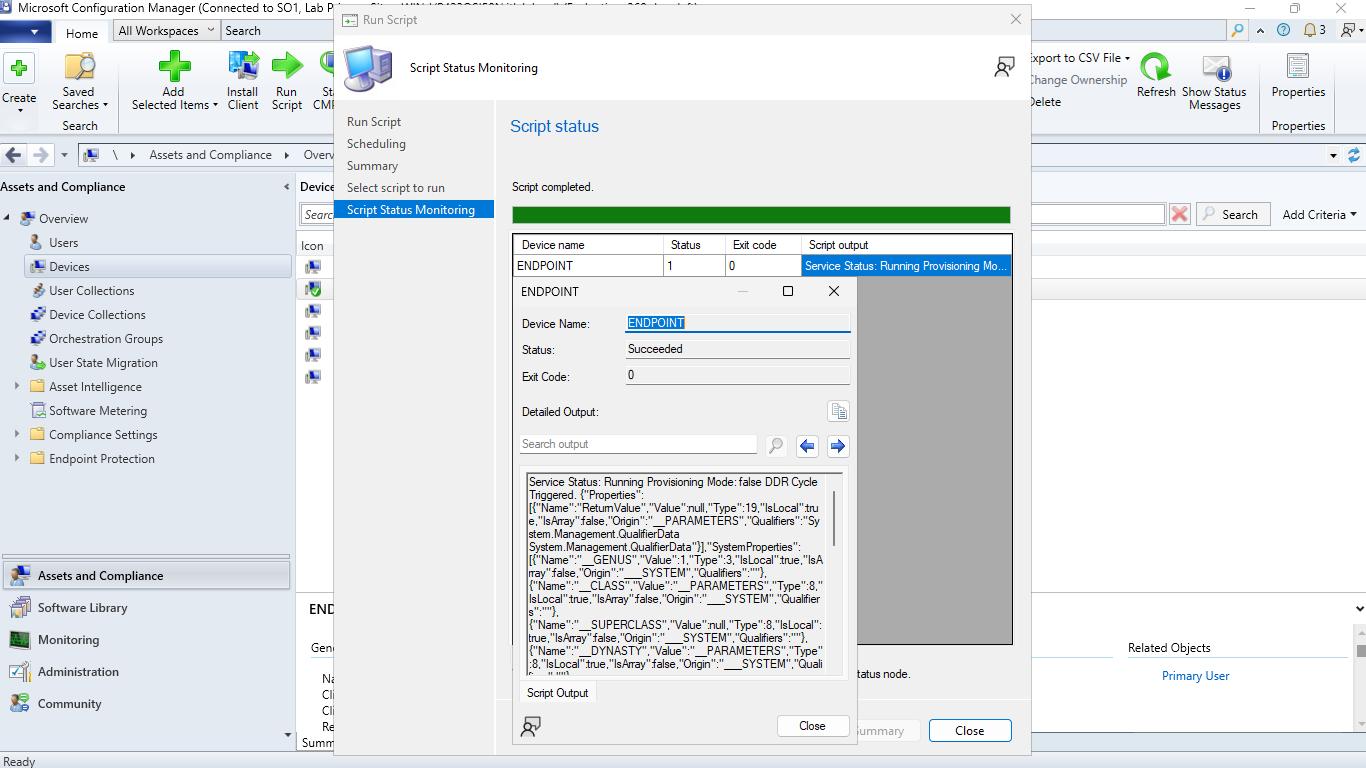
We can see that our script executed successfully and indicated that the SCCM Service Health is in order
If users in our itlab.local domain report the Start Menu or Calculator is broken, this script re-registers
the Windows Store apps for the systems profile and can be executed to troubleshoot the issues and resolve
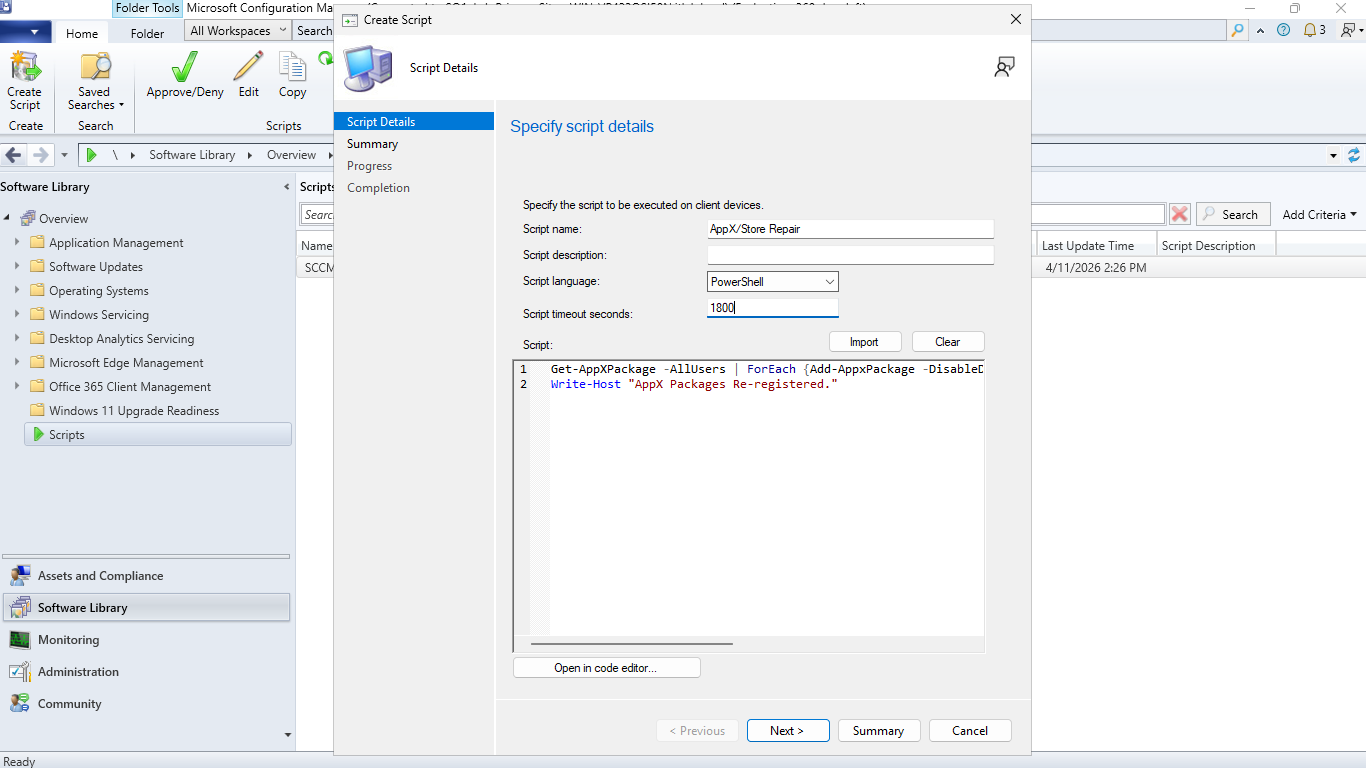
Get-AppXPackage -AllUsers | ForEach {Add-AppxPackage -DisableDevelopmentMode -Register "$($_.InstallLocation)\AppXManifest.xml"}
Write-Host "AppX Packages Re-registered."
In the Software Library workspace, navigate to Scripts and click Create Script to create another script
Type out the script above into the script box, enter the name and enter the Script Timeout as 1800 seconds
Now click Next > Next and you should see an SCCM task screen showing the script was created successfully
Now click close, right-click the script and hit Approve > Next > Next > Next, and you will see approval
Now hit Close > Assets and Compliance > Devices and right click ENDPOINT > Run Script > AppX/Store Repair
Hit Next, and you can see we can choose to schedule the script, click next to run it immediately instead
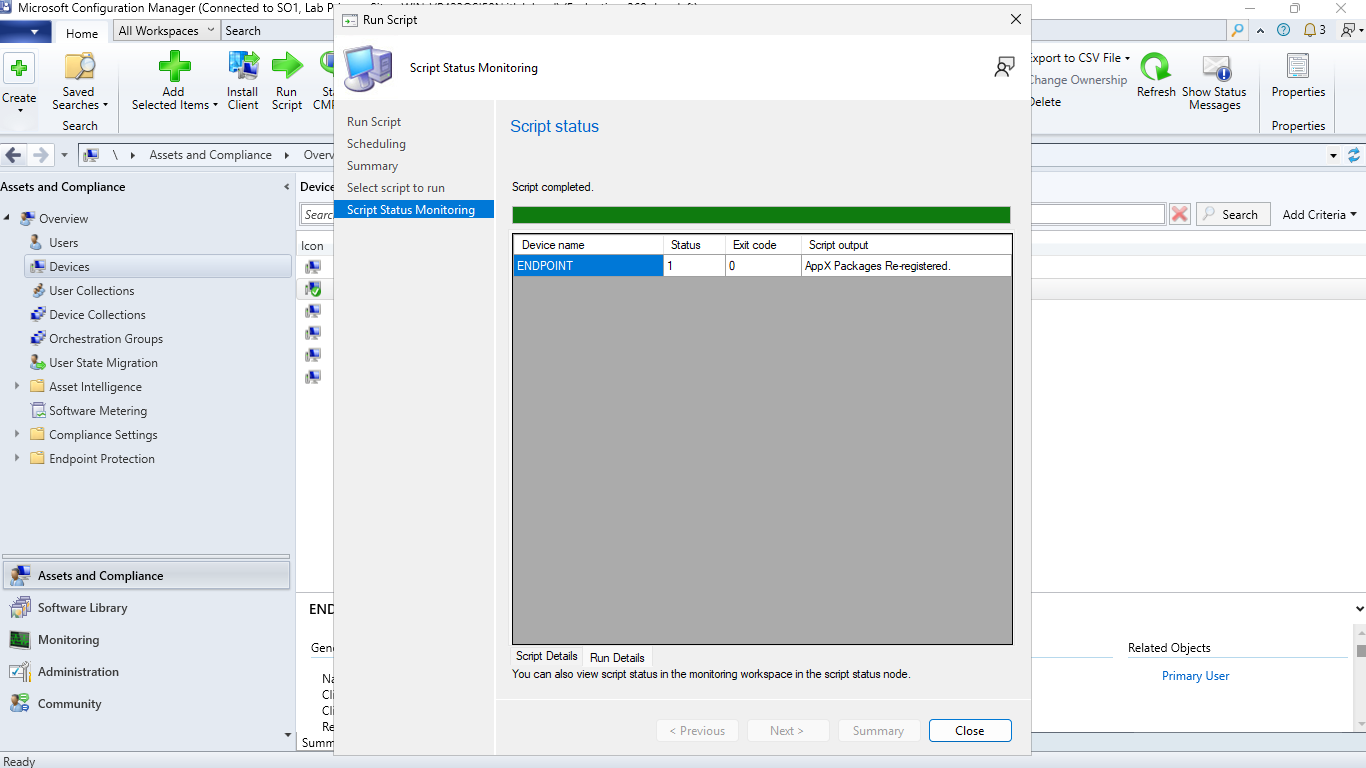
We can see that our script successfully executed on the endpoint and that AppX packages were re-registered
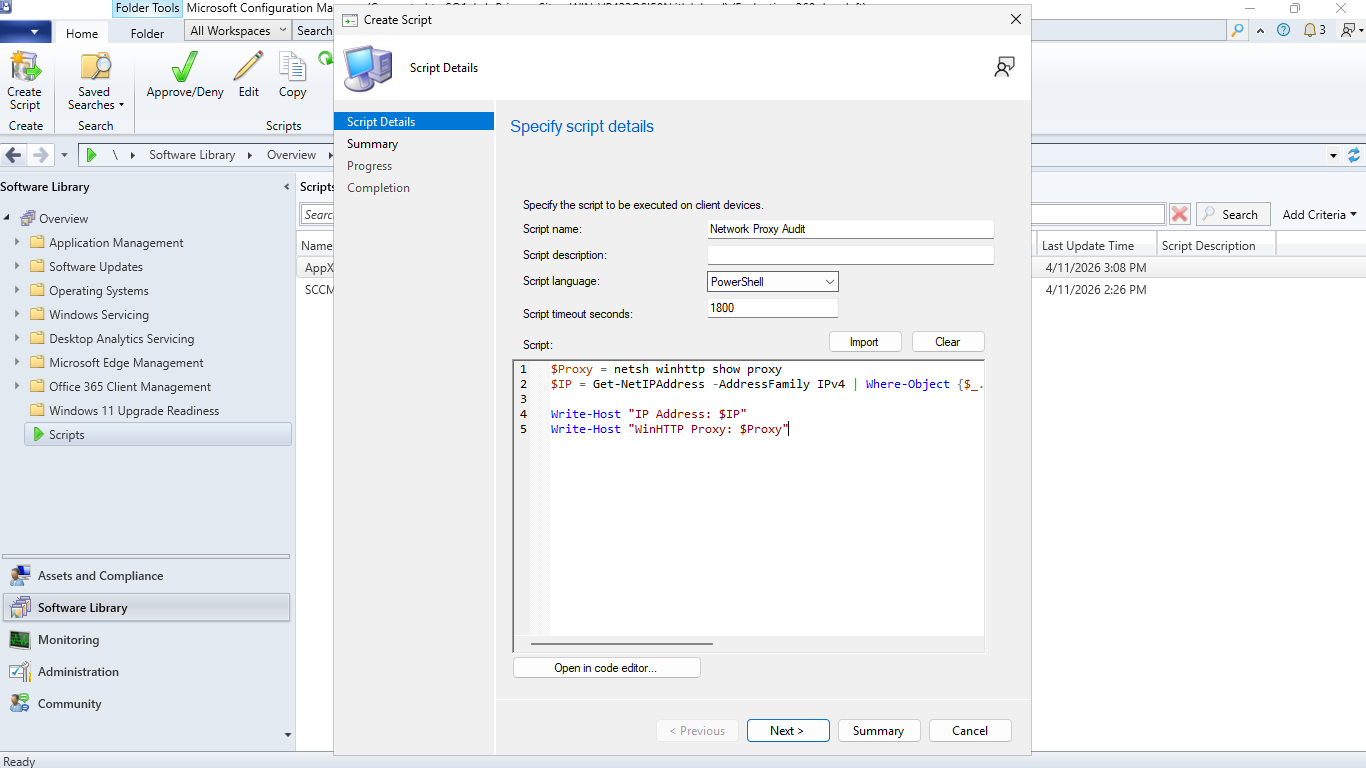
Provides networking information useful for troubleshooting why a client isn't downloading from the DP
$Proxy = netsh winhttp show proxy
$IP = Get-NetIPAddress -AddressFamily IPv4 | Where-Object {$_.InterfaceAlias -notlike "*Loopback*"} | Select-Object -ExpandProperty IPAddress
Write-Host "IP Address: $IP"
Write-Host "WinHTTP Proxy: $Proxy"
In the Software Library workspace, navigate to Scripts and click Create Script to create another script
Type out the script above into the script box, enter the name and enter the Script Timeout as 1800 seconds
Now click Next > Next and you should see an SCCM task screen showing the script was created successfully
Now click close, right-click the script and hit Approve > Next > Next > Next, and you will see approval
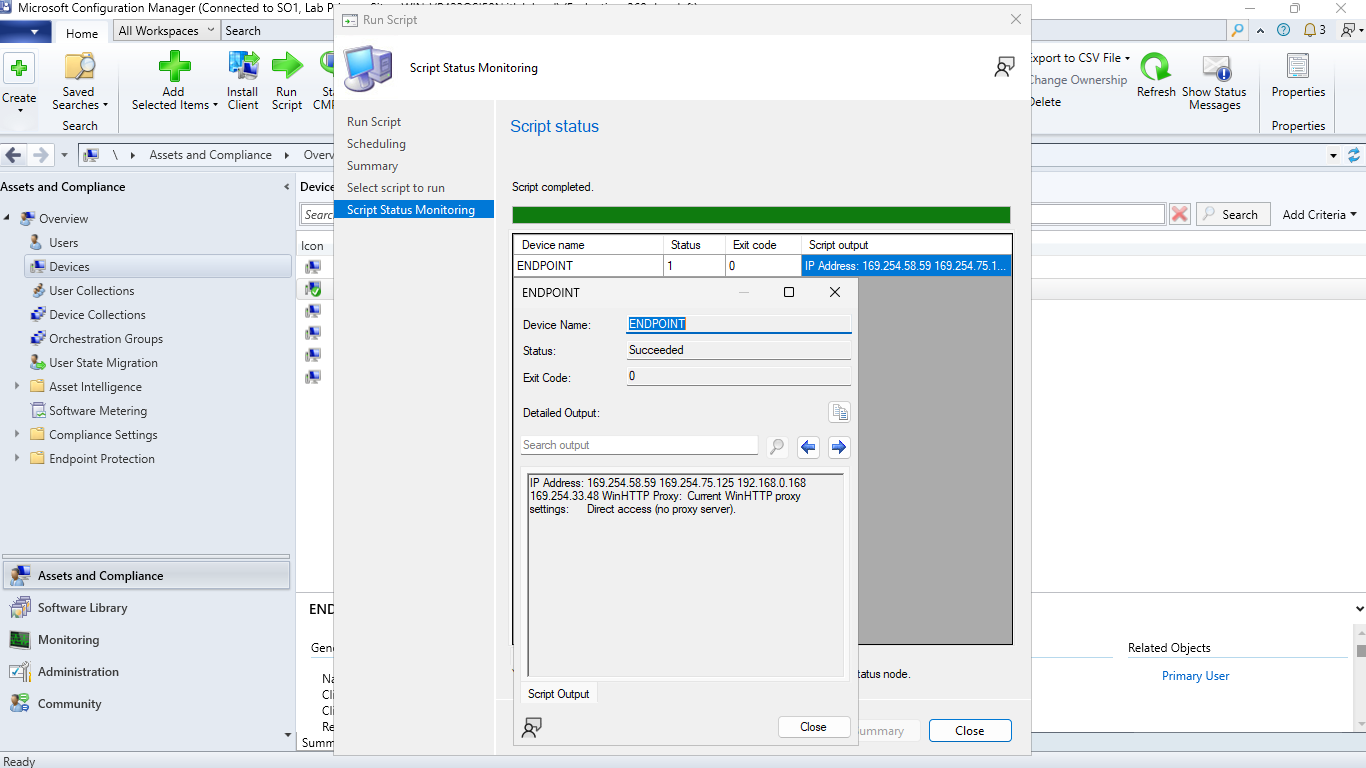
Now hit Close > Assets and Compliance > Devices and right click ENDPOINT > Run Script > Network Proxy Audit
Hit Next, and you can see we can choose to schedule the script, click next to run it immediately instead
As you have seen in this lab, PowerShell is an amazing tool for those willing to work with it and use it
to solve administrative problems. In this lesson, we covered key foundational PowerShell skills, including
the most common commands. We learned some important administrative commands and then applied that knowledge
to many powerful scripts locally, and across both Active Directory and Microsoft SCCM/MECM Environments