This lab introduces foundational concepts of the Windows file system, equipping learners with essential skills for navigating, managing, and securing data within a Windows environment. Through hands-on exercises, explore the structure and organization of drives, folders, and files, including NTFS permissions, file attributes, and directory hierarchies. Practice using built-in tools like File Explorer and Command Prompt.
Cybrary is a well established and free IT training platform with several intuitive labs to explore
A paid subscription with more advanced labs is available as well outside the scope of this platform
Head to https://www.cybrary.it to create a free account for learning available on their platform
Head to Windows CLI Basics to complete this lab for yourself or perform on your homelab below
Quick Links:
Requirements:
• Windows PC w/ Internet Connection
• USB Flash Drive w/ at least 64GB Capacity
• Unused PC w/ at least 4GB of Memory
1. Windows Filesystem Overview
In basic terms, a file system is the way the OS organizes files, folders, storage and peripherals
The computer's operating system (OS) stores and manages data in several places like CPU and memory
When not in use, data must be kept in slower, larger storage devices like hard drives and SSDs/NVME
Users access and manage this long-term storage through the operating systems internal file system
The Microsoft Windows OS uses a hierarchical system of volumes, folders, and files to organize data
Volumes can be physical or logical partitions on a physical device, Windows assigns volumes letters
Under each volume are folder or directories which can contain other files and folders on the system

The most commonly seen Windows file system formats in use today are FAT16, FAT32, exFAT, and NTFS
FAT stands for File Allocation Table. Once used for hard disk storage, it is now common for USBs
NTFS stands for New Technology File System. Initially developed by Microsoft in 1993 for Windows NT
NTFS is the primary file system used in modern Windows systems, allowing a larger storage than FAT
It also provides for better fault tolerance, encryption, user quotas and richer security features
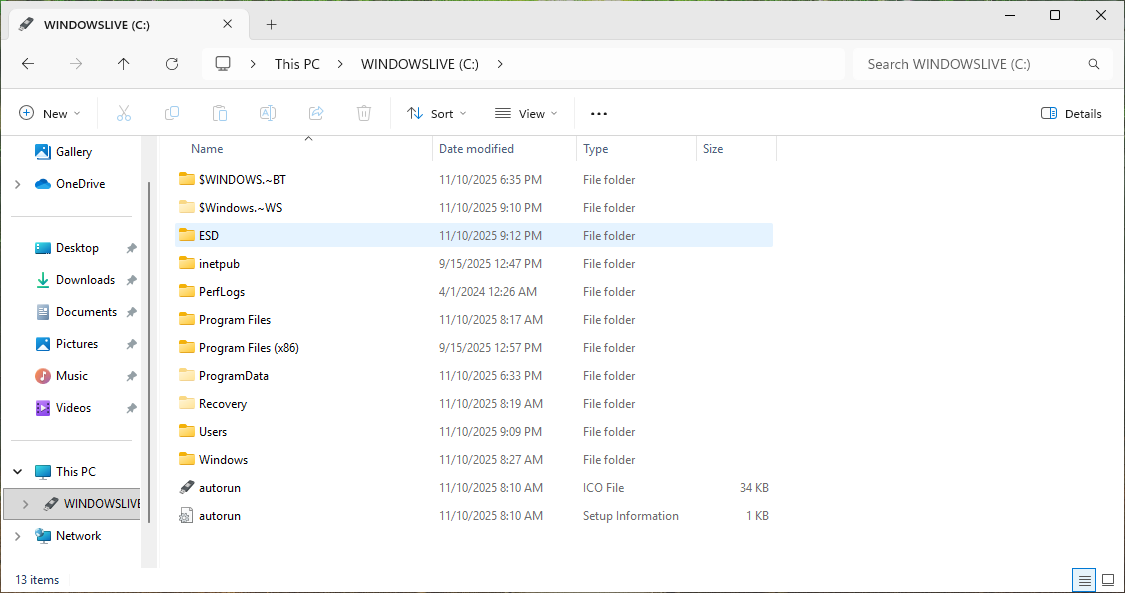
The top-most level of the Windows file system is the C drive where the operating system is installed
In modern Windows installations, the local C:\ drive contains seven folders which hold system files:
• EFI stands for Extensible Firmware Interface
This folder contains files needed at boot time and works with the hidden EFI partition on your drive
The most important file in the EFI folder is the Boot Configuration Data: C:\EFI\Microsoft\Boot\BCD
The Boot Configuration Data file holds information about the boot options on your operating system
• The PerfLogs folder is where the Performance Monitor saves its data.
The Performance Monitor is used to find system bottlenecks and troubleshoot PC performance issues
This is a persistent directory. If you were to delete the PerfLogs folder Windows will recreate it
• Program Files and Program Files (x86) store files for installed programs
The (x86) directory is for storing 32-bit programs, and the other directory is for 64-bit programs
While not every application uses these folders, it will utilize them if it has a windows installer
• The Program Data folder stores data from applications that is not user specific
Otherwise applications will use the C:\Users\[username]\AppData folder to store user specific data
The ProgramData and AppData folders are both hidden by default, windows hides file extensions too
To see them you must check 'Hidden Items' and 'File Name Extensions' in the file explorers view tab
• The Users directory is where user accounts keep their files
When a user logs in for the first time, Windows creates folders for them like Documents & Downloads
• The Windows directory contains everything else the OS needs to function
Some say the Windows folder is the Operating System, it contains a massive amount of files & folders
Note that when navigating the system using command prompt, you use quotes for file names with spaces
For example, to navigate to the Program Files (x86) folder, you would input cd "Program Files (x86)"
Windows also generates an 8-character version of the file/directory name for backwards compatibility
You can see the short name for a filename or directory by executing dir [target] /x in command prompt
In the following sections we will transition into a more hands on approach and examine the filesystem
2. Create Windows 11 Live USB
Here we will simulate the end user through a USB live version of Windows 11 which won't save on the PCs disk
This type of installation was referred to as Windows On-the-Go in the past but is now possible with rufus.exe
Download Windows 11 Disk Image (ISO): Microsoft Windows 11 ISO
Download Rufus Disk Imaging Software: Rufus Official Download
Insert USB Flash Drive, run rufus.exe, select target drive as your USB Flash Drive, select Windows 11 ISO file
From the 'Image option' dropdown menu, select the 'Windows To Go' image option to create a live usb, hit start:

Use the rufus popup menu to customize the Windows 11 Live installation and disable data collection for this lab:

Remove USB Flash Drive and Insert into unused PC. Start PC and press hot boot key on startup:

Select UEFI USB Flash Boot. Allow Windows 11 Live to load and move through the setup to reach the desktop:
We now have our basic workstation that will simulate the end user PC for us to troubleshoot later
Be sure to connect this system to the internet with WI-FI or a wired connection for the next steps
3. Examine the Windows File System
In this section of our lab, you will explore the file system and locations Windows stores its data
We will also discover the features which make Windows Unique, let's begin with the Startup folder
File Explorer > This PC > C:\Users\ITLab.Center\AppData\Roaming\Microsoft\Windows\Start Menu\Programs:

Within the Programs folder, you should see another folder titled Startup, this is the Startup folder
Windows will run any program, batch file, or script in the Startup folder whenever that user logs in
To navigate to a path in File Explorer you can either click into it manually or type it in at the top
You can also reach the Startup Folder by right-clicking Start, selecting Run, and input shell:startup
In the File Explorer, open the Startup folder, right-click the background and hit New > Text Document
Name the new document test.bat (and remove the .txt extension), then click Yes when you are prompted
The .bat extension designates it as a batch file, which is a script of commands stored in plain text
From the taskbar, click the Search icon and type startup, then select Startup Apps from the results:

On the Startup page, you should see that the test.bat is now listed as a windows startup application
This means that Windows will try to run test.bat every time the user account ITLab.Center logs in
Next we will examine the Security Accounts Manager (SAM) database where windows stores the passwords
Using the File Explorer, navigate to C:\Windows\Systems32\config and click continue when prompted:

In the config folder, we can see a file titles SAM. It is a unique and highly secure database file
It is impossible to open or read this file as a user while the Windows Operating System is running
In the config folder, take note of SECURITY, SOFTWARE, and SYSTEM files which store registry data
The Windows Registry is a hierarchical database which stores the data for OS programs and hardware
The registry is composed of two basic elements: keys and values (referred to as key-value pairs)
A logical grouping of keys and values or key-value pairs is commonly referred to as a registry hive
From the taskbar, click the Search icon and type regedit, then select the Registry Editor option
When prompted, click yes to continue. From the Registry Editor expand the HKEY_LOCAL_MACHINE hive:
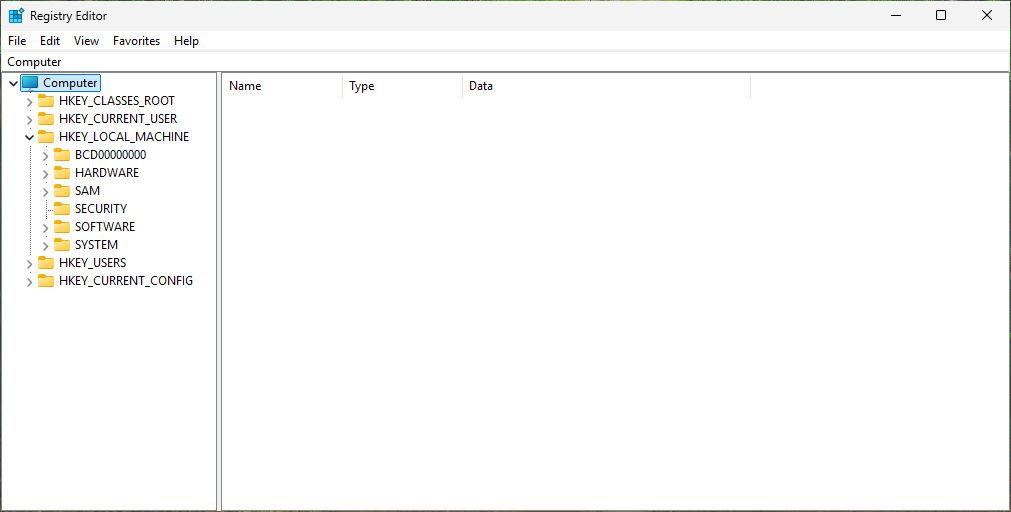
Notice there are corresponding SECURITY, SOFTWARE and SYSTEM registry hives, close Registry Editor
Next we will examine where Windows stores all the logs used to keep track of both events and errors
From the taskbar, click the Search icon and type event, then select the Event Viewer application
From the Event Viewer, expand the Windows Logs folder, you should see multiple separate log types:
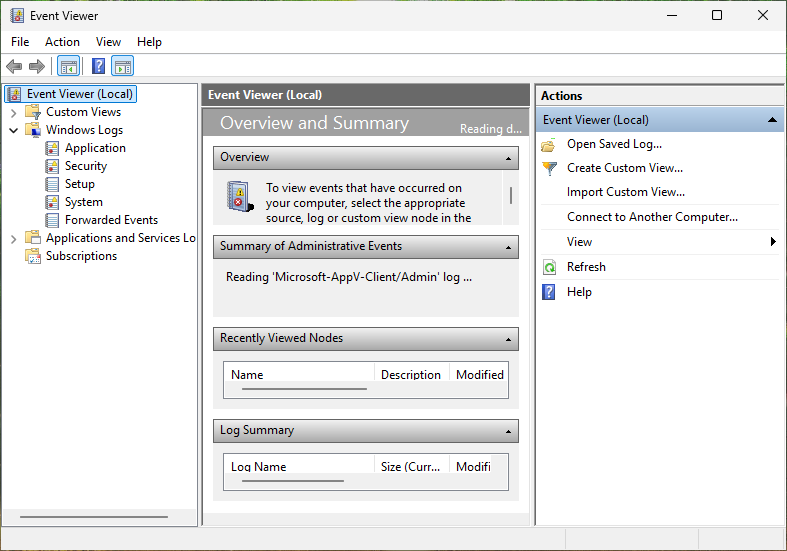
In the Event Viewer, right-click the Application log and select properties to open the properties:
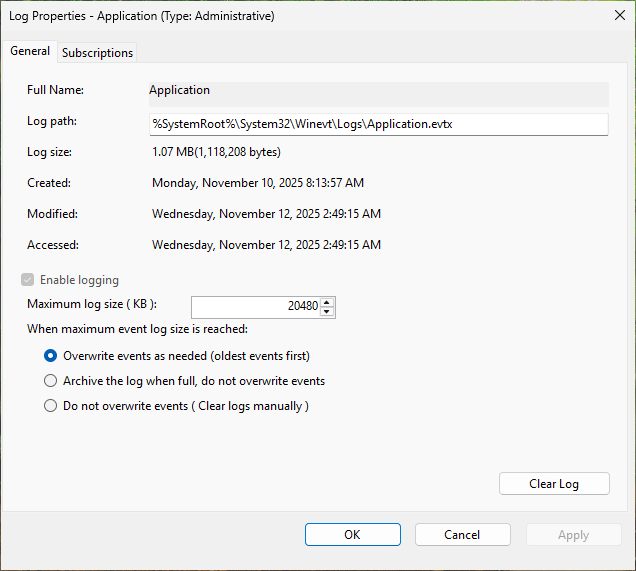
Copy the log path and paste it into File Explorer's navigation bar, then remove application.evtx:
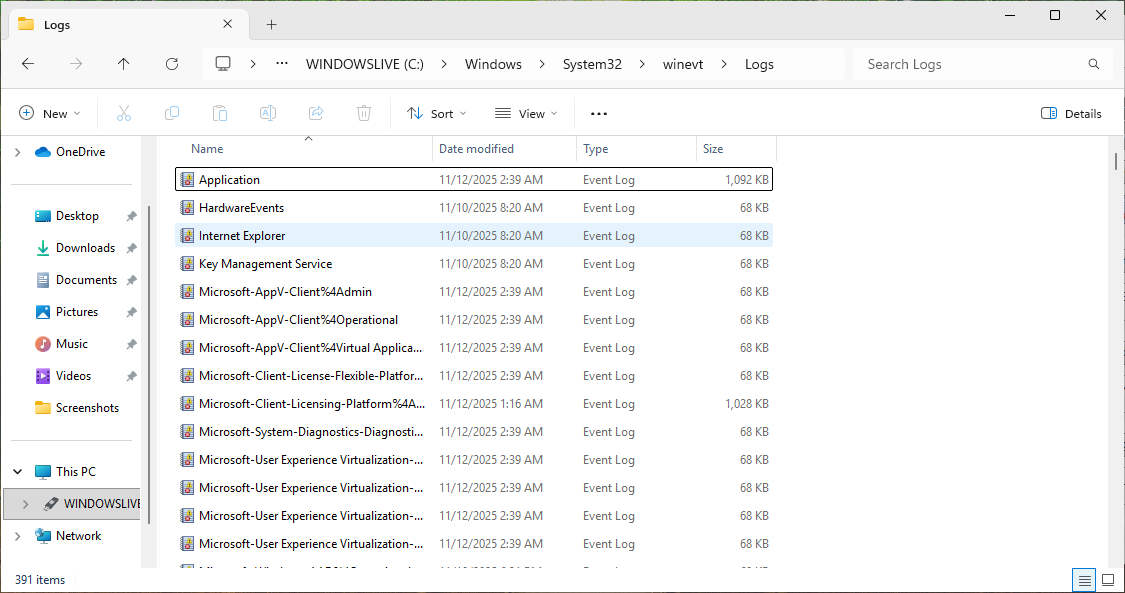
Take note of all the .evtx files which are primary windows logs, only readable with Event Viewer
Double-click any .evtx file, notice that the file will open a copy under the logs in Event Viewer
Close the Event Viewer. Next we will examine the folder where Windows keeps its most critical files
In the File Explorer, navigate to C:\Windows\System32, scroll down and take note of all the files:
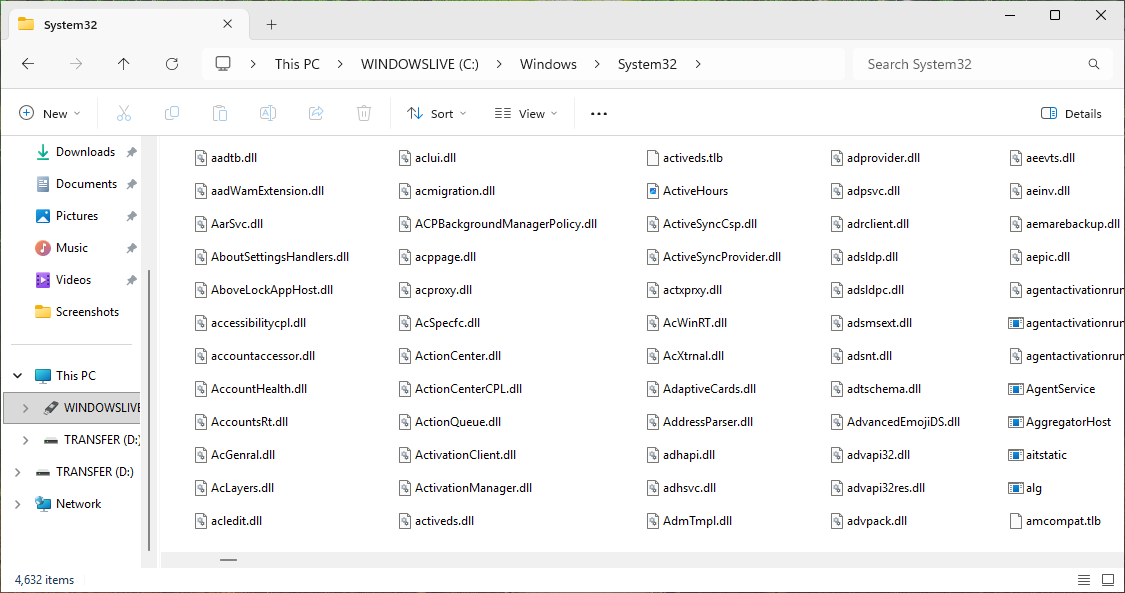
The System32 folder is where Windows keeps Dynamic Link Libraries (code other applications utilize)
As well as system applications such as Event Viewer, Calculator, Command Prompt, Netstat and Paint
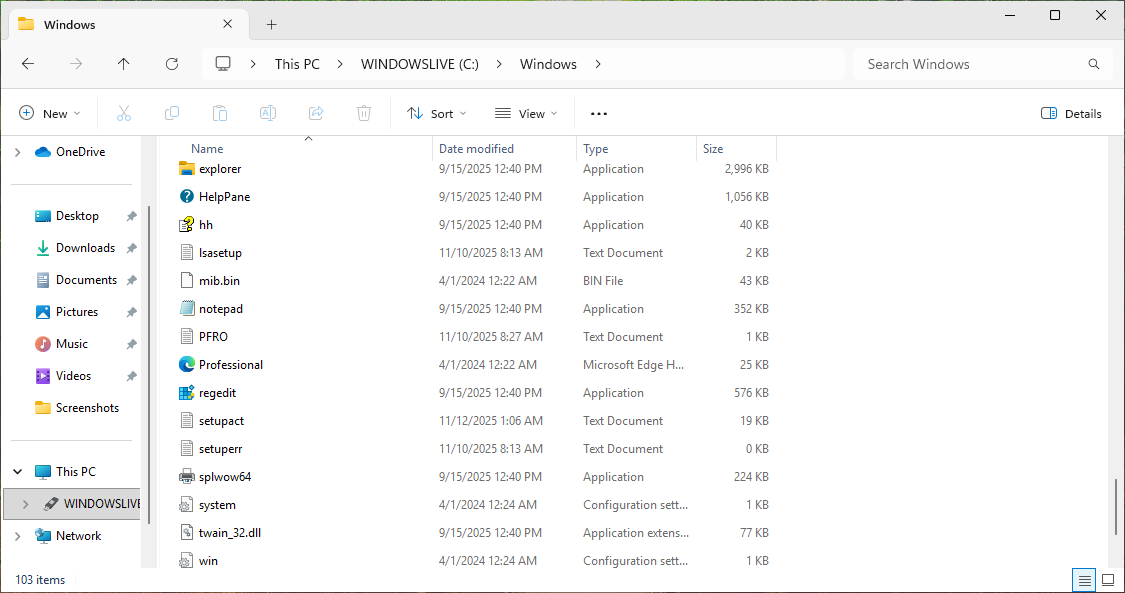
Navigate up one directory (C:\Windows). Here we find the Registry Editor, File Explorer and Notepad
Next we will determine the PATH environmental variable which determines where Windows looks for files
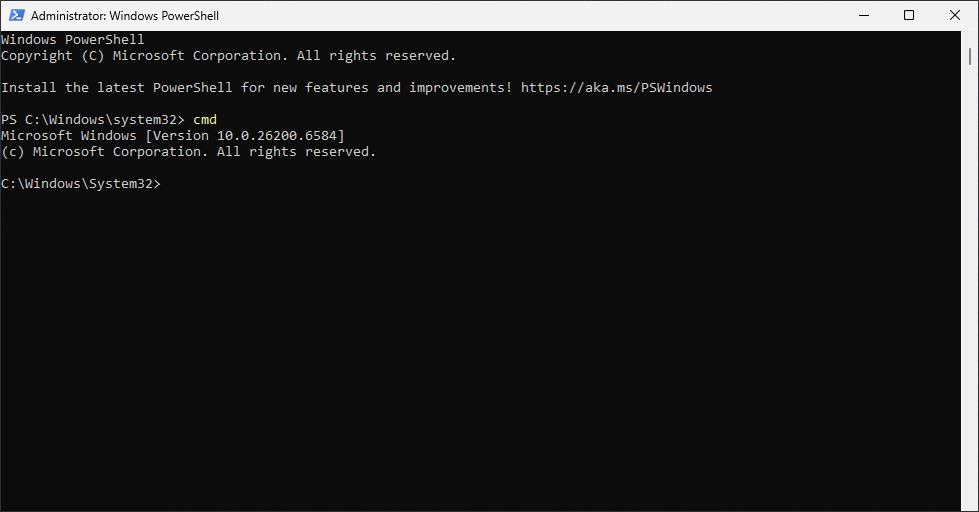
On the taskbar right-click the Windows Start icon and select Windows PowerShell (Admin), click yes
Run the following command from the Powershell terminal to downgrade the window to a Command Prompt:
PS C:\Windows\system32> cmd
Resulting Output:
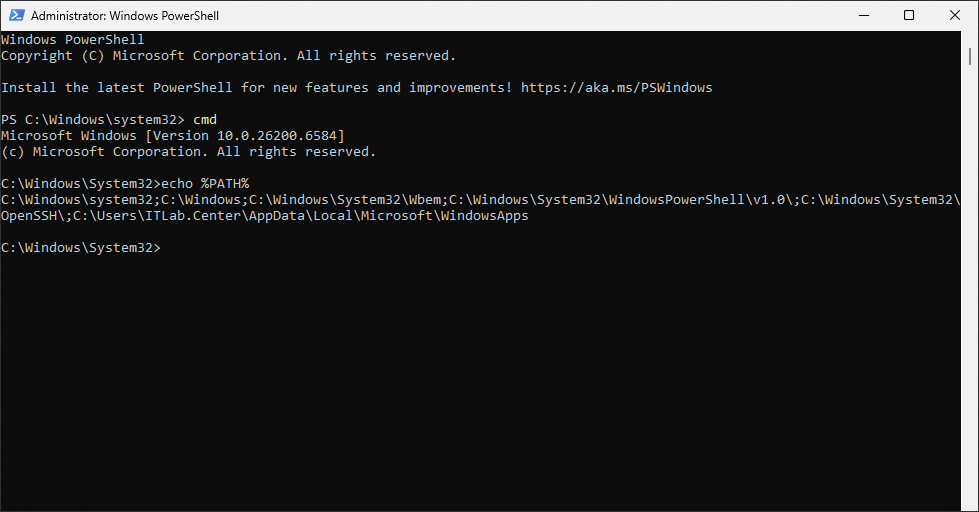
Run the following command from the Command Prompt to display the PATH environmental variable:
C:\Windows\System32>echo %PATH$
Resulting Output:
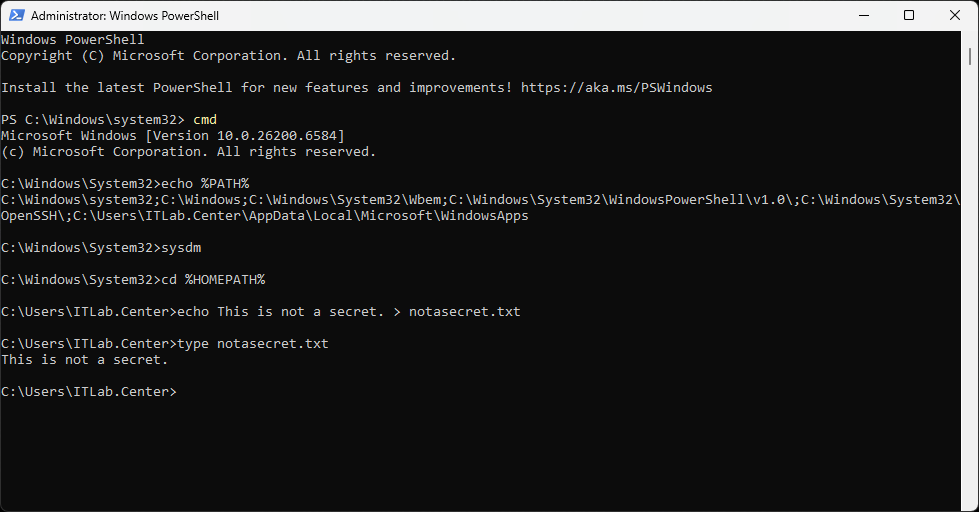
Run the following command from the Command Prompt to open the System Properties Window:
C:\Windows\System32>sysdm.cpl
From the System Properties Windows, navigate to the Advanced tab and select Environmental Variables:

Under System Variables, scroll down and select Path, then click edit to open the editing window:

In this window you can add or delete paths where you want Windows to look for files and applications
Comparing this to the output of our %PATH% variable we see that it is missing a user specific path
Click cancel to close the Edit Environmental Variables page, then close the Environmental Variables
Next we will examine the way that Windows can refer to the same location using different terminology
In the File Explorer, under Quick Access, click Desktop to open the Desktop folder: This PC>Desktop
Open a second File Explorer instance from the taskbar and navigate to C:\Users\ITLab.Center\Desktop
Right-click anywhere on the desktop and select New > Text Document, it appears in the File Explorer
4. Alternate Data Streams
Next we will explore a unique feature in Windows NTFS file system known as Alternate Data Streams
With ADS, you can hide data inside other data. This is a form on encoding known as Steganography
Windows currently uses the ADS feature for encryption, and the Windows Resource Manager processes
Run the following command from the Command Prompt to move into ItLab.Center's home directory:
C:\Windows\System32>cd %HOMEPATH%
Run the following commands from the Command Prompt to create and view contents of a new text file:
C:\Users\ITLab.Center>echo This is not a secret. > notasecret.txt
C:\Users\ITLab.Center>type notasecret.txt
Resulting Output:
Run the following command from the Command Prompt to to display our text files size in bytes:
C:\Users\ITLab.Center>dir notasecret.txt
Run the following command from the Command Prompt to place a secret message into an ADS:
C:\Users\ITLab.Center>echo The password is MUSTARD69420 > notasecret.txt:secret
Use the dir and type commands to confirm that our file is the same size and contains the same data
Run the following command from the Command Prompt to elevate back into a Powershell terminal:
C:\Users\ITLab.Center>exit
Run the following command from the PowerShell Terminal to change to the ITLab.Center home folder:
PS C:\Windows\system32> cd C:\Users\ITLab.Center
Run the following command from the PowerShell Terminal to show Alternate Data Streams in our file:
PS C:\Users\ITLab.Center> Get-Item .\notasecret.txt -Stream *
Resulting Output:
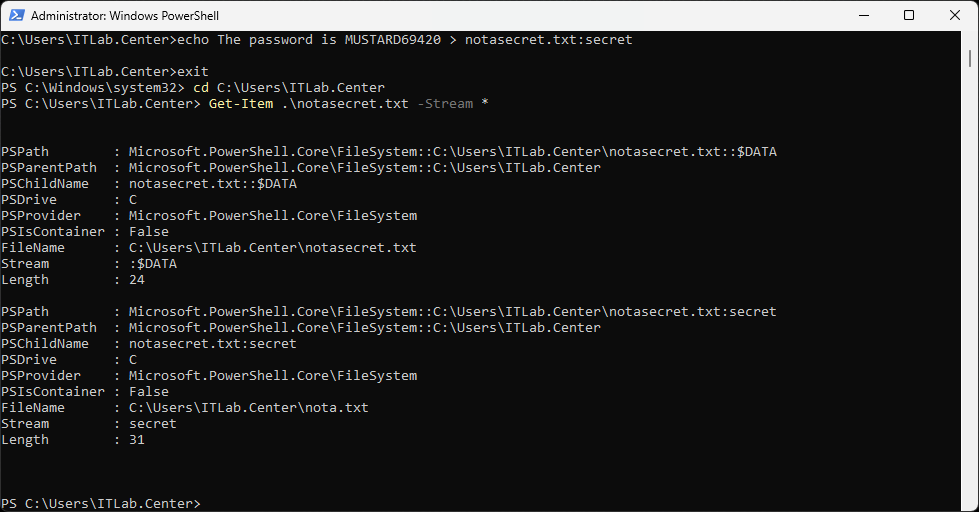
We can see the standard $DATA stream which holds the file contents along with the secret stream
Run the following command from the PowerShell Terminal to display the contents of secret stream:
PS C:\Users\ITLab.Center> Get-Item .\notasecret.txt | Get-Content -Stream secret
Resulting Output:
The password is MUSTARD69420
5. Windows Hosts File
For the next section of this lab, we will switch gears and examine a critical networking file
Run the following command from the PowerShell Terminal to downgrade back to a Command Prompt:
PS C:\Users\ITLab.Center> cmd
Run the following command from the Command Prompt to display the Windows Hosts configuration file:
C:\Users\ITLab.Center>type C:\Windows\System32\drivers\etc\hosts
Resulting Output:
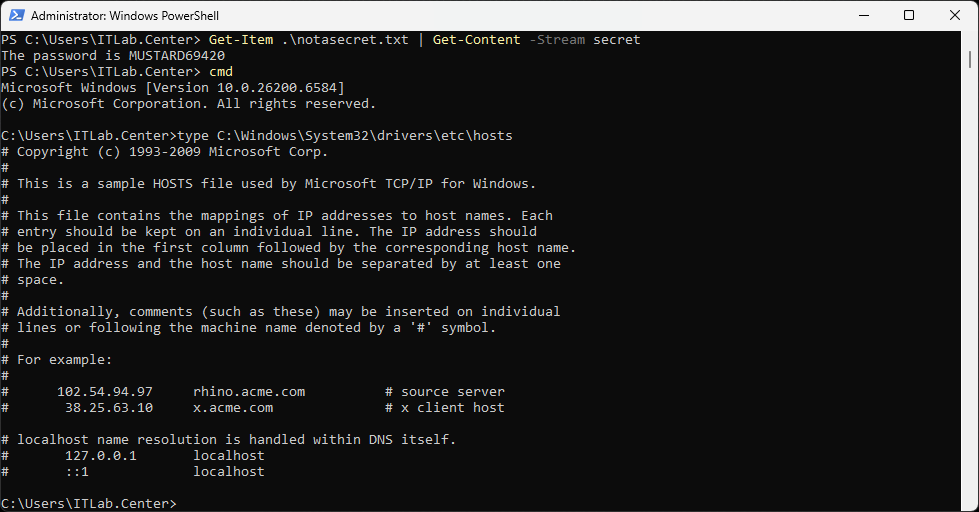
The hosts file maps IP Addresses to host names/URLs. We can see that each line is commented out
The format used is IP Address space/tab Hostname, for example, 100.100.100.100 www.itlab.center
Normally, when Windows needs an IP Address, it will query the Domain Name System (DNS) Servers
However, the hosts file takes precedence over DNS. Hackers can exploit this to phish credentials
They do this by adding entries to the hosts file to send you to hostile sites you think are safe
6. Windows File Types
Finally, we will examine Windows file types. Windows uses file extensions to determine contents
For example, ".txt" is a text file, and ".wav" is an audio file. Windows checks these extensions
From the taskbar, click the Search icon and type default, then select Default apps from results:

On the Default Apps pages, scroll down to select the "Choose default apps by file" menu option:
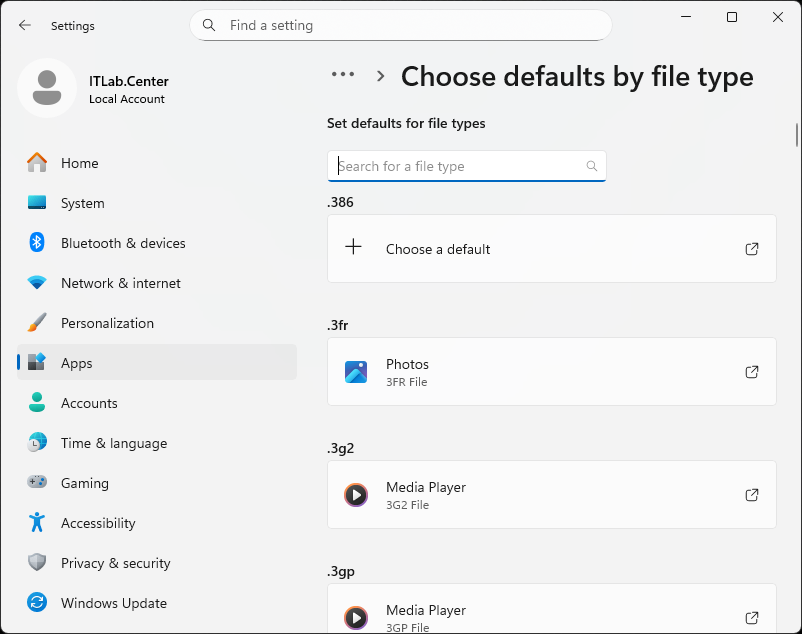
We can see Windows file types on the left with the associated applications listed below each one
This list is in alphabetical order so you can easily scroll through to view each supported type
Congratulations on completing your exploration of the Windows file system in this training lab
Here we used many tools including the Command Prompt, File Explorer, and the Registry Editor
These each helped us to get a different view of the file system which allows the OS to function