This hands-on lab guides users through the process of deploying a fully functional local web server using the LEMP stack: Linux, Nginx, MySQL, and PHP. Designed for developers, system administrators, and IT professionals, this lab provides a practical environment to build, configure, and test a modern web hosting solution from the ground up.
Quick Links:
Requirements:
• Windows PC w/ Internet Connection
• USB Flash Drive w/ at least 8GB Capacity
• Unused PC w/ at least 1GB of Ram & 10GB of Storage
1. Install Debian Linux
Linux is the leading server operating system family in terms of market share for a few reasons
It is highly customizable, has many free distributions and is based on open-source software
For this exercise we will be using Debian, a long-established and highly compatible variant
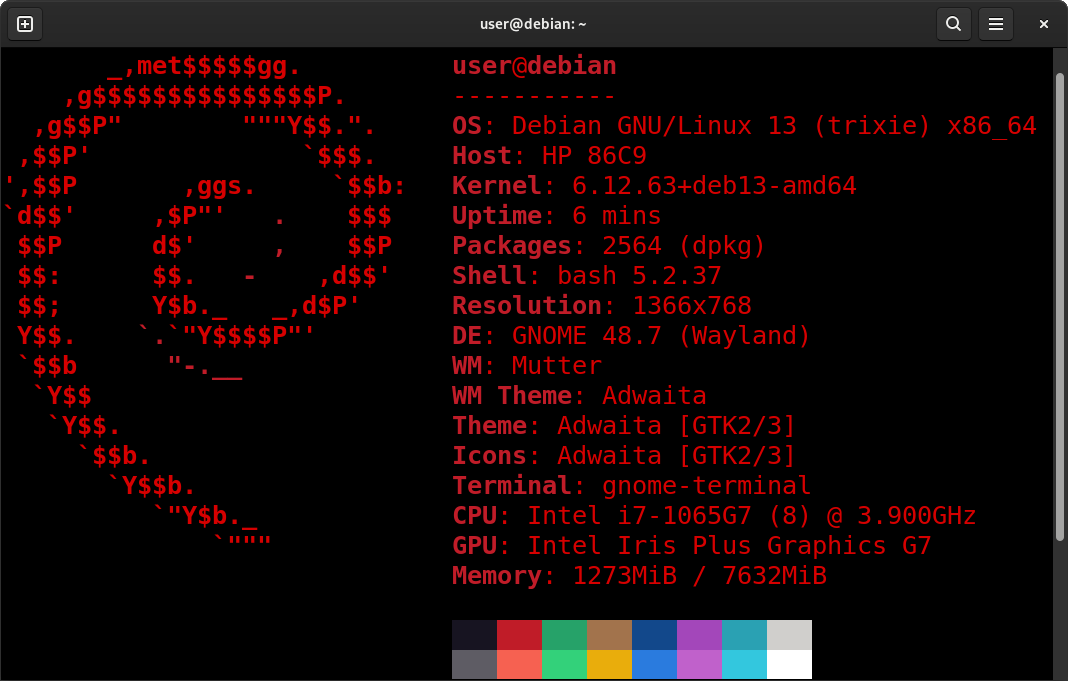
You can use the operating system without having to install it onto your hard drive with a live USB
Download Debian Live: Debian Live Official Download
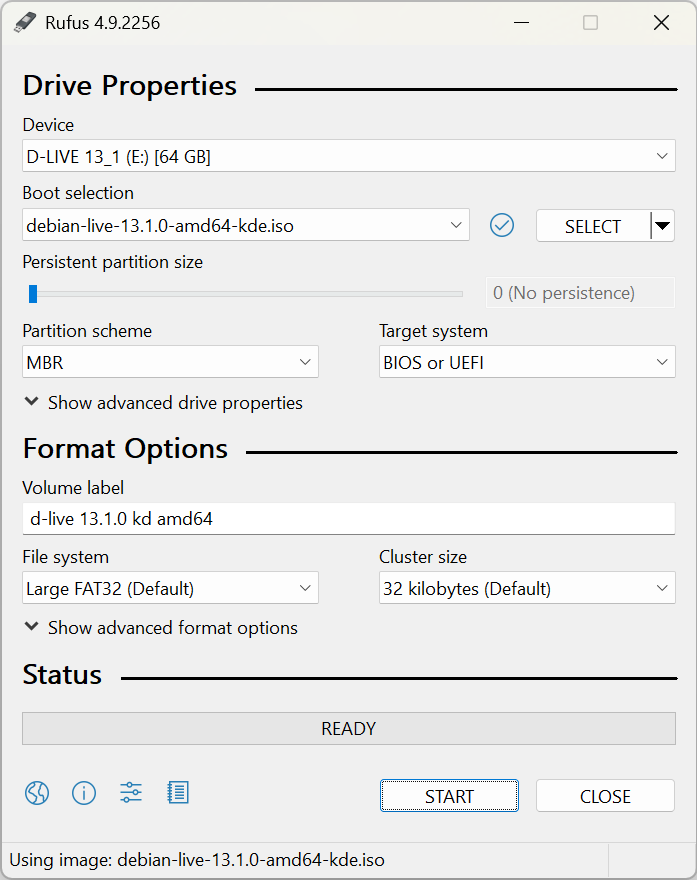
Download Rufus: Rufus Official Download
Insert USB Flash Drive, run rufus.exe, select target drive, select Debian Live Iso, start:
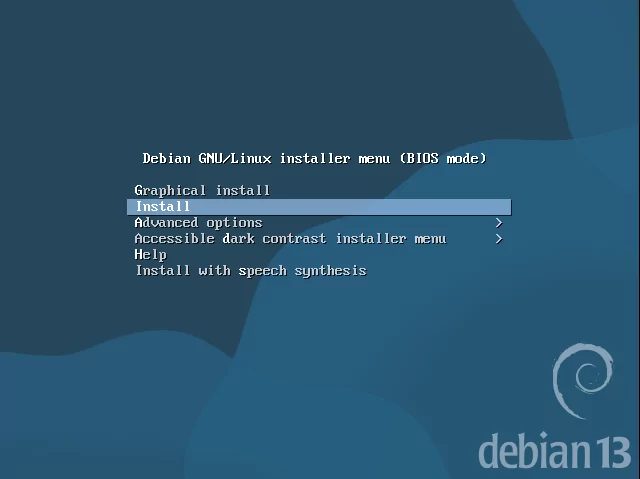
Remove USB Flash Drive and Insert into unused PC. Start PC and press hot boot key on startup:

Select UEFI USB Flash Boot. Allow Debian Live to load and scroll to select the Graphical Installer:
From here follow the on-screen prompts to guide you through the remainder of the installation
It is advised to disconnect your PC from the network during this installation as it can cause issues
It is also advised to take the server option of separate partitions during driver partitioning
Other options are not of consequence to this lab. Graphical Installer Prompts Include the Following:
• Language, Location and Keyboard
• Network Configuration
• Hostname
• User Accounts
• Disk Partitioning
• Package Manager
• Software Selection
• GRUB Boot Loader
Once the installation is complete, remove the USB Flash Drive and boot into the new system.
Optional: Configure Sudo / Sudoers
If you configured a root account during the installation you will need to add your user to sudoers
The sudoers group allows a standard user to execute commands with administrator level privileges
Boot your new system and use the Graphical User Interface to open a program known as Terminal/Konsole


From the terminal prompt, execute the following command:
<user@host> su -
Authenticate with the root password to gain administrator terminal. Use this to execute the following:
<root@host> usermod -aG sudo <username>
<root@host> su - <username>
Test your usernames sudo group membership with the following command:
<user@host> sudo whoami
The command will exit with root if successful and return a permissions error otherwise
2. Configure APT Sources
The primary method of installing software within Debian Linux is the APT Package Manager
For APT to find, install and update currently installed packages the sources must be defined
Reconnect your machine to the network and execute the following command from your terminal:
<user@host> sudo nano /etc/apt/sources.list
From the nano text editor arrow down to a blank area and add the following lines:
deb https://deb.debian.org/debian trixie main non-free-firmware
deb-src https://deb.debian.org/debian trixie main non-free-firmware
deb https://security.debian.org/debian-security trixie-security main non-free-firmware
deb-src https://security.debian.org/debian-security trixie-security main non-free-firmware
deb https://deb.debian.org/debian trixie-updates main non-free-firmware
deb-src https://deb.debian.org/debian trixie-updates main non-free-firmware
This lab is written for Debian 13. For future versions replace trixie with current distro
Once you've added the sources, write changes to file and close nano with CTRL+O and CTRL+X
Once saved you can update packages from the stable, updates and security repository with:
<user@host> sudo apt-get update
If successful, the system will cycle through each source for package updates and exit with done
3. Install & Configure NGINX
Our web server of choice is NGINX. Install the base package with the following command:
<user@host> sudo apt-get install nginx -y
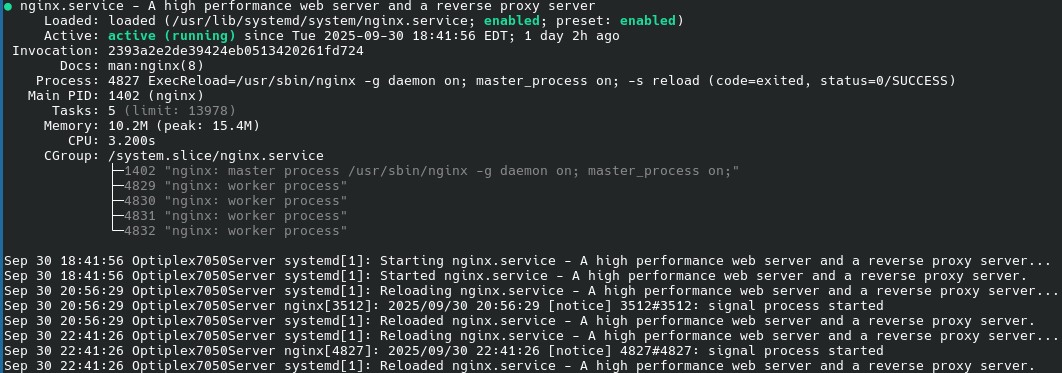
Check the Nginx service status with the following command:
<user@host> sudo systemctl status nginx
You should see information regarding the running process listed as active (running):
Now we will make some manual adjustments to the default configuration and file structure:
<user@host> sudo rmdir -r /var/www/html
<user@host> sudo mkdir /var/www/yourdomain
<user@host> sudo rm /etc/nginx/sites-available/default
<user@host> sudo nano /etc/nginx/sites-available/yourdomain
Now we've removed the default file structure and config file and created a custom one
Add the following lines within the nano text editor as the baseline configuration:
server {
listen 8080 yourdomain;
listen [::]:8080 yourdomain;
root /var/www/yourdomain;
index index.html;
server_name yourdomain;
location / {
try_files $uri $uri/ =404;
}
}
Save configuration file with CTRL+O and exit nano with CTRL+X
Create a soft link for the configuration file to be read by NGINX with the following:
<user@host> sudo ln -s /etc/nginx/sites-available/yourdomain /etc/nginx/sites-enabled/yourdomain
Create a connection test page with some HTML code by executing the following command:
<user@host> sudo echo "<html><body><h1>Hello World!</h1></body></html>" >> /var/www/yourdomain/index.html
Now you can test the configuration syntax and Reload NGINX with the following commands:
<user@host> sudo nginx -t
<user@host> sudo systemctl reload nginx
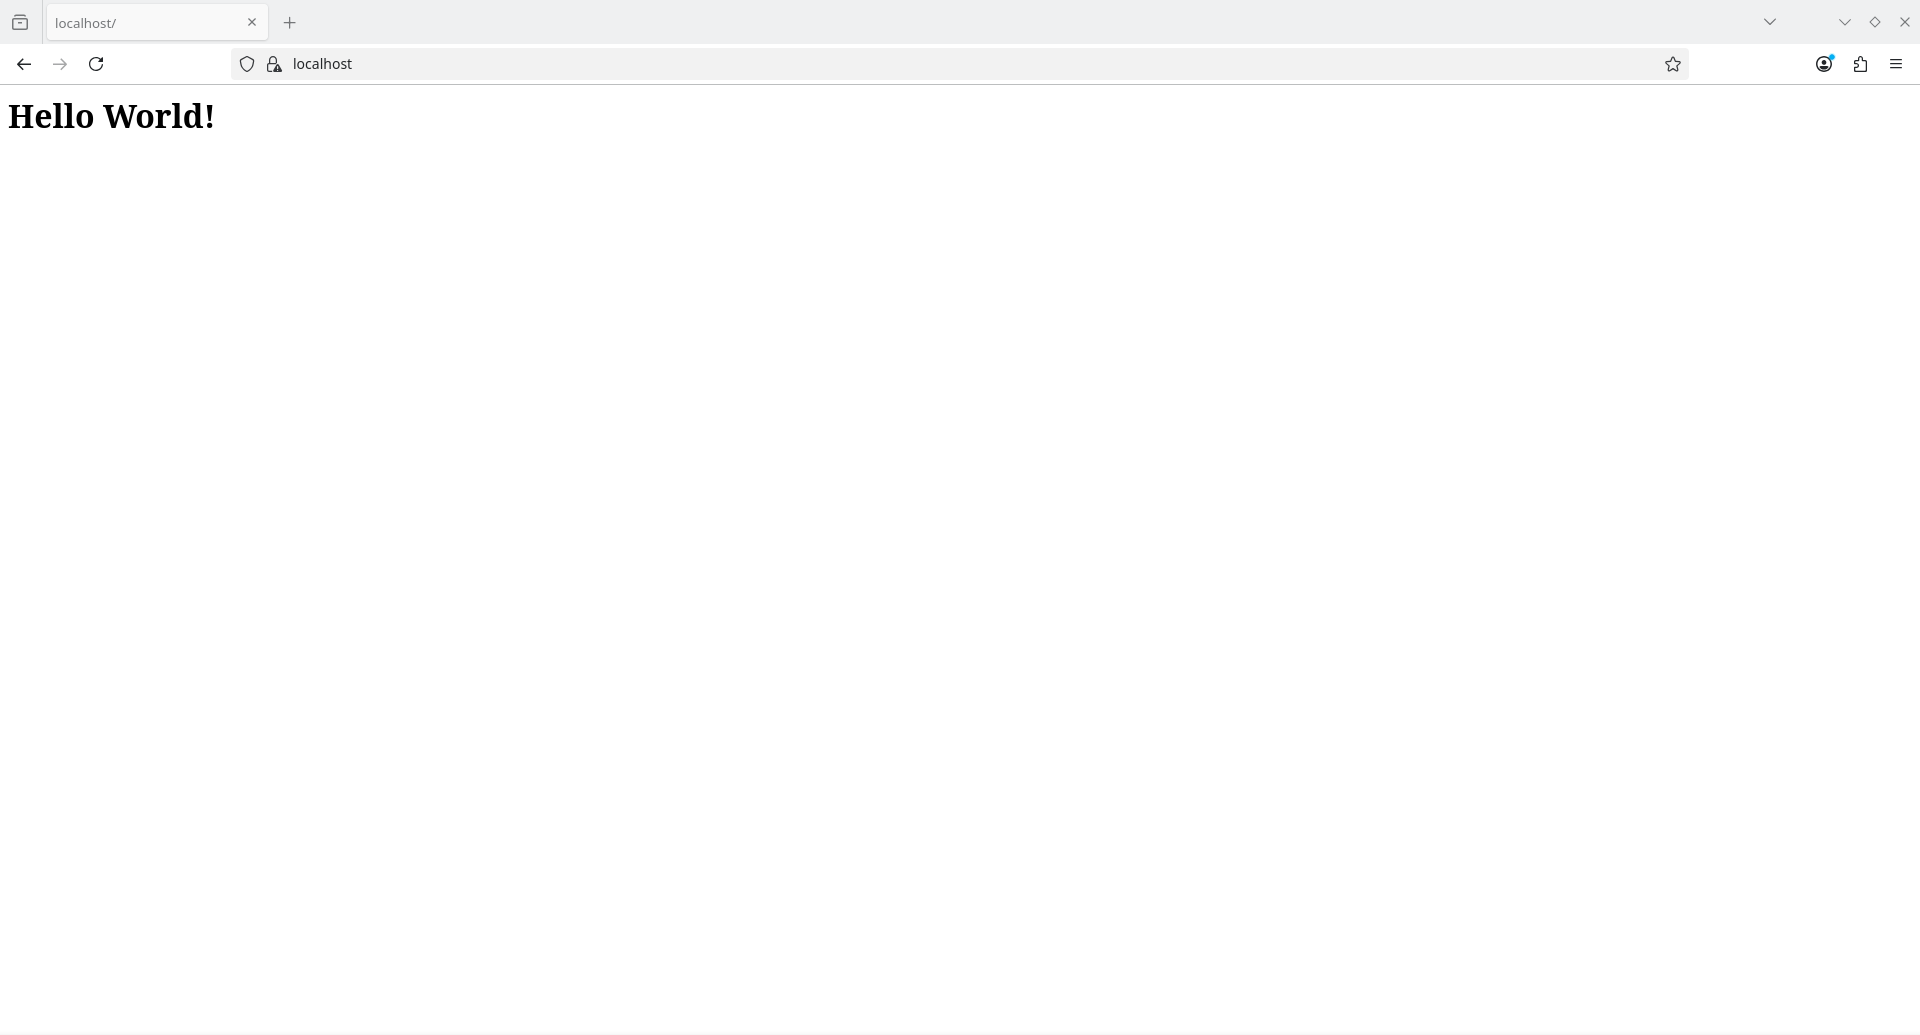
Head to the browser now and enter localhost:8080 in the address bar, behold your power:
4. Install & Configure PHP w/ FastCGI Process Manager
PHP is a server level language which allows users to add backend functionality to static HTML
While setup is minimal, the language requires an interpreter to function and execute statements
Begin by installing the components required and checking status with the following commands:
<user@host> sudo apt-get install php8.4-fpm php-mysql -y
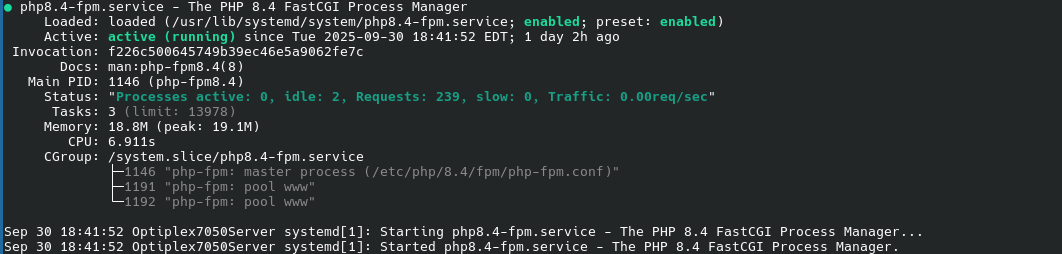
<user@host> sudo systemctl status php8.4-fpm
You should see information regarding the running process listed as active (running):
Now head back into your servers NGINX configuration file with the following command:
<user@host> sudo nano /etc/nginx/sites-available/yourdomain
Add some lines to match the following to enable nginx to interoperate with PHP-FPM:
server {
listen 8080 yourdomain;
listen [::]:8080 yourdomain;
root /var/www/yourdomain;
index index.php index.html;
server_name yourdomain;
location / {
try_files $uri $uri/ =404;
}
location ~ \.php$ {
include snippets/fastcgi-php.conf;
fastcgi_pass unix:/var/run/php/php8.4-fpm.sock;
}
location ~ /\.ht {
deny all;
}
}
Save configuration file with CTRL+O and exit nano with CTRL+X
Create a connection test page with some HTML code by executing the following command:
<user@host> sudo echo "<?php phpinfo(); ?>" >> /var/www/yourdomain/index.php
Now you can test the configuration syntax and Reload NGINX with the following commands:
<user@host> sudo nginx -t
<user@host> sudo systemctl reload nginx
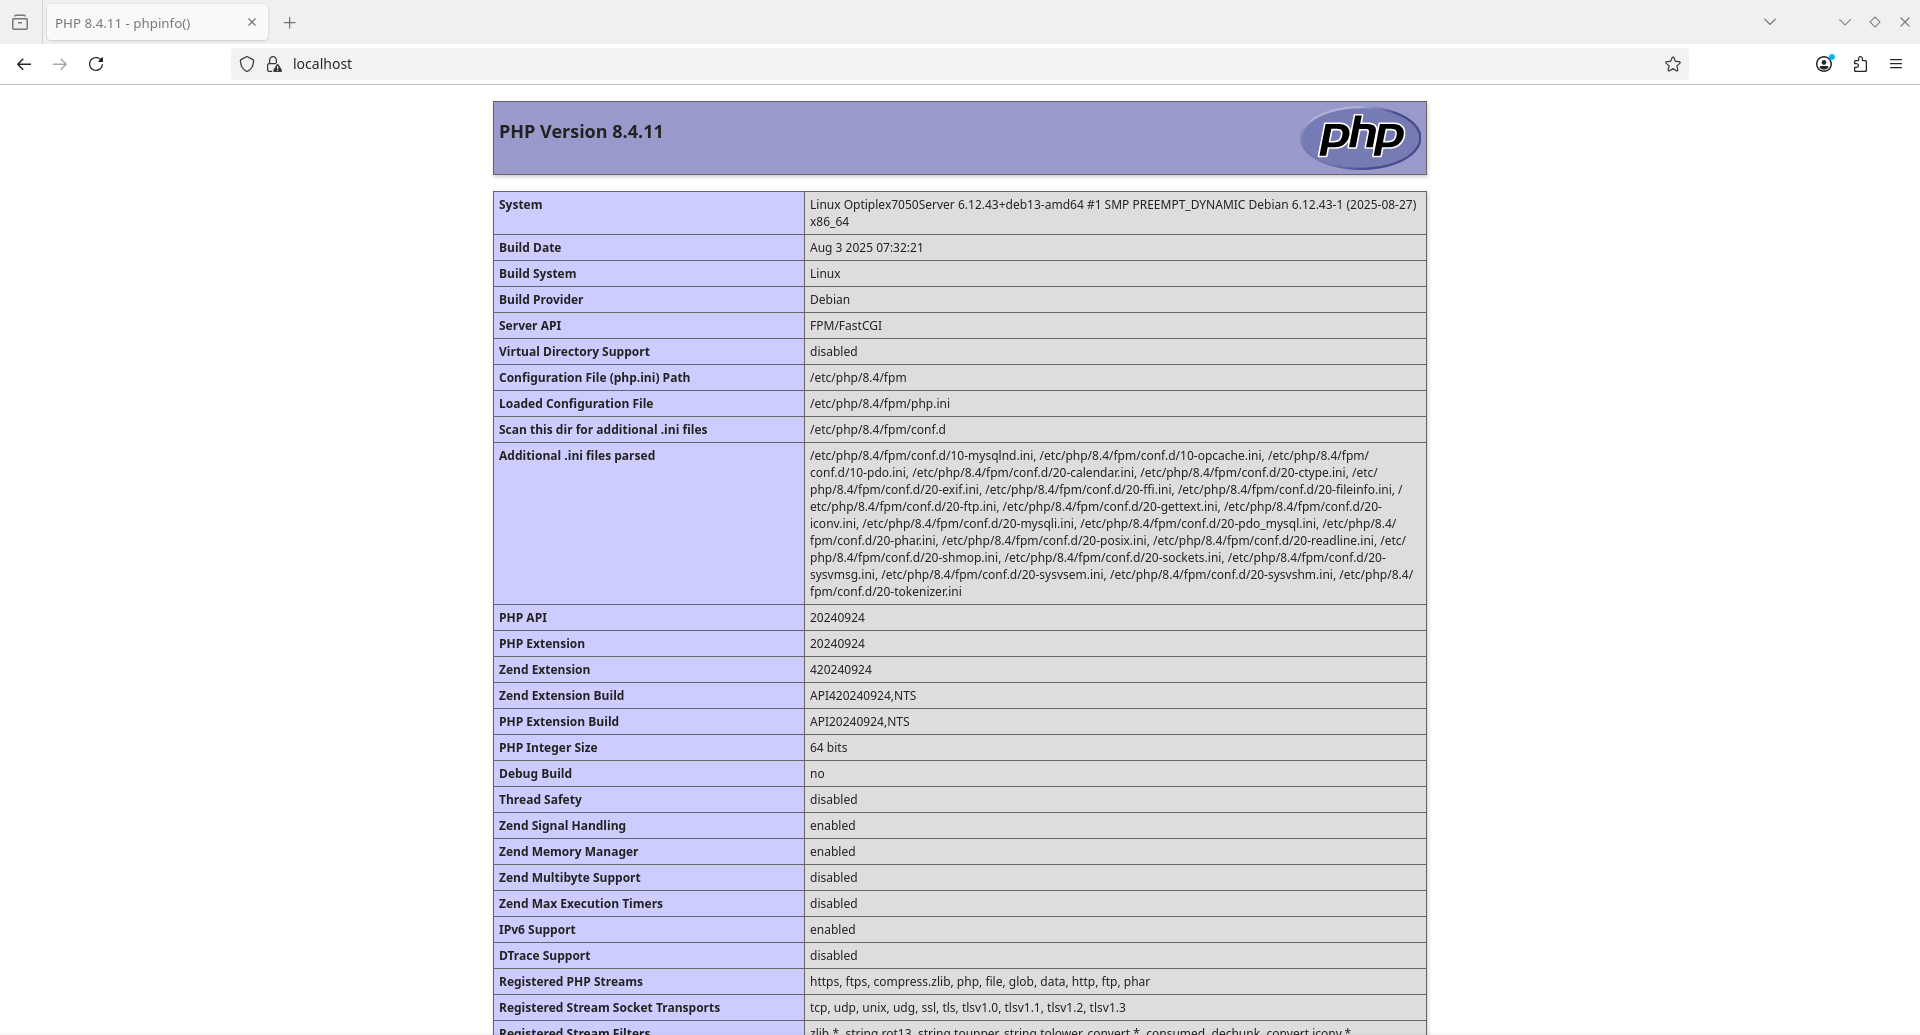
Head to the browser now and enter localhost:8080 in the address bar, behold your power:
5. Install & Configure MariaDB
MariaDB is an Open-Source Database Server allowing execution of SQL Queries on your Web Server
Ensure all packages are up to date and install the basic packages with the following commands:
<user@host> sudo apt-get update && sudo apt-get upgrade -y
<user@host> sudo apt-get install mariadb-server mariadb-client -y
Enable the service, set the application to start on boot and check status with the following:
<user@host> sudo systemctl enable mariadb
<user@host> sudo systemctl start mariadb
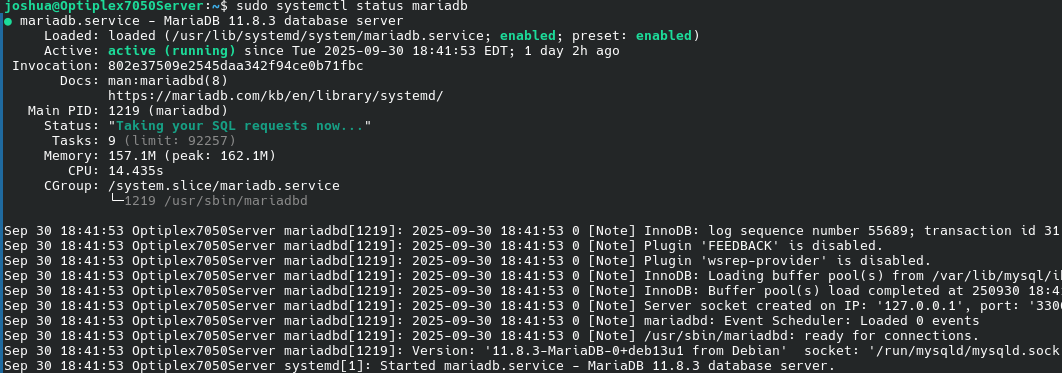
<user@host> sudo systemctl status mariadb
You should see information regarding the running process listed as active (running):
Begin the configuration process with the installation command below:
<user@host> mysql-secure-installation
By following the terminal prompts, the installation command will guide you through:
• Setting a Root Password
• Removing Anonymous Users
• Disabling Remote Root Login
• Removing the Test Database
• Reloading Privilege Tables
6. Putting it All Together | Executing SQL Queries
To begin utilizing the full power of your stack you must create a MariaDB user for your server
Enter the following command and authenticate with the created MariaDB root password for access:
<user@host> mysql -u root -p
Now from the MariaDB Terminal create a user, database, table and grant read privileges below:
MariaDB [(none)]> CREATE USER 'username'@'localhost' IDENTIFIED BY 'password';
MariaDB [(none)]> CREATE DATABASE testDB;
MariaDB [(none)]> CREATE TABLE testtb (
MariaDB [(none)]> Secret varchar(255)
MariaDB [(none)]> );
MariaDB [(none)]> GRANT SELECT ON testDB.* TO 'username'@'localhost';
Create a value in your table to display upon successful query execution with the following:
MariaDB [(none)]> USE testDB;
MariaDB [(testDB)]> INSERT INTO testtb (Secret)
MariaDB [(testDB)]> VALUES ("Query Execution Successful");
MariaDB [(testDB)]> exit
Head back into your index file with the following command:
<user@host> sudo nano /var/www/yourdomain/index.php
Remove what's there and write out the following PHP script to initiate the connection with MariaDB:
<?php
$servername = "127.0.0.1";
$username = "username";
$password = "password";
$dbname = "testDB";
$conn = new mysqli($servername, $username, $password, $dbname);
if ($conn->connect_error) {
die("Connection Failed: " . $conn->connect_error);
}
$sql = "SELECT Secret FROM testtb";
$query = $conn->query($sql);
$result = $query->fetch_assoc();
echo $result;
?>
Save configuration file with CTRL+O and exit nano with CTRL+X
Head to the browser now and enter localhost:8080 in the address bar, behold your power:

Congratulations, you now have the capability to deliver content dynamically with full database support
This server, however, is currently only capable of serving files to other machines locally on the network
Check out the Networking labs section where I expand on this by connecting a domain and enabling SSL/TLS