This walkthrough highlights hands-on engagement with the Cybrary Linux Command Line Interface (CLI) Basics course, designed to build foundational proficiency in navigating and managing Linux systems via the terminal. As part of your IT training journey, complete this module to strengthen your command-line fluency, an essential skill for system administrators, cybersecurity analysts, and DevOps professionals.
Cybrary is a well-established and free IT training platform with several intuitive labs to explore
A paid subscription with more advanced labs is available as well outside the scope of this platform
Head to https://www.cybrary.it to create a free account for learning available on their platform
Head to Linux CLI Basics to complete this training lab for yourself or perform on your home lab below
Quick Links:
Requirements:
• Windows PC w/ Internet Connection
• USB Flash Drive w/ at least 8GB Capacity
• Second PC w/ at least 1GB of Ram
1. Create Ubuntu Live USB
The lab utilizes a well know Linux Distribution Ubuntu based on Debian to explore basic CLI commands
You can use the operating system without having to install it onto your hard drive with a live USB
Download Ubuntu Desktop LTS: Ubuntu Desktop LTS Official Download
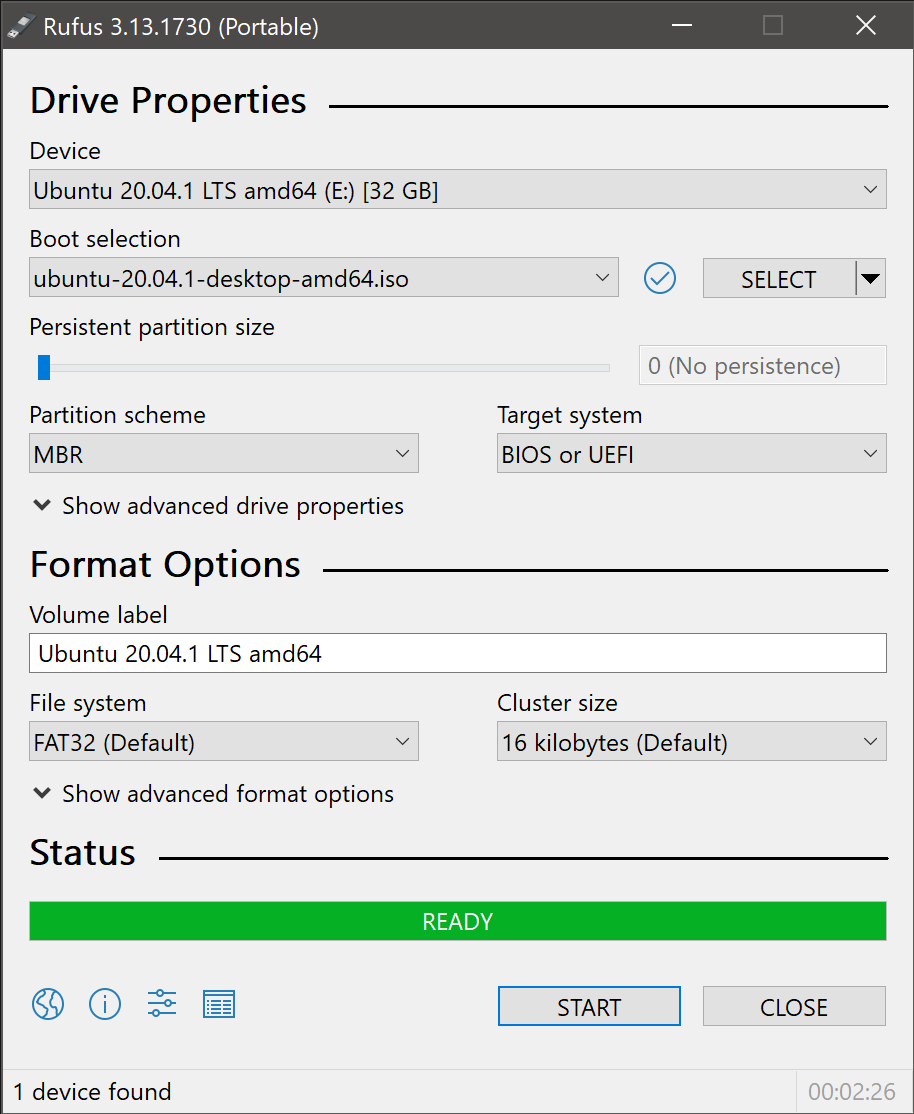
Download Rufus: Rufus Official Download
Insert USB Flash Drive, run rufus.exe, select target drive, select Ubuntu Desktop TLS Iso, start:
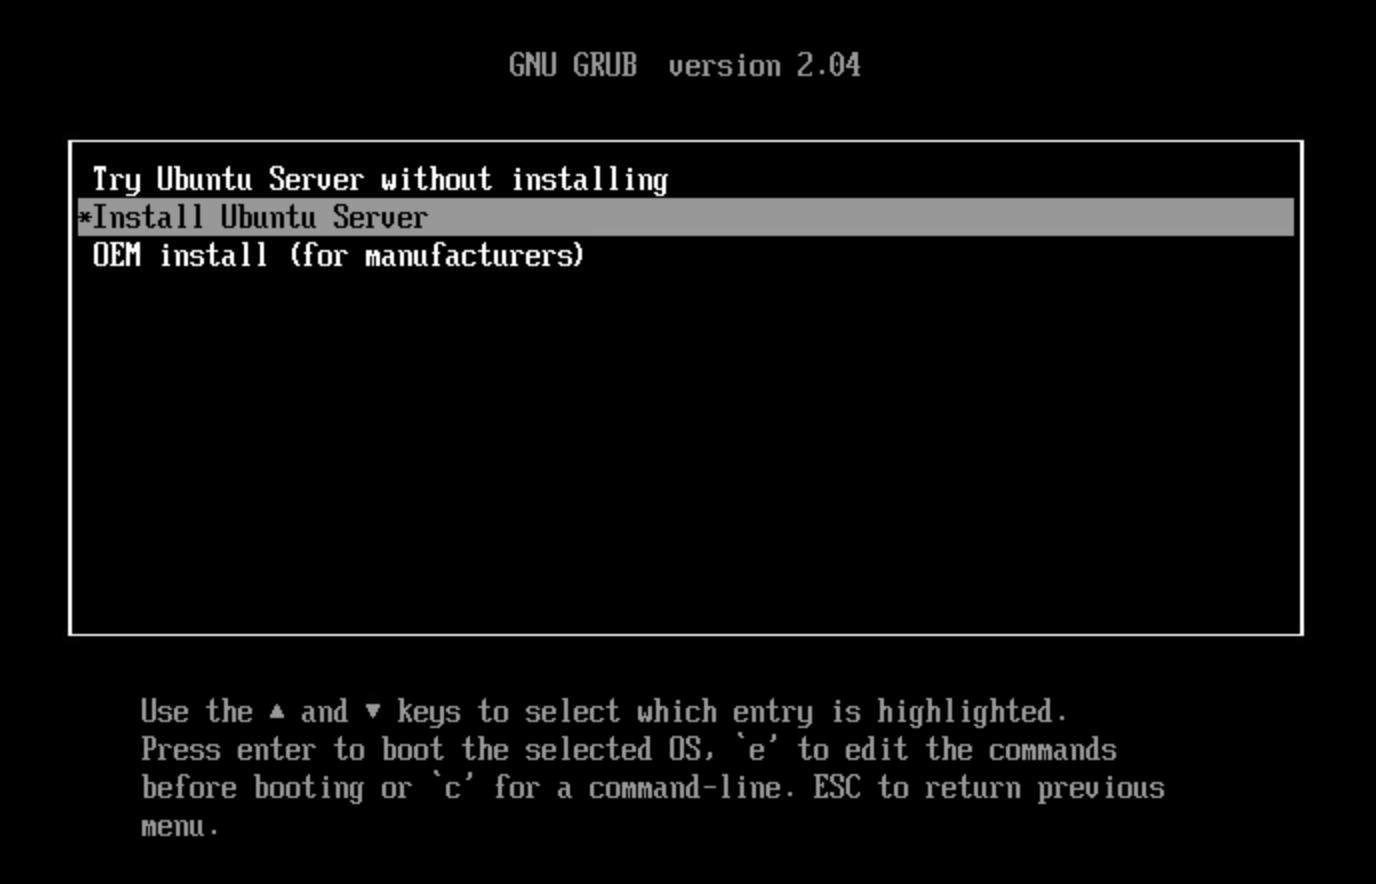
Remove USB Flash Drive and Insert into second PC. Start PC and press hot boot key on startup:

Select UEFI USB Flash Boot. Allow Ubuntu to load and scroll to select the Try Ubuntu Without Installing:
Now allow your workstation a moment to load and you will be taken to the Ubuntu setup utility
Navigate through the language and keyboard layout options until you reach the 'Try Ubuntu' option:
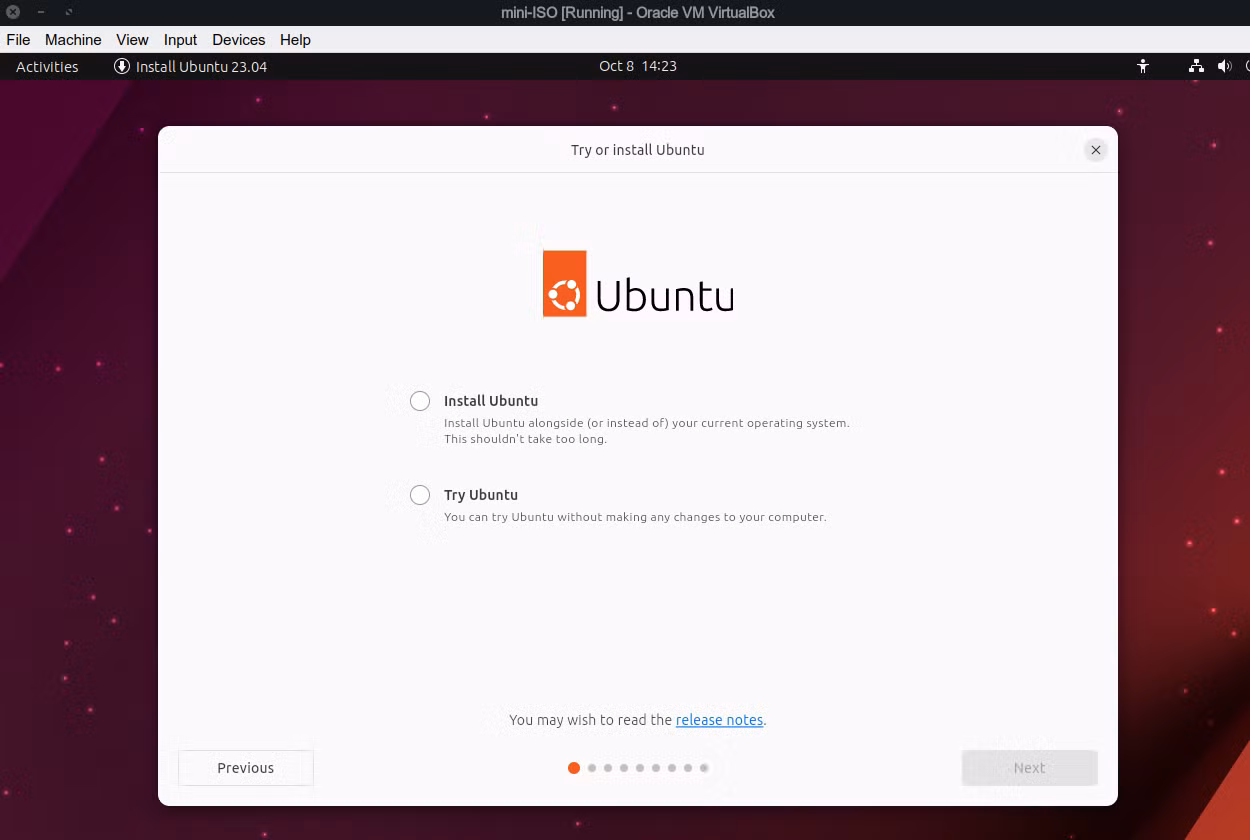
Once selected you will be able to close the setup window and enter the Ubuntu Graphical Desktop
This live system won't save anything on your PC's hard drive, and we will complete the lab here
2. Navigation Commands
Command Line Interfaces are known as shells, the most common for Linux is Bourne Again Shell (BASH)
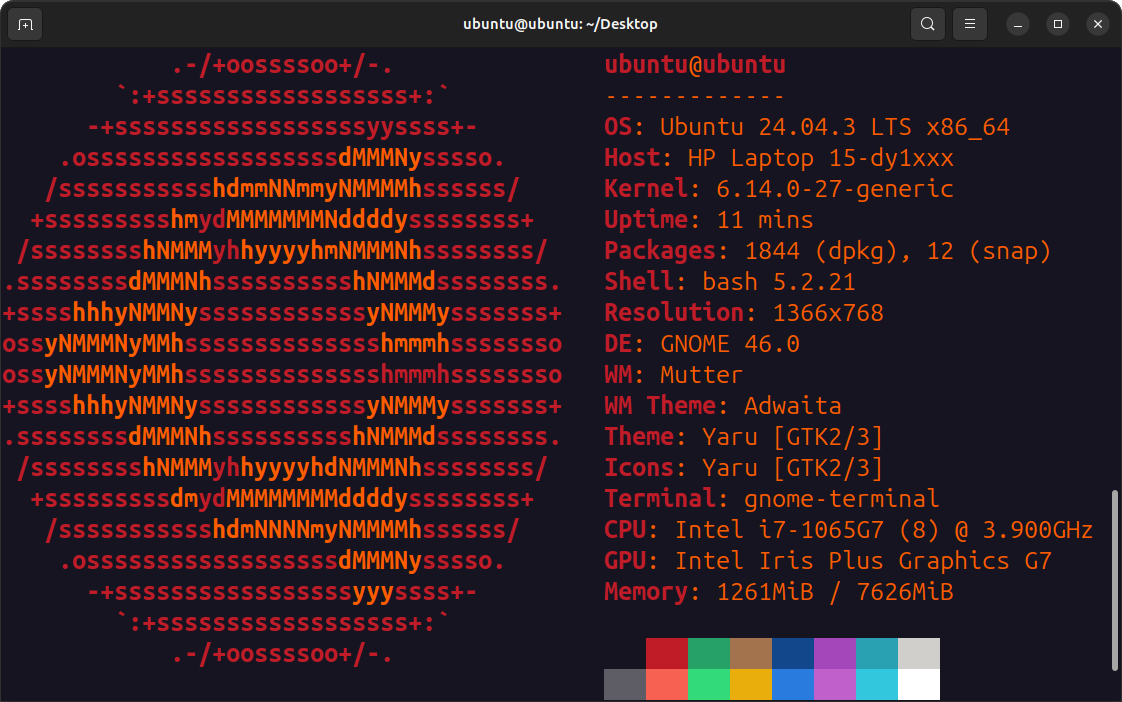
Here we will explore some basic BASH commands, right click the desktop and select Open in Terminal:

The Terminal program is the method of accessing the Linux Command Line Interface from a Desktop GUI
Already this window is giving us quite a bit of information about how the system is configured:
• ubuntu - username of the account currently logged in
• @ - separator character from the active username and active hostname
• ubuntu - hostname of the currently logged in system
• : - separator character from the identifiers and the directories
• ~ - character representing the home directory of the current user, for this user it is /home/ubuntu in the filesystem
• /Desktop - since we opened the terminal from the desktop, it opens in the /home/ubuntu/Desktop location
• $ - user privilege level indicator, this means that ubuntu does not have administrator level privileges
Run the following command from the terminal to display the current user:
ubuntu@ubuntu:~/Desktop$ whoami
Resulting Output:
ubuntu@ubuntu:~/Desktop$ whoami
ubuntu
ubuntu@ubuntu:~/Desktop$
Run the following command from the terminal to display the current host:
ubuntu@ubuntu:~/Desktop$ hostname
Resulting Output:
ubuntu@ubuntu:~/Desktop$ hostname
ubuntu
ubuntu@ubuntu:~/Desktop$
Run the following command from the terminal to display the current directory:
ubuntu@ubuntu:~/Desktop$ pwd
Resulting Output:
ubuntu@ubuntu:~/Desktop$ pwd
/home/ubuntu/Desktop
ubuntu@ubuntu:~/Desktop$
pwd stands for print working directory, remember that ~ stands for home or /home/ubuntu in this case
Run the following command from the terminal to display the user and group IDs for your account:
ubuntu@ubuntu:~/Desktop$ id
Resulting Output:
ubuntu@ubuntu:~/Desktop$ id
uid=1000(ubuntu) gid=1000(ubuntu) groups=1000(ubuntu),4(adm),24(cdrom),27(sudo),30(dip),46(plugdev),100(users),114(lpadmin),124(sambashare)
ubuntu@ubuntu:~/Desktop$
Each user account is assigned to a unique user ID, all standard non-root users have IDs greater than 1000
Each user account also has membership to one or more groups which are collections of users based on permissions
Run the following command from the terminal to change and then check the current working directory:
ubuntu@ubuntu:~/Desktop$ cd ..
ubuntu@ubuntu:~/Desktop$ pwd
Resulting Output:
ubuntu@ubuntu:~/Desktop$ cd ..
ubuntu@ubuntu:~$ pwd
/home/ubuntu
ubuntu@ubuntu:~$
cd stands for change directory followed by the target (..) in this case which represents the parent directory
So, this command essentially tells the terminal to go up one level within the current place in the filesystem
Run the following command from the terminal to explore the files inside the current working directory:
ubuntu@ubuntu:~$ ls
Resulting Output:
ubuntu@ubuntu:~$ ls
Desktop Documents Downloads Music Pictures Public Templates Videos snap
ubuntu@ubuntu:~$
ls stands for list and will create exactly that with the files and directories within the current directory
Run the following command from the terminal for more information on the files and directories in ~/:
ubuntu@ubuntu:~$ ls -l
Resulting Output:
ubuntu@ubuntu:~$ ls -l
total 0
drwxr-xr-x 2 ubuntu ubuntu 60 Oct 5 18:27 Desktop
drwxr-xr-x 2 ubuntu ubuntu 40 Oct 5 18:27 Documents
drwxr-xr-x 2 ubuntu ubuntu 40 Oct 5 18:27 Downloads
drwxr-xr-x 2 ubuntu ubuntu 40 Oct 5 18:27 Music
drwxr-xr-x 2 ubuntu ubuntu 40 Oct 5 18:27 Pictures
drwxr-xr-x 2 ubuntu ubuntu 40 Oct 5 18:27 Public
drwxr-xr-x 2 ubuntu ubuntu 40 Oct 5 18:27 Templates
drwxr-xr-x 2 ubuntu ubuntu 40 Oct 5 18:27 Videos
drwx------ 4 ubuntu ubuntu 80 Oct 5 18:27 snap
ubuntu@ubuntu:~$
With the -l or long option you can see information about the creation date, object type and permissions
The object type and permissions information are displayed within that long string at the beginning, sequentially:
• d - stands for directory, indicating the object is a directory
• r - stands for read permissions enabled
• w - stands for write permissions enabled
• x - stands for execute permissions enabled
• - - means that permission in the sequence is not enabled
There are 3 sets of read, write and execute permissions with a leading directory indicator. These are as follows:
1. Directory Indicator (d or -)
2. File or Folder Owner Permissions (rwx or --- or combination)
3. Group Permissions (rwx or --- or combination)
4. All Other Users Permissions (rwx or --- or combination)
Run the following command from the terminal for detailed information on ALL files and directories in ~/:
ubuntu@ubuntu:~$ ls -la
Resulting Output:
ubuntu@ubuntu:~$ ls -la
total 12
drwxr-x--- 15 ubuntu ubuntu 380 Oct 5 18:27 .
drwxr-xr-x 1 root root 80 Oct 5 18:27 ..
-rw-r--r-- 1 ubuntu ubuntu 220 Oct 5 18:27 .bash_logout
-rw-r--r-- 1 ubuntu ubuntu 3771 Oct 5 18:27 .bashrc
drwx------ 11 ubuntu ubuntu 240 Oct 5 19:04 .cache
drwxr-xr-x 13 ubuntu ubuntu 420 Oct 5 19:04 .config
drwz------ 2 ubuntu ubuntu 40 Oct 5 18:27 .gvfs
drwx------ 4 ubuntu ubuntu 80 Oct 5 18:27 .local
-rw-r--r-- 1 ubuntu ubuntu 807 Oct 5 18:27 .profile
-rw-r--r-- 1 ubuntu ubuntu 0 Oct 5 18:27 .sudo_as_admin_successful
drwxr-xr-x 2 ubuntu ubuntu 60 Oct 5 18:27 Desktop
drwxr-xr-x 2 ubuntu ubuntu 40 Oct 5 18:27 Documents
drwxr-xr-x 2 ubuntu ubuntu 40 Oct 5 18:27 Downloads
drwxr-xr-x 2 ubuntu ubuntu 40 Oct 5 18:27 Music
drwxr-xr-x 2 ubuntu ubuntu 40 Oct 5 18:27 Pictures
drwxr-xr-x 2 ubuntu ubuntu 40 Oct 5 18:27 Public
drwxr-xr-x 2 ubuntu ubuntu 40 Oct 5 18:27 Templates
drwxr-xr-x 2 ubuntu ubuntu 40 Oct 5 18:27 Videos
drwx------ 4 ubuntu ubuntu 80 Oct 5 18:27 snap
ubuntu@ubuntu:~$
Notice there are many more objects displayed here, -a display all files and directories including hidden ones
Each of the hidden files and directories start with a (.) which hides them from the standard terminal view
These files are system files with important functions, so they are hidden to prevent users from accidentally altering
Run the following command from the terminal to go upwards by two directories in the filesystem:
ubuntu@ubuntu:~$ cd ../..
Resulting Output:
ubuntu@ubuntu:~$ cd ../..
ubuntu@ubuntu:/$
Notice that our home directory (~) has been changed to (/). This represents the root directory of the filesystem
The root directory is the highest level in the filesystem which all other directories and files branch off from
Run the following command from the terminal to explore the standard filesystem structure for Linux:
ubuntu@ubuntu:/$ ls
Resulting Output:
ubuntu@ubuntu:/$ ls
bin boot dev home lib.usr-is-merged media opt rofs run sbin.usr-is-merged srv tmp var
bin.usr-is-merged cdrom etc lib lib64 mnt proc root sbin snap sys usr
ubuntu@ubuntu:/$
All the configuration files, logs, system files and included software are contained within one of these directories
Run the following command from the terminal to return to the home directory:
ubuntu@ubuntu:/$ cd ~
3. File Creation Commands
We will now move on from simply viewing the files/directories and begin building them with various BASH commands
Run the following command from the terminal to create a new directory:
ubuntu@ubuntu:~$ mkdir testdir
No output is given for this operation; confirm it was successful by checking for it in the filesystem:
ubuntu@ubuntu:~$ ls
Resulting Output:
ubuntu@ubuntu:~$ ls
Desktop Documents Downloads Music Pictures Public Templates Videos snap testdir
ubuntu@ubuntu:~$
Success! Now let's change our working directory to our newly created /testdir with the following:
ubuntu@ubuntu:~$ cd ~/testdir
Resulting Output:
ubuntu@ubuntu:~$ cd ~/testdir
ubuntu@ubuntu:~/testdir$
Run the following command from the terminal to create three empty files within our newly created directory and confirm success:
ubuntu@ubuntu:~/testdir$ touch file1.txt file2.txt file3.txt
ubuntu@ubuntu:~/testdir$ ls
Resulting Output:
ubuntu@ubuntu:~/testdir$ ls
file1.txt file2.txt file3.txt
ubuntu@ubuntu:~/testdir$
Run the following command from the terminal to append a string statement to a file:
ubuntu@ubuntu:~/testdir$ echo "My name is file 1" >> file1.txt
The (>>) above is an example of an output redirector which adds a value to the end of an existing file
BASH also contains other output redirectors such as (>) which overwrites an existing file with a value
Run the following command from the terminal to output the contents of our file:
ubuntu@ubuntu:~/testdir$ cat file1.txt
Resulting Output:
ubuntu@ubuntu:~/testdir$ cat file1.txt
My name is file 1
ubuntu@ubuntu:~/testdir$
Cat stands for concatenate and can be used to show the text contents of files along with other uses
Run the following command from the terminal to display the file type of our file:
ubuntu@ubuntu:~/testdir$ file file1.txt
Resulting Output:
ubuntu@ubuntu:~/testdir$ file file1.txt
file1.txt ASCII text
ubuntu@ubuntu:~/testdir$
The file command can be used to reveal a files type even if it is mislabeled or has no file extension
Unlike Windows, Linux does not strictly require file extensions, it is seen as a courtesy to other users
Run the following commands from the terminal to file our other files and display the results:
ubuntu@ubuntu:~/testdir$ echo "My name is file 2" >> file2.txt
ubuntu@ubuntu:~/testdir$ echo "My name is file 3" >> file3.txt
ubuntu@ubuntu:~/testdir$ cat file1.txt file2.txt file3.txt
Resulting Output:
ubuntu@ubuntu:~/testdir$ cat file1.txt file2.txt file3.txt
My name is file 1
My name is file 2
My name is file 3
ubuntu@ubuntu:~/testdir$
Run the following command from the terminal to create three more directories within our test directory:
mkdir red green blue
4. File Manipulation Commands
Making new files is great and comes in handy for building applications and doing deep work on the Linux OS
But what if you'd like to alter the structure of the filesystem or locations of files, we will explore this
Run the following commands from the terminal to create a copy of our file in another location and confirm:
ubuntu@ubuntu:~/testdir$ cp file1.txt green/
ubuntu@ubuntu:~/testdir$ ls -R
Resulting Output:
ubuntu@ubuntu:~/testdir$ ls -R
.:
blue file1.txt file2.txt file3.txt green red
./blue:
./green:
file1.txt
./red
ubuntu@ubuntu:~/testdir$
The -R options for the ls command stands for recursive and will list all files, directories, and files within those directories
Notice that there are two instances of file1.txt at this point within both the ~/testdir and ~/testdir/green directories
Run the following command from the terminal to remove the instance within the ~/testdir: directory
ubuntu@ubuntu:~/testdir$ rm -i file1.txt
rm: remove regular file 'file1.txt'? y
Notice how the terminal makes you type y to confirm. This is due to the presence of the -i option for rm
Always use this option, otherwise Linux will erase the file beyond recovery without confirming with you
There have been many IT professional careers ruined by deleting their employers' critical assets beyond recovery
There is no Recycling Bin in Linux and no undo button. Show respect for the rm command as it can break things.
Run the following command from the terminal to test that your removal was successful:
ubuntu@ubuntu:~/testdir$ ls -R
Resulting Output:
ubuntu@ubuntu:~/testdir$ ls -R
.:
blue file2.txt file3.txt green red
./blue:
./green:
file1.txt
./red:
ubuntu@ubuntu:~/testdir$
Run the following commands from the terminal to move a file without leaving a copy behind and test:
ubuntu@ubuntu:~/testdir$ mv file2.txt blue
ubuntu@ubuntu:~/testdir$ ls -R
Resulting Output:
ubuntu@ubuntu:~/testdir$ ls -R
.:
blue file3.txt green red
./blue:
file2.txt
./green:
file1.txt
./red:
ubuntu@ubuntu:~/testdir$
Run the following command from the terminal to rename our file and confirm:
ubuntu@ubuntu:~/testdir$ mv file3.txt file3a.txt
ubuntu@ubuntu:~/testdir$ ls
Resulting Output:
ubuntu@ubuntu:~/testdir$ ls
blue file3a.txt green red
ubuntu@ubuntu:~/testdir$
Run the cat command from the terminal to confirm the contents of the renamed file have not changed:
ubuntu@ubuntu:~/testdir$ cat file3a.txt
My name is file 3
ubuntu@ubuntu:~/testdir$
Run the following command from the terminal to move and rename our file and confirm:
ubuntu@ubuntu:~/testdir$ mv file3a.txt red/file3.txt
ubuntu@ubuntu:~/testdir$ ls -R
Resulting Output:
ubuntu@ubuntu:~/testdir$ ls -R
.:
blue green red
./blue:
file2.txt
./green:
file1.txt
./red:
file3.txt
ubuntu@ubuntu:~/testdir$
There are more options for viewing the contents of files in Linux than the Cat command
More is the original terminal scrolling command which allows you to scroll forward in text
Less is the modern way to scroll through text allowing forwards and backwards scrolling
Run the following command from the terminal to generate a large text file:
ubuntu@ubuntu:~/testdir$ base64 /dev/urandom | head -c 1M > bigfile.txt
This command has several statements, let's break down the components of this command:
• /dev/urandom - directory included in Linux used to create a large volume of random characters
• base64 - encoding method used to ensure the random characters are printable
• | - Output Redirector used to 'pipe' the output from the first statement as input for the following statement
• head - Reduces the file size by removing the first 1MB of the file
• > - Output Redirector used to overwrite the existing contents of the target file with the given input
Use the long and all options for the ls command to view information about the new file:
ubuntu@ubuntu:~/testdir$ ls -la
total 1044
drwxrwxr-x 5 ubuntu ubuntu 4096 Oct 6 15:09 .
drwxr-x--- 18 ubuntu ubuntu 4096 Oct 6 15:00 ..
-rw-rw-r-- 1 ubuntu ubuntu 1048576 Oct 6 15:09 bigfile.txt
drwxrwxr-x 2 ubuntu ubuntu 4096 Oct 6 15:05 blue
drwxrwxr-x 2 ubuntu ubuntu 4096 Oct 6 15:06 green
drwxrwxr-x 2 ubuntu ubuntu 4096 Oct 6 15:08 red
ubuntu@ubuntu:~/testdir$
Run the following command from the terminal to view the contents of the large file:
ubuntu@ubuntu:~/testdir$ more bigfile.txt
Resulting Output:
Scroll down the text file using the Enter key and exit back to the prompt with the q key
Run the following command from the terminal to use the modern less viewing tool for the file:
ubuntu@ubuntu:~/testdir$ less bigfile.txt
With the less command you can use Enter or the down arrow to scroll down one line at a time
With less you can also use the spacebar for faster scrolling, which scrolls one page at a time
Unlike the more command you can also scroll up with the up arrow by line or the b key by page
When you are done exploring the illegible gibberish you can quit out of the less command with q
5. File Locator Commands
An important skill within Linux is the ability to locate files and their placement in the system
While we already know how to navigate the filesystem, it is vast and difficult to search completely
Run the following command from the terminal to locate files and directories named 'more':
ubuntu@ubuntu:~/testdir$ find / -name "more" 2>/dev/null
Resulting Output:
ubuntu@ubuntu:~/testdir$ find / -name "more" 2>/dev/null
/snap/core22/2045/usr/bin/more
/snap/core22/2045/usr/share/bash-completion/completions/more
/usr/bin/more
/usr/share/bash-completion/completions/more
/rofs/usr/bin/more
/rofs/usr/share/bash-completion/completions/more
ubuntu@ubuntu:~/testdir$
The /dev/null is a black hole directory and the 2> redirects any error messages there for readability
Run the following command from the terminal to locate all files with the .txt file extension:
ubuntu@ubuntu:~/testdir$ find . -name "*.txt"
Resulting Output:
ubuntu@ubuntu:~/testdir$ find . -name "*.txt"
./bigfile.txt
./red/file3.txt
./green/file1.txt
./blue/file2.txt
ubuntu@ubuntu:~/testdir$
Run the following command from the terminal to find files containing a particular word or phrase:
ubuntu@ubuntu:~/testdir$ grep -r "name"
Resulting Output:
ubuntu@ubuntu:~/testdir$ grep -r "name"
red/file3.txt:My name is file 3
green/file1.txt:My name is file 1
blue/file2.txt:My name is file 2
ubuntu@ubuntu:~/testdir$
The grep command will show the files' locations and the line of text where the phrase is found
Use the cd ~ command within the terminal window to return to the home directory for the next section
6. File-Parsing Techniques
Run the following commands to generate a file filled with unsorted strings:
ubuntu@ubuntu:~/testdir$ touch unsorted
ubuntu@ubuntu:~/testdir$ echo "apple" >> unsorted
ubuntu@ubuntu:~/testdir$ echo "zoo" >> unsorted
ubuntu@ubuntu:~/testdir$ echo "xylophone" >> unsorted
ubuntu@ubuntu:~/testdir$ echo "band" >> unsorted
ubuntu@ubuntu:~/testdir$ echo "cantaloupe" >> unsorted
ubuntu@ubuntu:~/testdir$ echo "knife" >> unsorted
ubuntu@ubuntu:~/testdir$ echo "corn" >> unsorted
ubuntu@ubuntu:~/testdir$ echo "salt" >> unsorted
ubuntu@ubuntu:~/testdir$ echo "truck" >> unsorted
ubuntu@ubuntu:~/testdir$ echo "talisman" >> unsorted
ubuntu@ubuntu:~/testdir$ echo "groceries" >> unsorted
ubuntu@ubuntu:~/testdir$ echo "corn" >> unsorted
ubuntu@ubuntu:~/testdir$ echo "salt" >> unsorted
ubuntu@ubuntu:~/testdir$ echo "cantaloupe" >> unsorted
ubuntu@ubuntu:~/testdir$ echo "xylophone" >> unsorted
ubuntu@ubuntu:~/testdir$ echo "talisman" >> unsorted
ubuntu@ubuntu:~/testdir$ echo "apple" >> unsorted
Run the cat command to view your newly created unsorted list:
ubuntu@ubuntu:~/testdir$ cat unsorted
apple
zoo
xylophone
band
cantaloupe
knife
corn
salt
truck
talisman
groceries
corn
salt
cantaloupe
xylophone
talisman
apple
ubuntu@ubuntu:~/testdir$
Run the following command from the terminal to sort the list and view the sorted contents:
ubuntu@ubuntu:~/testdir$ cat unsorted | sort
apple
apple
band
cantaloupe
cantaloupe
corn
corn
groceries
knife
salt
salt
talisman
talisman
truck
xylophone
xylophone
zoo
ubuntu@ubuntu:~/testdir$
Run the following command from the terminal to sort the list and remove duplicate entries:
ubuntu@ubuntu:~/testdir$ cat unsorted | sort | uniq
apple
band
cantaloupe
corn
groceries
knife
salt
talisman
truck
xylophone
zoo
ubuntu@ubuntu:~/testdir$
Run the following command from the terminal to view the files word, line and character count:
ubuntu@ubuntu:~/testdir$ cat unsorted | wc
17 17 123
ubuntu@ubuntu:~/testdir$
Run the same command from the terminal with the -w option to view only the word count:
ubuntu@ubuntu:~/testdir$ cat unsorted | wc -w
17
ubuntu@ubuntu:~/testdir$
Run the following command from the terminal to count the number of lines in the unsorted file:
ubuntu@ubuntu:~/testdir$ cat unsorted | sort | uniq | wc -l
11
ubuntu@ubuntu:~/testdir$
Congratulations, this marks the end of our lab discussing the basic Linux Command Line Interface
You are now prepared to navigate your way around these systems and alter the files and directories
Check out our future upcoming labs where we take these skills and this platform to the next level:
Linux Advanced CLI Commands
Cybrary Linux CLI Challenge Lab Solution