This project showcases a fundamental understanding of Windows Server administration and identity management through the deployment and configuration of Active Directory Domain Services (AD DS). This hands-on lab involves building a complete directory infrastructure using both graphical and command-line interfaces. This project demonstrates the ability to set up, manage, and scale a Windows network environment.
Cybrary is a well established and free IT training platform with several intuitive labs to explore
A paid subscription with more advanced labs is available as well outside the scope of this platform
Head to https://www.cybrary.it to create a free account for learning available on their platform
Head to Active Directory Basics to complete it yourself or you can perform it on your homelab below
Quick Links:
Requirements:
• Windows PC w/ Internet Connection
• USB Flash Drives w/ at least 64GB Capacity
• 2 Unused PCs w/ at least 4GB of Memory
1. Active Directory Overview
One of the all time most important features of the Windows ecosystem is the Active Directory framework
According to Microsoft, Active Directory is a hierarchical structure that stores information about objects
In this context, referenced objects are things on the network such as users, groups, and computer systems
The Active Directory structure is effectively a centralized database containing identifiable information
This information allows for the process of authentication and controlled access to the networks resources
Active Directory is supported by another core feature of the Windows ecosystem - The Domain Controller
A Domain Controller is a Windows Server that hosts Active Directory services and provides authentication
Although any version of Windows Server can be promoted to a Domain Controller, it's best to use the latest
Domain Controllers should have sufficient CPU and memory to run Active Directory and manage the objects
Installing Active Directory can be done using the Server Manager GUI or PowerShell. We will use both here
When you install Active Directory, the installation process will create what is referred to as a forest
A forest is more than a collection of domains; it represents the security boundary in Active Directory
All domains contained within a single forest inherently trust each other through transitive relationships
This means that authentication and access control can occur seamlessly across domains in the same forest
The forest also defines a shared schema, which is essentially the blueprint that determines object types
A forest also includes a global catalog and a configuration container that are shared across its domains
A forest can be composed of a single domain or span multiple domains, depending on the organizations needs
For instance, separate domains might be established to reflect different regions or even lines of business
However, regardless of how many domains exist within a forest, the schema and configuration remain common
Additionally the administrative control can be delegated as needed within a forests multi-domain structure
Importantly, administrative rights do not extend across forests unless explicitly defined in forest trusts
Making the forest a strong isolation boundary in scenarios needing high security/operational independence
Common scenarios this would apply to include mergers, acquisitions, or hosting multi-tenant environments
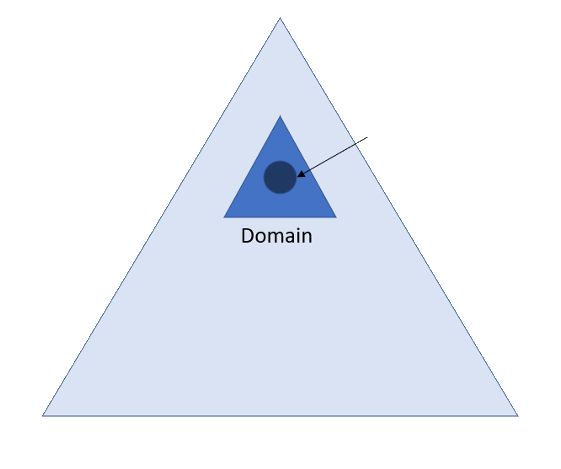
A domain is a logical grouping within the forest that serves as an administrative boundary and extension
Each domain maintains its own Active Directory database and is responsible for authenticating the users
Domains typically reflect a particular organizational structure or policy domain and support independence
The independence supported is in the form of management of group policies, user permissions, and security
When multiple domains exist within a forest, they can often be arranged hierarchically in a tree structure
This design supports both centralization and autonomy, depending on the overall objectives of the business
Each domain is divided further into Organizational Units (OUs) containing users, groups, and computers
OUs allow you to create a logical structure inside your directory that mimics your broader organization
In a Microsoft Active Directory (AD) environment, the Domain Name System (DNS) is not just an extra service
DNS is fundamentally integrated into the fabric of Active Directory, the relationship between is symbiotic
With DNS serving as the essential name resolution mechanism that allows AD clients to locate one another
DNS also allows for the Domain Controllers to take on actions and function cohesively across the network
Active Directory is dependent on and tightly integrated with the Domain Name System (DNS) functionality
In fact, outside of time synchronization issues, nearly all Active Directory failures come down to the DNS
In complex environments involving multiple domains or forests, careful consideration must be given to DNS
This includes how DNS zones are structured and delegated. Poor namespace design often lead to resolution
failures and administrative difficulties, particularly when integrating non-Windows systems or external DNS
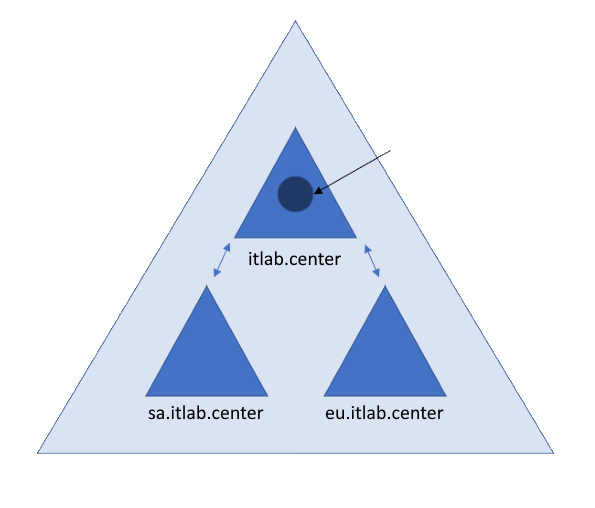
In the organization example shown below, there is a single forest and three domains using DNS-styled names
In this example, the organization ITLAB.Center has decided to have a different domain for each location:
• US: itlab.center
• Europe: eu.itlab.center
• South America: sa.itlab.center
Although you can create new domains based on any criteria you like, good AD design is complex and requires
a great deal of planning, especially when branch offices and diverse geographical locations are involved
Sadly, most organizations start with a single forest and domain, and grow their domains in an ad-hoc way
They later merge with other messy organizations, creating a tangled web of unorganized forests and domains
Feel free to browse the following article to see at a high level the amount of thought and planning that
goes into designing an enterprise Active Directory Active Directory Design Considerations & Best Practices
For the purposes of this lab, a single forest with a single domain will suffice, we will do this twice
2. Install Windows Server 2025
Windows Server is Microsoft's enterprise-grade server operating system for hosting several applications
Organizations wishing to host their web servers, databases, or file shares on Windows will utilize this
Download Windows Server 2025 Disk Image (ISO): Windows Server 2025 ISO
Download Rufus Disk Imaging Software: Rufus Official Download
Insert USB Flash Drive, run rufus.exe, select target drive, select Windows Server 2025 ISO, hit start:
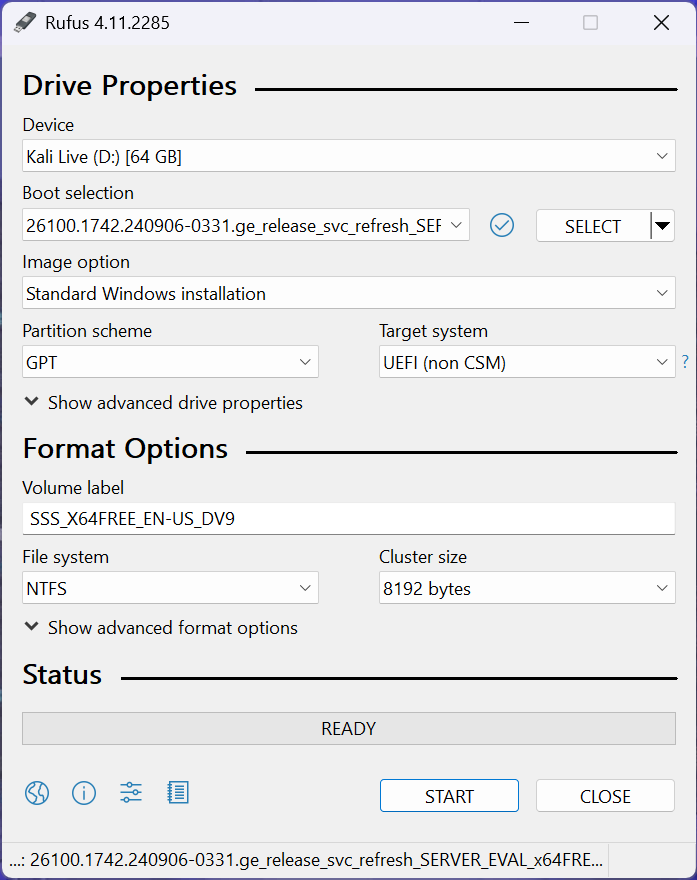
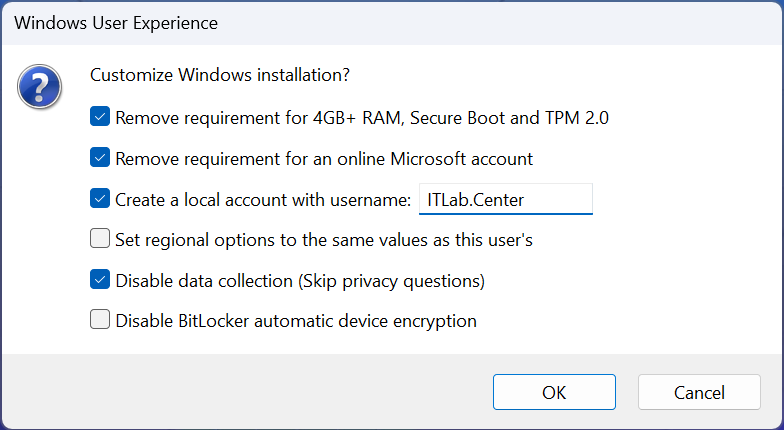
Use the rufus popup menu to customize the Windows Server 2025 installation and disable data collection:
Remove USB Flash Drive and Insert into unused PC. Start the PC and press the hot boot key at the startup:

Navigate through the installer and select the Windows Server Standard Evaluation Desktop Experience option:
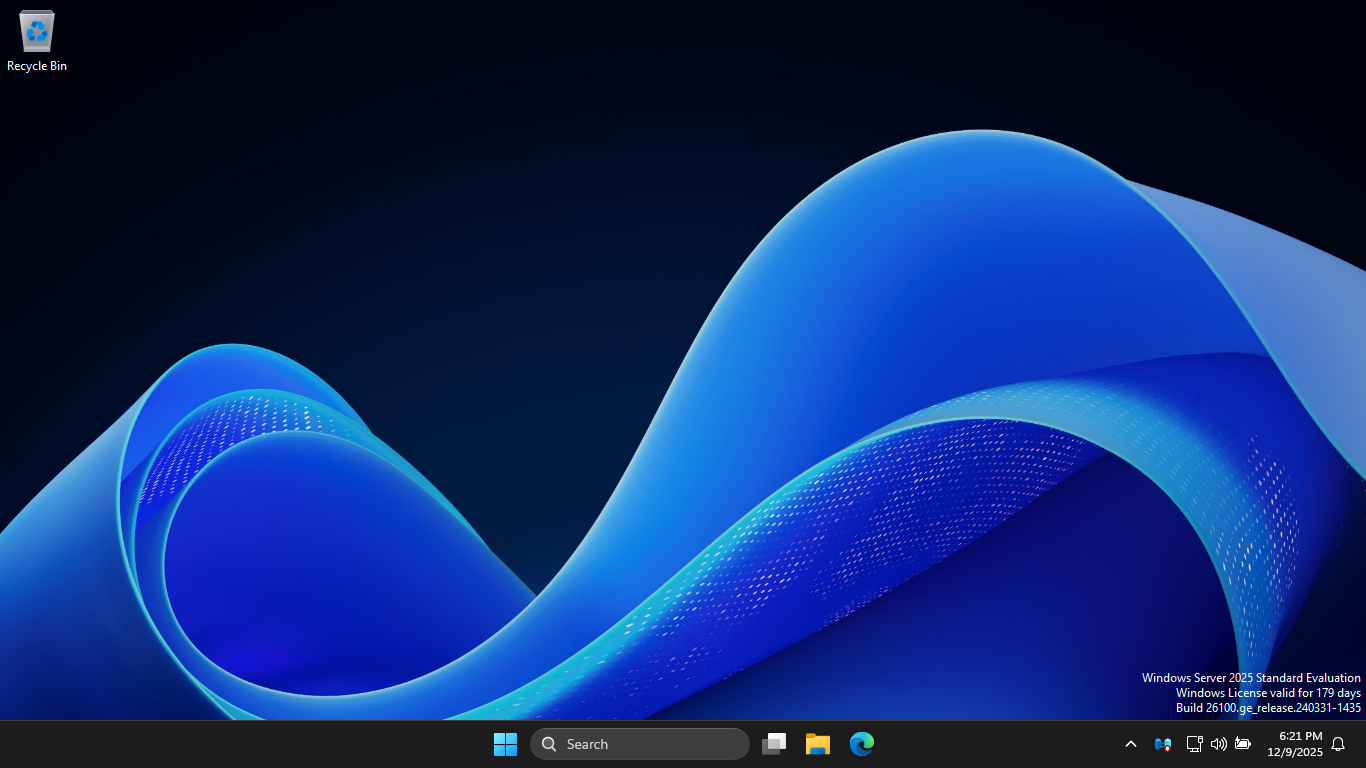
We now have our Server provisioned which will simulate our Active Directory for the following lab sections
3. Create a Domain Controller w/ Server Manager GUI
In this lab, you will learn how to install Active Directory, create Organizational Units, Users and Groups
In this section, you will create two domains, one using the Server Manager GUI, and one using PowerShell
You will then create users and groups in each domain using the Active Directory Users and Computers GUI
You will begin by using the Server Manager to install Active Directory Domain Services on the GUI Server
For the purposes of this lab we will refer to this as the GUI Server and the other as PowerShell Server
You will switch between GUI and PowerShell during the lab, be sure which server you are on before acting
On the taskbar, click the Windows Start icon, then click the Server Manager to open the Windows Manager:
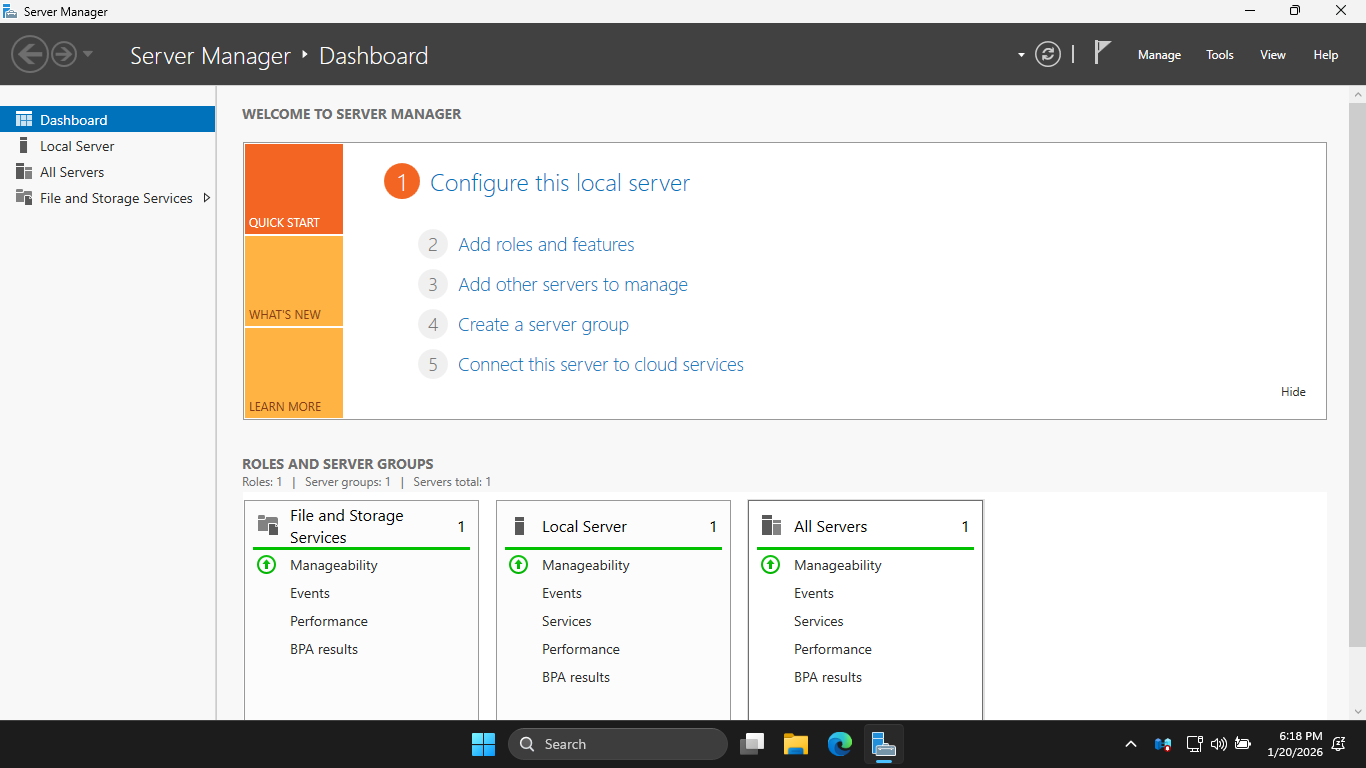
In the Server Manager, click the Add Roles and Features link to open the Add Roles and Features Wizard:
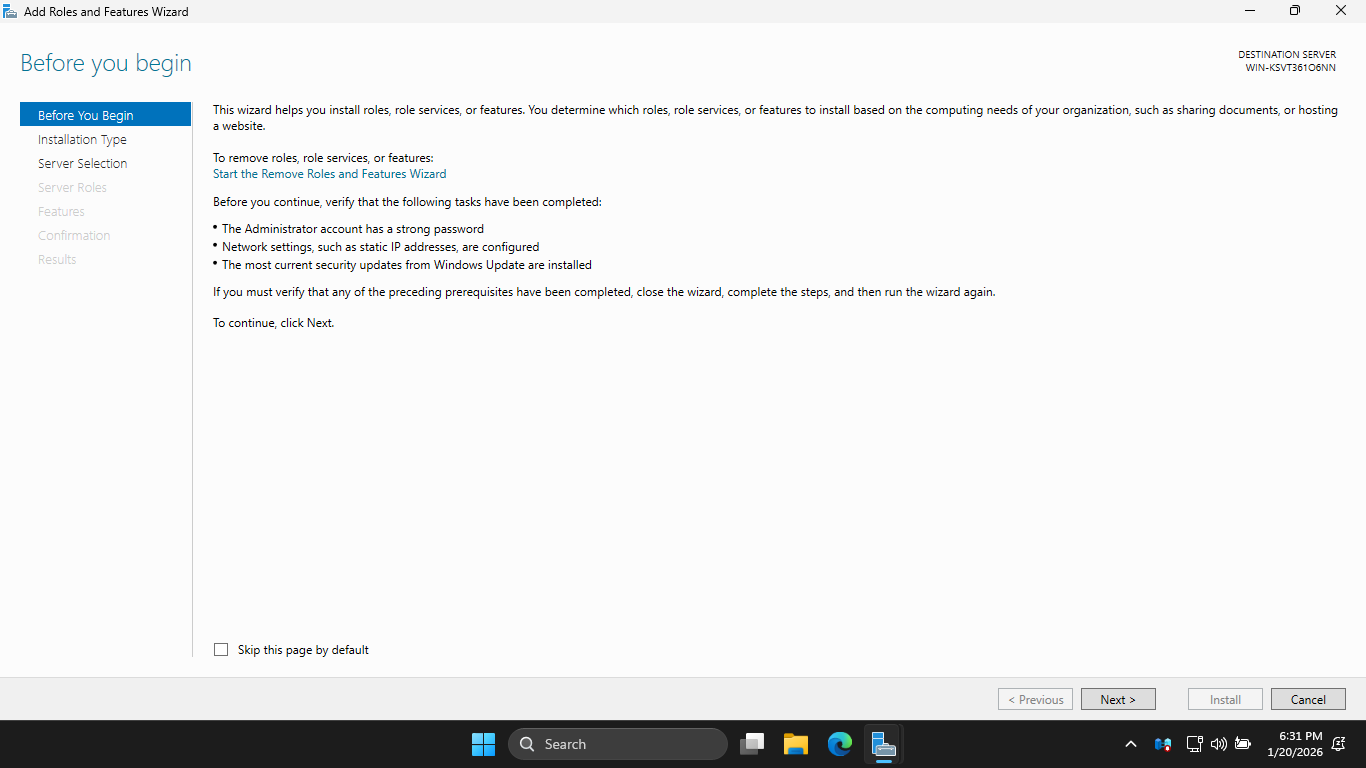
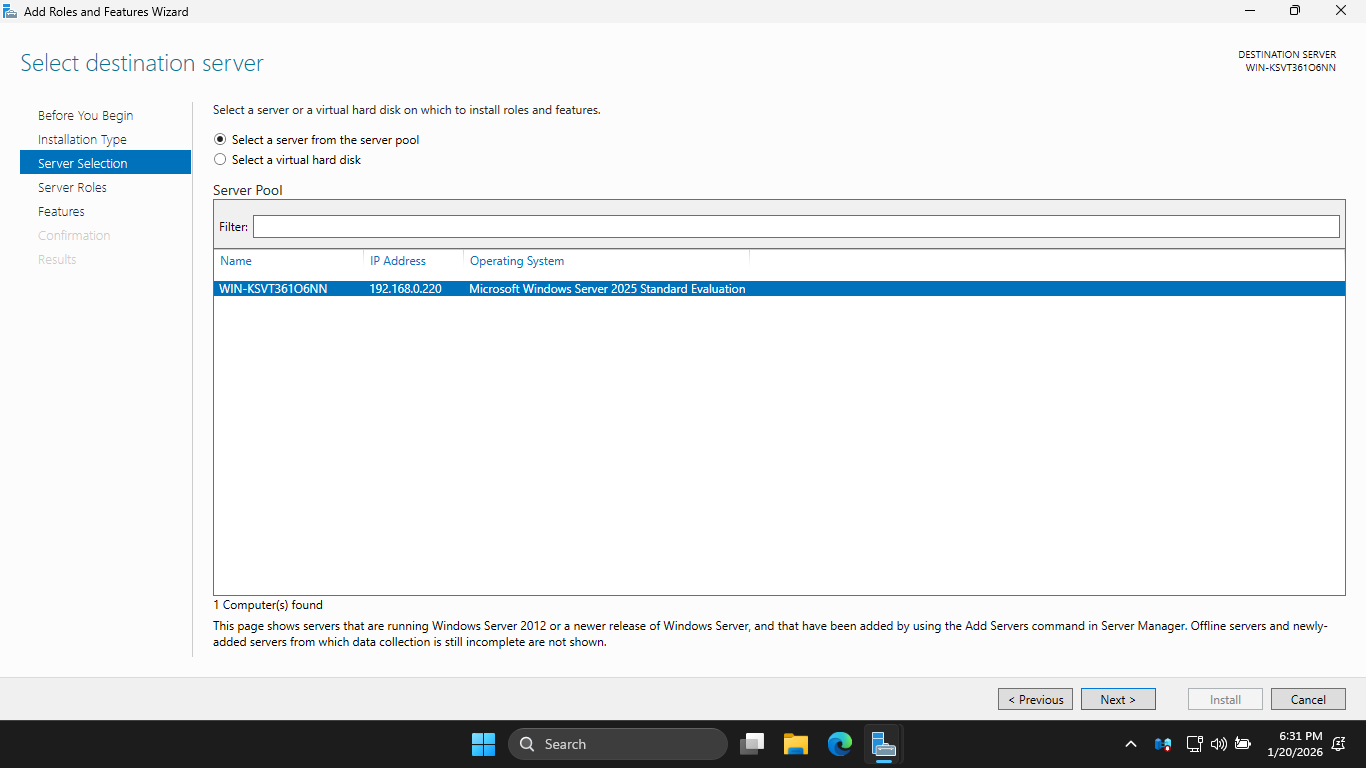
On the Before You Begin page, click Next to continue twice, then on Server Selection, hit Next for default
On the Server Roles page, click the Active Directory Domain Services checkbox, then click Add Features:

On the Server Roles page, click Next to continue. On the Features page, click on Next again to continue
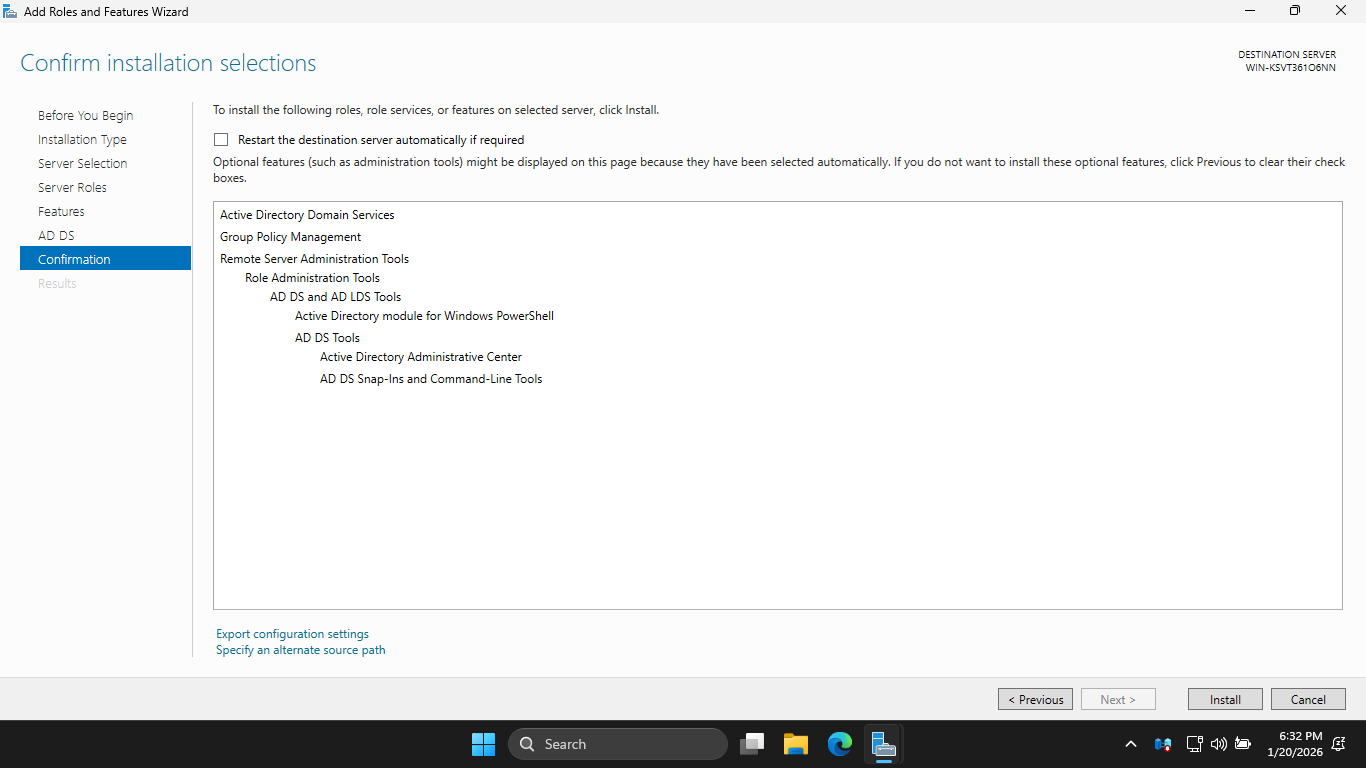
On the AD DS page, click Next to continue. On the Confirm Installation Selections page, click Install:
Wait a few minutes for Active Directory Domain Services to be installed on your Windows Server Machine
When the installation is complete, you'll see a note indicating there is additional configuration required
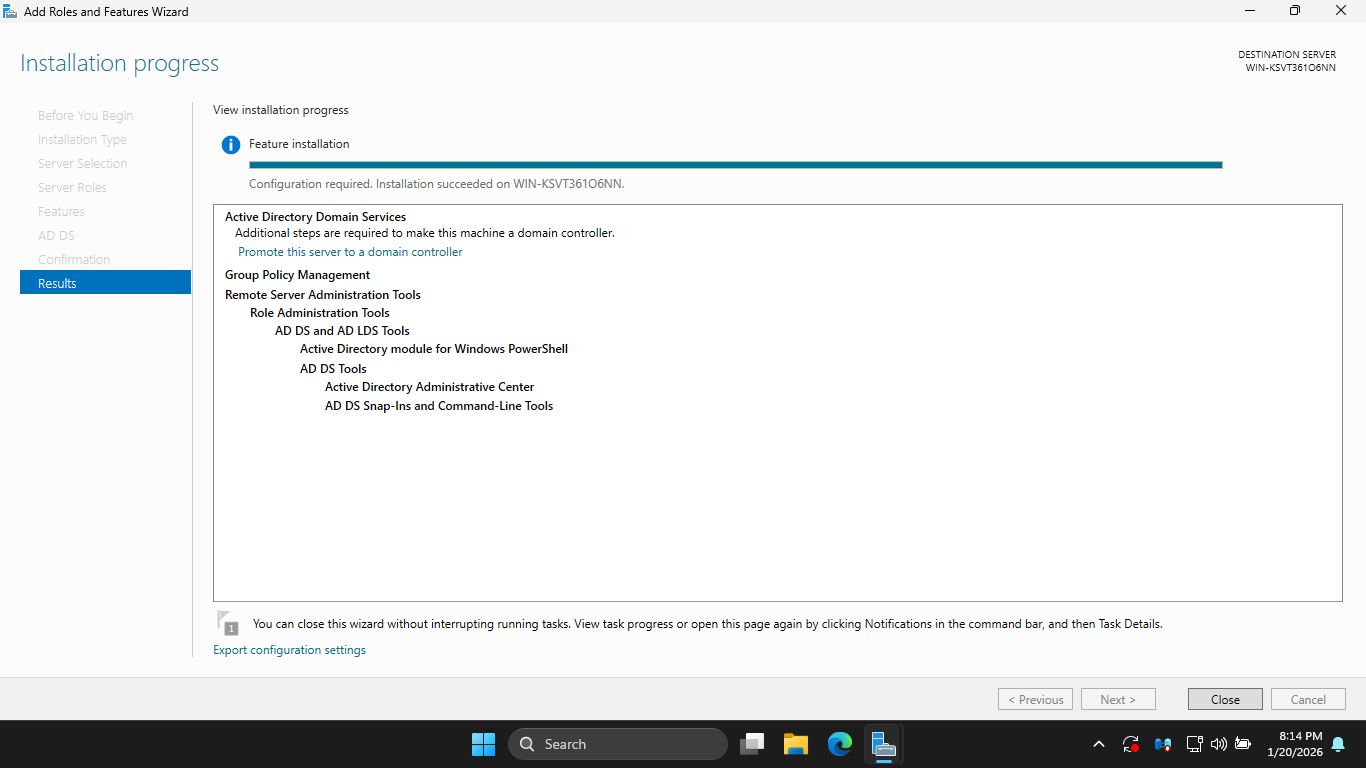
In the next few steps, you will complete those tasks and promote the GUI Server to a Domain Controller
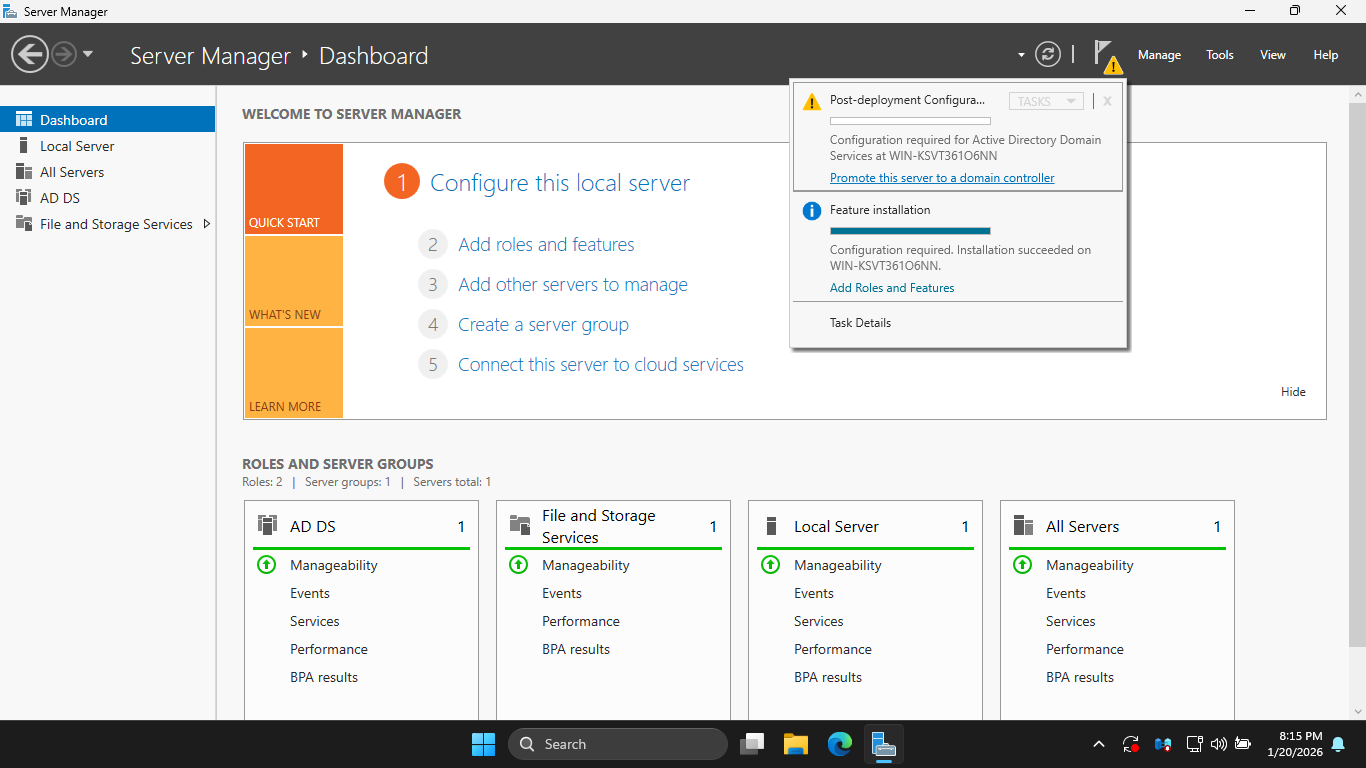
Click close, then in the upper-right click Notifications > Promote this server to a domain controller
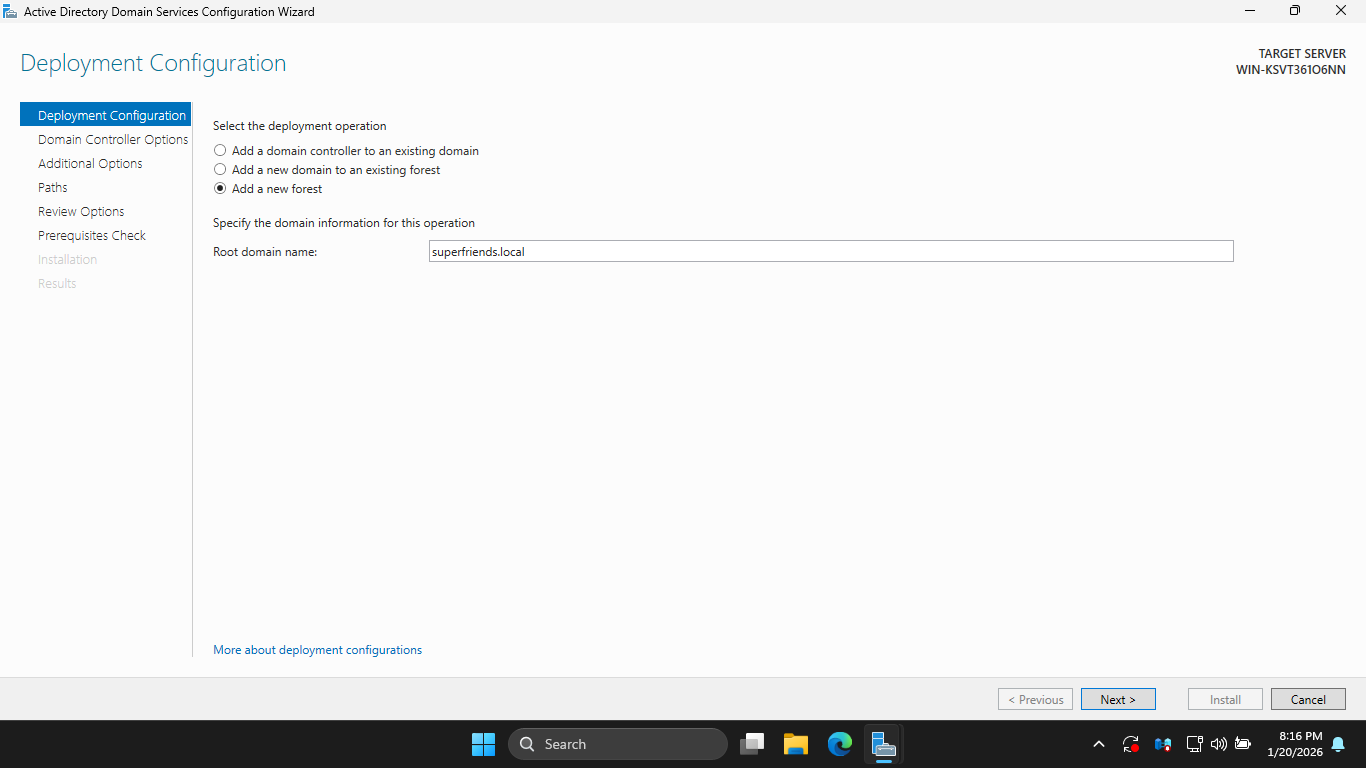
The 'Promote this server' link will open up the Active Directory Domain Services Configuration Wizard
On the Deployment Configuration page, select the "Add a new forest" radio and enter "superfriends.local"
Click next to continue, then on the Domain Controller Options page enter password Password!23 and hit Next
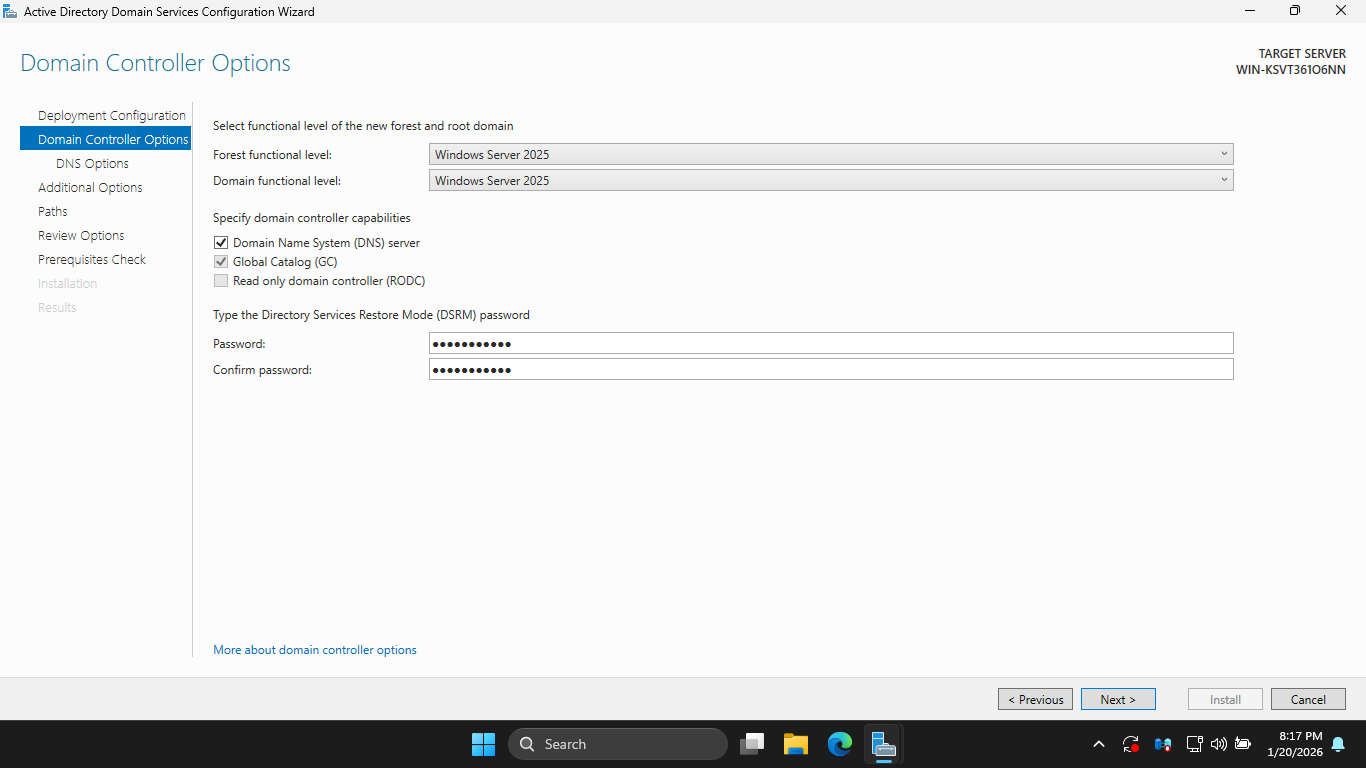
This password is used to repair Active Directory if needed. On the DNS Options page, ignore the warning
Click next, then on the Additional Options page, click Next to accept the auto-generated NetBIOS name
A NetBIOS name cannot be longer than 15 characters, something to keep in mind when choosing domain name
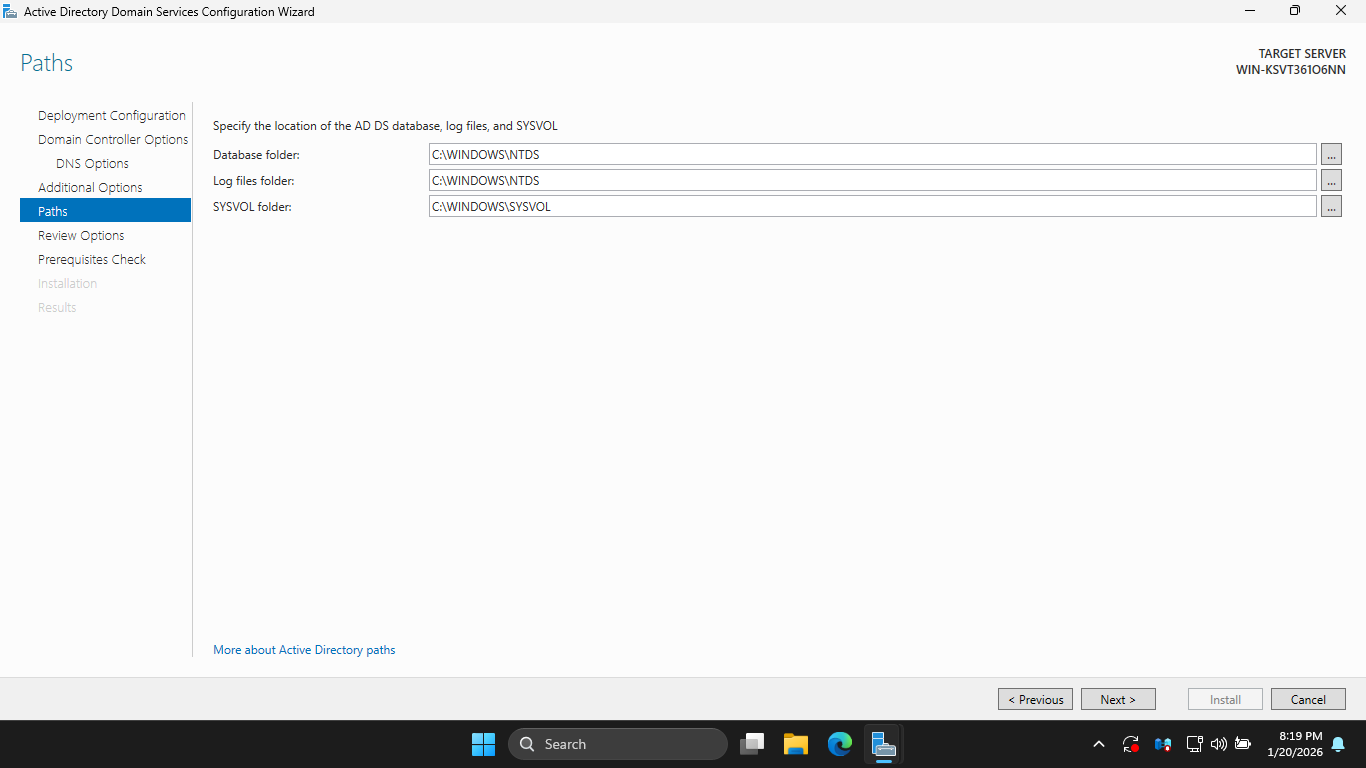
Take note of the default file path for the Active Directory database folder, then click Next to continue
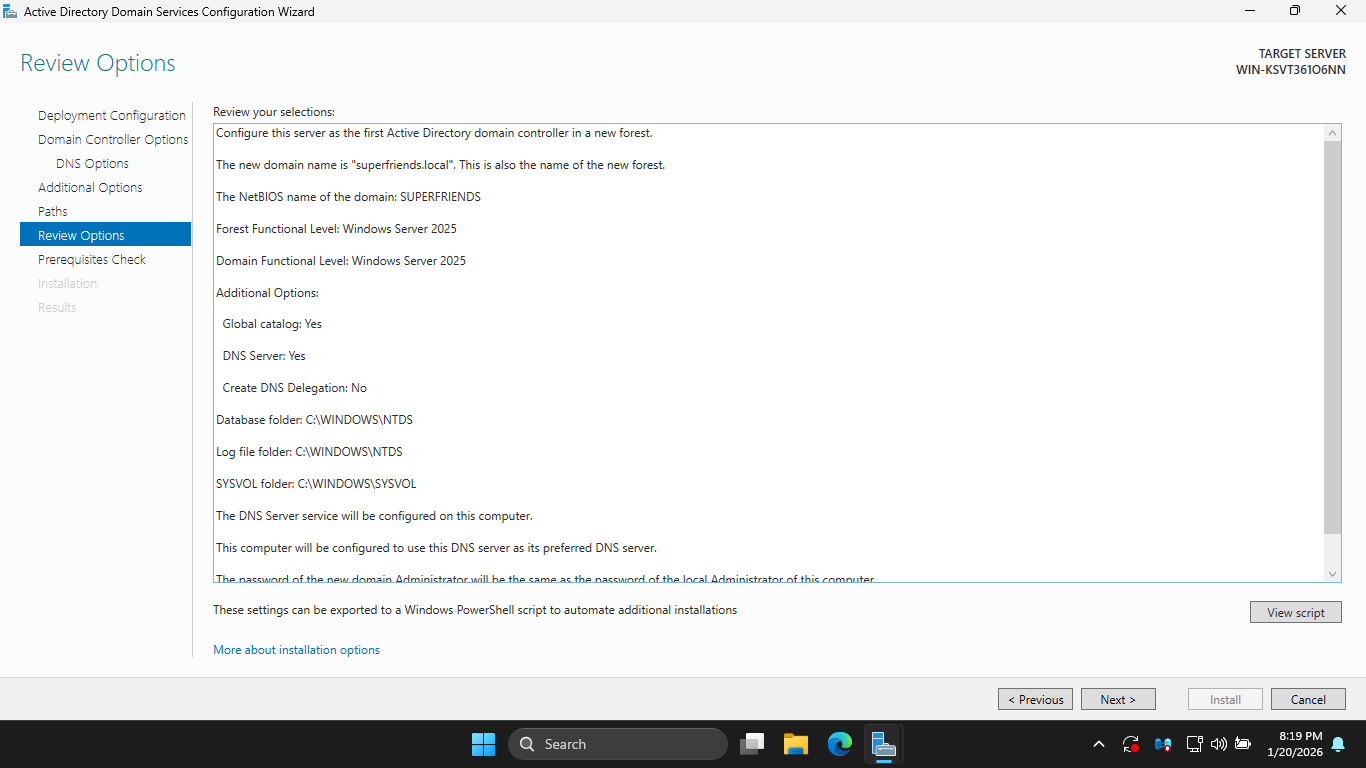
On the Review Options page, review your selections, once satisfied, click Next to continue configuration
The Active Directory installer will now perform a prerequisite check to ensure that Active Directory
Domain Services can be installed to this server and this server can be promoted to a Domain Controller
There will be a number of warnings that can be ignored. You should see a green checkmark message after:
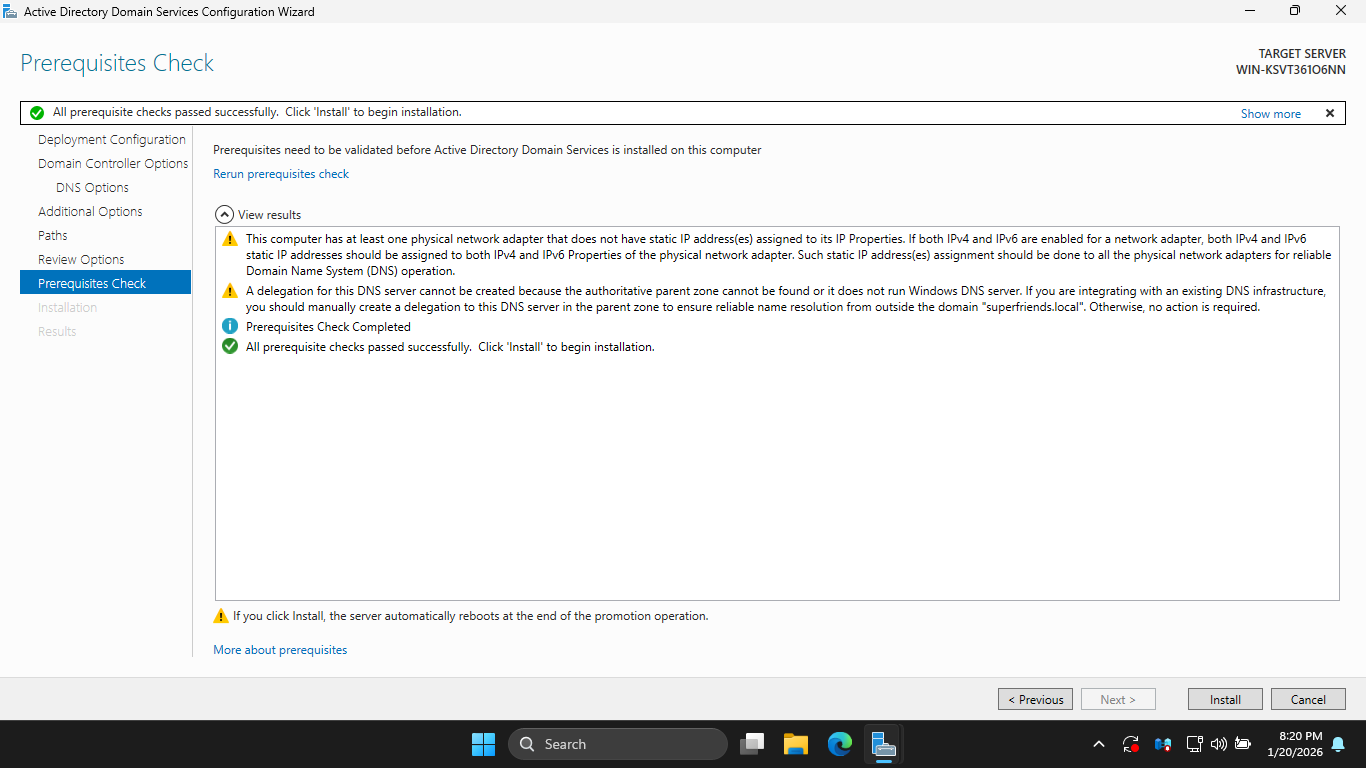
On the Prerequisites Check page, click Install to continue, then allow the installer to complete its task
This installation may take some time, a new Domain Controller can take up to 5 minutes to fully boot up
The PC will restart several times, once reconnected, right-click the Windows Start Icon and select Run
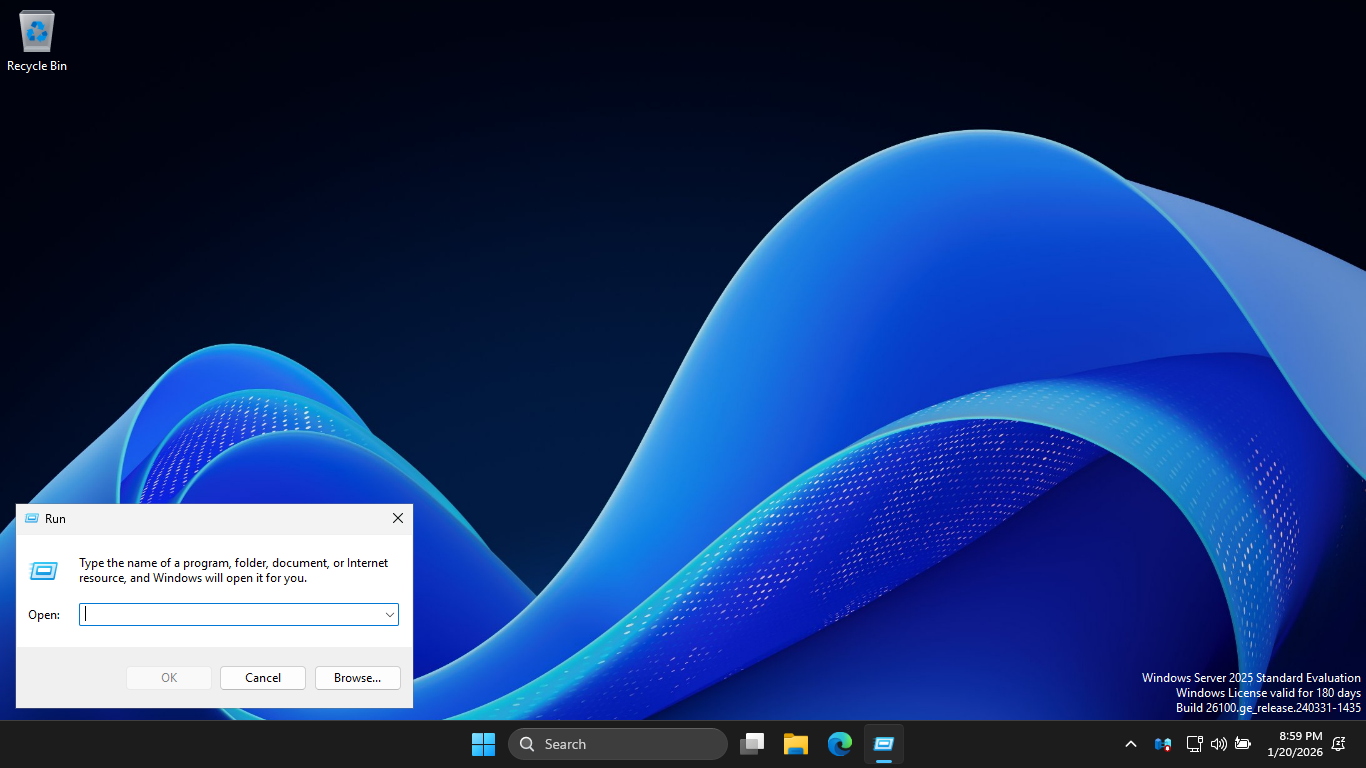
In the dialogue box, type dsa.msc and press Enter to launch the Active Directory Users and Computers tool
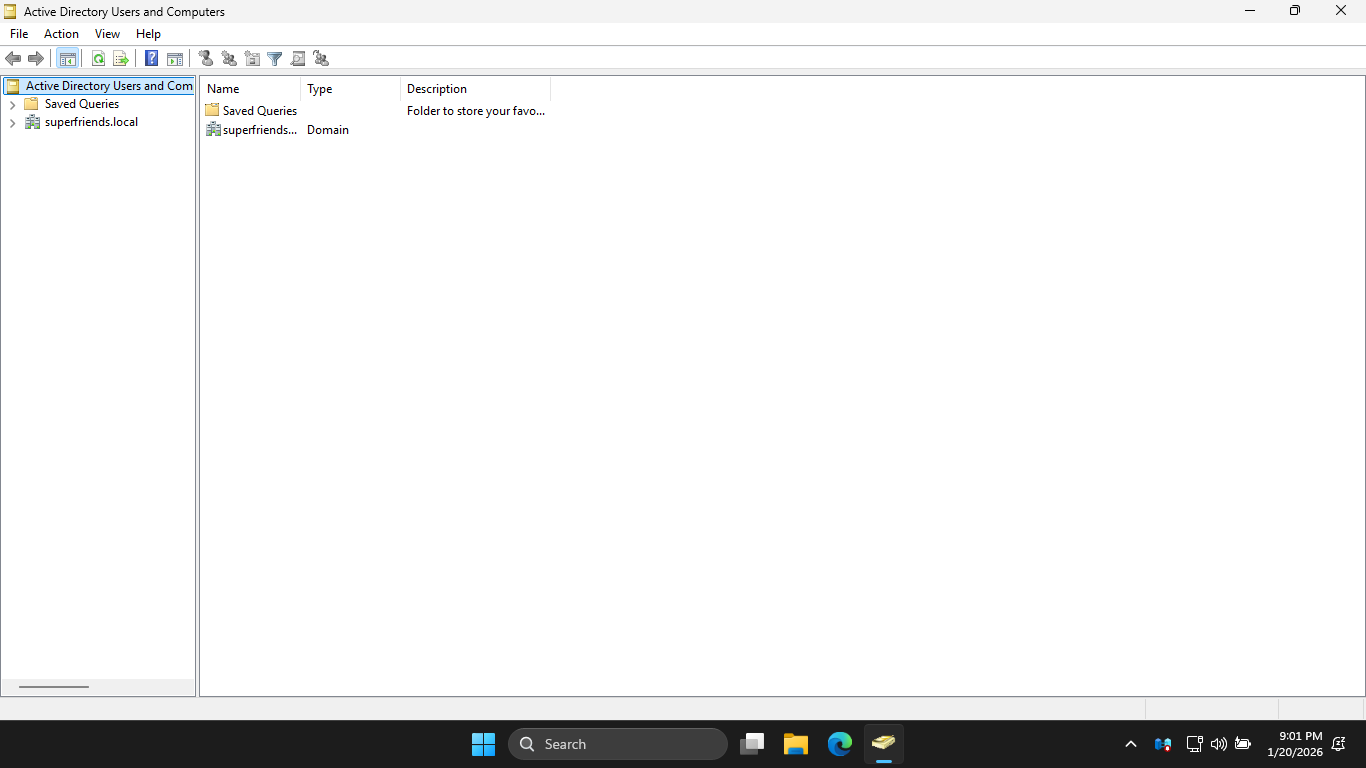
In ADUC, you should see your new domain. ADUC is one of the primary tools for managing Active Directory
You can use ADUC to create and manage the organizational units (OU), users, and groups in your domain
4. Install Windows Server 2025 CLI
In this lab exercise we will use two domain controllers and will therefore require two unused computers
Insert USB Flash Drive, run rufus.exe, select target drive, select Windows Server 2025 ISO, hit start:
Use the rufus popup menu to customize the Windows Server 2025 installation and disable data collection:
Remove USB Flash Drive and Insert into unused PC. Start the PC and press the hot boot key at the startup:
Navigate through the installer and select the Windows Server Standard Evaluation without Desktop Experience:
We now have our Server provisioned which will simulate our Active Directory for the following lab sections
5. Create a Domain Controller using PowerShell
We will return to ADUC soon, but first we will create a second domain on a secondary Domain Controller
This time we will do so using PowerShell. Log into the Administrator Account and type 15 to enter CLI:
Run the following commands from the Windows Server PowerShell to set a password for the ITLab.Center user:
PS C:\Users\Administrator> $Password = Read-Host -AsSecureString "Enter Password:"
PS C:\Users\Administrator> Set-LocalUser -Name "ITLab.Center" -Password $Password
Now type exit and press enter to exit the PowerShell, press escape twice to select the ITLab.Center user
The SConfig Windows Server menu will appear again, type 15 and press enter to exit to the PowerShell CLI:

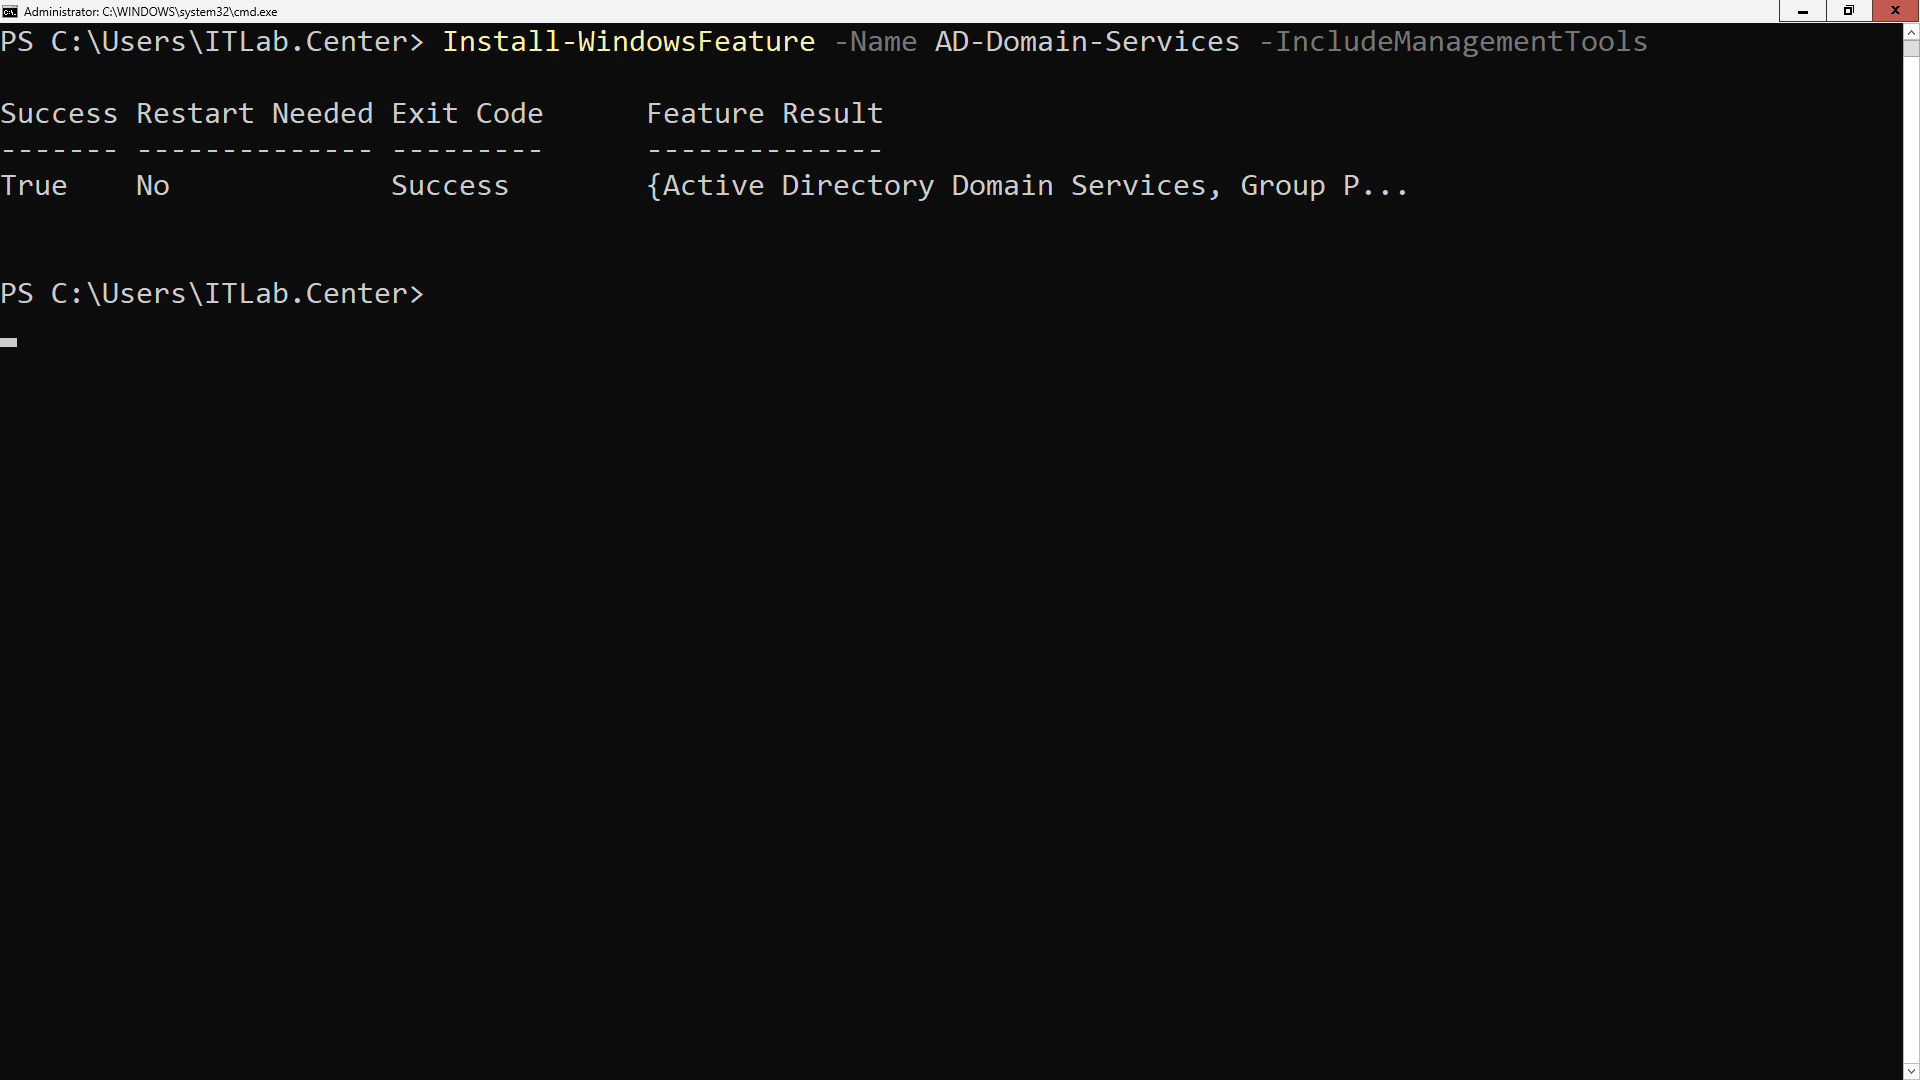
Run the following command from the Windows Server PowerShell to install Active Directory Domain Services:
PS C:\Users\ITLab.Center> Install-WindowsFeature -Name AD-Domain-Services -IncludeManagementTools
Resulting Output:
Run the following command from the Windows Server PowerShell to create the new legionofdoom.local domain:
PS C:\Users\ITLab.Center> Install-ADDSForest -DomainName "legionofdoom.local" -CreateDnsDelegation:$false -DatabasePath "C:\Windows\NTDS" -DomainMode "7" -DomainNetbiosName "LEGIONOFDOOM" -ForestMode "7" -InstallDns:$true -LogPath "C:\Windows\NTDS" -NoRebootOnCompletion:$False -SysvolPath "C:\Windows\SYSVOL" -Force:$true
When prompted for the DSRM password, type Password!23 and press Enter. You will need to do this two times
During the installation the PC will restart several times. This may take up to 5 minutes to fully finish
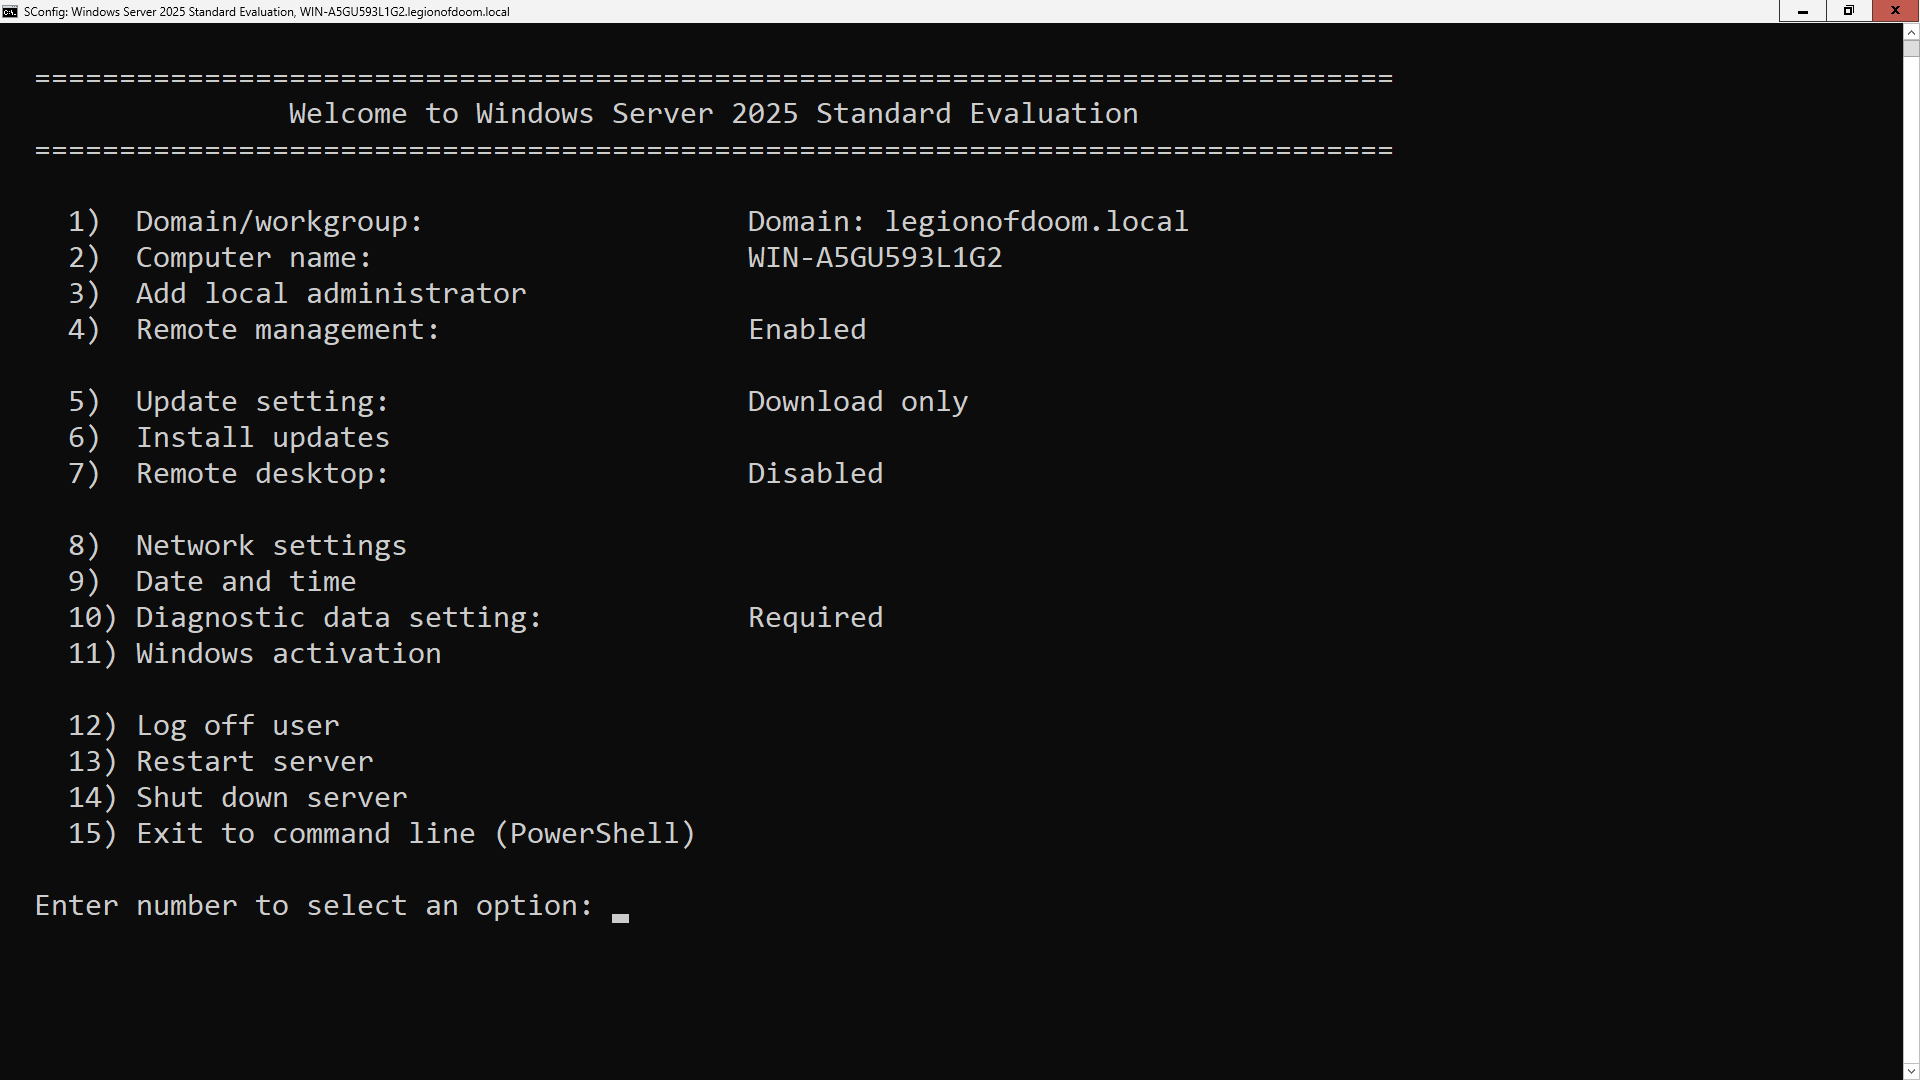
Run the following command from the Windows Server PowerShell once restarted to view the Domain Controller:
PS C:\Users\ITLab.Center> Get-ADDomain
Resulting Output:
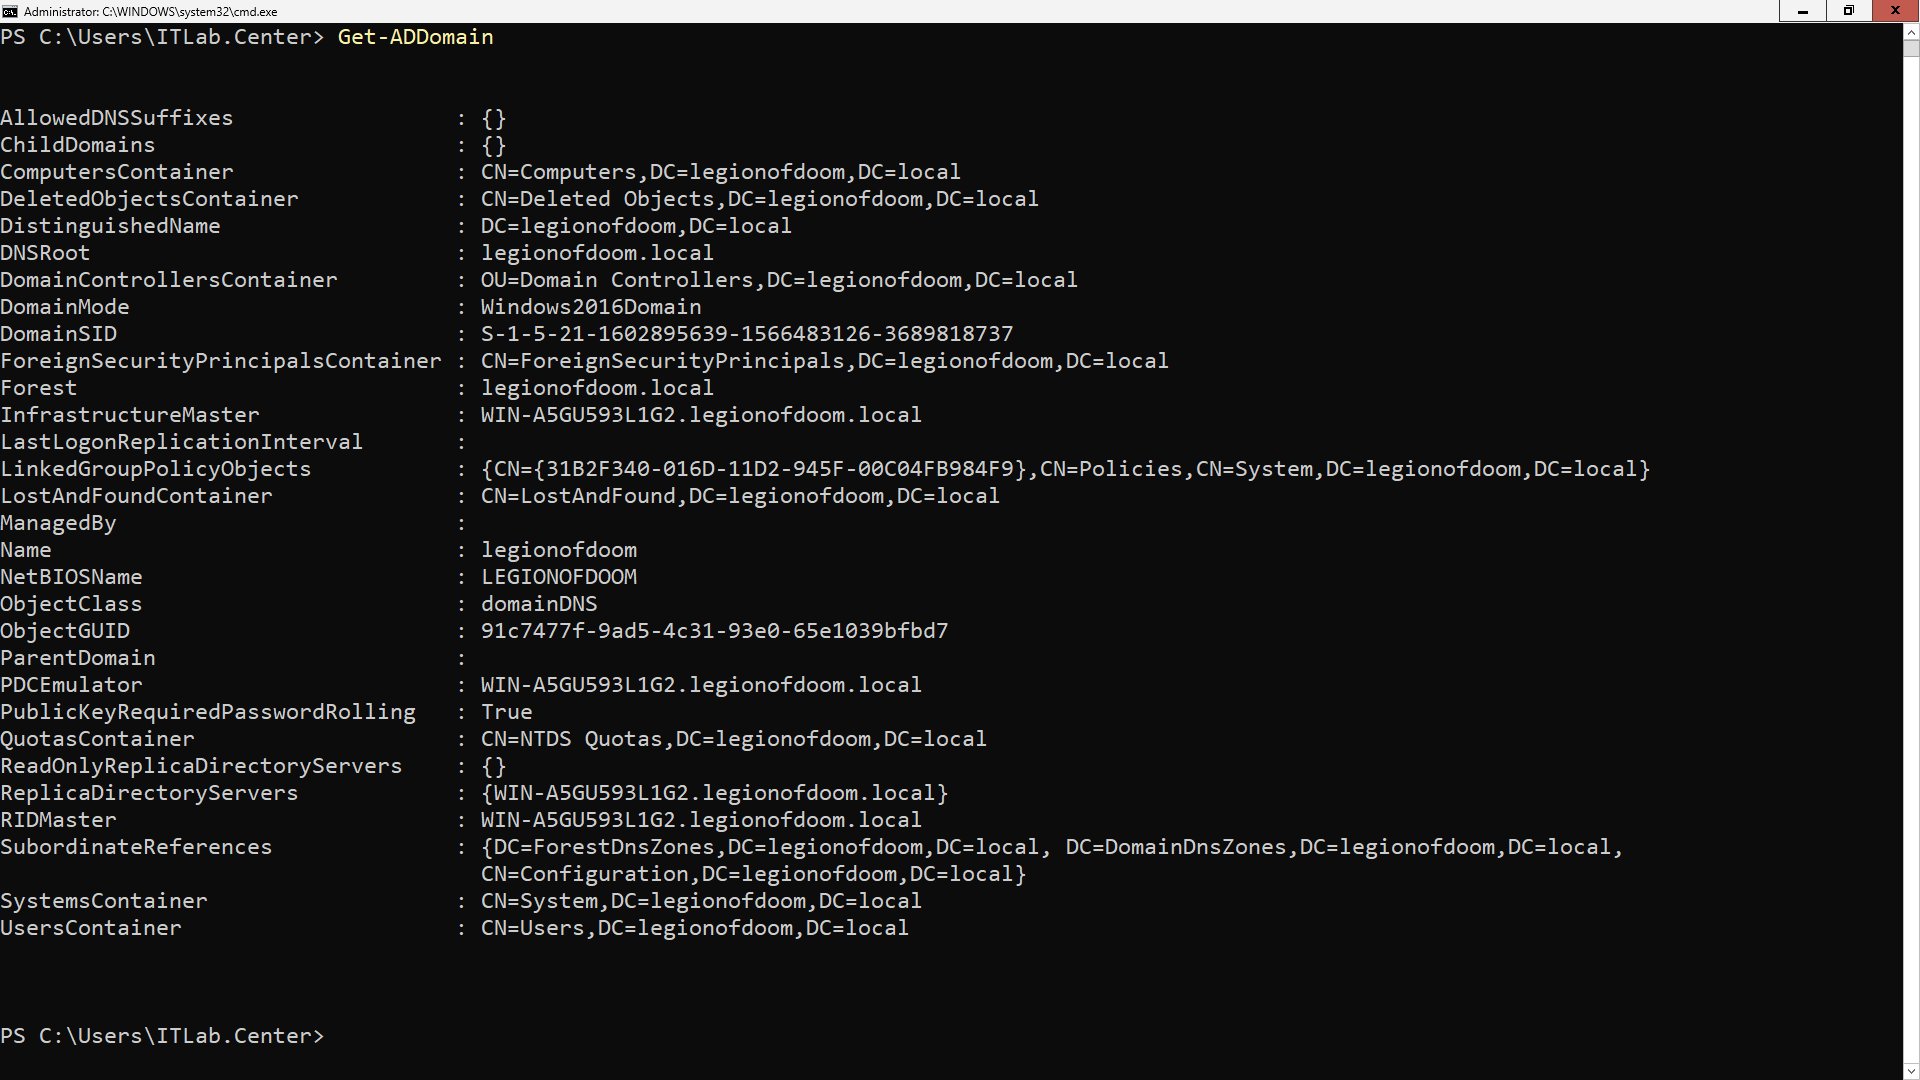
Take note that out domain name is now set and has been placed into Domain Controllers Organizational Unit
6. Create Active Directory Users
In this part of the lab, you will populate your new domains with users and groups as referenceable objects
Let's return to the superfriends.local domain on the GUI Server and start creating some domain objects
From the Active Directory Users and Computers window, expand the superfriends.local domain at the left:
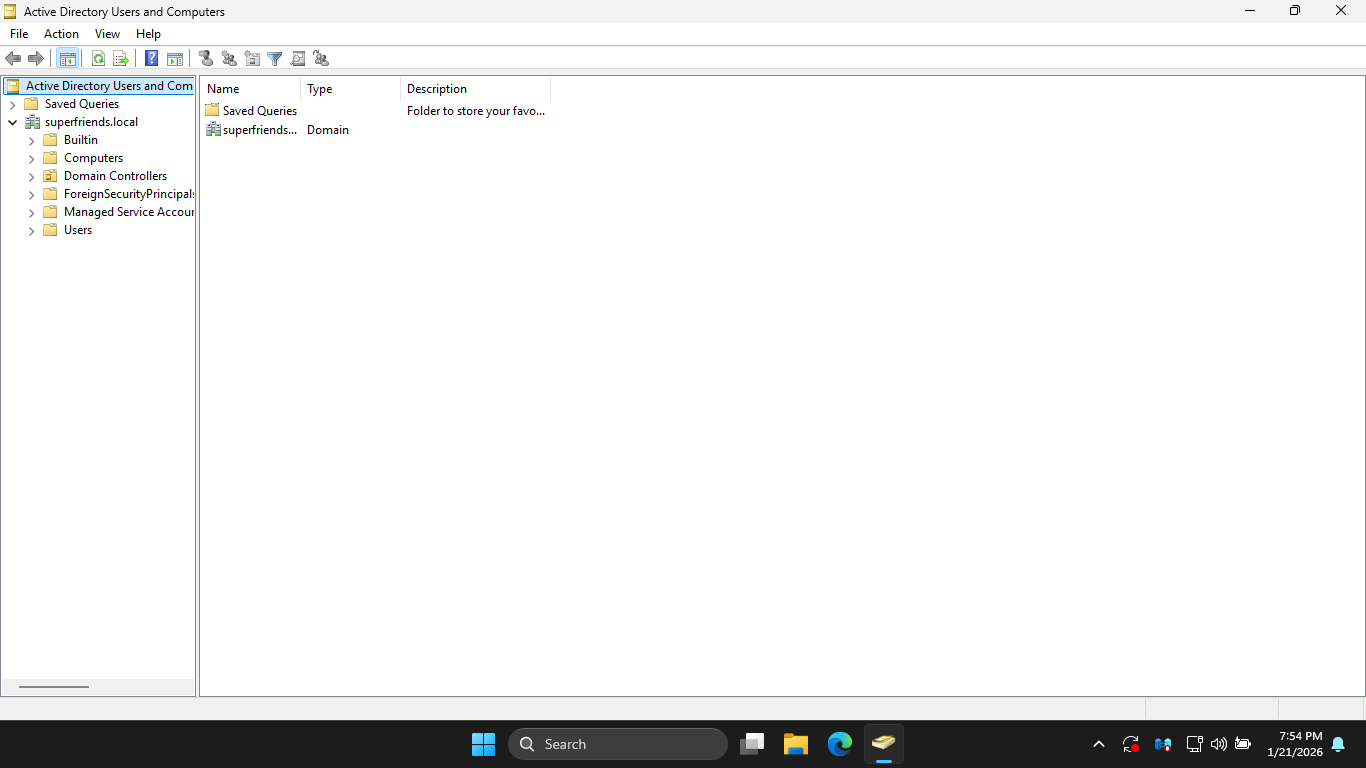
These containers could be used to house all of your users, groups, and computers. However containers are
limited because Group Policy cannot manage them directly within Active Directory Users and Computers ADUC
Windows Systems Administrators rely on Group Policy to help manage directory objects. Thus, even if you
are not ready to use Group Policy, creating Organizational Units for your users and group is future proof
In the ADUC window, right-click the superfriends.local domain object in the navigation tree and select
New > Organizational Unit from the context menu to open the New Object - Organizational Unit Creation Menu
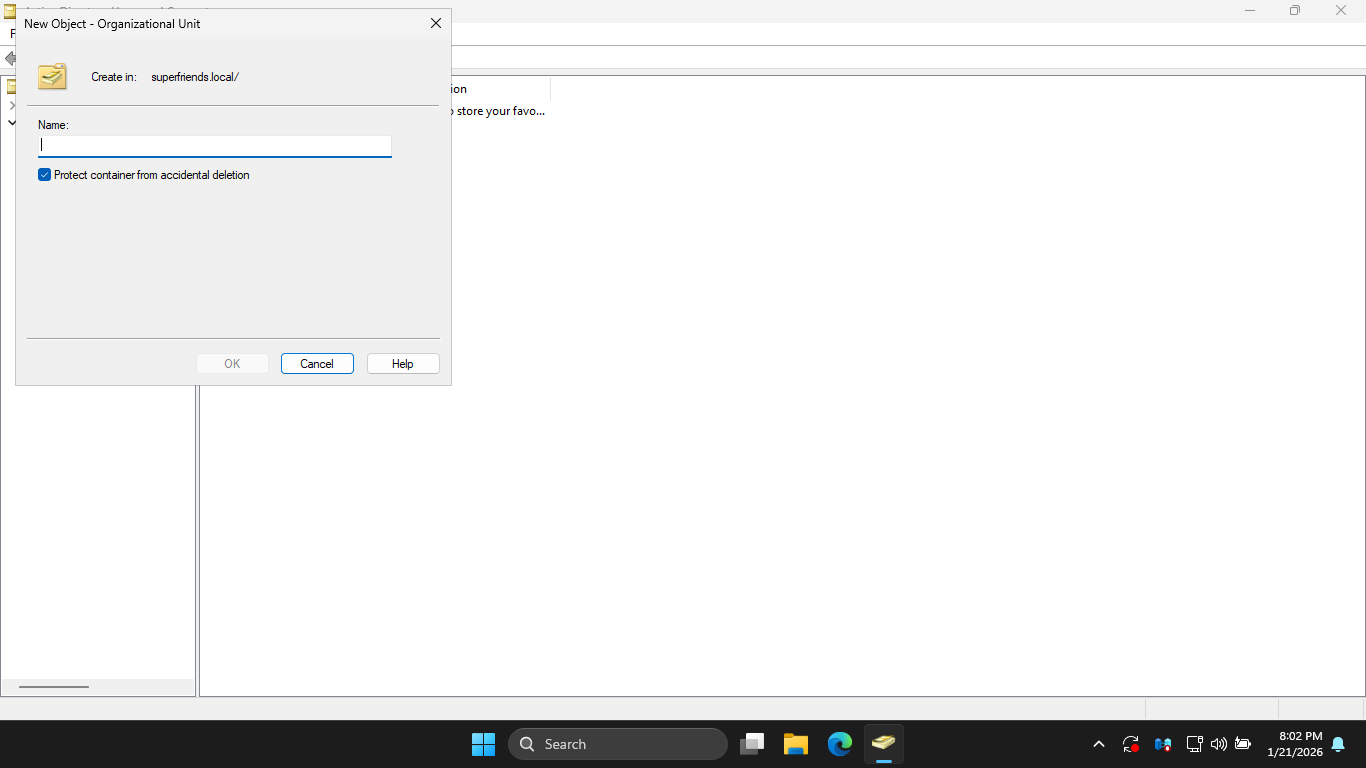
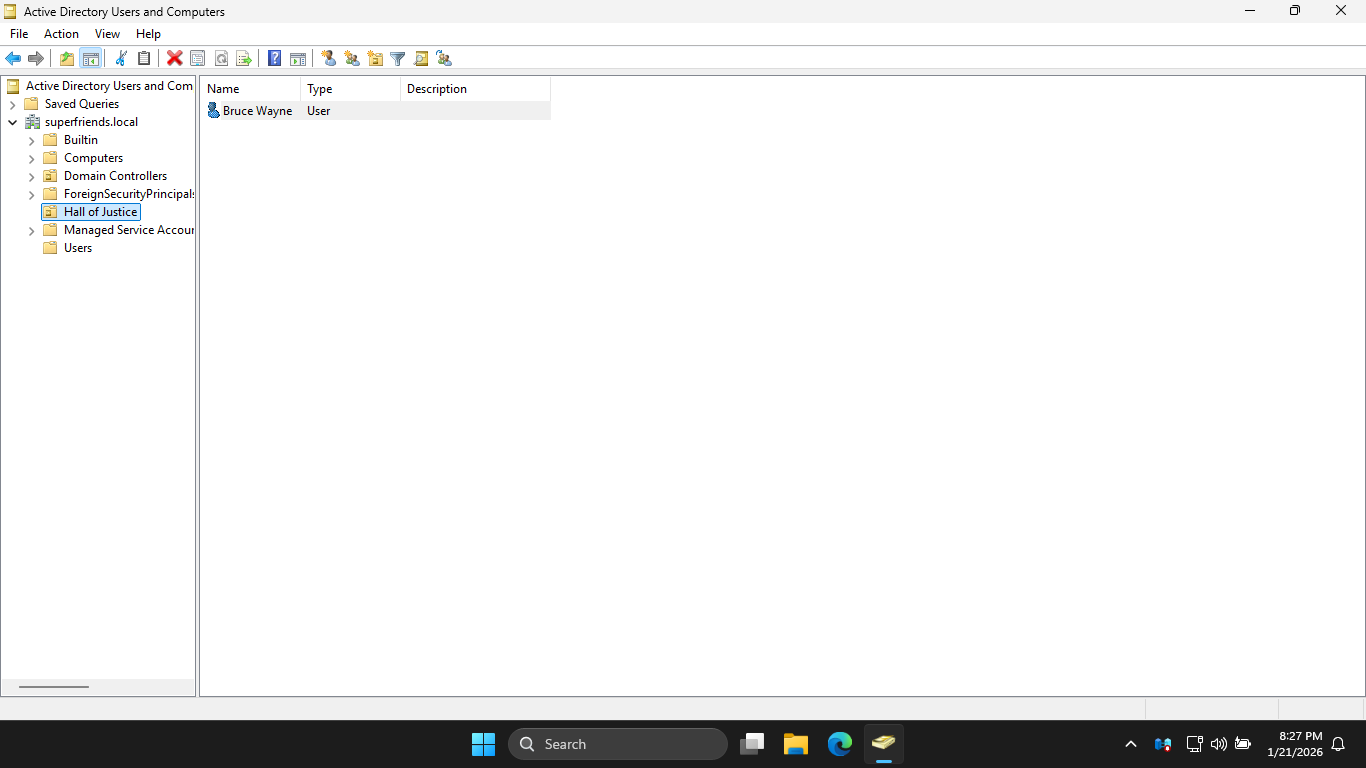
In the New Object Organizational Unit window, type Hall of Justice and click OK, you should see it below
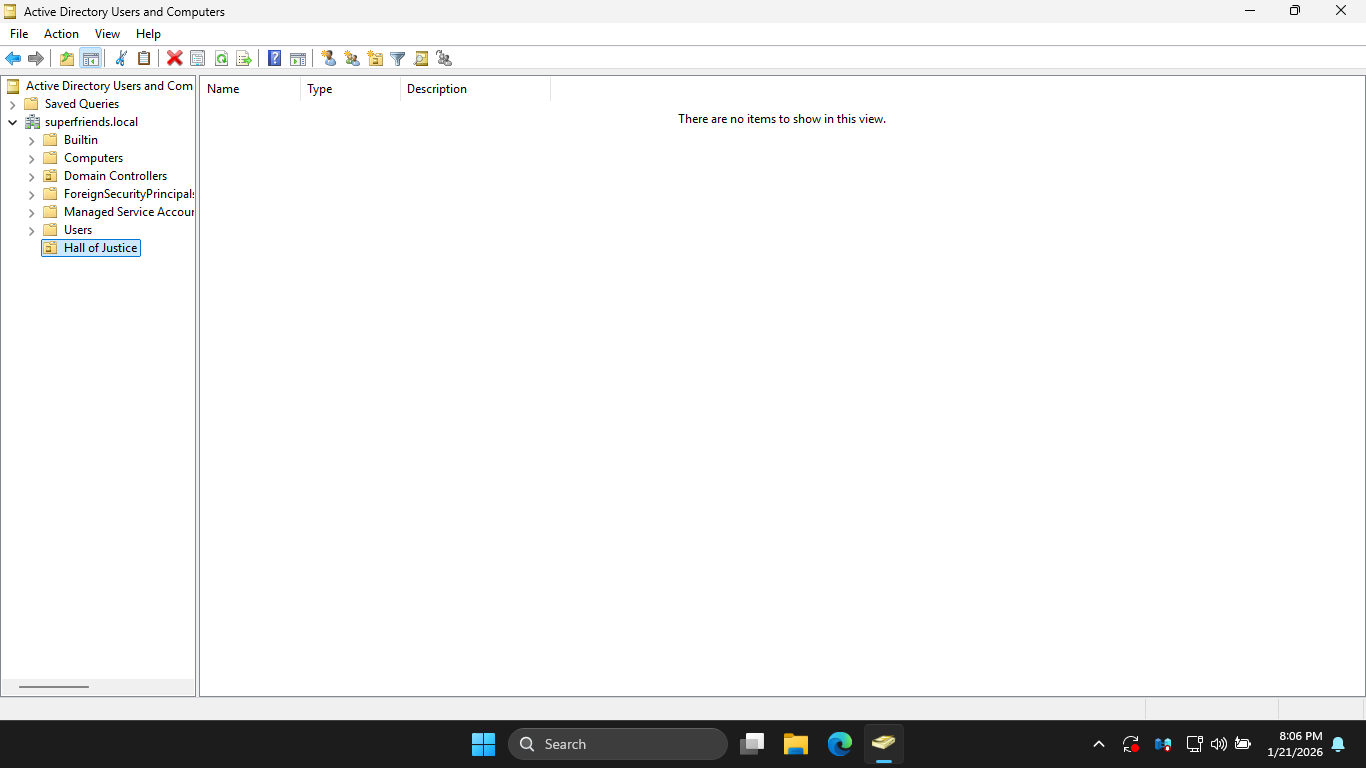
You can tell that "Hall of Justice" is an OU and not a container by the icon, Domain Controller is an OU
In the ADUC window, right-click the Hall of Justice OU and select New > User to open the New Object menu
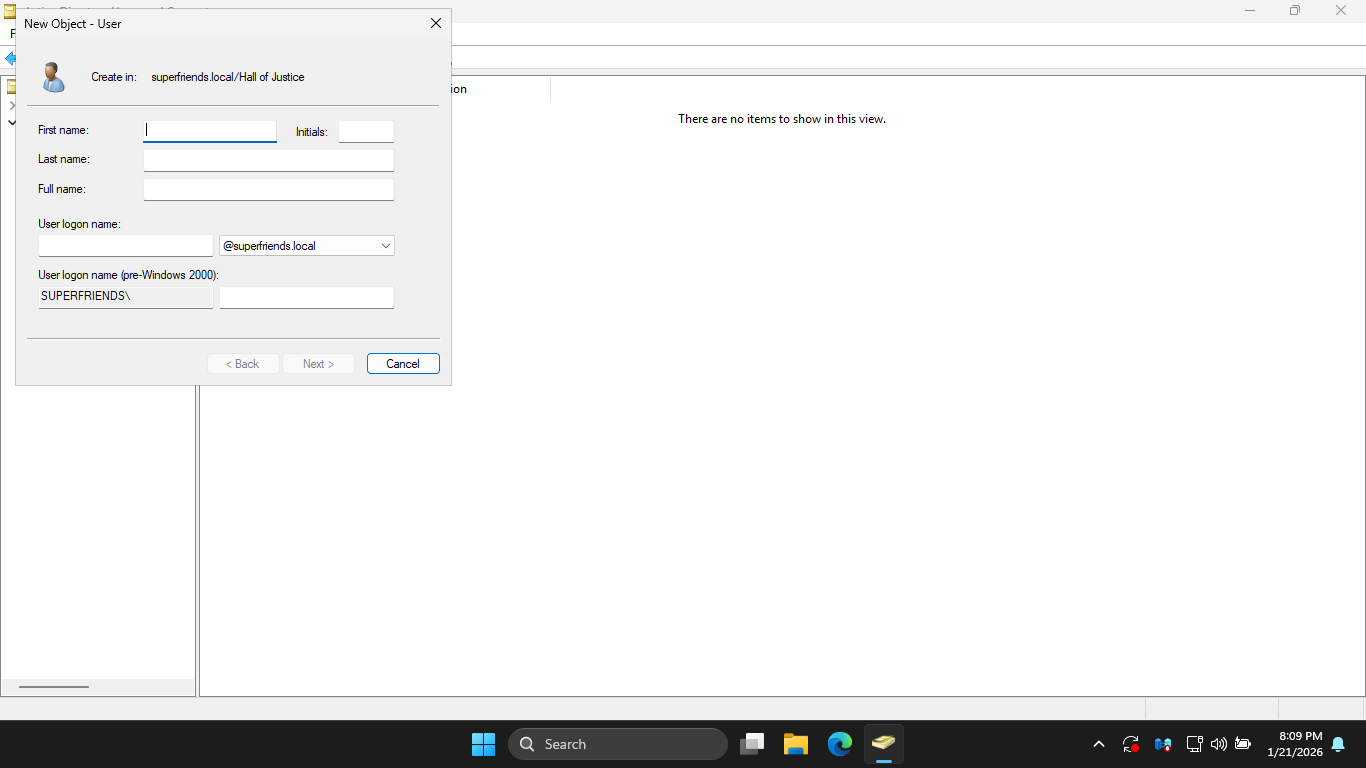
In the New Object User window, fill in the information below for Bruce Wayne, then click Next to continue:
• First Name: Bruce
• Last Name: Wayne
• User logon name: bruce.wayne
At the password prompt, set Bruce Wayne's password to Password!23 and uncheck the require password change
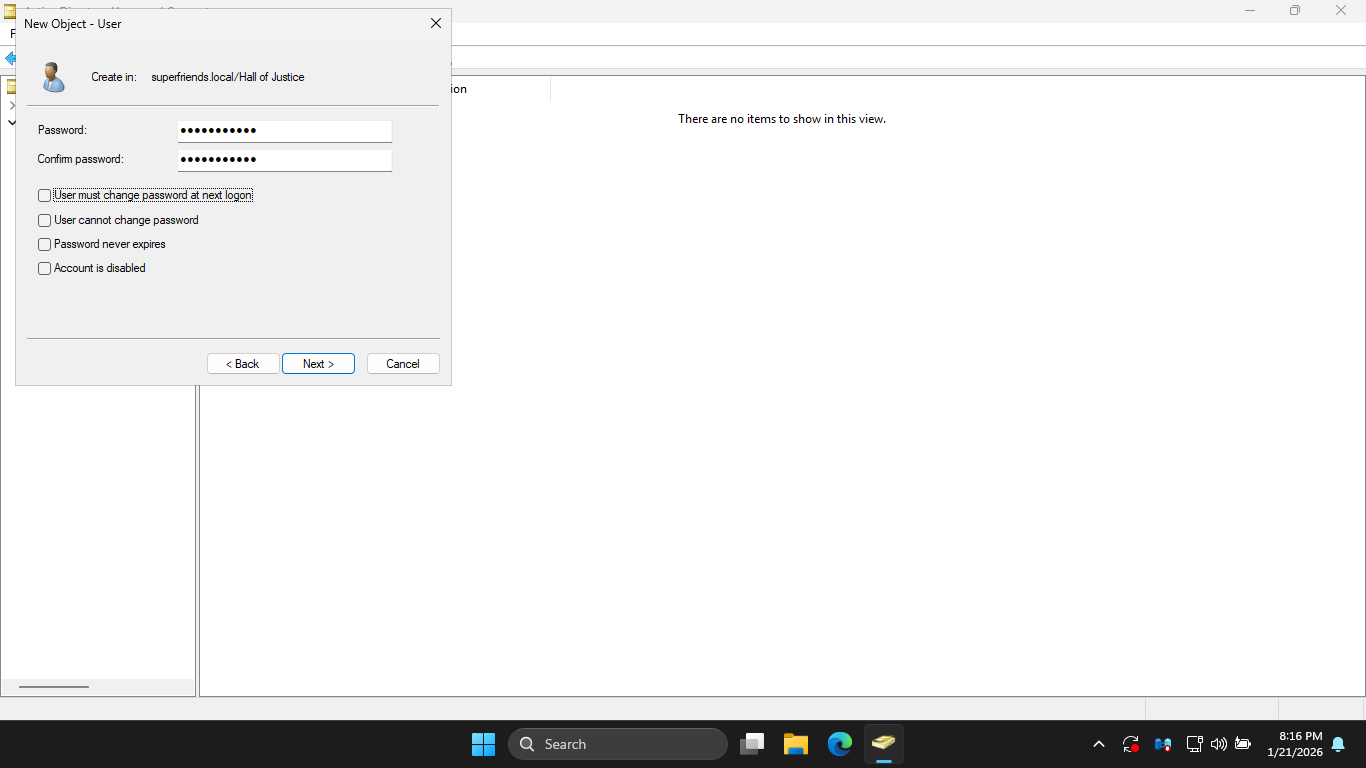
Click Next to continue, then click Finish to create the Bruce Wayne User using the Active Directory tool
Next we will return to our other domain controller to add a new user to the legionofdoom.local domain
Run the following command from the Windows Server PowerShell to create a new OU in legionofdoom.local:
PS C:\Users\ITLab.Center> New-ADOrganizationalUnit -Name "Hall of Doom" -Path "DC=legionofdoom,DC=local"
Run the following command from the Windows Server PowerShell to confirm your Organizational Units creation:
PS C:\Users\ITLab.Center> Get-ADOrganizationalUnit -Filter ' Name -like "*" ' | Format-table Name
Resulting Output:
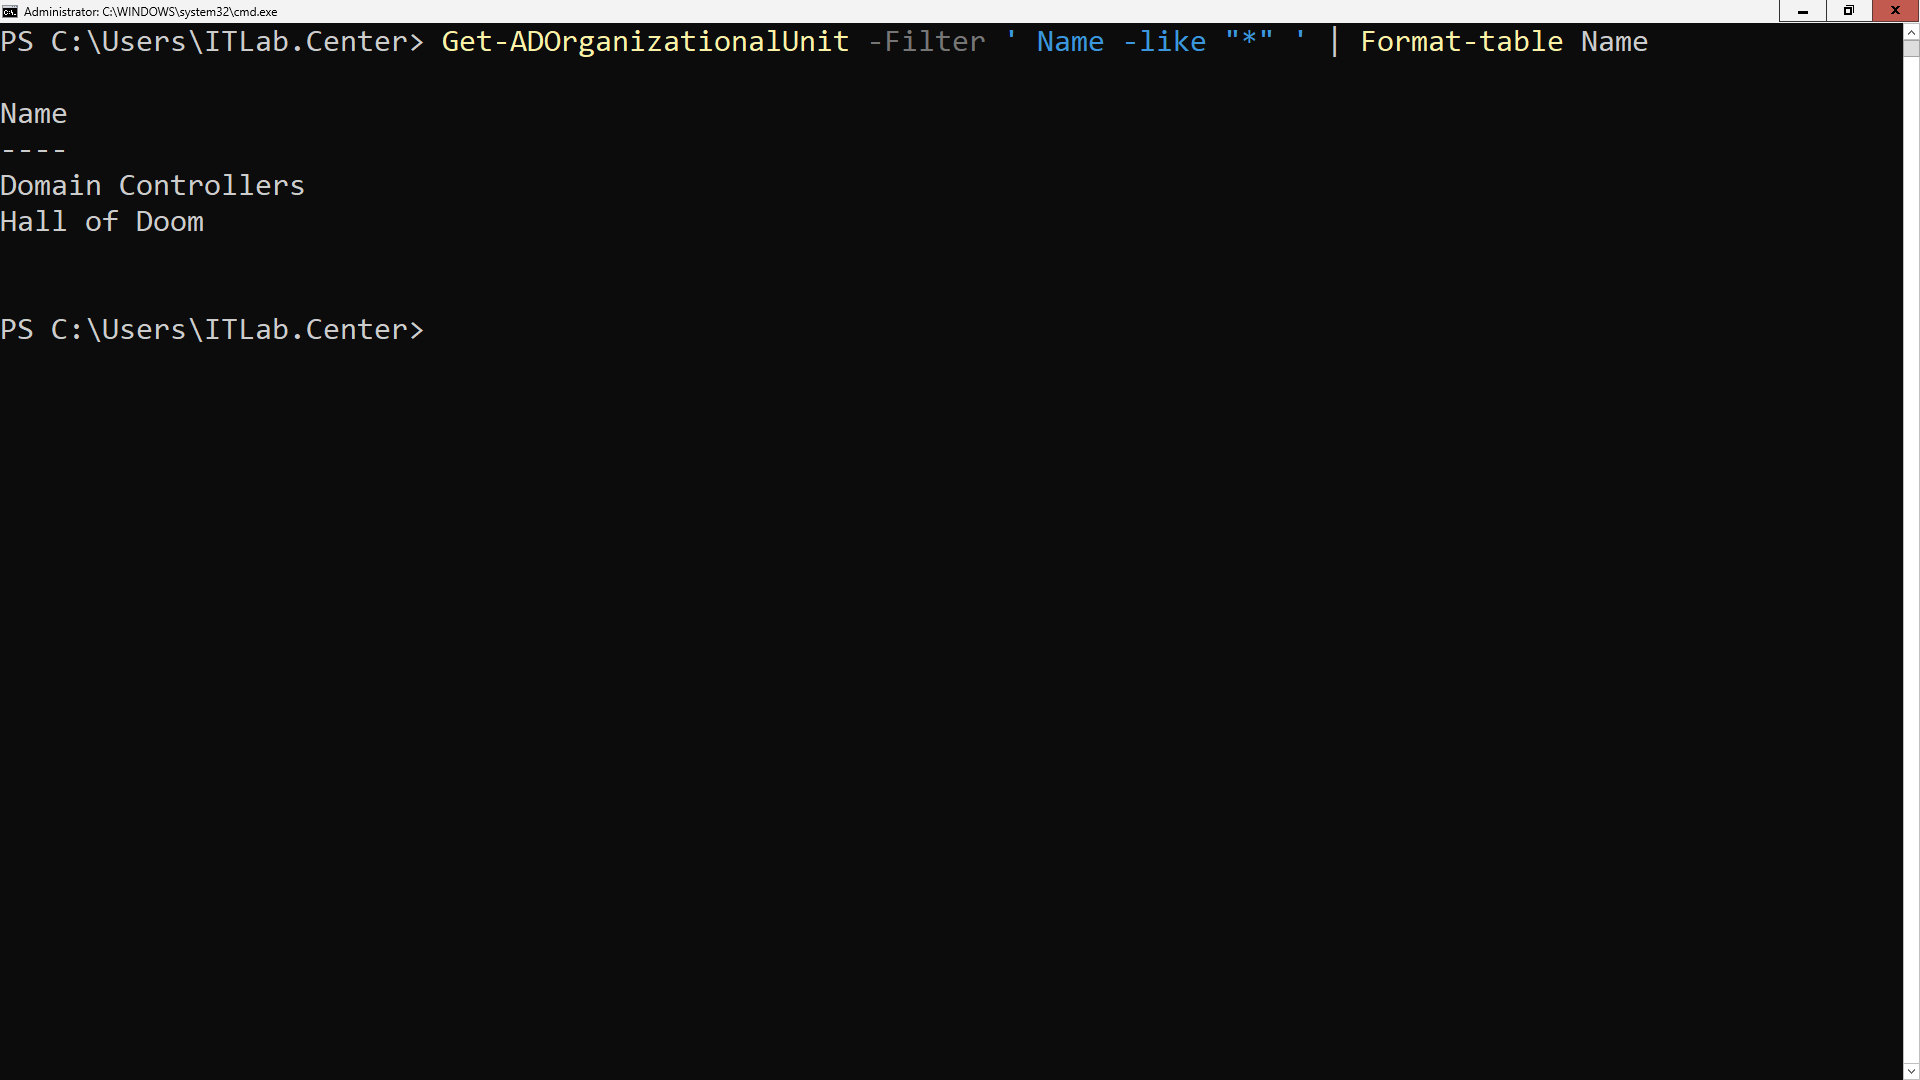
As you saw with the ADUC tool in the superfriends.local domain, you will see two Organizational Units
Run the following command from the Windows Server PowerShell to create the Lex Luthor Unit in our OU:
PS C:\Users\ITLab.Center> New-ADUser -Name "Lex Luthor" -DisplayName "Lex Luthor" -GivenName "Lex" -Surname "Luthor" -SamAccountName "lex.luthor" -UserPrincipalName "lex.luthor@legionofdoom.local" -Path "OU=Hall of Doom,DC=legionofdoom,DC=local" -AccountPassword(Read-host -AsSecureString "Input Password") -Enabled:$true
This emulates the ADUC user creation wizard. When prompted, enter Password!23 for Lex Luthor's password
You may wonder what fields in the New-ADUser PowerShell command cap to the ADUC wizard, this should help:
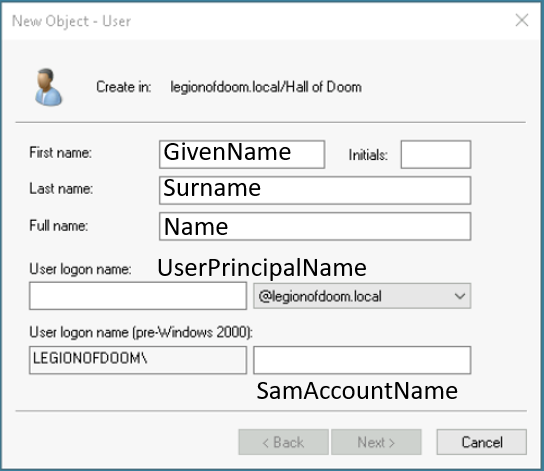
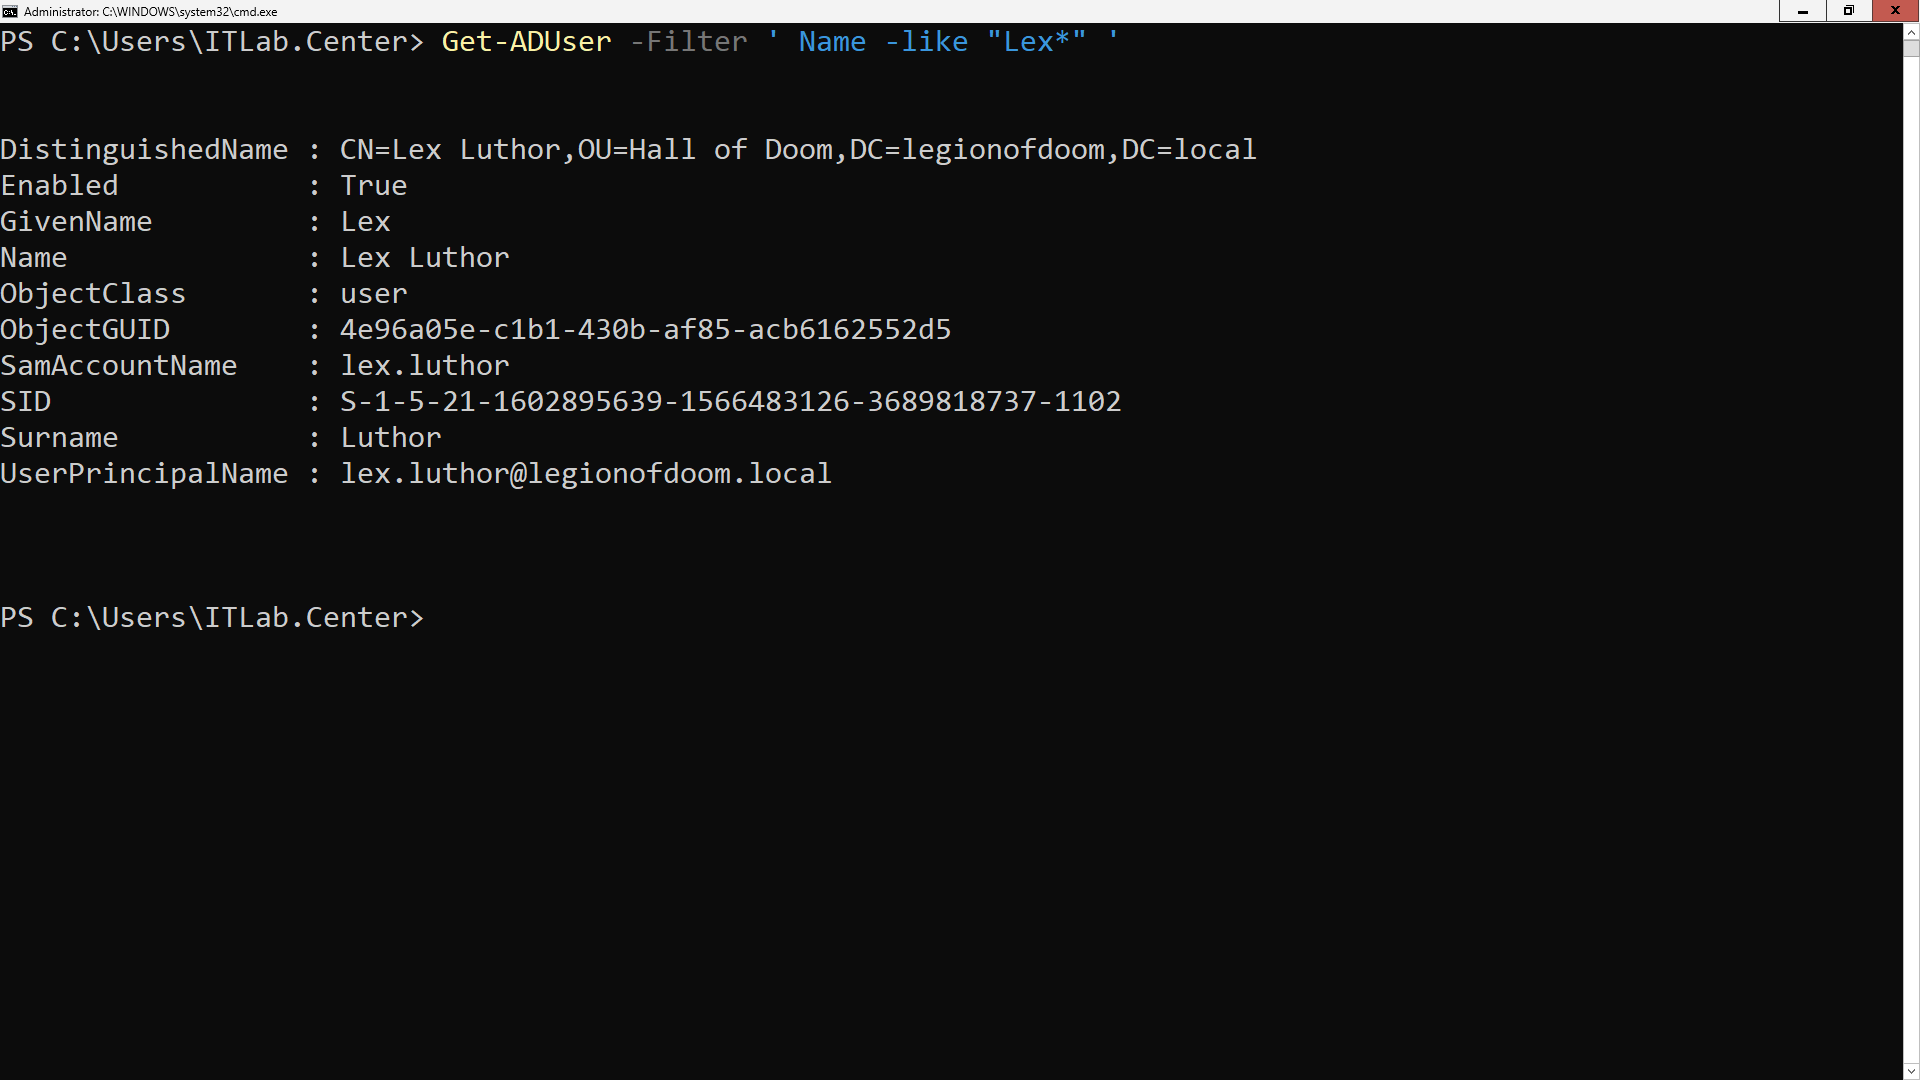
Run the following command from the Windows Server PowerShell to confirm the creation of Lex Luthor's user
PS C:\Users\ITLab.Center> Get-ADUser -Filter ' Name -like "Lex*" '
Resulting Output:
In our CLI only server, we do not have the option to view the structure with ADUC, but we can with scripts
From your main PC, open up PowerShell ISE and type out the following script to provide the structured view
$dom = Get-ADDomain
Write-Host "[$($dom.DNSRoot)]" -ForegroundColor Blue
Get-ADOrganizationalUnit -Filter * -Properties CanonicalName | Sort-Object CanonicalName | ForEach-Object {
$depth = ($_.CanonicalName.Split('/').Count - 2)
$indent = " " * $depth
Write-host ("$indent|-- " + $_.Name) _ForegroundColor Cyan
Get-ADUser -Filter * -SearchBase $_.DistinguishedName -SearchScope OneLevel | ForEach-Object {
$userIndent = " " * ($depth + 1)
Write-Host ($userIndent|-- " + $_.Name) -ForegroundColor Green
}
}
Save this script to your flash drive as adtree.ps1, then insert your USB flash drive into the CLI Server
Run the following command from the Windows Server PowerShell to Invoke and Execute the pre-made script:
PS C:\Users\ITLab.Center> powershell -ExecutionPolicy Bypass -File D:\adtree.ps1
Resulting Output:
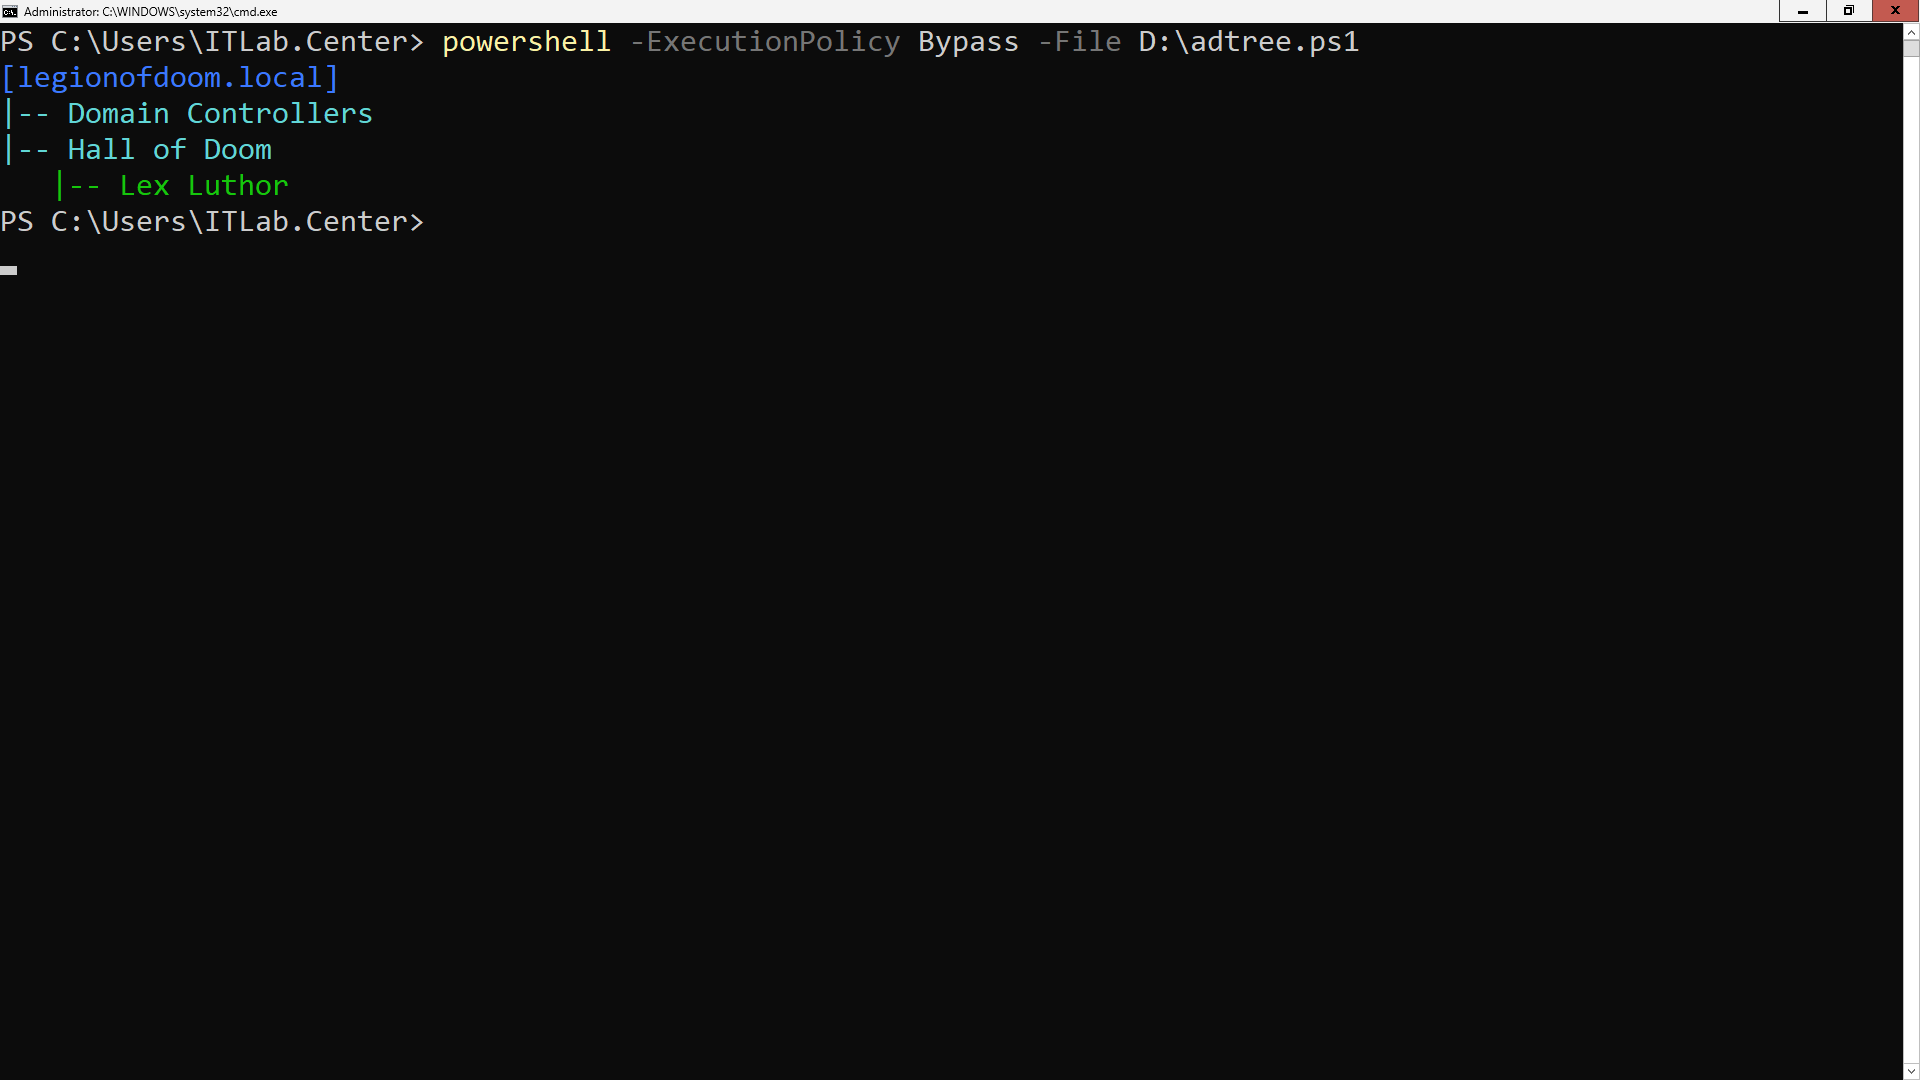
Here we can see the Organizational Units and the Lex Luthor user account we have created within one of them
7. Create Active Directory Groups
Next we will learn how to create groups. In AD, groups can be used for both communication and permissions
Distribution Groups are only used when Microsoft Exchange is added to a domain, while Security Groups are
the primary way to grant permissions to domain resources such as files and folders in the Active Directory
There are three types of Security Groups:• Universal Groups: Contains users and groups from any domain in a forest
• Global Groups: Contains users and groups from the same domain
• Domain Local: Used to grant access to domain objects
Because we have only a single domain in each of our two forests, there is no need to use Universal Groups
With only a single domain, Microsoft recommends the best practice: Account,Global,Domain Local,Permission
That means user accounts are added to Global groups, which are added to Domain Local groups thereafter
The mentioned Domain Local groups are then granted access permissions to objects in the Active Directory
Note that in a productions environment, you will find that users are granted access to resources directly
Granting permissions this way works of course, but poor practices will lead to a tangled web of permission
In the next steps, we will create a Global group in each domain and add our users to the group we created
In the ADUC window, right-click the Hall of Justice OU and select New > Group to open the New Object menu
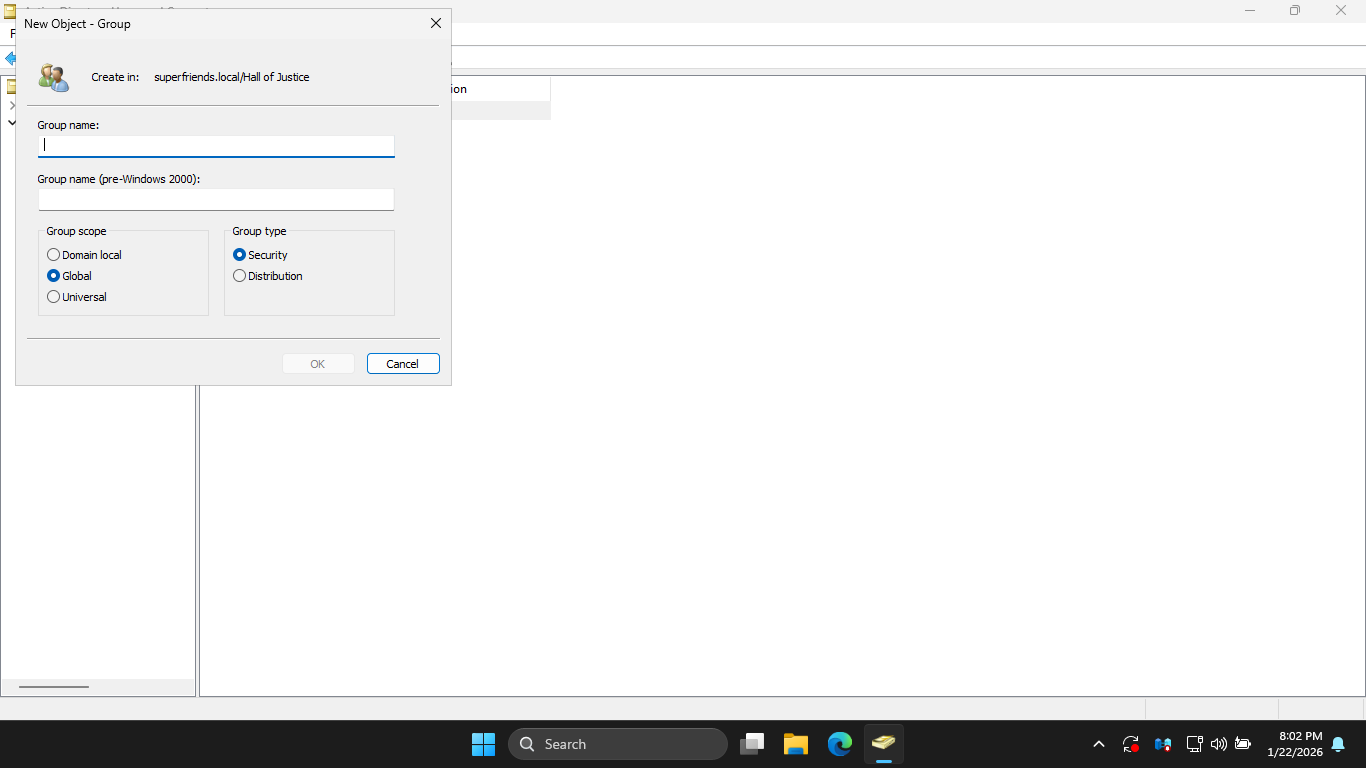
In the ADUC application, from the New Object - Group dialog box, enter the following information, hit ok:
• Group Name: Heroes
• Group Scope: Global
• Group Type: Security
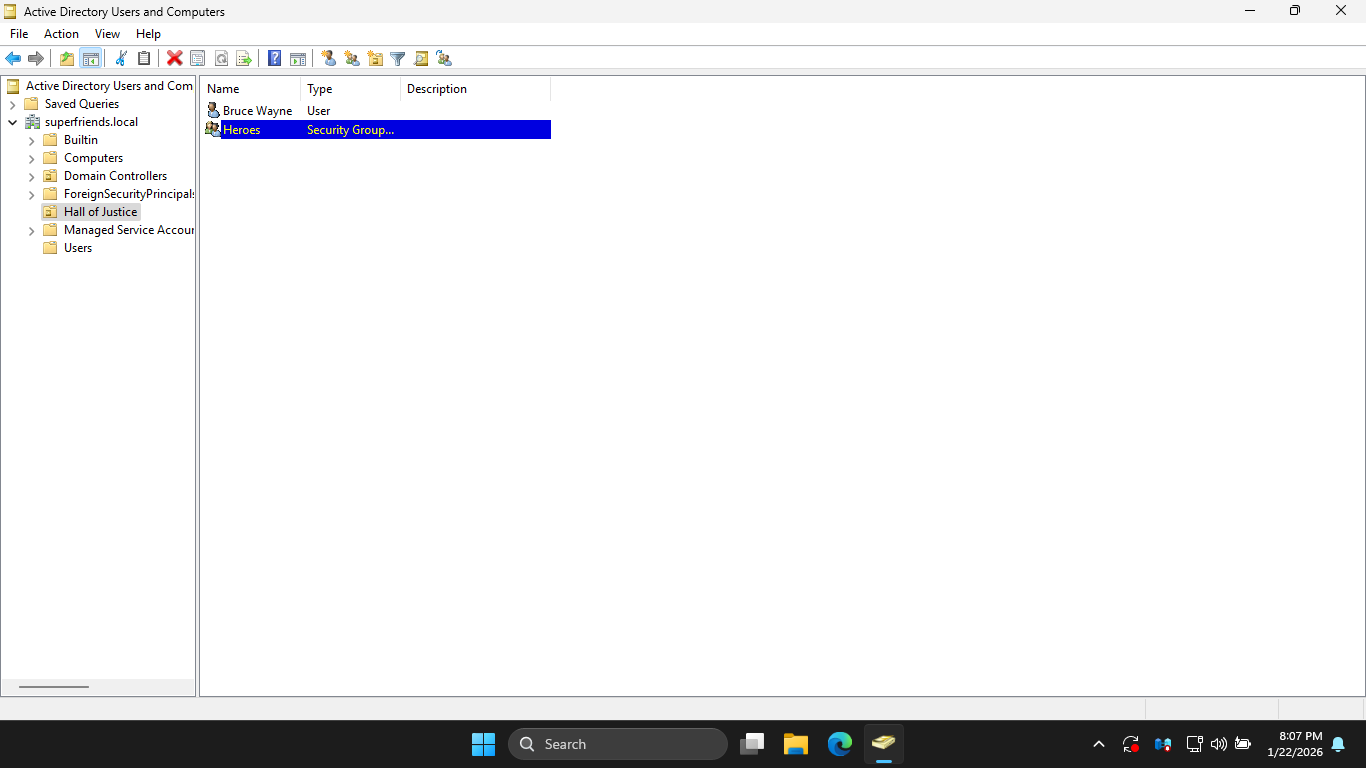
from the ADUC application window, you will see the new Global security group in the Hall of Justice OU
In the ADUC application window, double-click the new Heroes group to open the Heroes - Properties window
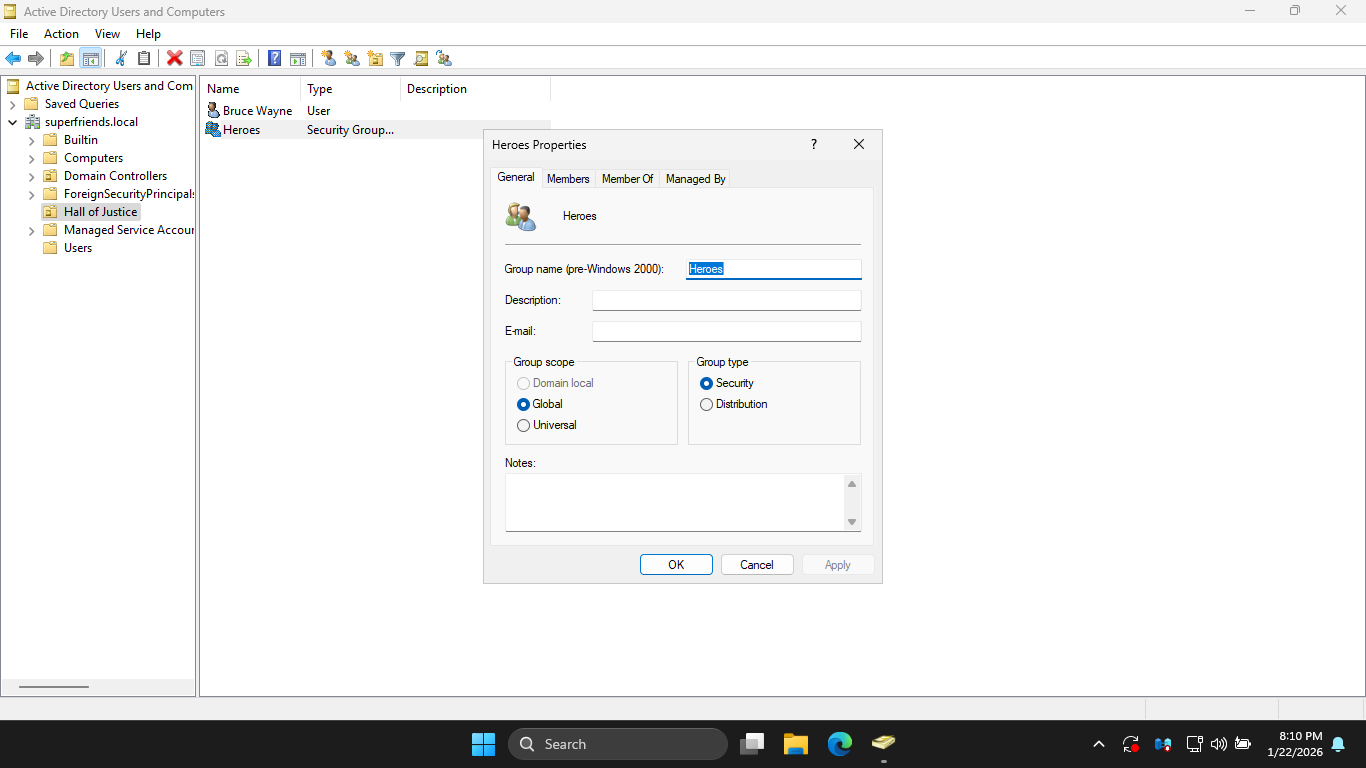
In the Heroes Properties window, click the Members tab, then click Add... to open the Select Users window
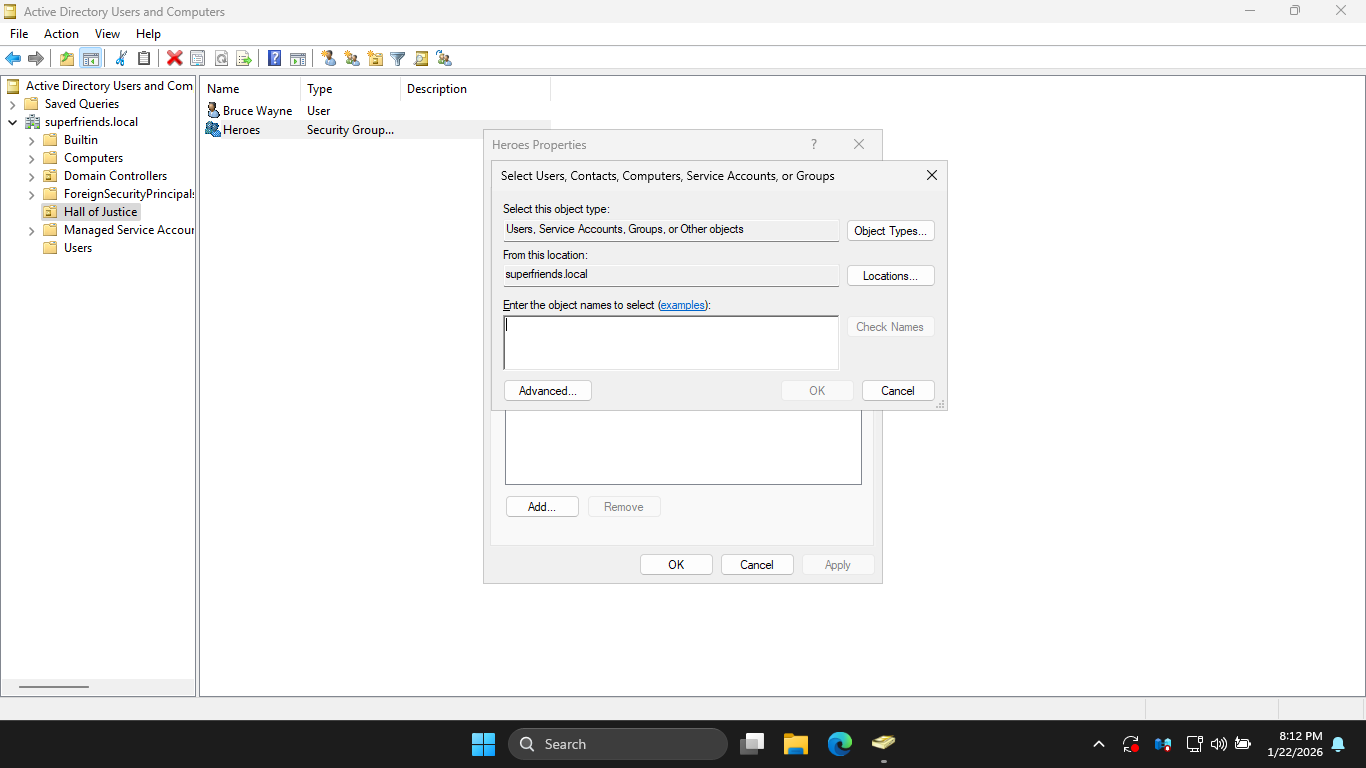
In the Select Users, type Bruce Wayne and click Check Names, Active Directory will search for our user
You will notice that the application automatically fills in the users principal name, click ok to continue
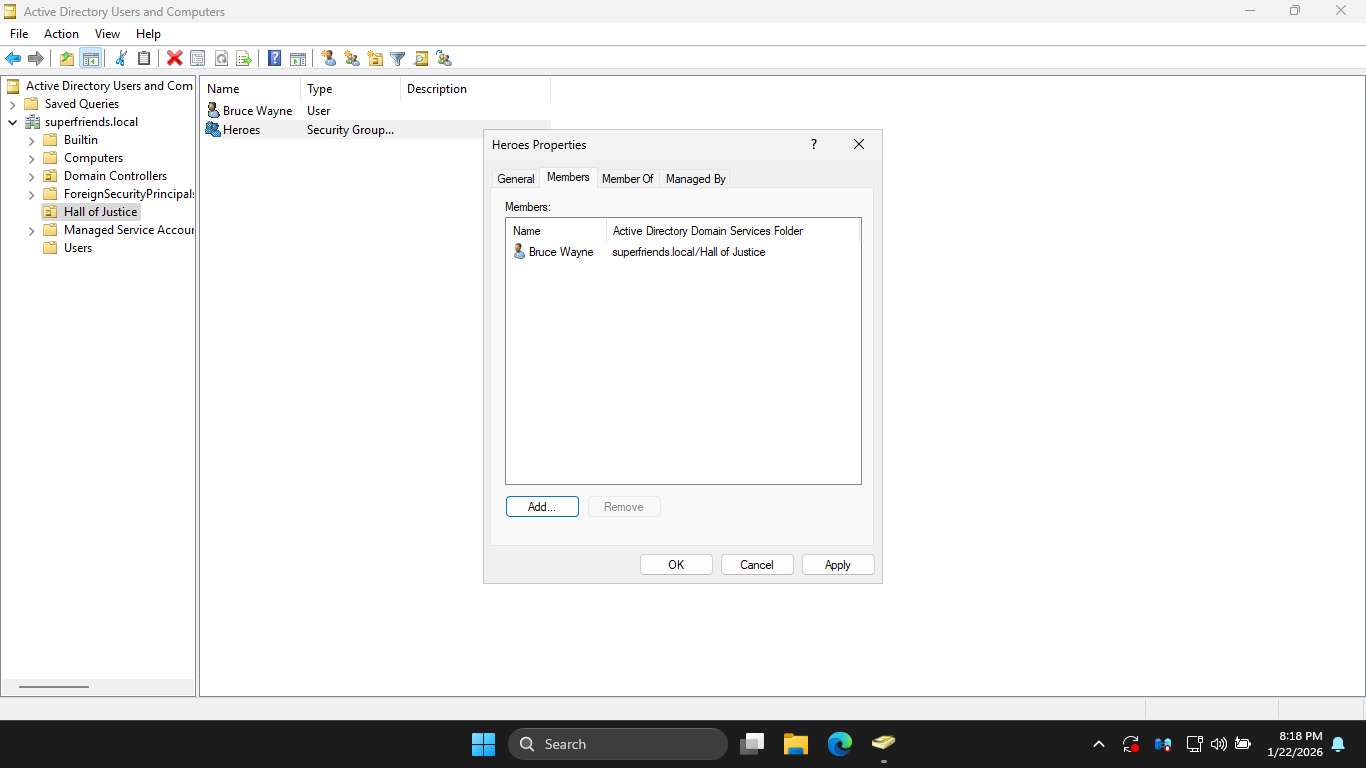
We can see that our user is now listed as a member of the group, click apply to save the change to disk
Now let's switch back to our Command Line server and create a new Global group using PowerShell commands
Run the following command from the Windows Server PowerShell to create the Villains Global Security group
PS C:\Users\Itlab.Center> New-ADGroup -Name "Villains" -SamAccountName "Villains" -GroupCategory Security -GroupScope Global -DisplayName "Villains" -Path "OU=Hall of Doom,DC=legionofdoom,DC=local"
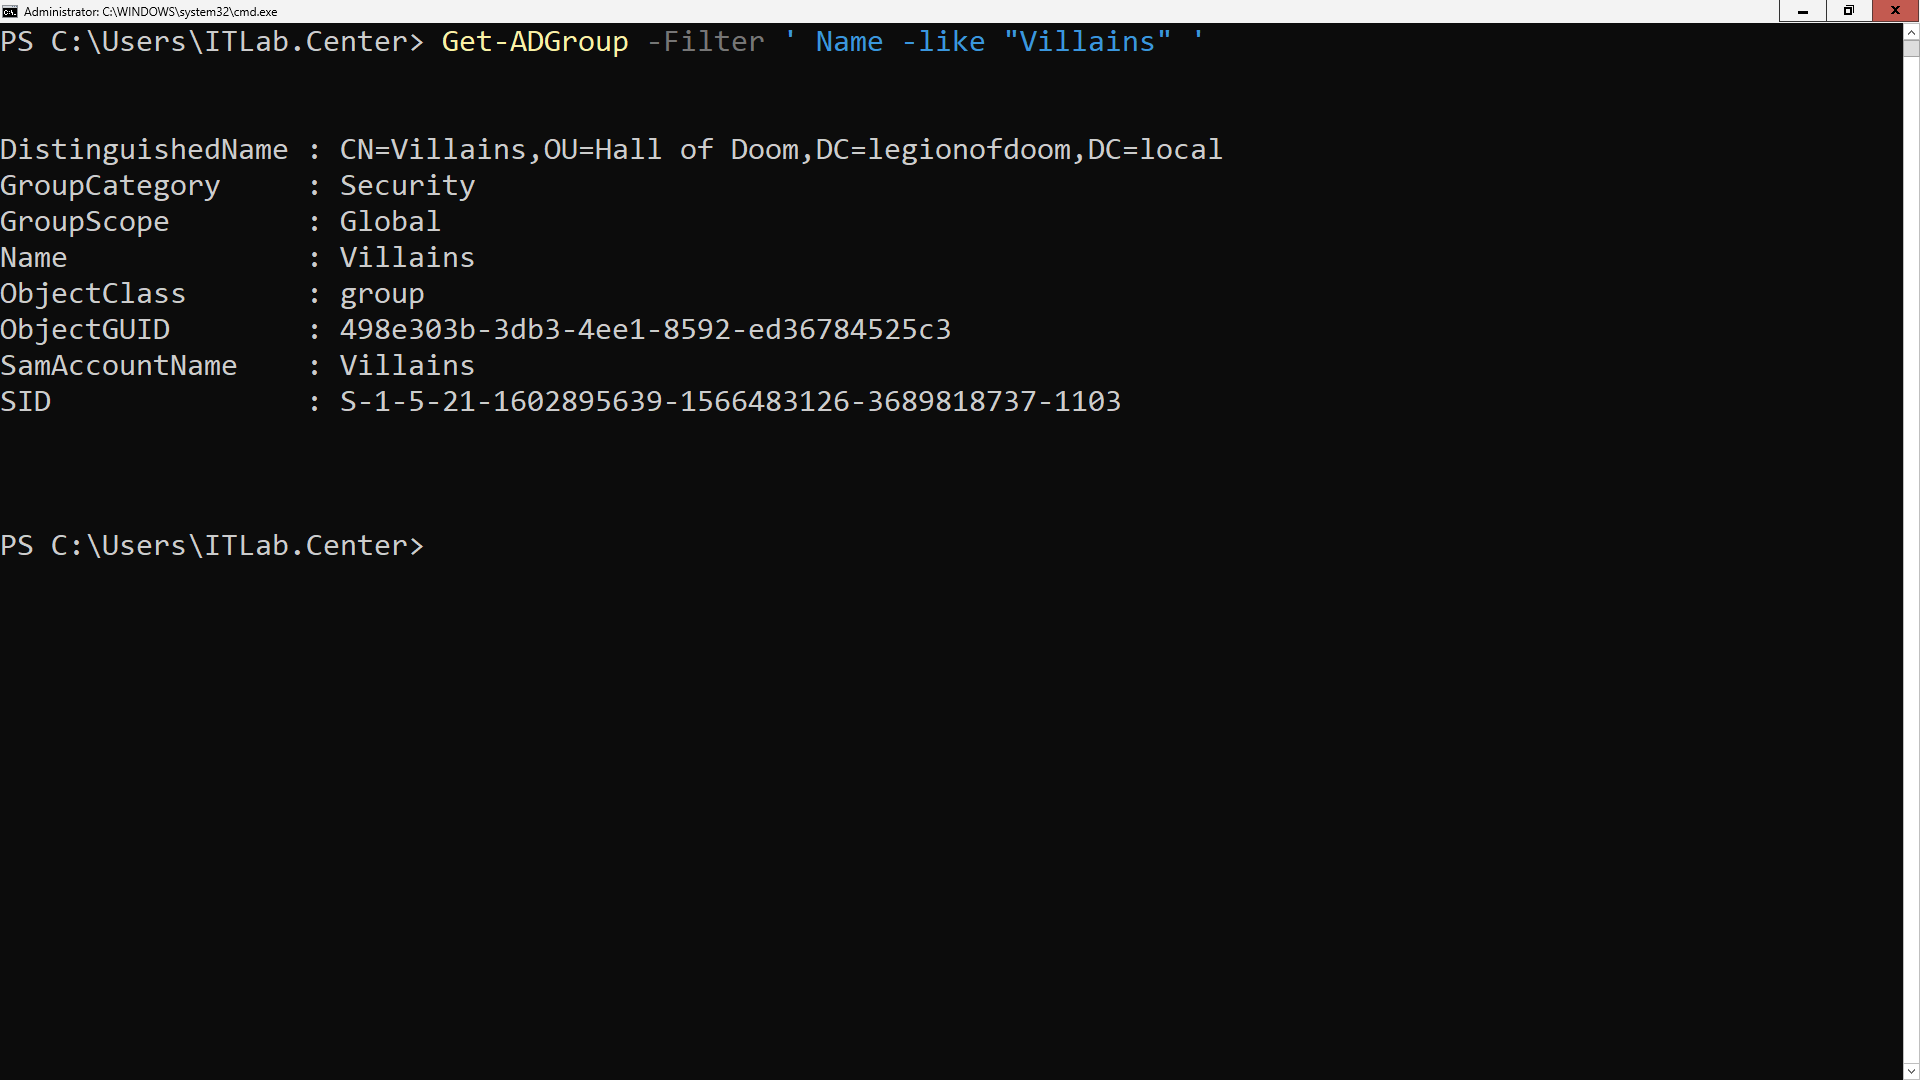
Run the following command from the Windows Server PowerShell to confirm the creation of the new Group:
PS C:\Users\ITLab.Center> GetADGroup -Filter ' Name -like "Villains" '
Resulting Output:
Run the following command from the Windows Server PowerShell to add Lex Luthor to the Villains Group:
PS C:\Users\ITLab.Center> Add-ADGroupMember -Identity "Villains" -Members lex.luthor
Run the following command from the Windows Server PowerShell to confirm Lex Luthors Group Membership:
PS C:\Users\ITLab.Center> Get-ADGroupMember -Identity "Villains"
Resulting Output:
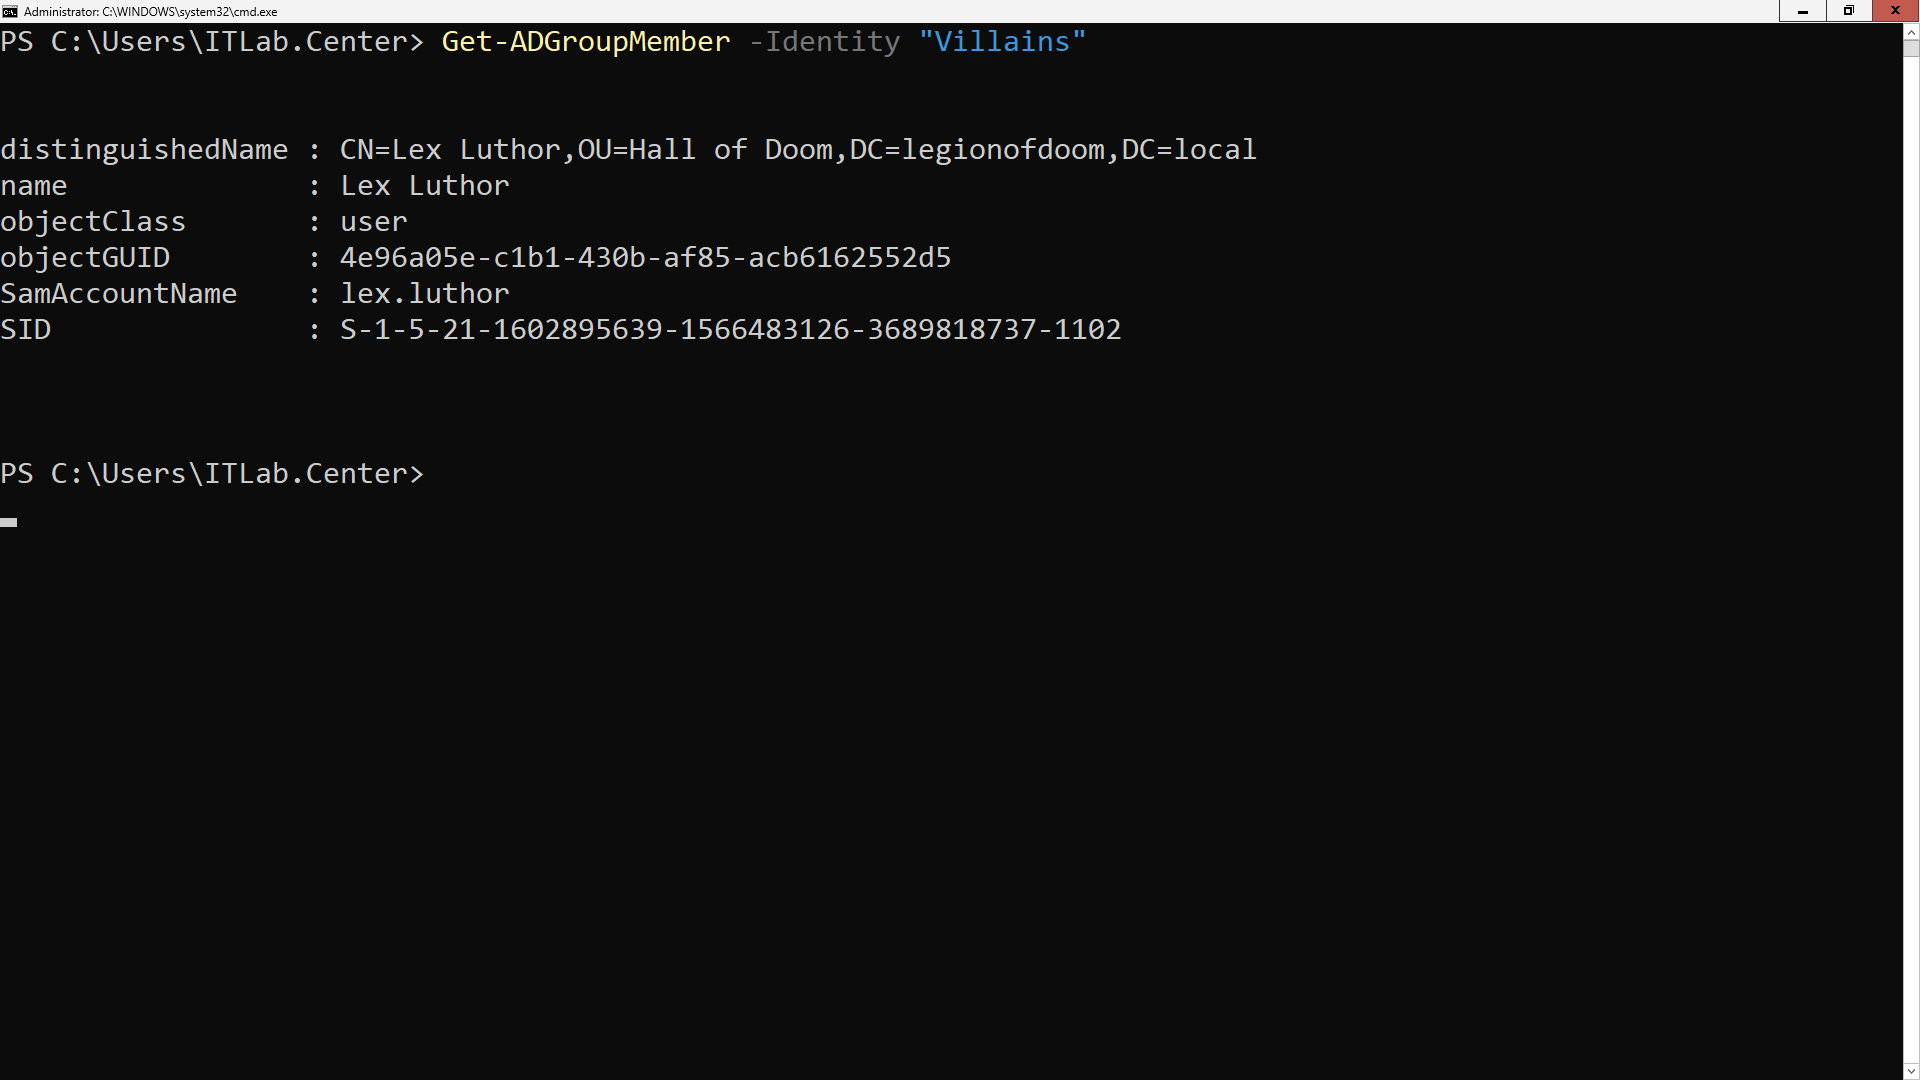
We can see from the output above that Lex Luthor is now a member of our newly created Villains AD group
And that's it! You've now installed Active Directory Domain Services and created both users and groups
You completed this on two different server environments and using two completely different methods+tools