This project demonstrates a comprehensive understanding of Windows system administration by configuring and enforcing system-wide policies through Group Policy Objects (GPOs). The lab progressed from managing standalone local security to architecting a centralized management structure within a live Active Directory environment. Key Technical Hands-On Experiences include: Security Configuration, Active Directory and Domain Management
Cybrary is a well established and free IT training platform with several intuitive labs to explore
A paid subscription with more advanced labs is available as well outside the scope of this platform
Head to https://www.cybrary.it to create a free account for learning available on their platform
Head to Group Policy Basics to complete it yourself or you can perform it on your homelab below
Quick Links:
Requirements:
• Windows PC w/ Internet Connection
• USB Flash Drives w/ at least 64GB Capacity
• 2 Unused PCs w/ at least 4GB of Memory
1. Group Policy Overview
Group Policy is a Windows management tool that provides admins with a powerful mechanism for configuration
The Enforcement across user accounts and computer systems enables a consistent policy application baseline
At its core, Group Policy operates through a structure of rules and settings which dictate many settings
These settings include dictating everything from desktop environments and security to software deployment
Even script execution can be controlled this way. Microsoft released Group Policy in 1999 along with AD
Before Group Policy administrators would collect and manually deploy registry tweaks in an ad-hoc manner
With Group Policy, an admin can enforce settings and customize the user experience in a controlled manner

Windows implements Group Policy using Group Policy Objects (GPOs) which are collections of policy settings
Each GPO contains two parts: a Group Policy template, and corresponding set of Active Directory attributes
The Group Policy template resides in the SYSVOL folder on domain controllers and includes admin templates
The Active Directory attribute set links the Group Policy Object to users + computers within the directory
This dual storage approach ensures that policy settings are both scalable and easily replicated anywhere
When a user logs into the domain or when a computer starts up, the system queries AD to determine the GPO
The appropriate GPO is applied based on where the user or computer resides in the AD directory hierarchy
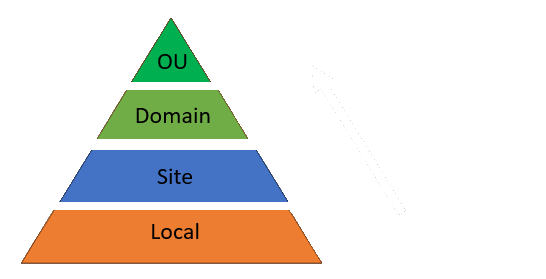
GPOs applied at one level (Site) may conflict with or contradict a GPO applied at another level (Local)
In the event of a Group Policy conflict, GPOs are applied by way of hierarchy in the following order:
Local GPOs are applied first and overwritten by any Active Directory level policy
Group Policies applied to an Active Directory Site are applied next. Site GPOs overwrite Local GPOs but
are overwritten themselves by other domain level policies below
Domain GPOs apply to all objects in the Active Directory domain; only an OU GPO can overwrite these GPOs
This is the preferred way to apply GPOs in an Active Directory domain. For this reason, OU GPOs are then
applied last and overwrite all other GPOs with some exceptions (see below)
There are cases where the Default Domain Policy will take precedence over an Organizational Unit policy
Consider the case of Password policies for domain member servers, stored in the local security database
However, domain user credentials should not be stored in the local SAM, they are stored in the AD database
So when we are logged into the domain, the Default Domain Policy for passwords should always be applied
The Group Policy Management Console (GPMC) manages those centralized domain-level Group Policy settings
Local Group Policies are managed through use of the Local Group Policy Editor referred to as gpedit.msc
As noted above, domain-level policies are first created and then linked (connected) to objects in domain
You can have many policies linked to a single object as well as a single policy linked to many objects

Group Policies, both Local and Domain, are divided into two primary groups: Computer and User Policies:
User policies are applied when a user logs on. In a domain, User policies follow the user on any system
Computer policies however, are applied to a system or group of systems. They are applied at system startup
All Group Policies are re-applied every 90 minutes by default, though this refresh period is customizable
Group Policies can also be applied immediately using the windows built-in gpupdate command line utility
Given the inherent complexity and flexibility of Group Policies, Microsoft provides tools to help with
visualization of how Group Policies are applied and which policies are in effect. These tools include:
• Resultant Set of Policy (RSoP)
• gpresult
• Group Policy Results
• Group Policy Modeling
Both the Group Policy Results and Group Policy Modeling tools are included as a part of the built-in GPMC
So we know what Group Policies are, where they're applied, and how they're viewed, but how can we use them?
There are literally thousands of user and system settings available for us to manipulate to our advantage
An administrator can do almost anything to configure and manage a system using Group Policy. Some examples:
• Manage password policies like length, complexity, and expiration times
• Control Windows Firewall settings
• Install Updates
• Map Drives
• Redirect Folders
• Set a background image
• Prevent a user form shutting down the system
• Deny access to the Control panel or Registry editor
• Configure the system to use a proxy server
• Manage Network Printers
• Enable File Auditing
• Run scripts at startup, shutdown, and login
• Manage Windows Time Settings
• Create and alter Power Plans
In this lab, you will practice using Group Policy to enforce configurations on both the local and domain
2. Install Windows Server 2025
Windows Server is Microsoft's enterprise-grade server operating system for hosting several applications
Organizations wishing to host their web servers, databases, or file shares on Windows will utilize this
Download Windows Server 2025 Disk Image (ISO): Windows Server 2025 ISO
Download Rufus Disk Imaging Software: Rufus Official Download
Insert USB Flash Drive, run rufus.exe, select target drive, select Windows Server 2025 ISO, hit start:
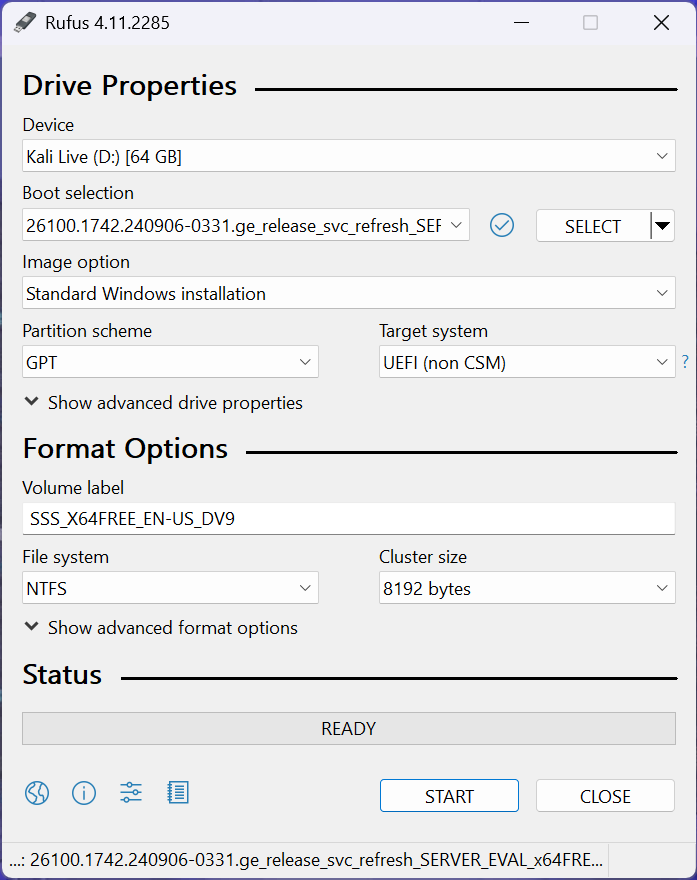
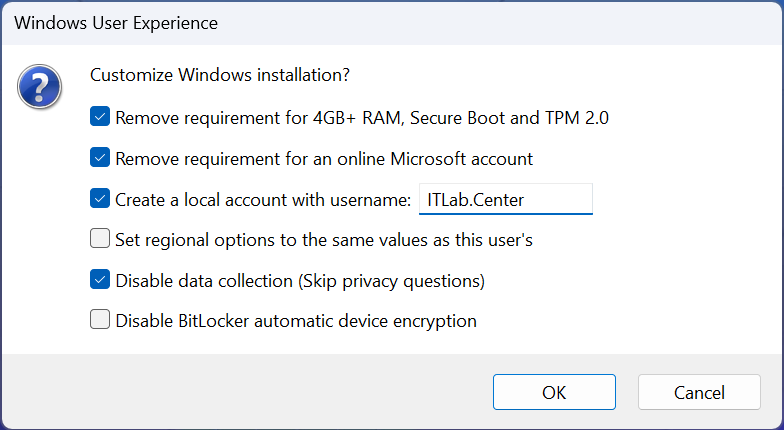
Use the rufus popup menu to customize the Windows Server 2025 installation and disable data collection:
Remove USB Flash Drive and Insert into unused PC. Start the PC and press the hot boot key at the startup:

Navigate through the installer and select the Windows Server Standard Evaluation Desktop Experience option:
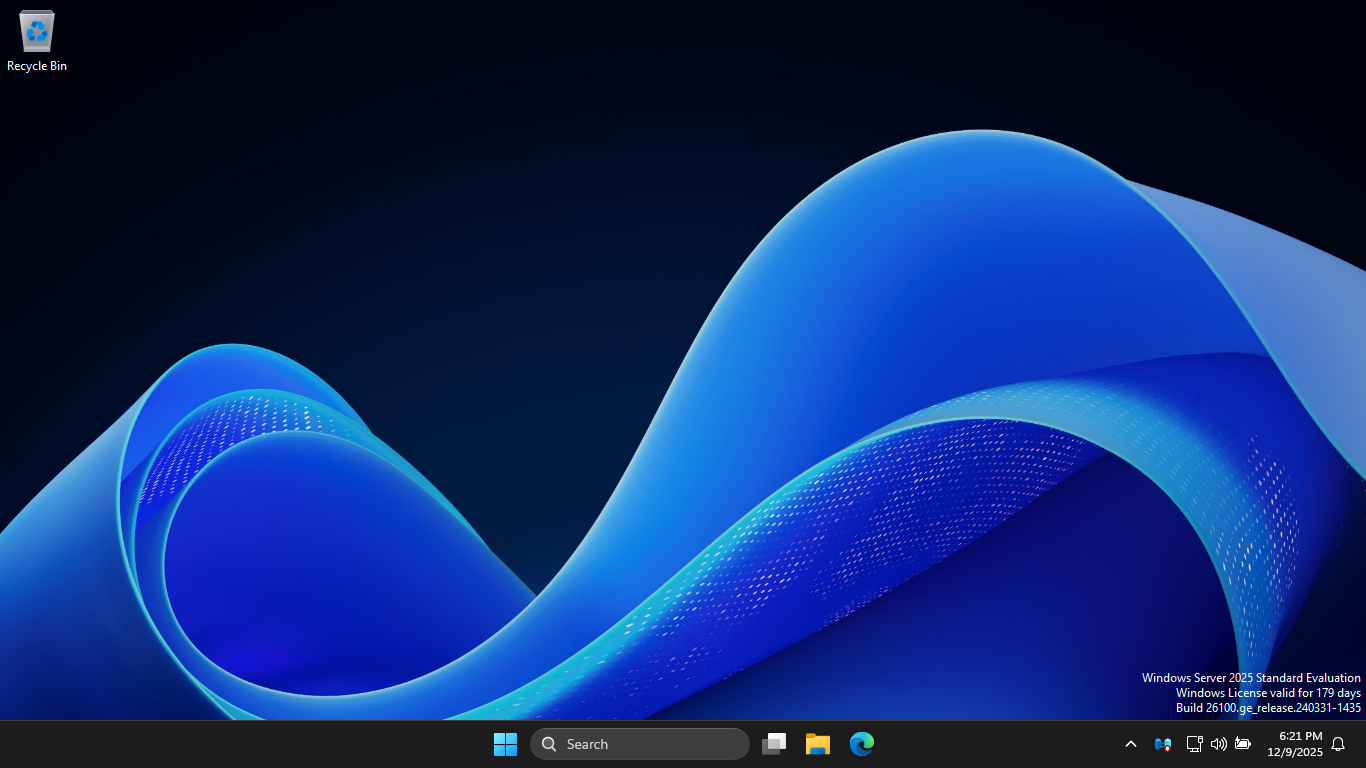
We now have our Server provisioned which will simulate our Group Policy for the following lab sections
3. Explore Local Group Policy Settings
In this part of the lab, you will explore Group Policies using the Local Group Policy Editor and discover
some common Group Policy Settings for computers and users. We will then see it in action by applying them
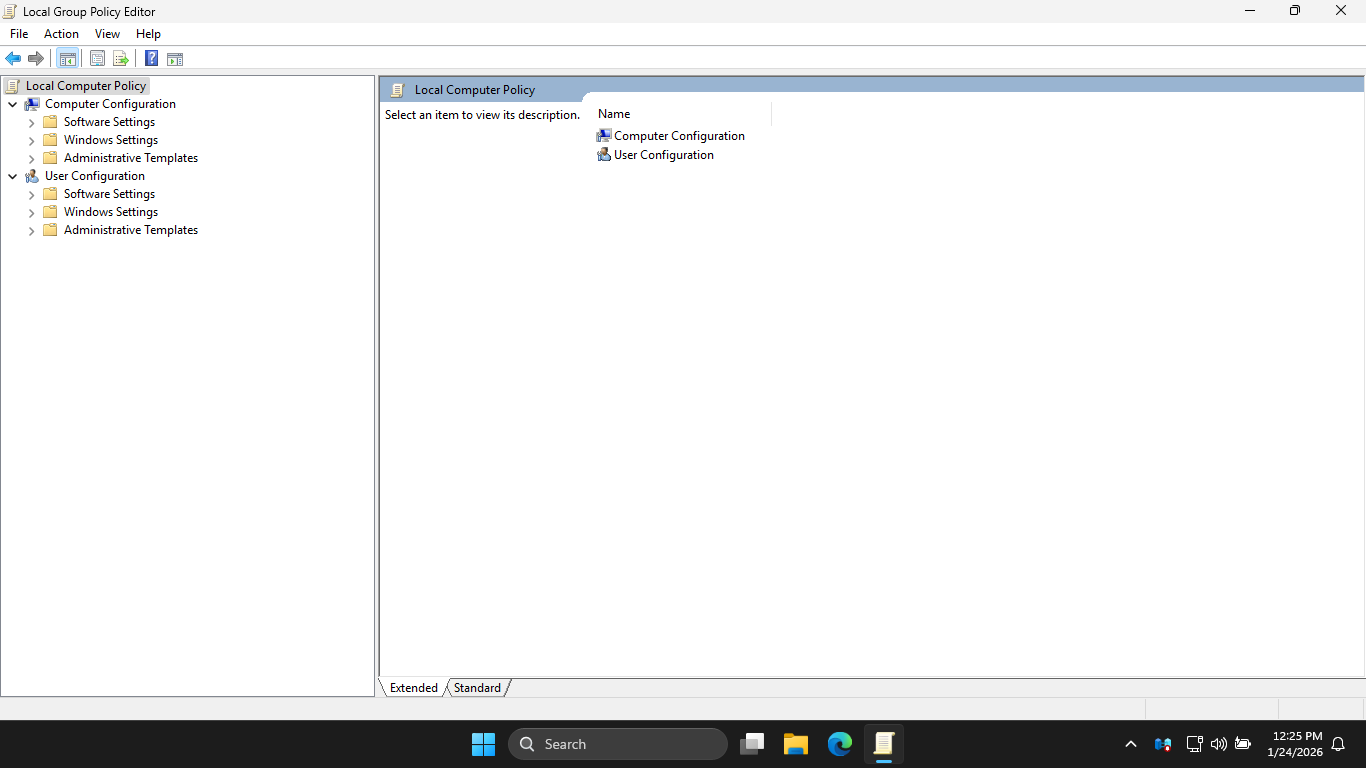
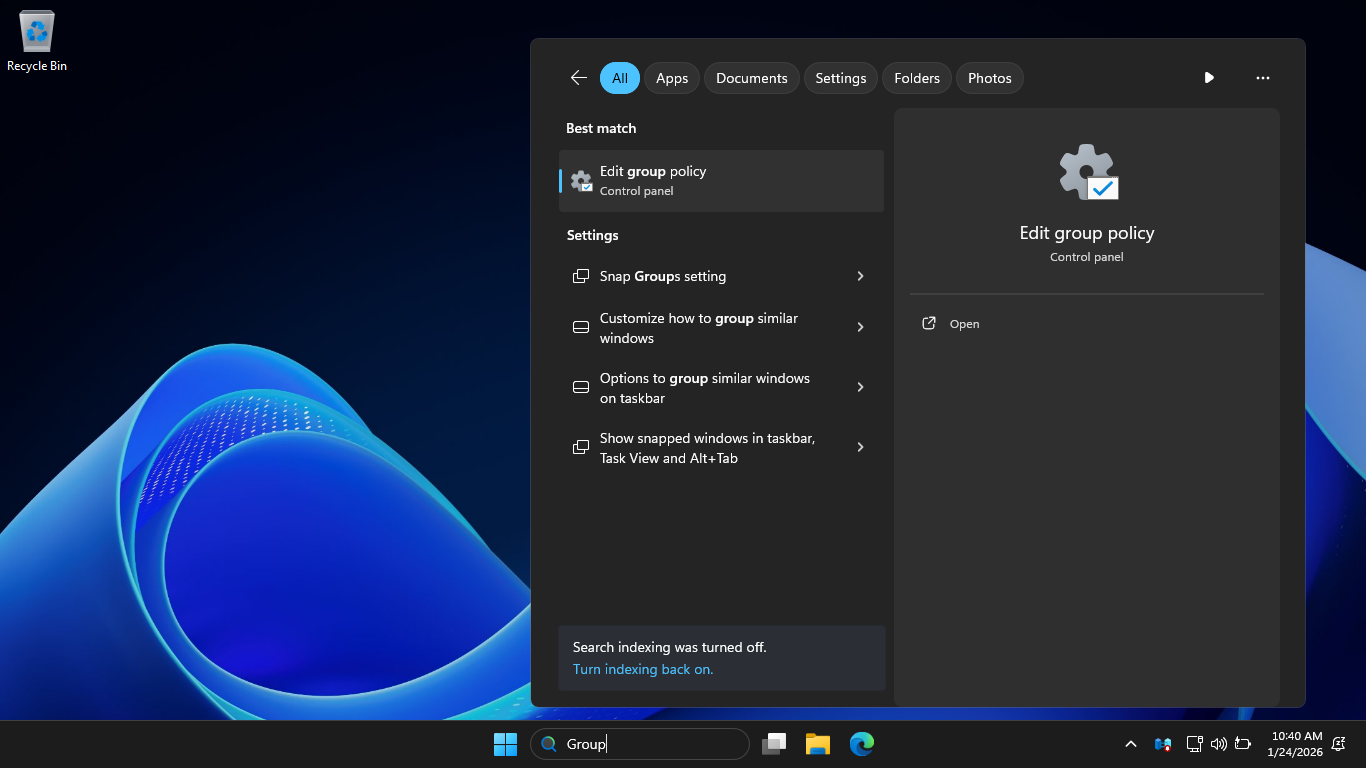
On the Windows taskbar, type Group in the search field, then select Edit Group Policy from the results:
In the navigation pane on the left, under Computer Configuration, expand Windows Settings then hit Scripts
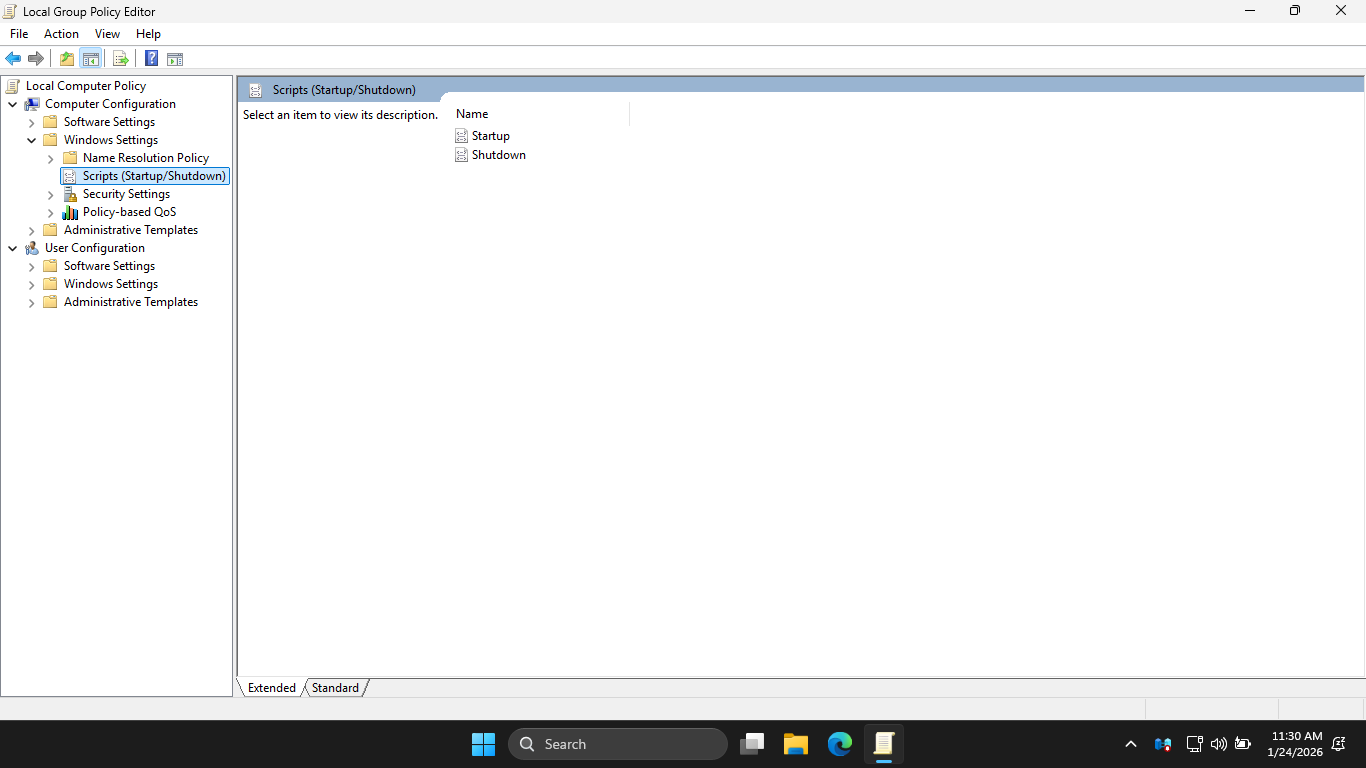
In the configuration pane on the right, you will see where you can configure both the startup and shutdown
As you might guess, these scripts will run when the system starts up or just before the system shuts down
In the Local Group Policy Editor, expand Security Settings > Account Policies and select Password Policy
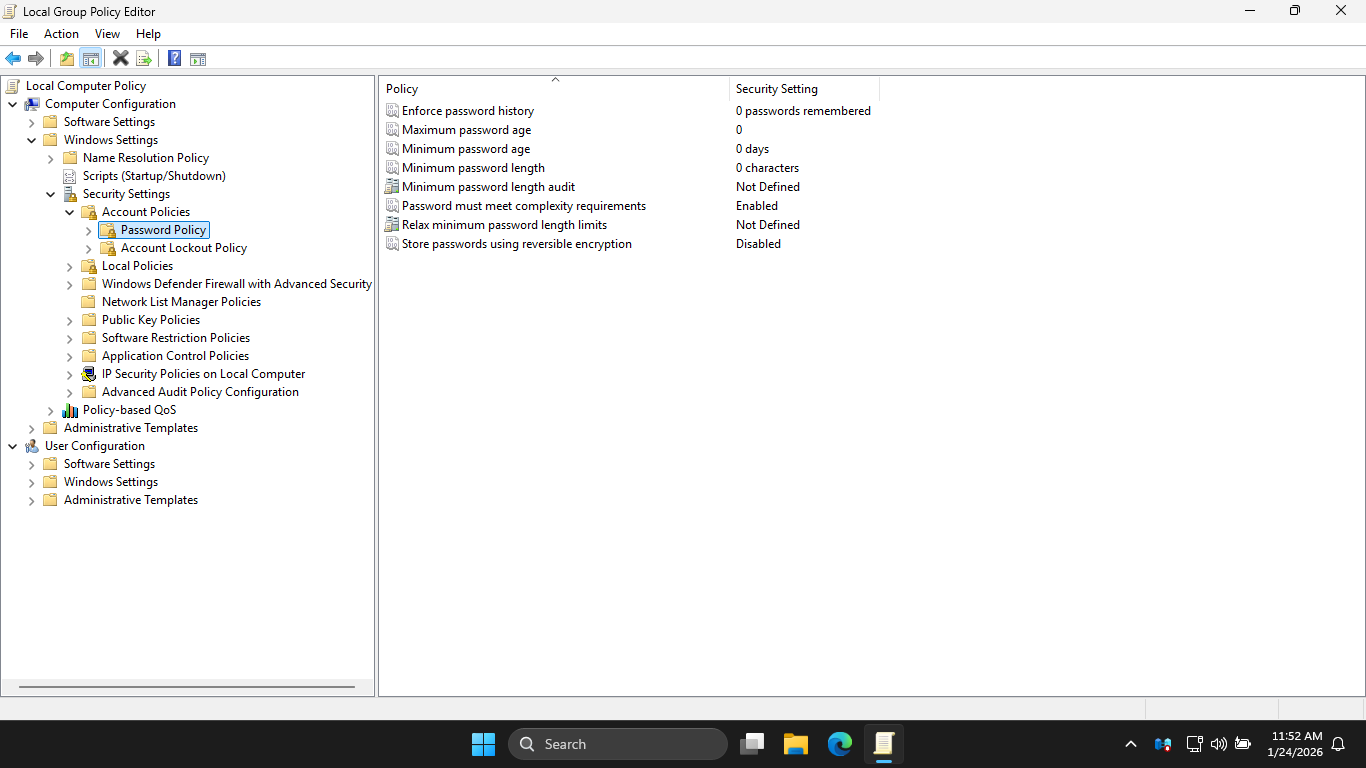
With these policies, you can customize password security for local accounts on this Windows Server Machine
From the Local Group Policy Editor navigation pane, under the Security Settings, hit Account Lockout Policy
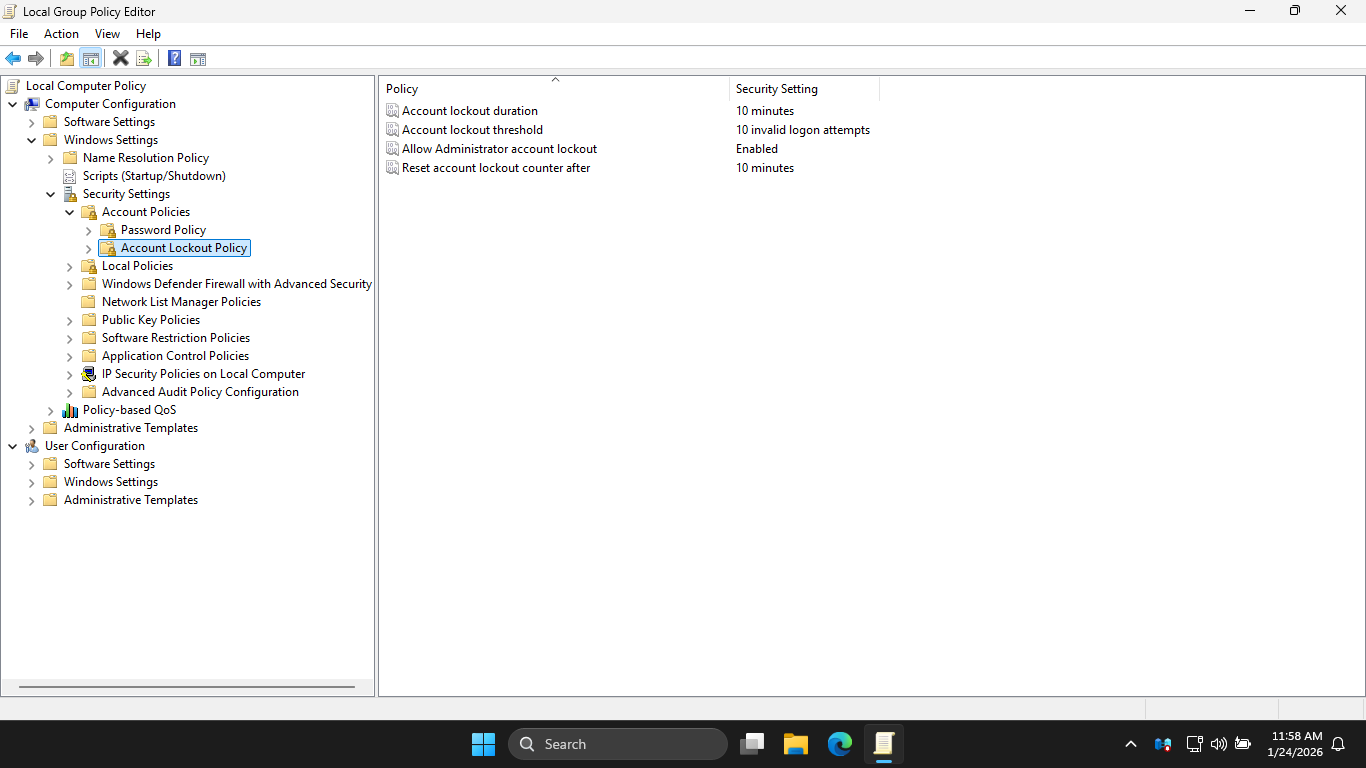
With these policies, you can configure when a user account is locked out due to login and password failures
You can also configure when the account will be unlocked. By default there is no lockout policy in effect
In the Local Group Policy Editor pane, under User Configuration, expand Windows Settings and hit Scripts
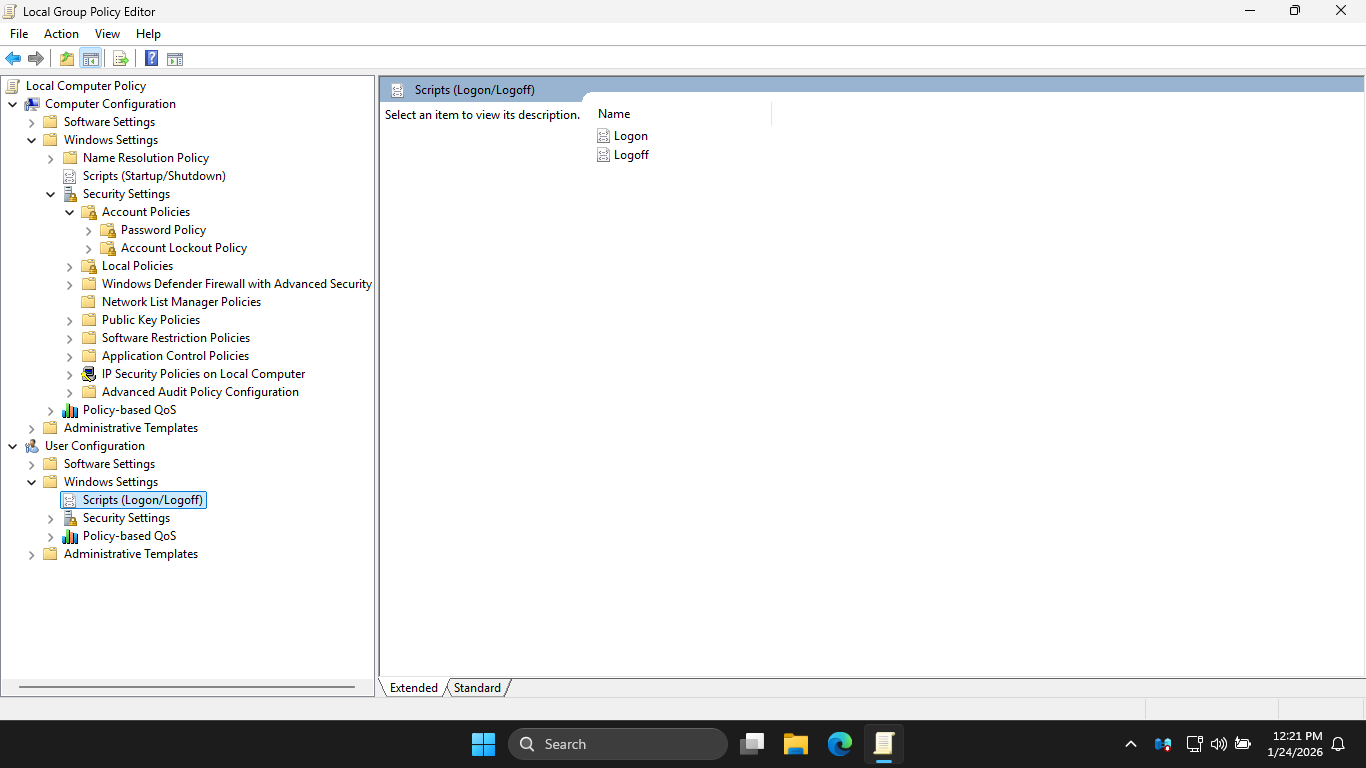
With these policies, you can configure logon and logoff scripts to be run every time any user logs on or off
Now that we have explored the Local Group Policy Editor interface, time to observe Group Policy in action
In the next steps, you will use Group Policy to enforce the following restrictions to your lab workstation
• Users should not have access to the Control Panel
• Users should not be able to change the Taskbar
• Users should not have access to the Registry
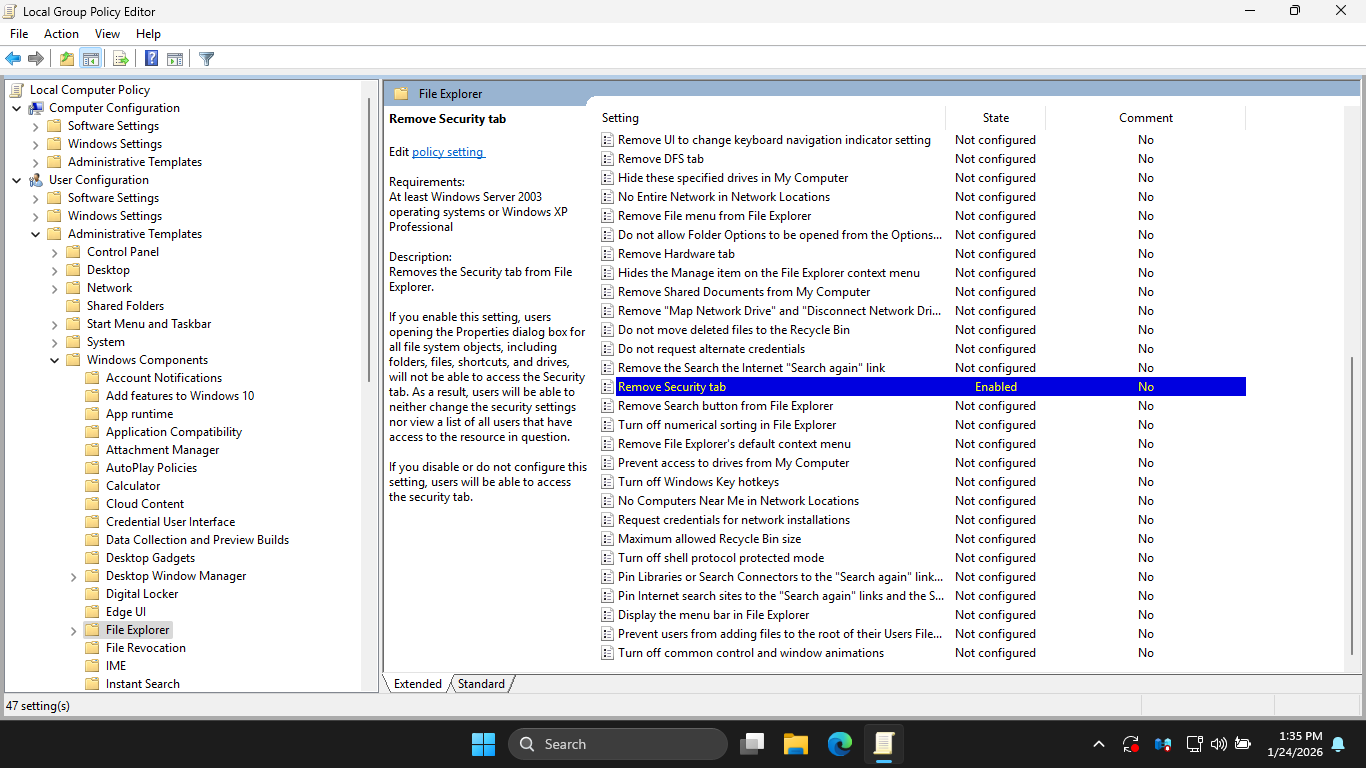
• Users should not have access to the Security Tab
• There should be no Balloon Popups
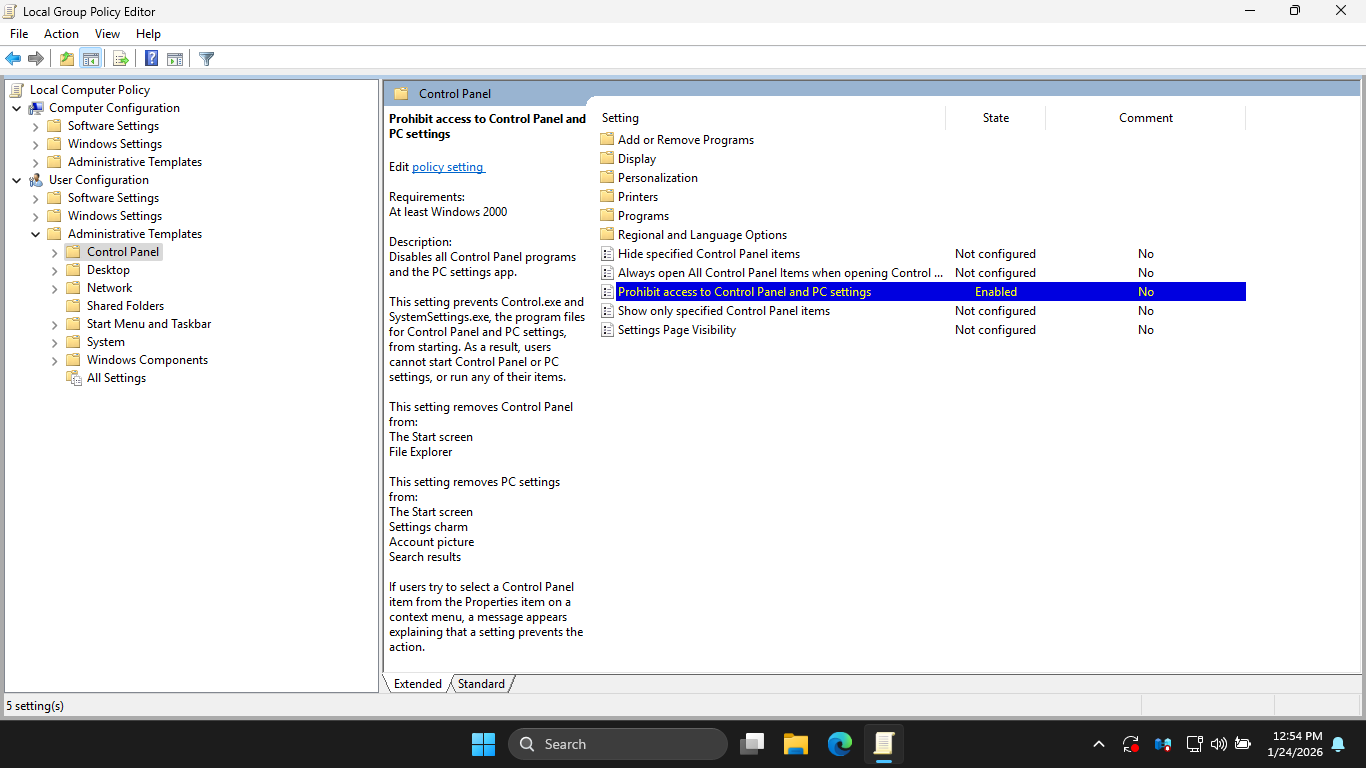
In the Local Group Policy Editor, head to User Configuration > Administrative Templates > Control Panel
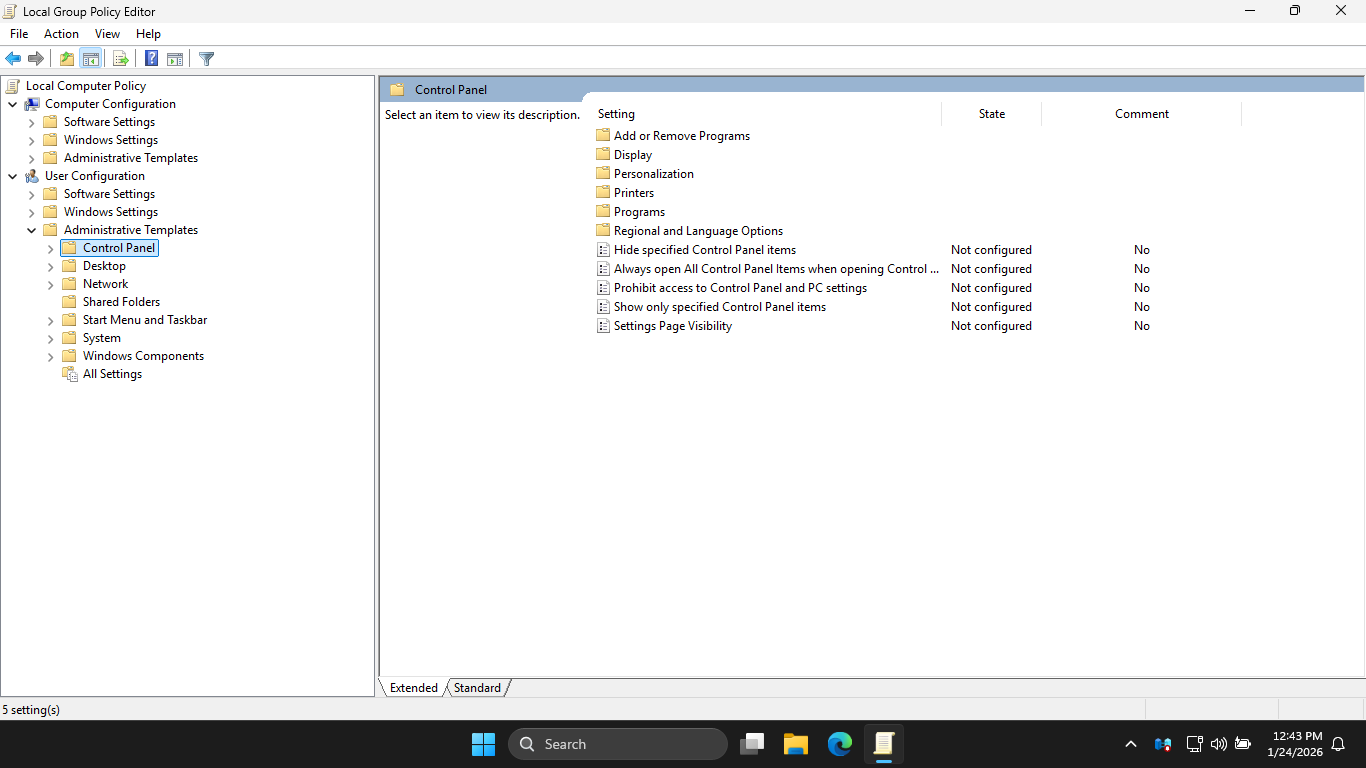
In the Local Group Policy Editor config pane, double-click Prohibit access to Control Panel and PC Settings
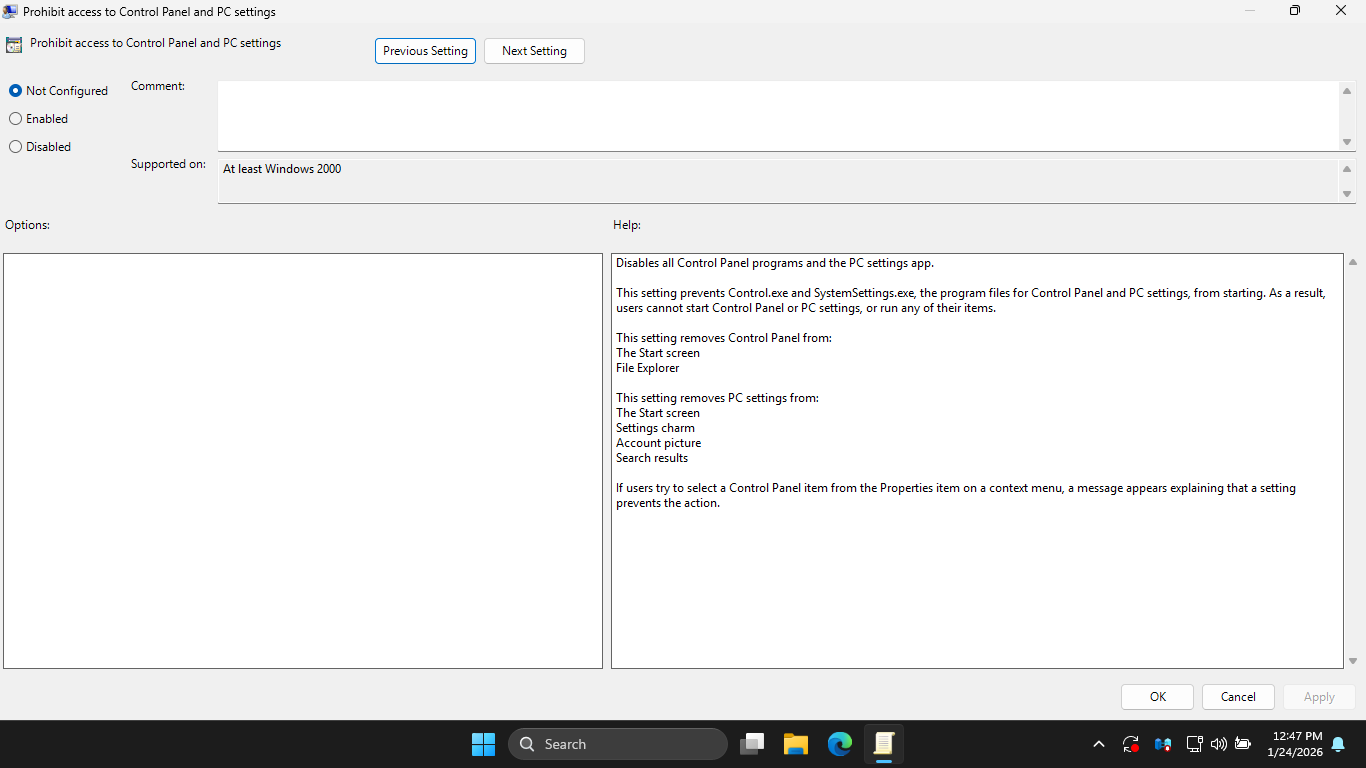
In the Prohibit access to Control Panel and PC Settings window, click the Enabled radio > Apply > then OK
Notice in the configuration pane that the state of Prohibit access to Control Panel and PC Settings changed
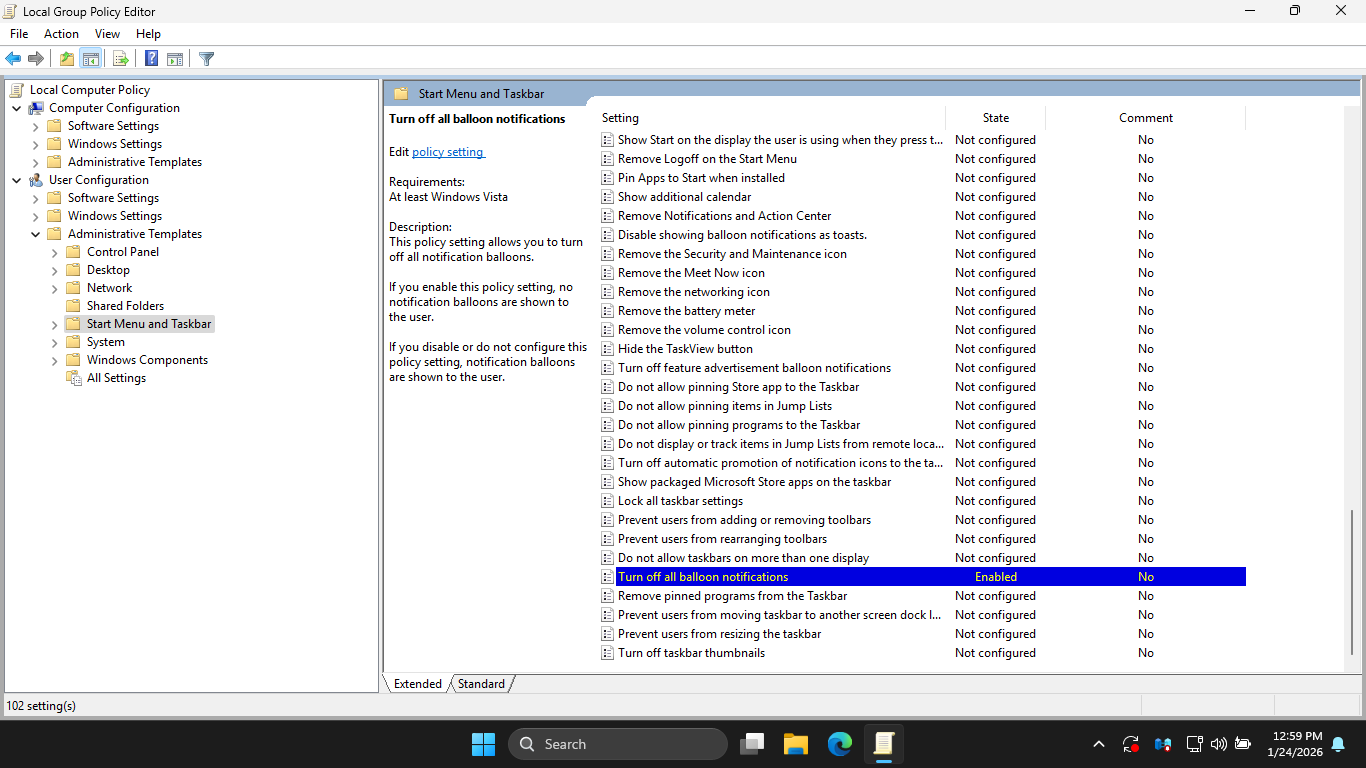
In the LGPE, under Administrative Templates, hit Start Menu and Taskbar then enable the following policy:
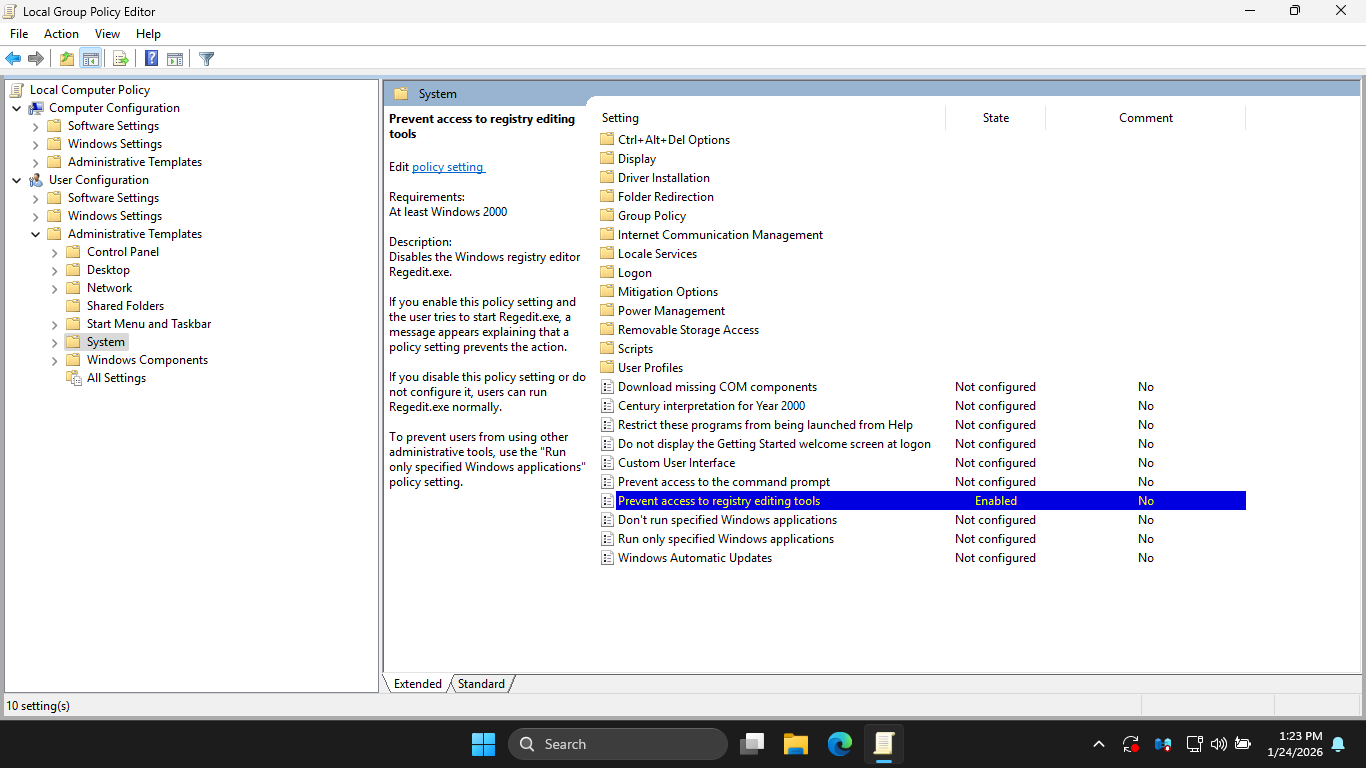
In the LGPE, under Administrative Templates, select the System option then enable the following policy:
In the LGPE, under Administrative Templates > Windows Components > File Explorer and then enable policy:
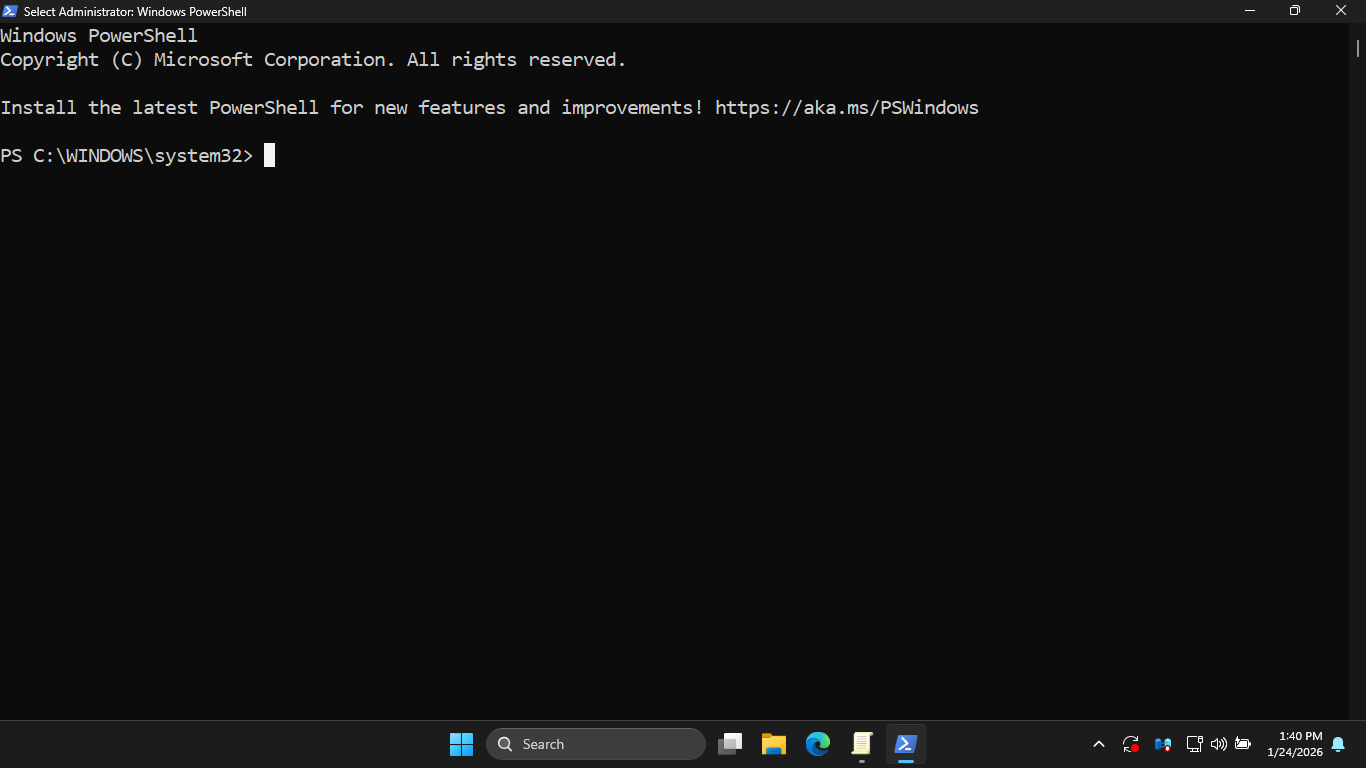
On the taskbar, search for PowerShell, then select Windows PowerShell (Admin) to open an admin PowerShell
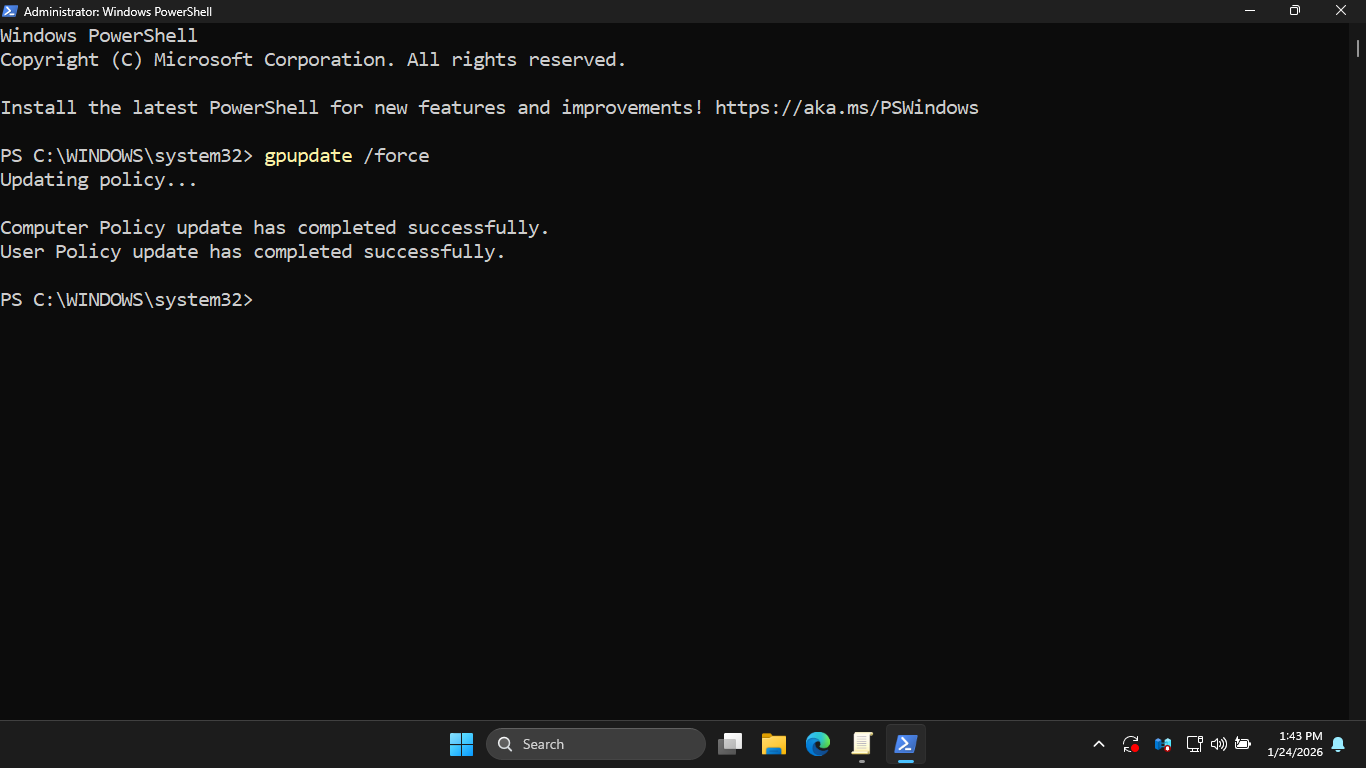
Run the following command from the Windows Server PowerShell to immediately apply our Group Policy changes
PS C:\WINDOWS\system32> gpupdate /force
Resulting Output:
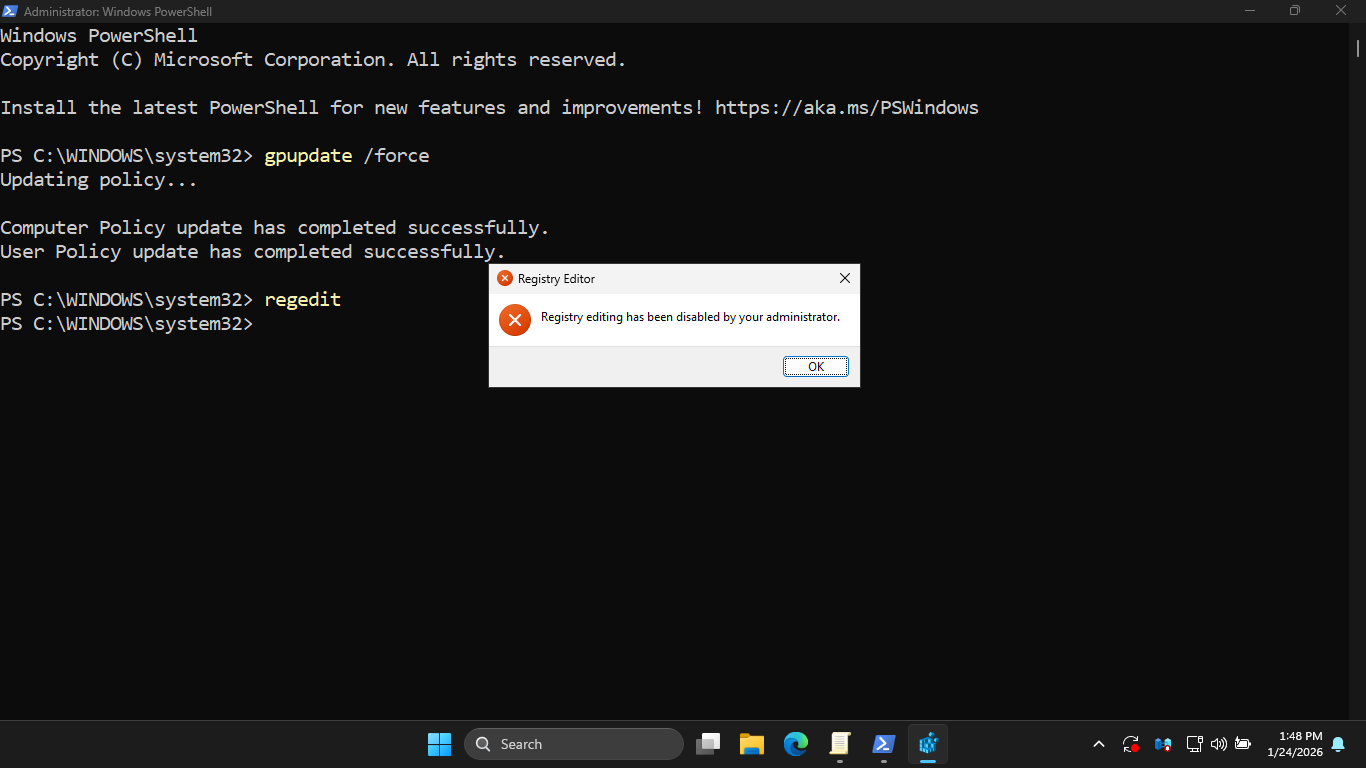
Run the following command from the Windows Server PowerShell to test our registry edit restriction policy
PS C:\WINDOWS\system32> regedit
Resulting Output:
Run the following command from the Windows Server PowerShell to test our control pane restriction policy
PS C:\WINDOWS\system32> control
Resulting Output:
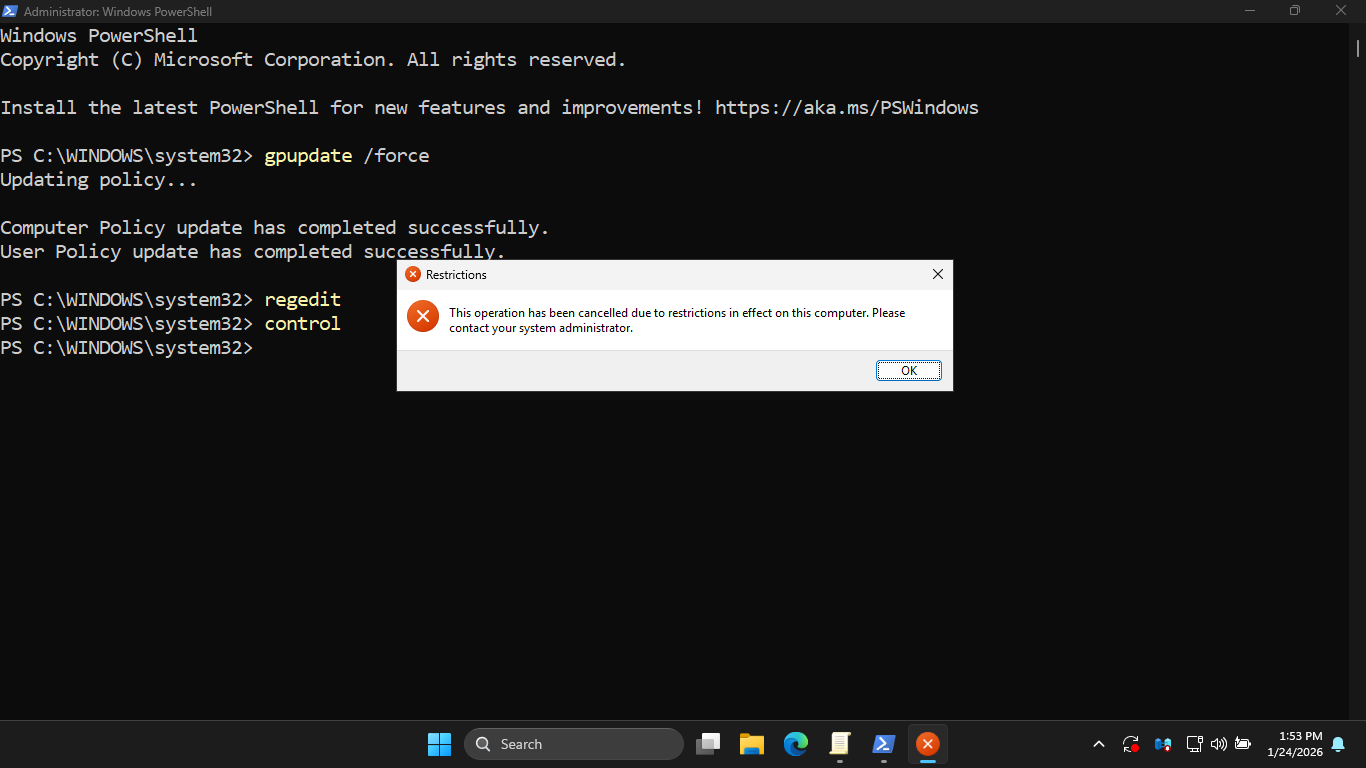
We can see that each of these policies is effective in preventing access even to administrator PowerShells
4. Promote Server to a Domain Controller
In this part of the lab, we will explore how Group Policy works in an live Active Directory environment
First we will need to promote your lab server to a Domain Controller. Leave the elevated PowerShell open
Run the following command from the Windows Server PowerShell to install Active Directory Domain Services:
PS C:\WINDOWS\system32> Install-WindowsFeature -Name AD-Domain-Services -IncludeManagementTools
Resulting Output:
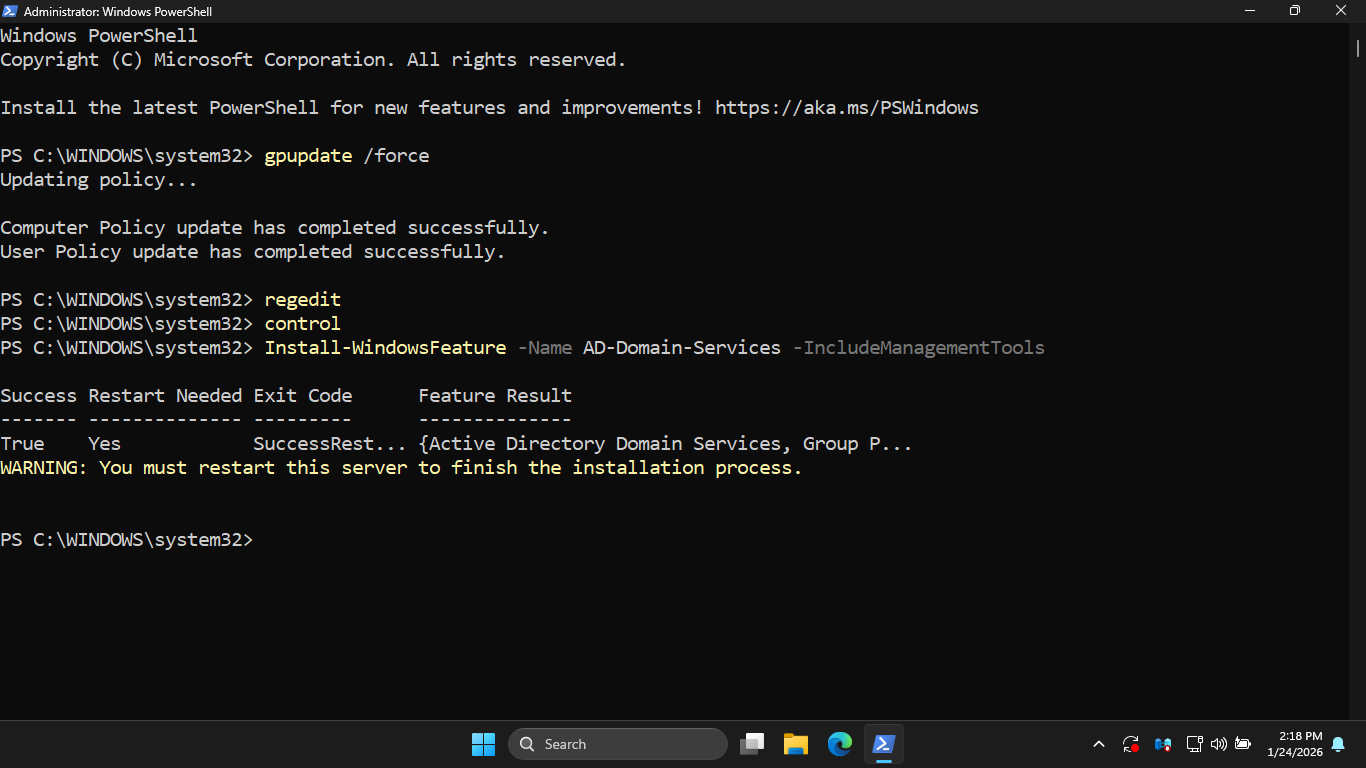
Run the following command from the Windows Server PowerShell to restart the server and finish the install
PS C:\WINDOWS\system32> Restart-Computer
Once the Server has restarted, open another administrator PowerShell to continue promoting the Server
Run the following command from the Windows Server PowerShell to create the new itlabcenter.local domain:
PS C:\WINDOWS\system32> Install-ADDSForest -DomainName "itlabcenter.local" -CreateDnsDelegation:$false -DatabasePath "C:\Windows\NTDS" -DomainMode "7" -DomainNetbiosName "ITLABCENTER" -ForestMode "7" -InstallDns:$true -LogPath "C:\Windows\NTDS" -NoRebootOnCompletion:$False -SysvolPath "C:\Windows\SYSVOL" -Force:$true
When prompted for the DSRM password, type Password!23 and press Enter. You will need to do this two times
During the installation the PC will restart several times. This may take up to 5 minutes to fully finish
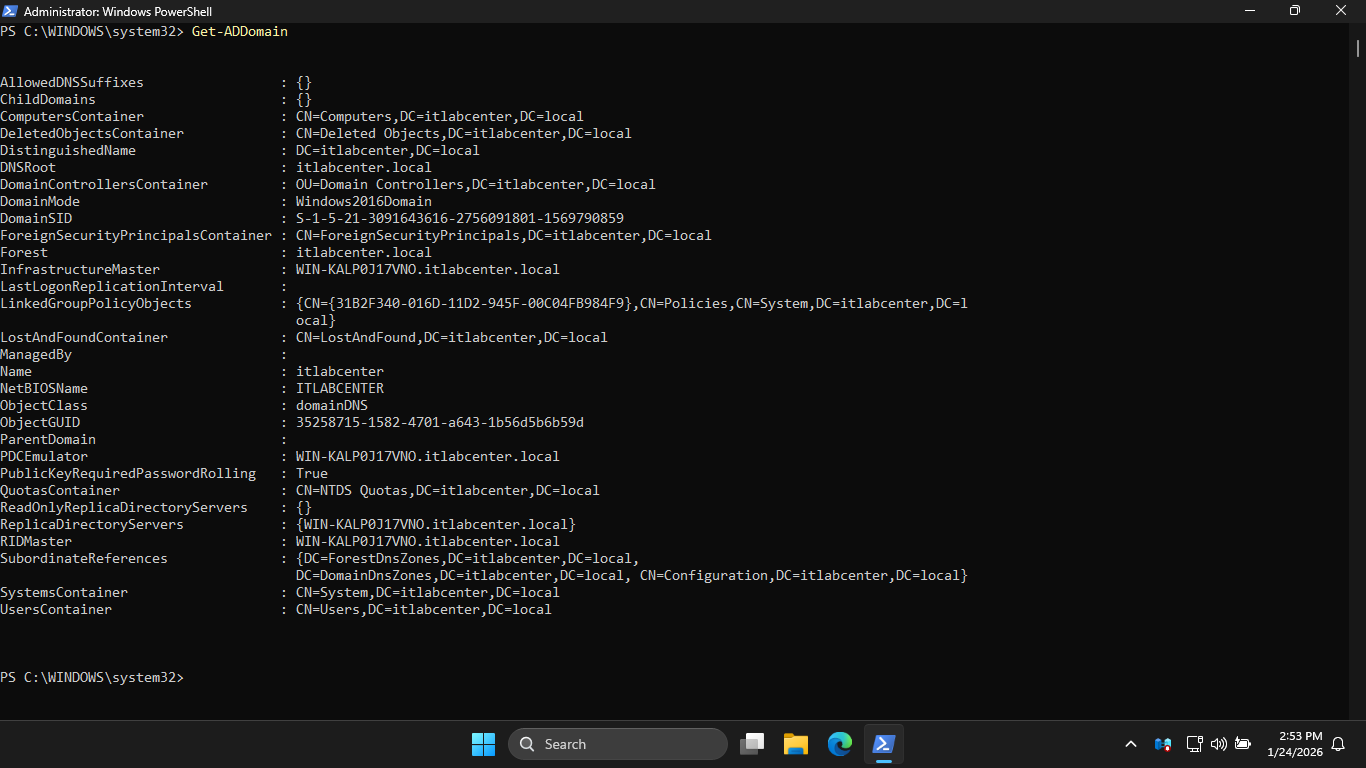
Run the following command from the Windows Server PowerShell once restarted to view the Domain Controller:
PS C:\WINDOWS\system32> Get-ADDomain
Resulting Output:
Before we continue, we will need elevated permissions to edit and create our domain-level Group Policies
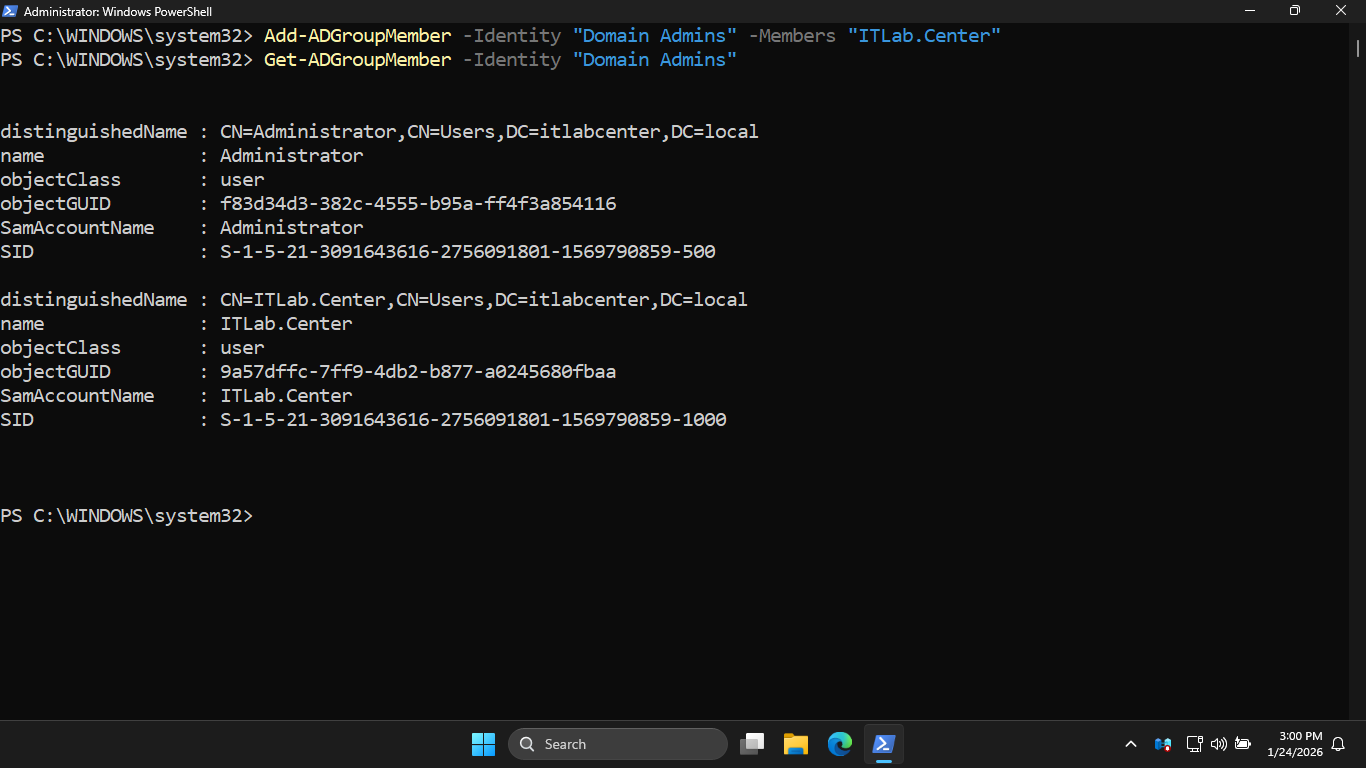
Run the following commands from the Windows Server PowerShell add our user to the Domain Administrators
PS C:\WINDOWS\system32> Add-ADGroupMember -Identity "Domain Admins" -Members "ITLab.Center"
PS C:\WINDOWS\system32> Get-ADGroupMember -Identity "Domain Admins"
Resulting Output:
Now run Restart-Computer from the PowerShell again to finalize the administrator group membership addition
5. Explore Domain-Level Group Policy Settings
With our Domain Controller configured and our admin privileges set, we are ready to explore these policies
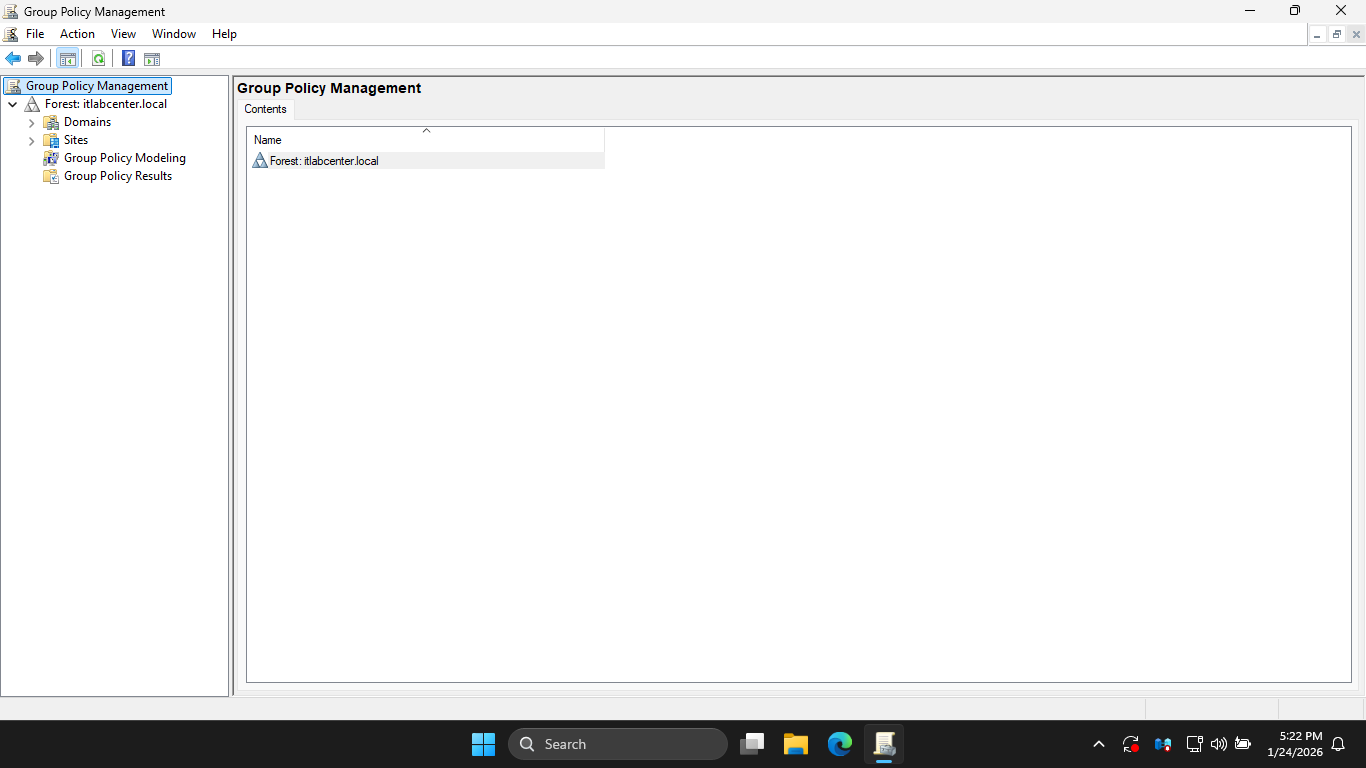
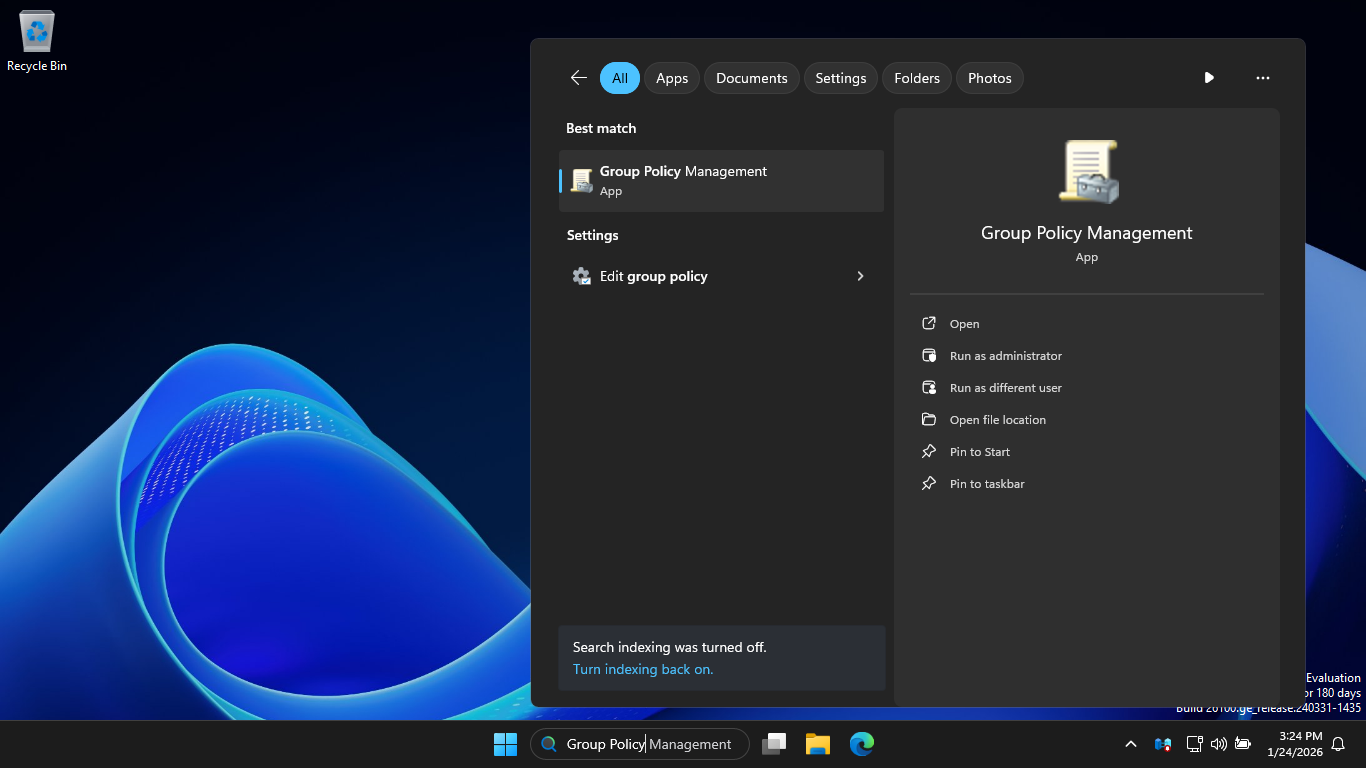
On the Windows taskbar, type Group Policy in a search, then select Group Policy Management from the output
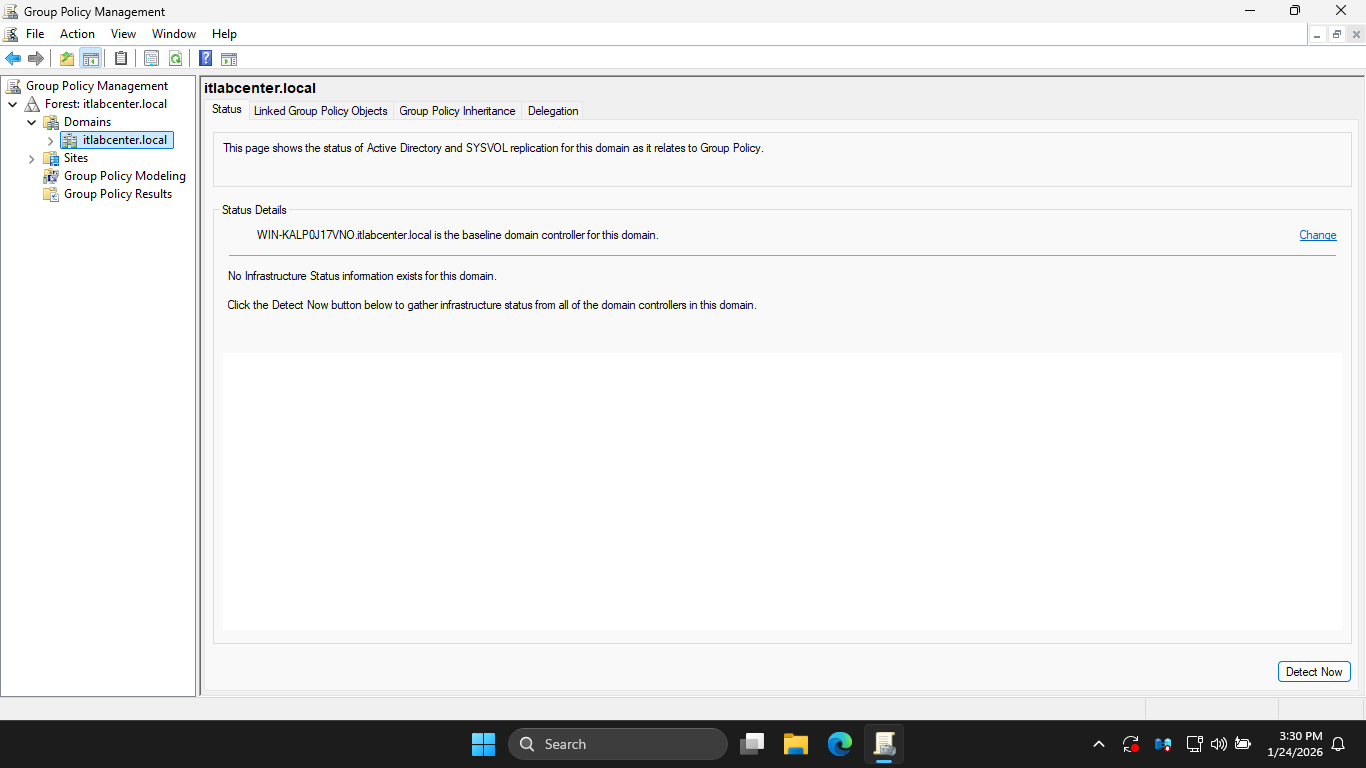
In the GPMC window, under Group Policy Management > Forest: itlabcenter.local > Domains > itlabcenter.local
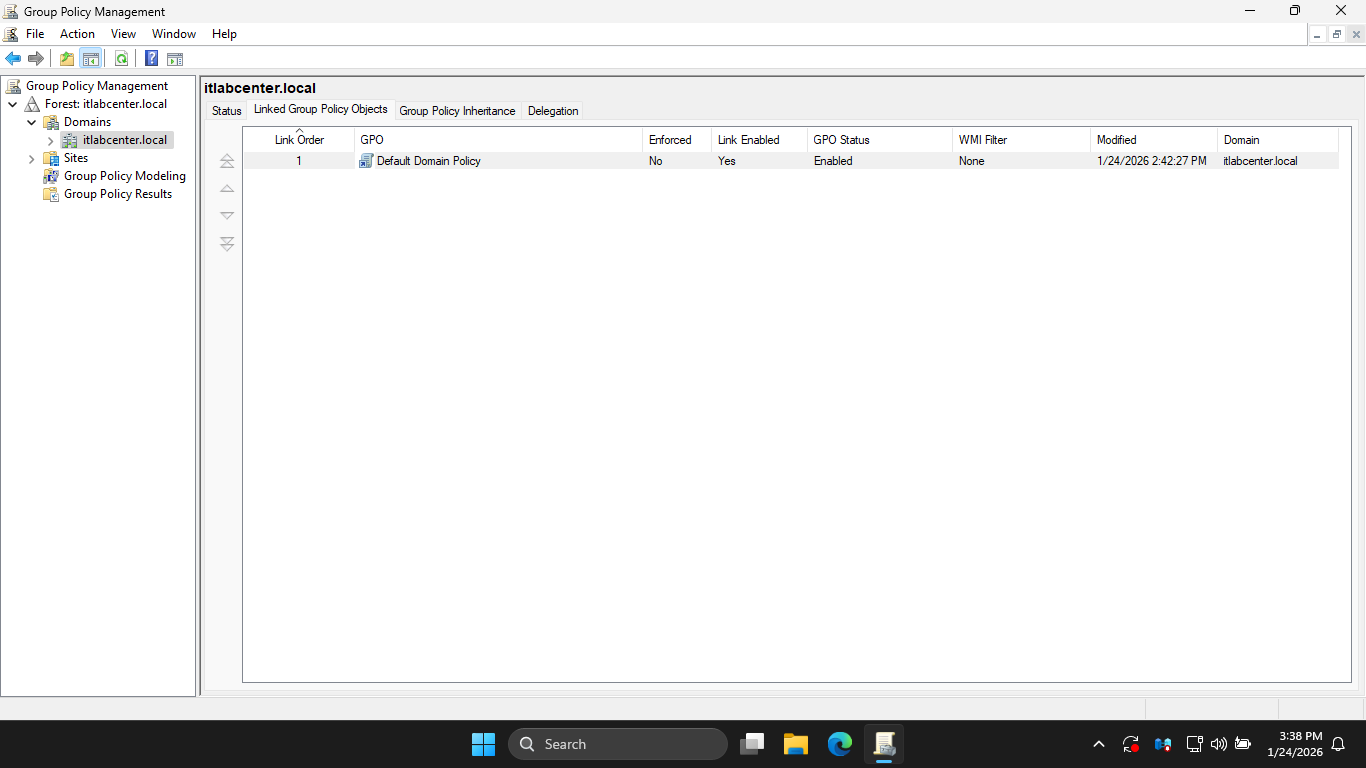
Hit the Linked Group Policy Objects tab, notice there is a GPO linked to the domain: Default Domain Policy
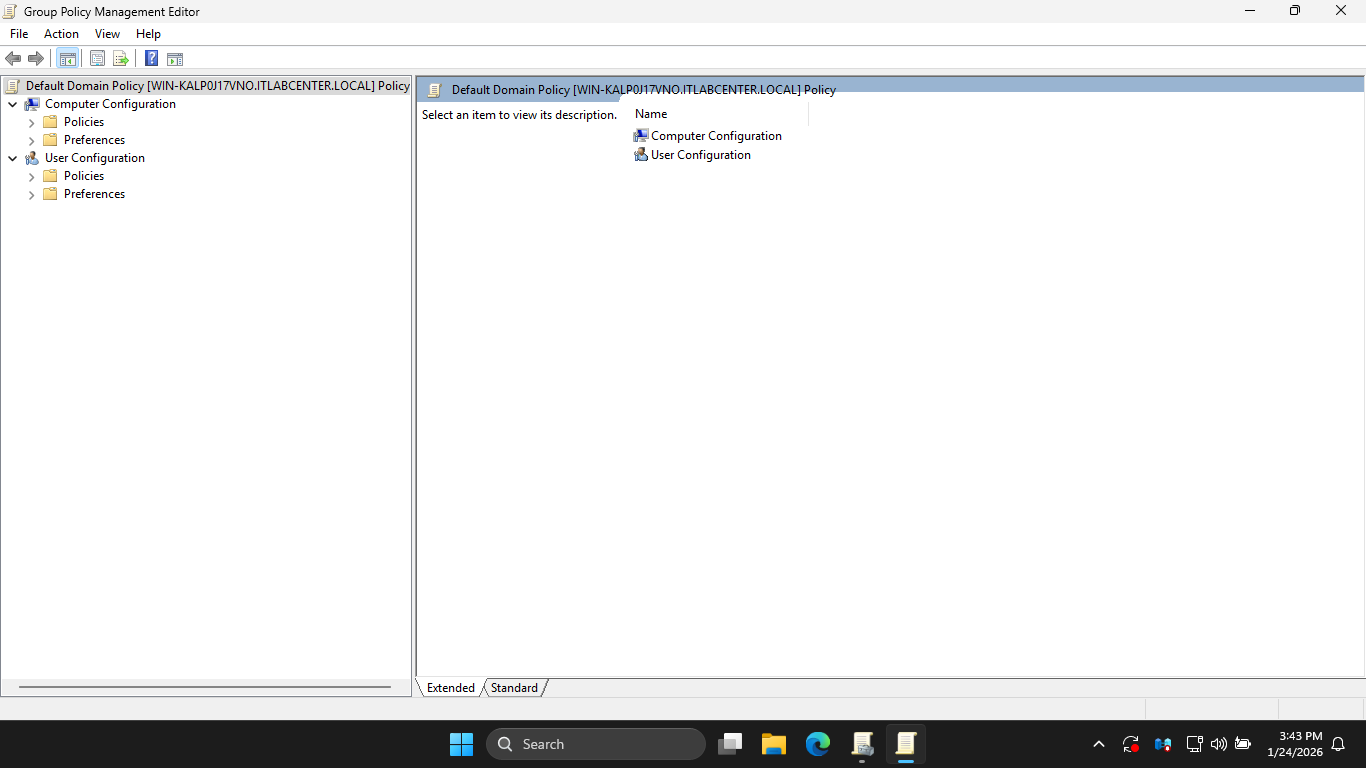
From the Group Policy Management Console config pane, right-click the Default Domain Policy and click Edit
This action will open the Group Policy Management Editor which looks similar to the Local Policy Editor:
In the next steps, we will explore the relationship between Domain-level and Local-Level Group Policies
In the GPME, under User Configuration > Policies > Administrative Templates, select Control Panel option
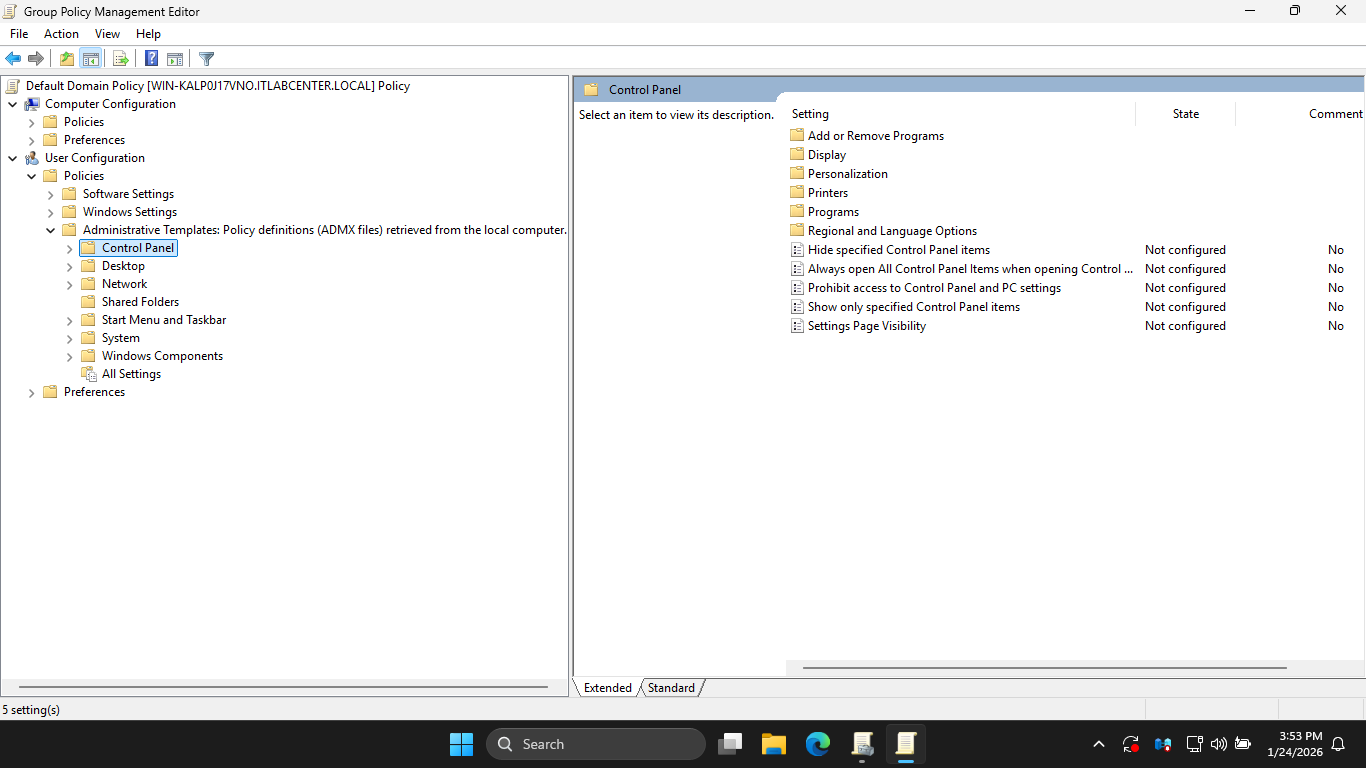
Notice that the Prohibit access to the Control Panel and PC settings is set to Not Configured currently
In the Group Policy Management Editor pane, double-click Prohibit access to Control Panel and PC Settings
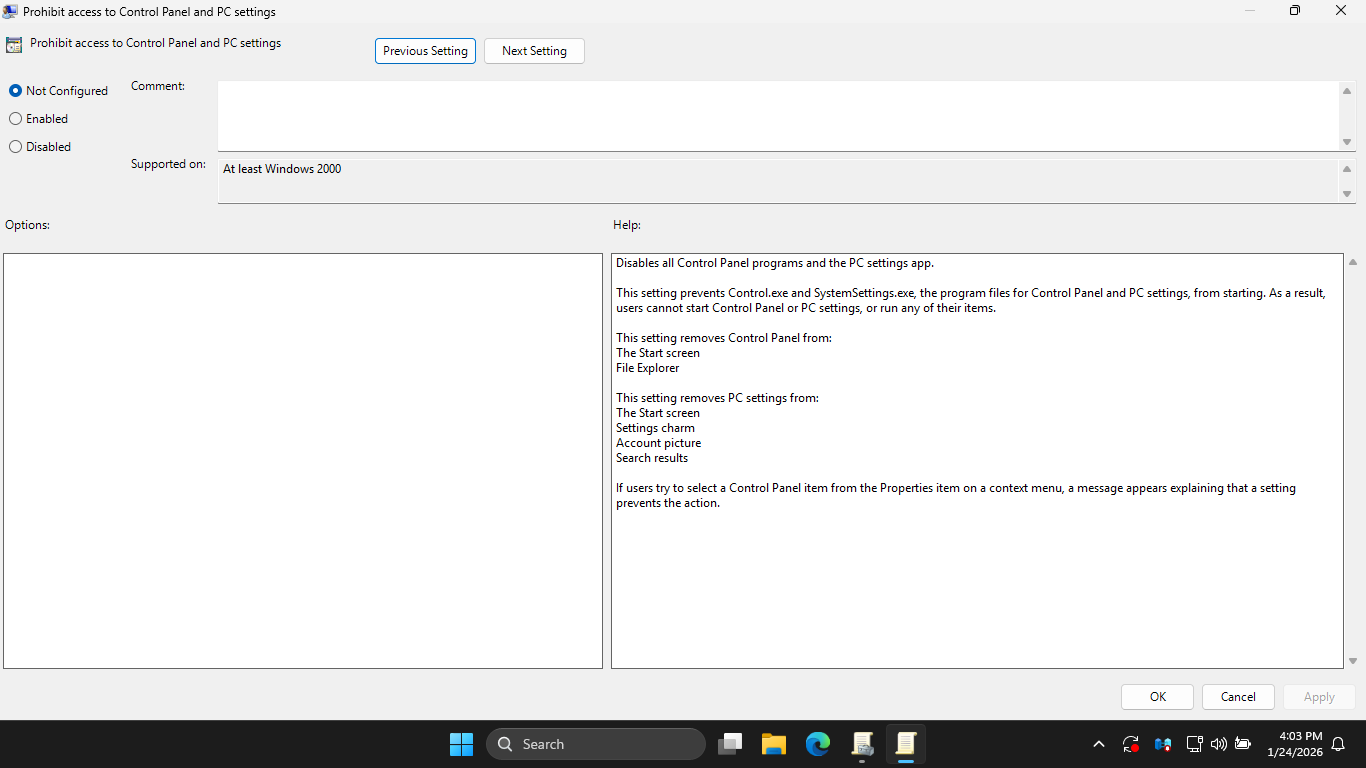
In the Prohibit access to Control Panel and PC Settings window, click the Disabled radio > Apply > then OK
Notice in the configuration pane that the state of Prohibit access to Control Panel and PC Settings changed
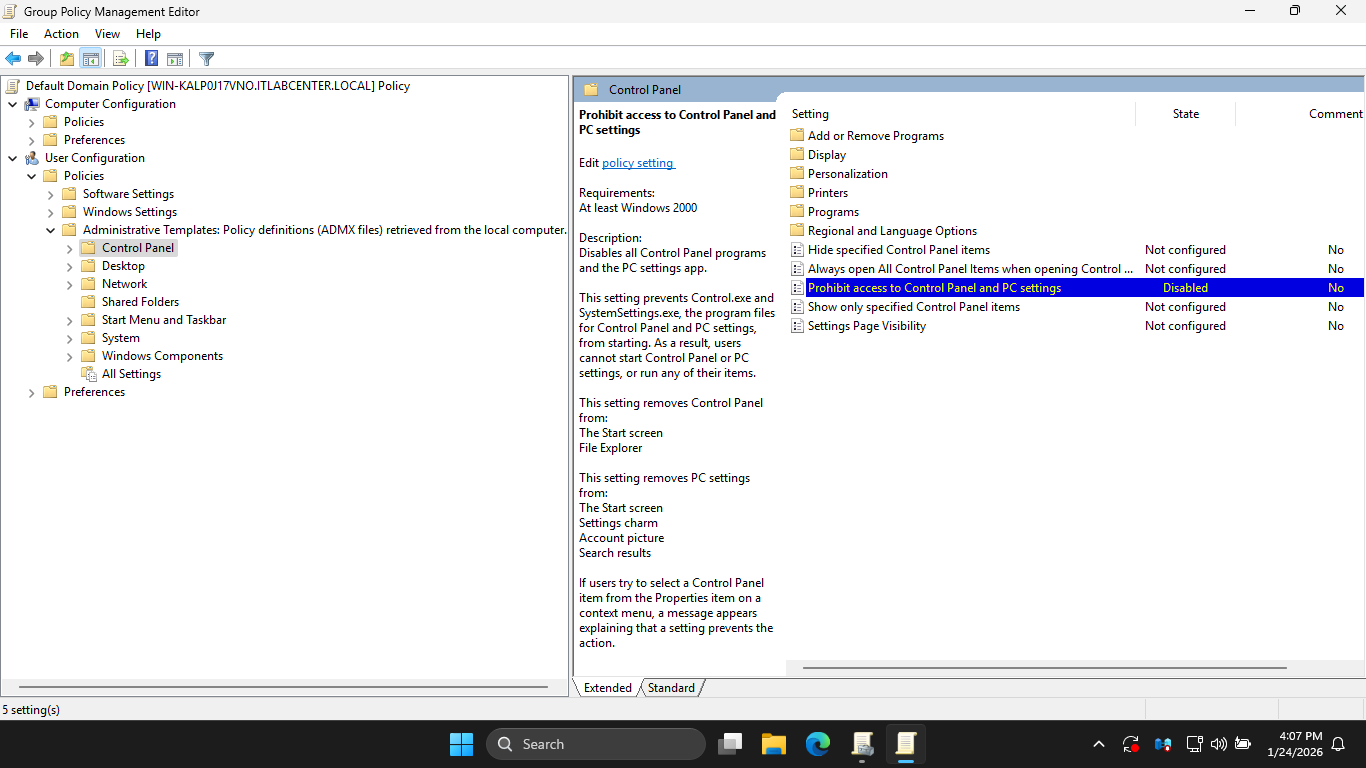
Prohibit access to Control Panel and PC Settings change from Not Configured to Disabled, allowing access
Run the following command from the Windows Server PowerShell to immediately apply our Group Policy changes
PS C:\WINDOWS\system32> gpupdate /force
Recall that in the Local Group Policy editor, we Enabled Prohibit access to Control Panel and PC Settings
Now in the Group Policy Management Editor we have Disabled that same policy, which policy will prevail?
Run the following command from the Windows Server PowerShell to generate an RSoP report of Group Policies
PS C:\WINDOWS\system32> gpresult /Z
Resulting Output:
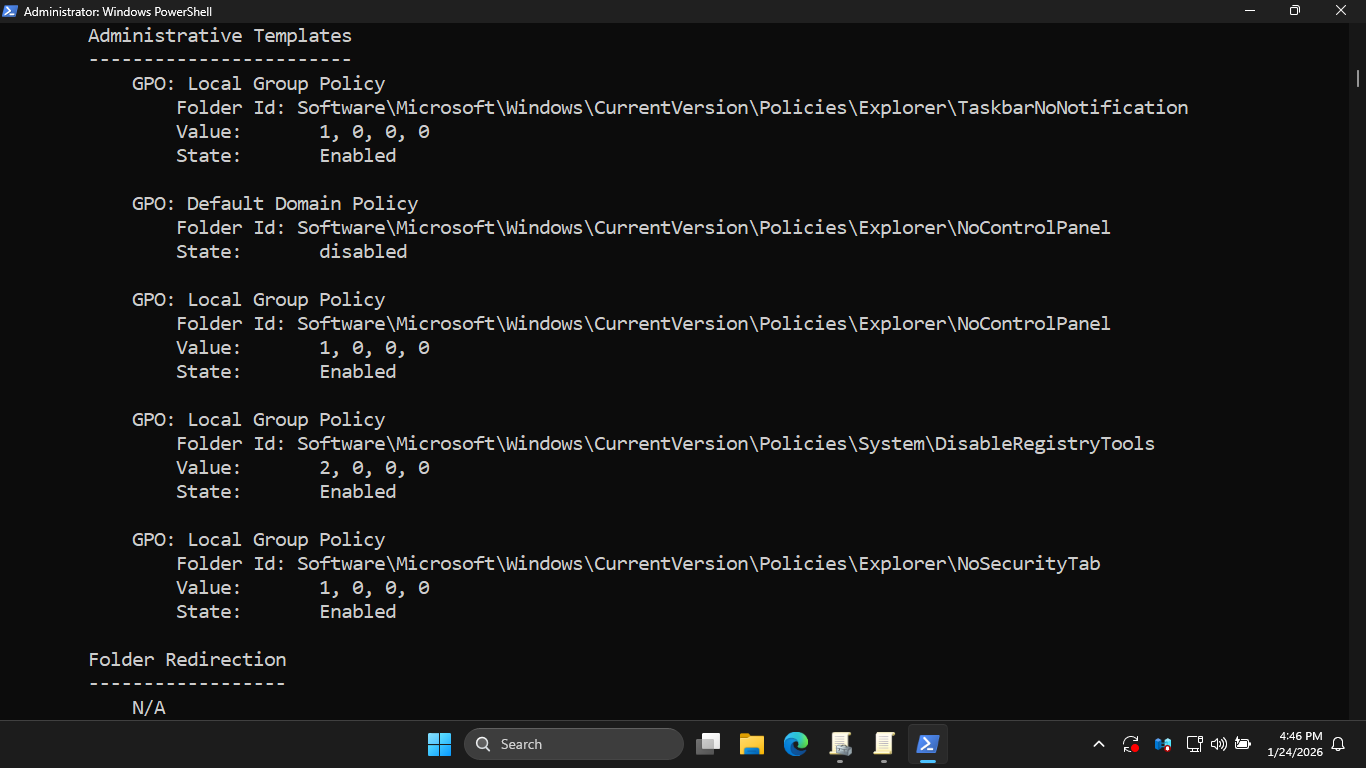
You should see form the gpresult output that the Local Group and Default Domain policies are in conflict
Run the following command from the Windows Server PowerShell to test if control panel access is enabled:
PS C:\WINDOWS\system32> control
Resulting Output:

The Local GPO prohibits access and is applied first, but the Default Domain policy then overrides the GPO
The result is that the user accounts located within this domain are fully able to access the control panel
6. Explore OU-Level Group Policy Settings
In the final part of our lab, we will create an OU structure in the itlabcenter.local domain and apply GPOs
Run the following command from the Windows Server PowerShell to create the IT OU in the itlabcenter.local
PS C:\WINDOWS\system32> New-ADOrganizationalUnit -Name "IT" -Path "DC=itlabcenter,DC=local"
Run the following command from the Windows Server PowerShell to create the Engineering OU in the IT OU
PS C:\WINDOWS\system32> New-ADOrganizationalUnit -Name "Engineering" -Path "OU=IT,DC=itlabcenter,DC=local"
Close both the Group Policy Management Editor and GPMC windows, then reopen the Group Policy MGMT Console
In the GPMC navigation pane, expand Forest: itlabcenter.local > Domains > itlabcenter.local > and hit IT
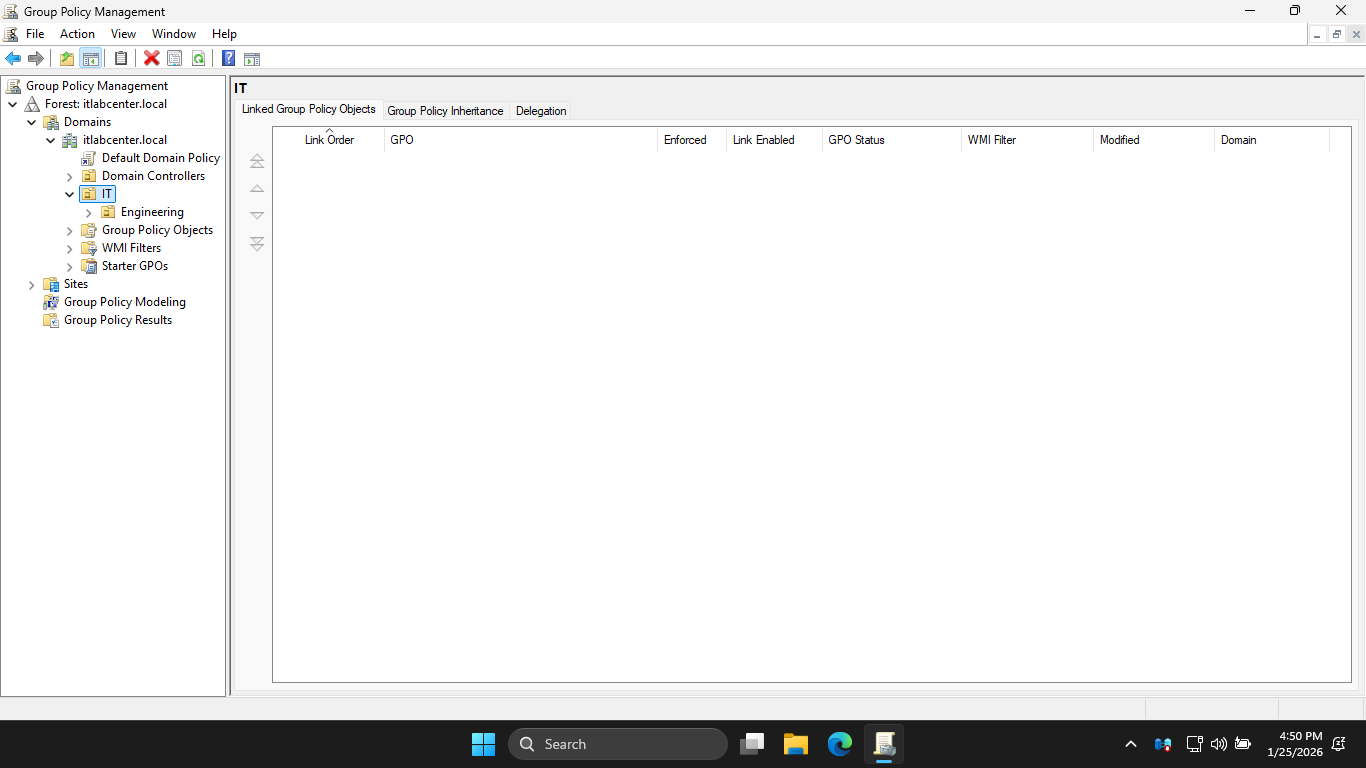
You will see the new OU structure we just created. Notice that in the IT OU there are no GPOs currently
In the GPMC navigation pane, right-click the IT OU and select Create a GPO in this domain, and link it here
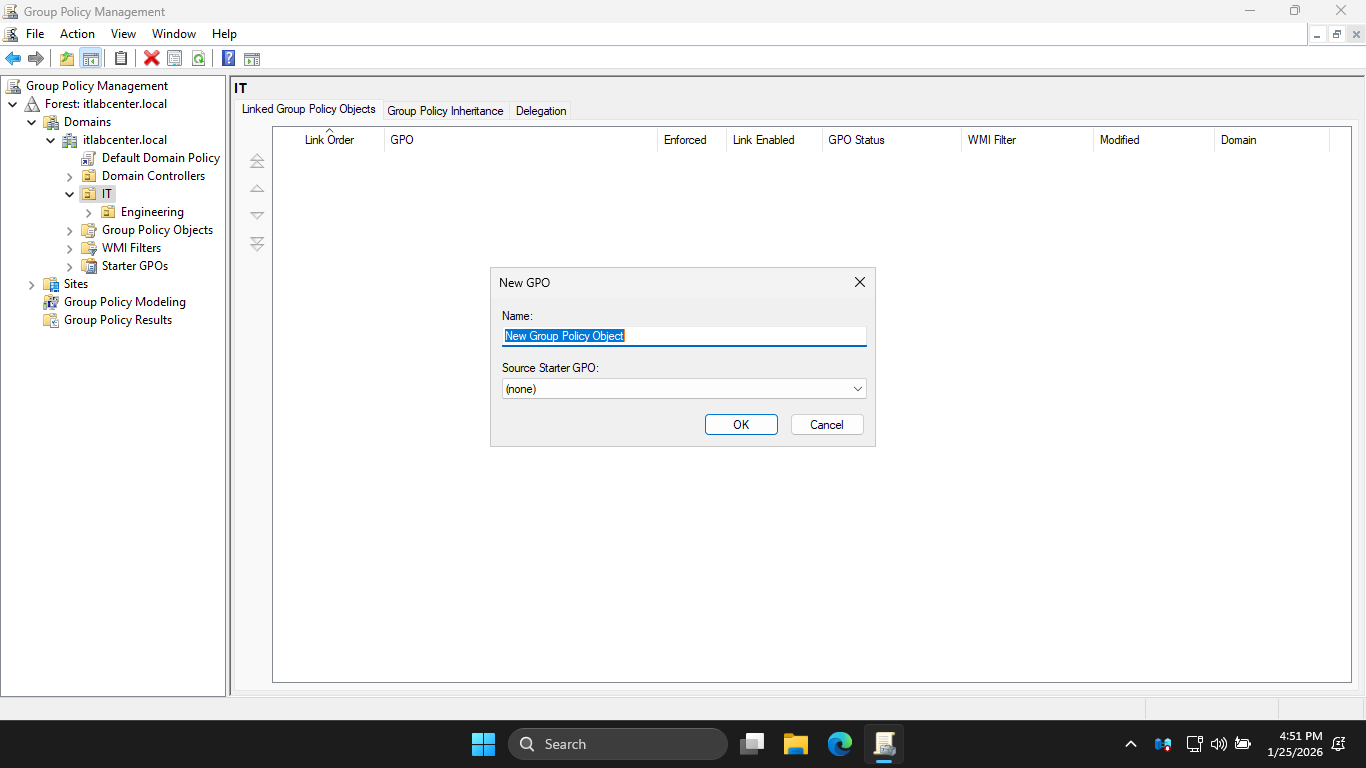
From the New GPO dialog box, name the GPO IT-ALL-Desktops and click ok to create the Group Policy Object
A new GPO called IT-All-Desktops is created and linked to the IT OU, this policy will apply to all objects
placed inside the IT OU as well as all OUs contained within the IT, any sub-OUs would inherit this GPO

The name of the GPO suggests whatever policies we configure should apply to all the IT employees desktops
We could also create a new GPO called IT-All-Users for user policies and IT-All-Servers for server policies
As a best practice, policies that apply to everyone should flow downward through the process of inheritance
Granular policies, applied directly to child OUs, are used for exceptions and for special cases, abnormal
In the configuration pane, right click the IT-All-Desktops Group Policy Object and select the Edit option
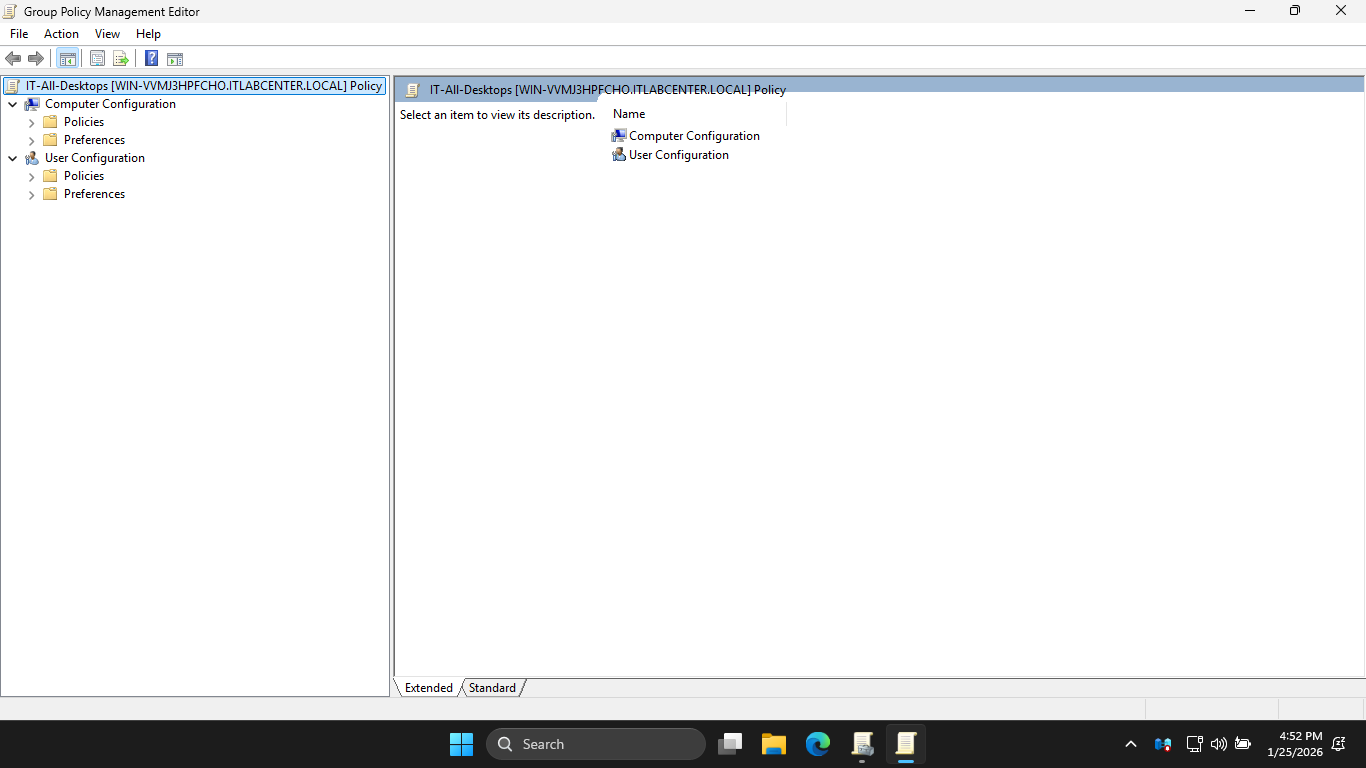
In GPME, Computer Configuration > Policies > Administrative Templates > Windows Components > Windows Update
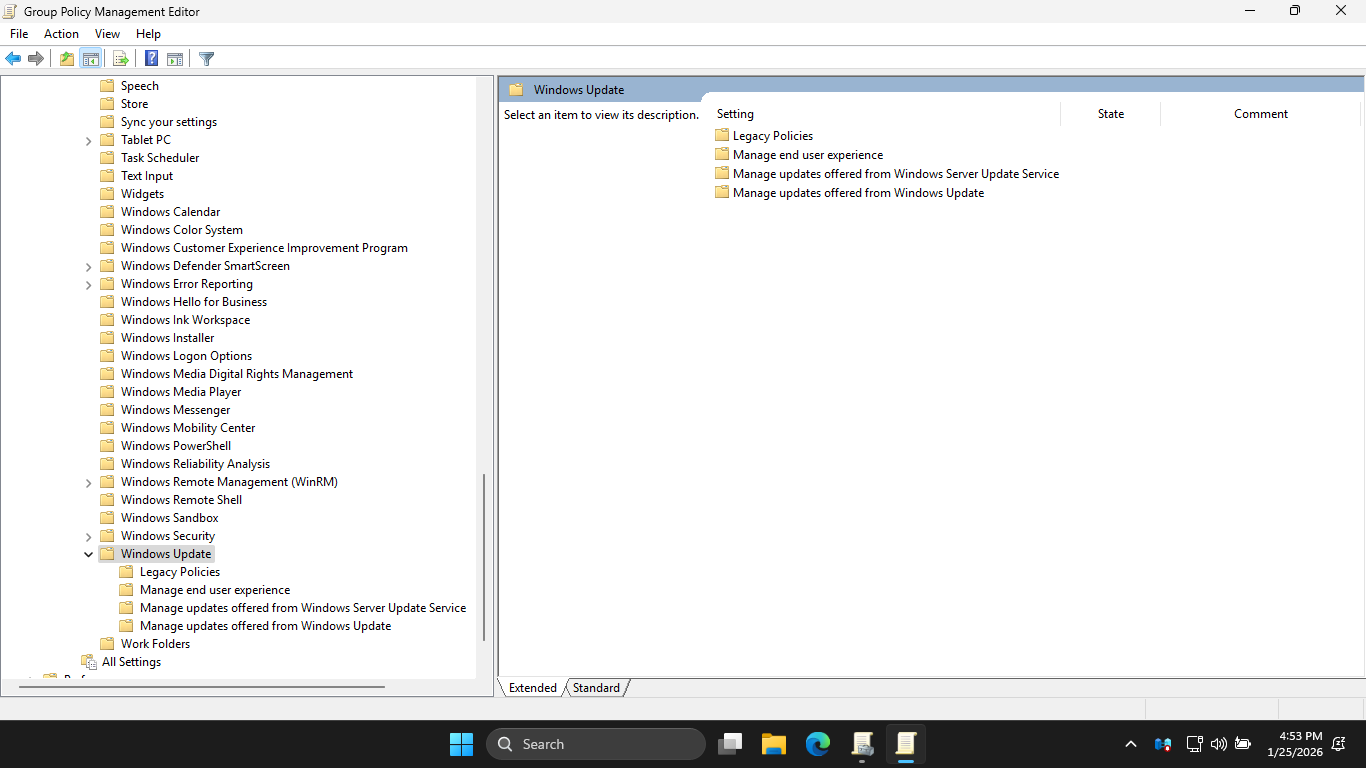
From the navigation pane, select the Manage end user experience subfolder, then enable the following policy
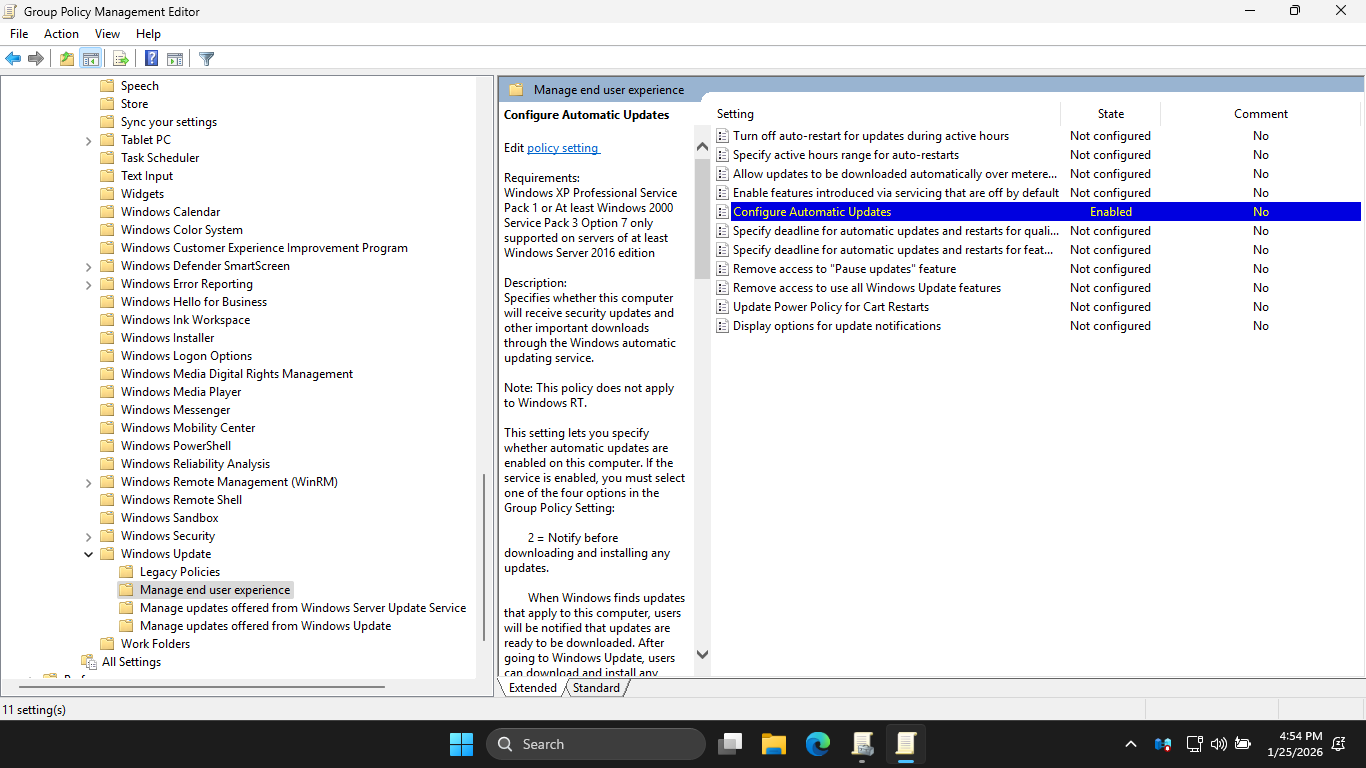
We can see that this policy was applied to the IT-All-Desktops GPO. Go ahead and close out of the GPME
In the GPMC pane, right-click the Engineering OU and select Create a GPO in this domain, and link it here
From the New GPO dialog box, name the GPO Disable-Windows-Update and then click ok to create the new GPO
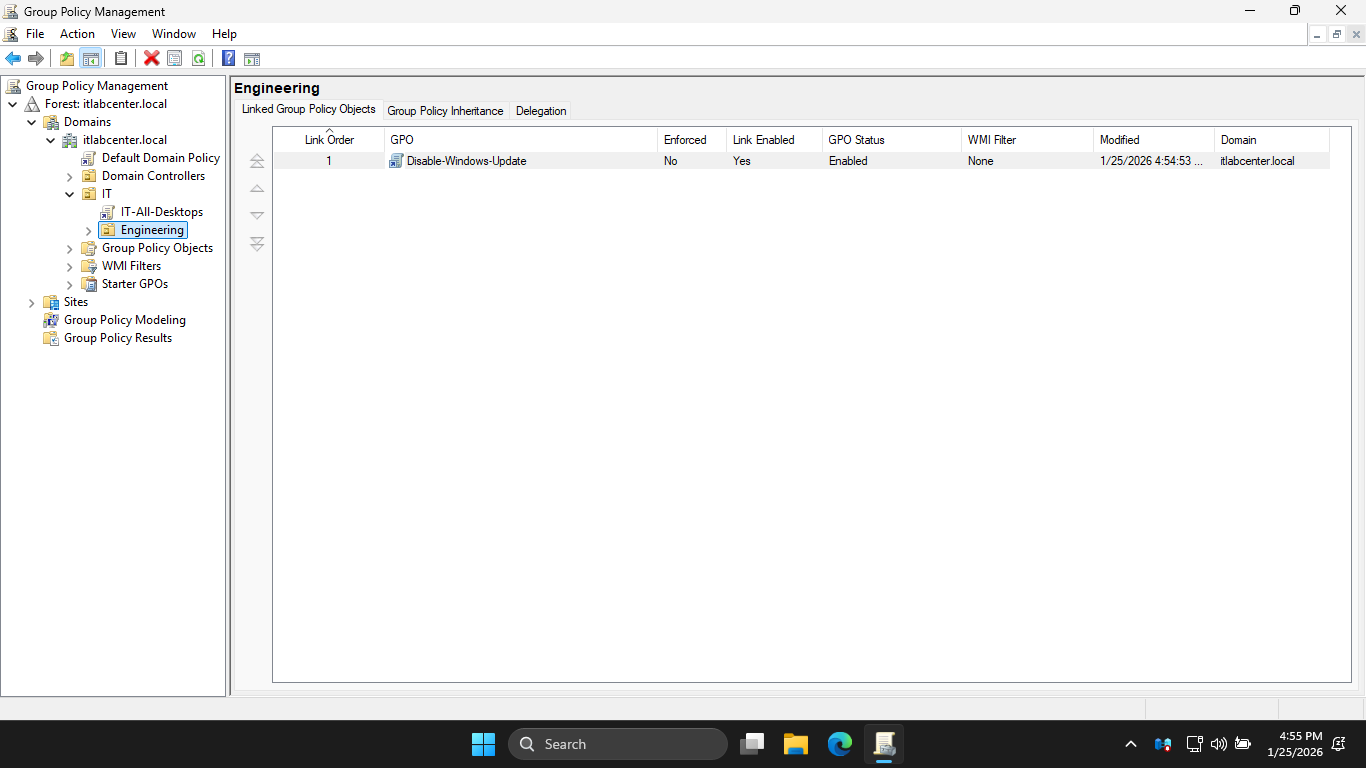
In this example, we have created a more granular policy that tells us by name what it does or should do
We would not expect this policy to do anything else. By placing this policy on the Engineering OU, we are
essentially telling other admins that the Engineers need/want to have the forced Windows updates disabled
The policies attached to the Engineering OU will override inherited policies in the event of a conflict
In the configuration pane, right click the Disable-Windows-Update GPO, and then select the Edit option
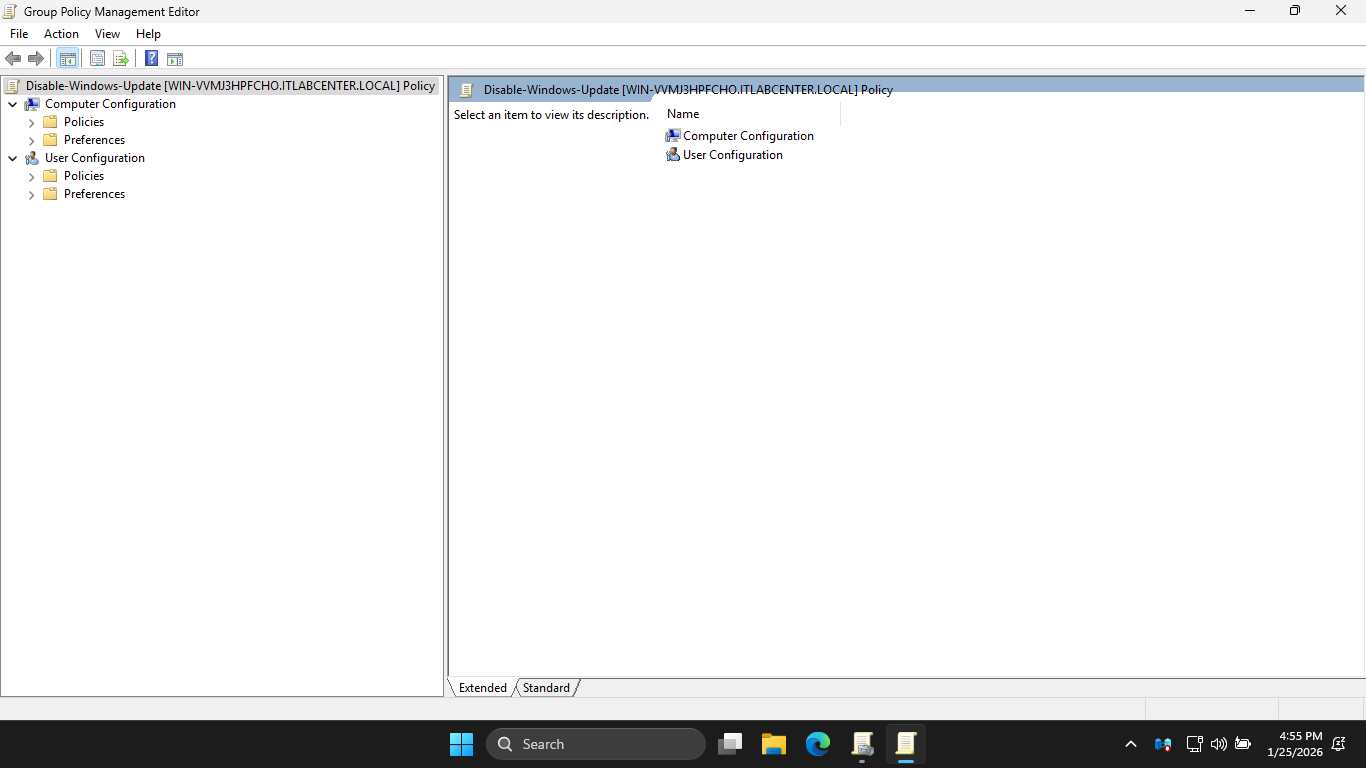
In GPME, Computer Configuration > Policies > Administrative Templates > Windows Components > Windows Update
From the navigation pane, select Manage end user experience subfolder, then disable the following policy
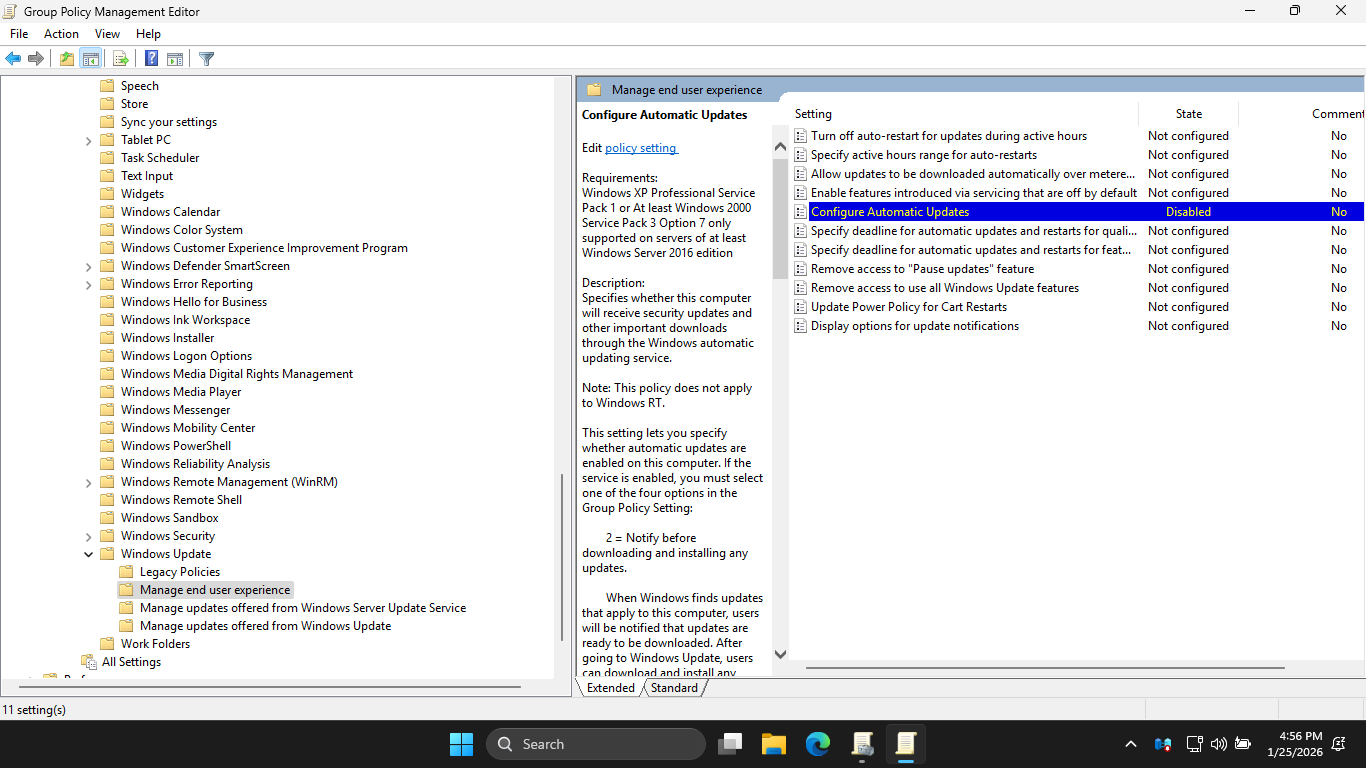
We can see that this policy was applied to the Disable-Windows-Update GPO. Let's close out of the GPME
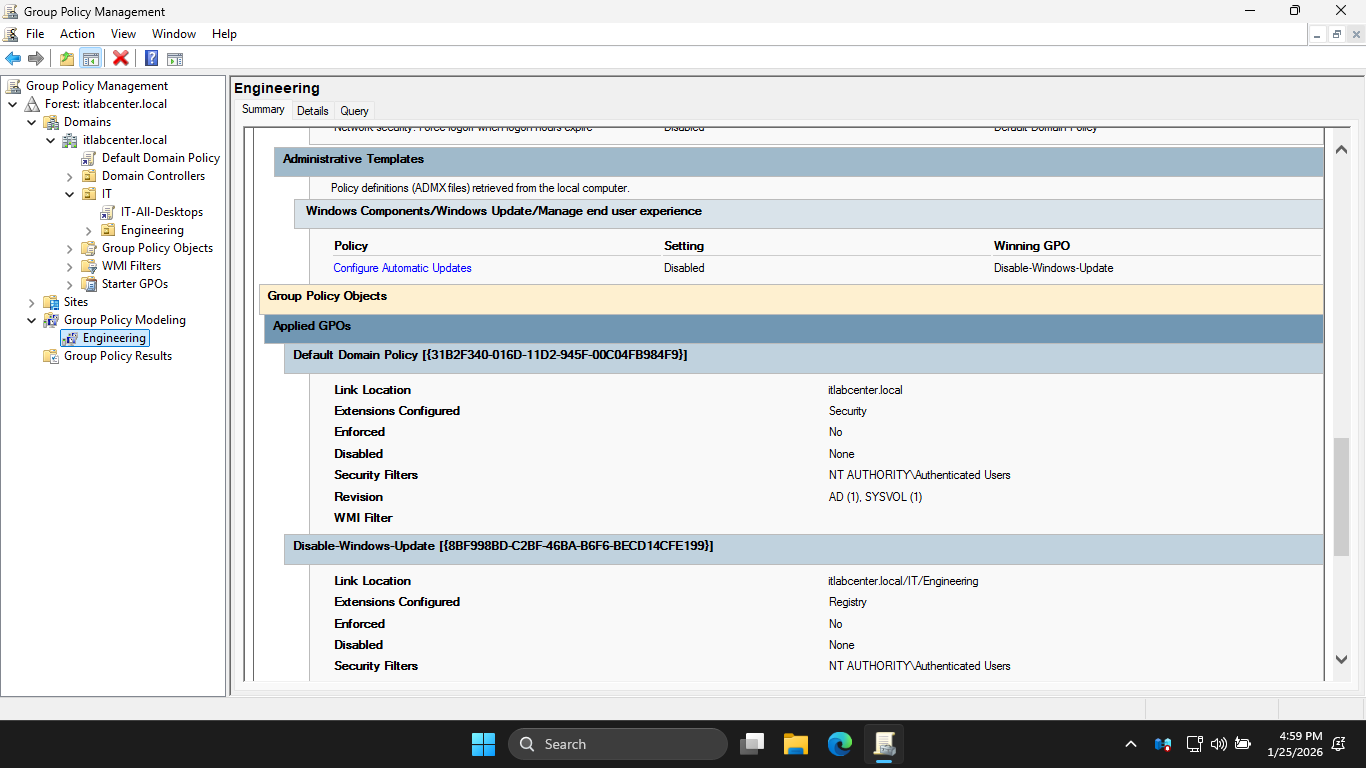
Next we will use the Group Policy Modeling tool in GPMC to see what GPOs get applied to the Engineering OU
In the GPMC navigation pane, right-click Group Policy Modeling and select Group Policy Modeling Wizard
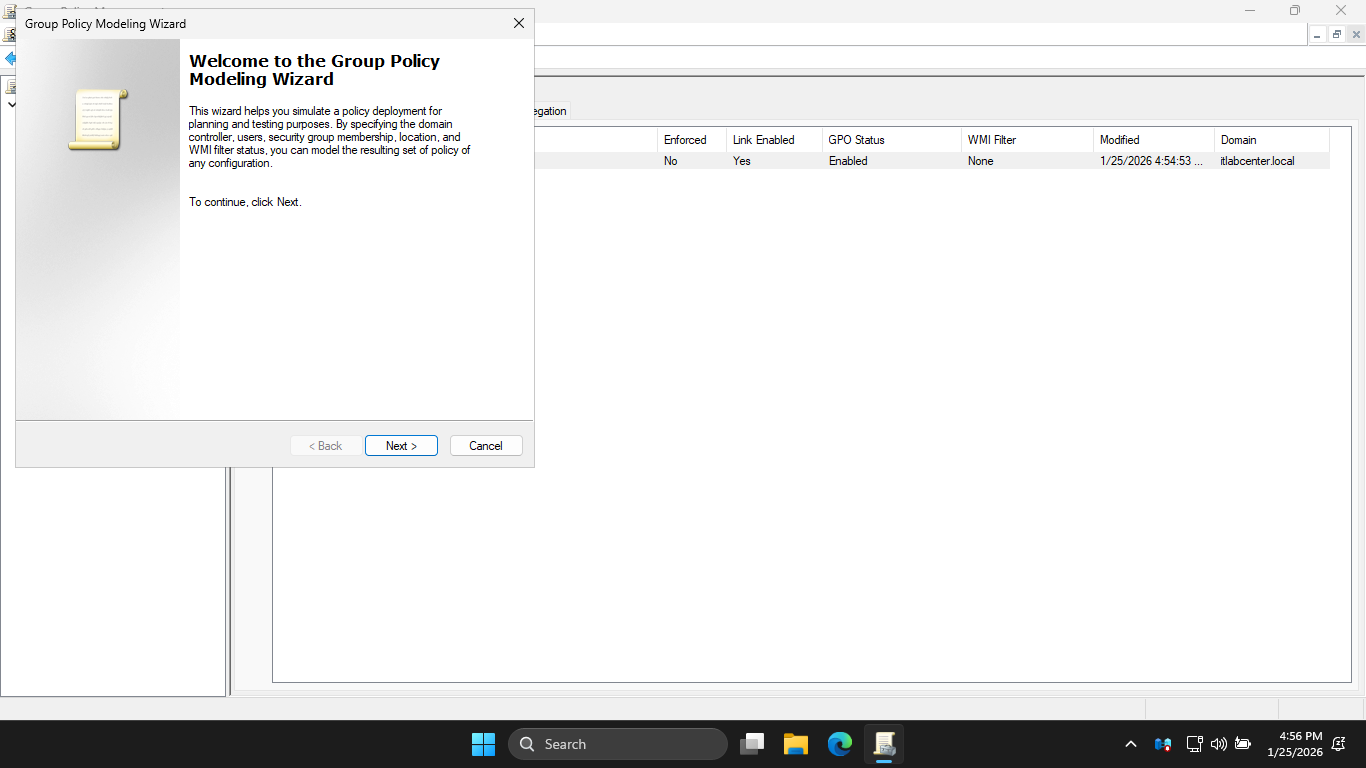
Click Next to continue twice, on the User and Computer Selection page, use Browse to select Engineering
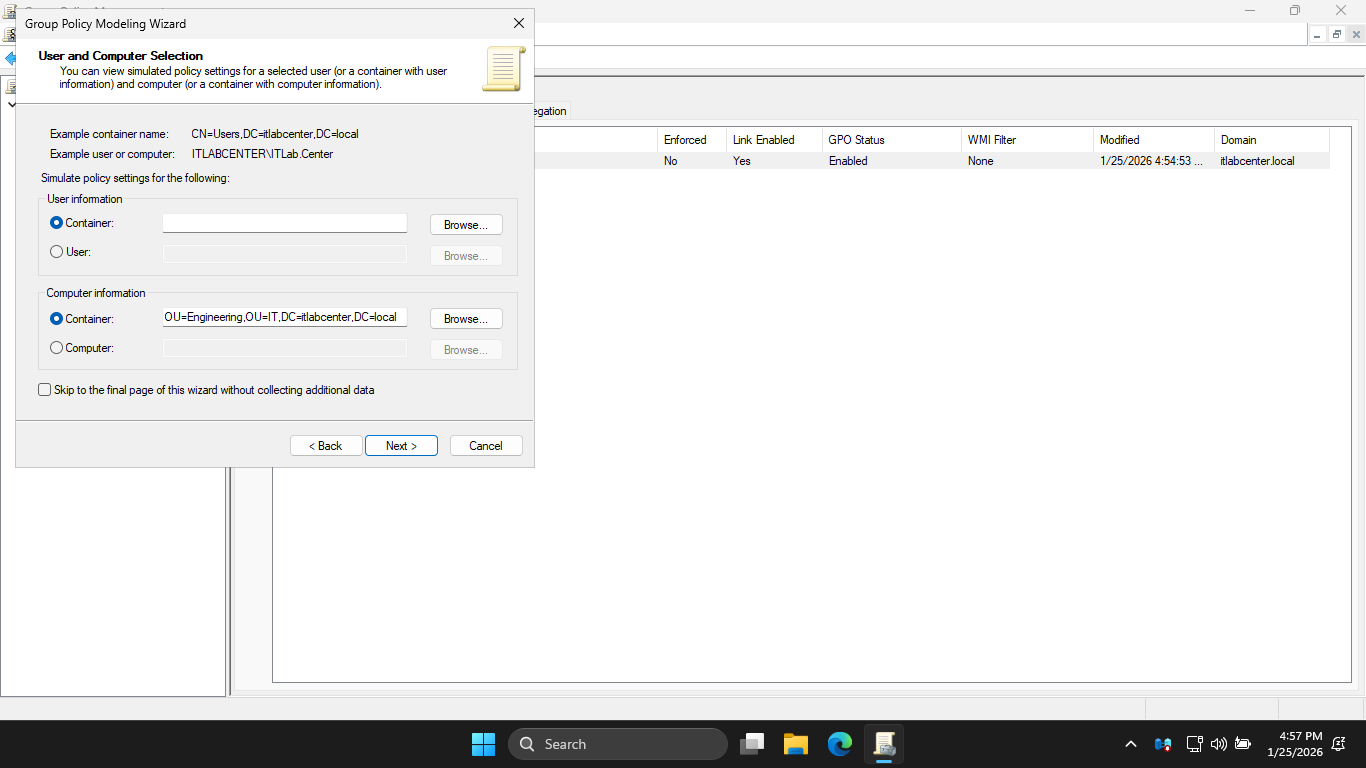
Make sure to do this under the Computer information section, take note of the container name listed above
On User and Computer Selection page, check the Skip to the final page checkbox and click next to continue
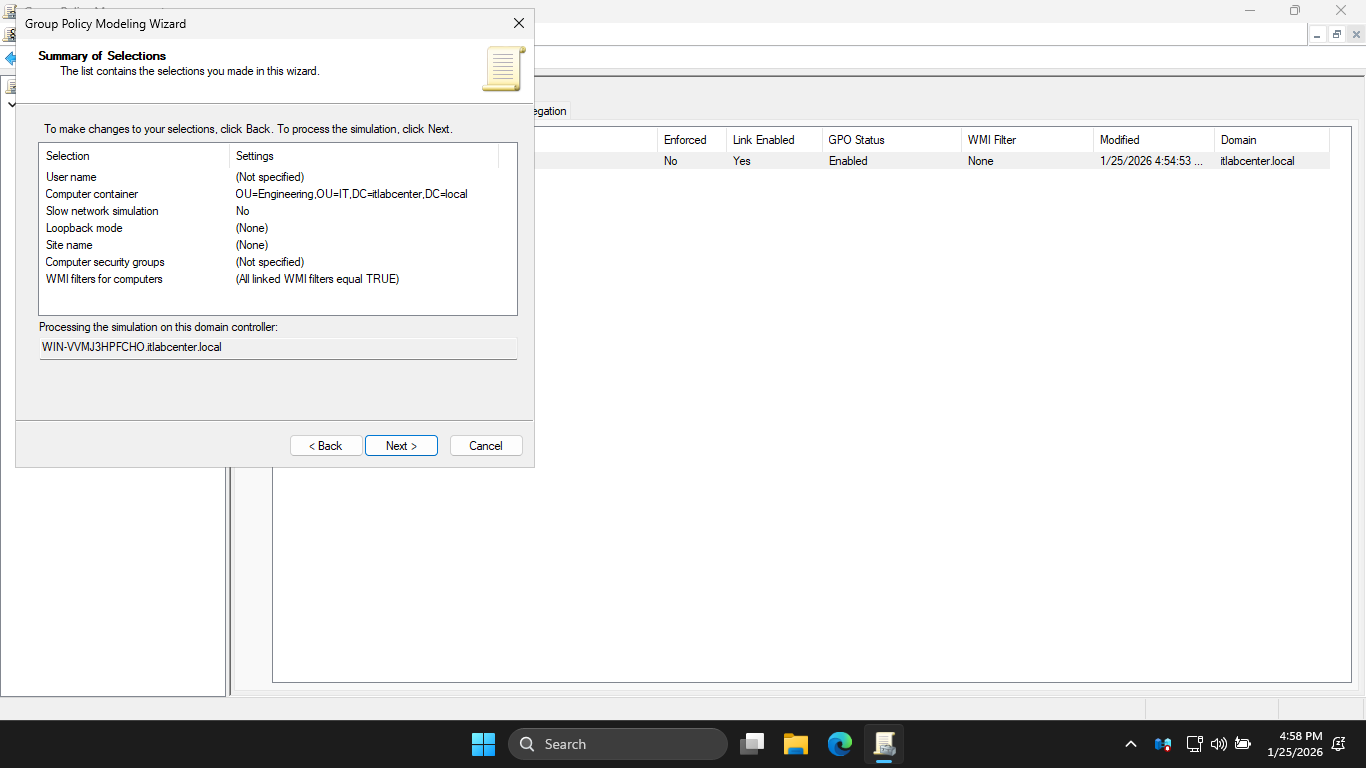
On the Summary of Selections page, click Next, then on the Completion page click Finish to apply changes
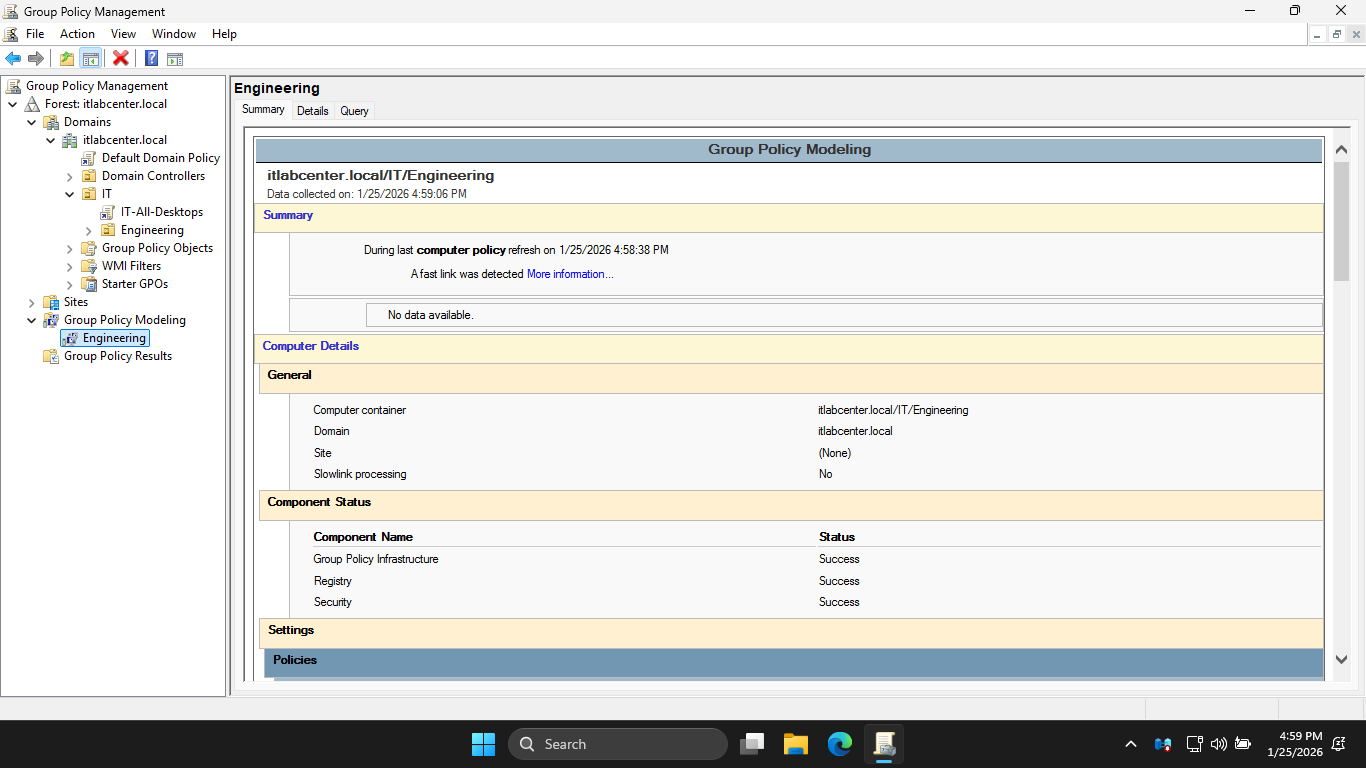
In the configuration pane of the GPMC, review the Group Policy Report. You should notice above that the
Disable-Windows-Update policy is applied to the Engineering OU. This policy will override any policy that
id inherited from the IT OU, any Domain level policy, and any Local-level policy. This is the winning GPO
Congratulations on completing the guided exercise. You first explored Local Group Policies, and then after
building a new domain, you explored domain-level Group Policies using the GPMC and Group Policy MGMT Editor
Finally, you created an OU structure and applied intuitive GPOs to it. Great work on gaining hands-on exp.